FASTLED_clock_ALL_feed_V6_2023_01_22_FINAL_ONLY_CLOCK DOWNLOAD ARDUINO PROGRAM FILE


3D modeling, scanning and printing
FASTLED_clock_ALL_feed_V6_2023_01_22_FINAL_ONLY_CLOCK DOWNLOAD ARDUINO PROGRAM FILE

Geprint op de Voron2.4-300 met wit PETG filament.
De ster bestaat uit 5 gelijke delen. Je moet de 5 delen printen, de LED’s er doorheen voeren en daarna de draden er ergens uit laten komen. De punten kun je na het monteren en testen aan elkaar lijmen met hotglue of superglue.
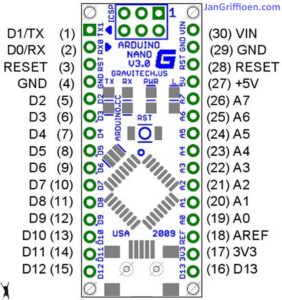
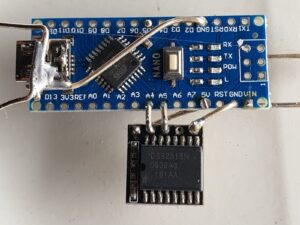
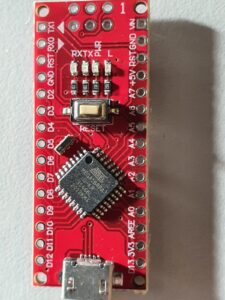
De 3 draden van de WS2812 LED string soldeer je aan de Arduino Nano (5V aan 5V, Gnd aan Gnd en de Data IN van de LED string soldeer je aan D3 of D5 van de Arduino Nano. That’s it! Daarna kun je de Arduino aan je PC koppelen met een data USB kabel en kun je de code downloaden van mijn website.

IK houd het meestal gemakkelijk en gebruik een telefoonlader met een USB kabel, die past in de Arduino nano. Dan soldeer je de 3 draden van je WS2812 leds aan VIN (+), GND (-) en D5 (data). Optioneel kun je een LDR (lichtgevoelige weerstand) aansluiten op A0 en Gnd.
In mijn latere ontwerpen heb ik dus een LDR toegevoegd tussen A0 en Gnd. Met een stukje extra code is de intensiteit van de ster nu automatisch afgestemd op het omgevingslicht. Daarnaast heb ik een aantal extra lichteffecten gemaakt.
Als je de Arduino IDE nog niet hebt, download dan de app van de Microsoft website (Arduino IDE).
Zorg dat je mijn Arduino code download en open dit met de Arduino IDE APP> Waarschijnlijk moet de APP de arduino INO file nog herplaatsen in een nieuwe directory maar dat hoort vanzelf te gaan. Zo niet, doe dat dan zelf even.
Selecteer in de Arduino IDE de juiste microprocessor (Arduino Nano).. Vervolgens de juiste versie processor (groot of klein geheugen) en de oude of nieuwe bootloader. Deze keuzes zijn afhankelijk van het soort Nano dat je hebt gekocht of nog had liggen. Daarna kies je de juiste poort (USB) voor je Nano.
Om te testen of je verbinding hebt tussen IDE en Nano , kun je opvragen of de Arduino IDE je Nano kan lezen. Pas hierna kun je de Nano gaan laden met het gecomplieerde programma.
Succes!
De Arduino code zonder LDR staat HIER.
De arduino code MET LDR staat HIER:
De STL file voor de 76cm ster staat HIER. Deze moet je 5x printen en in elkaar lijmen. De LEDS kun je binnen door elk segment voeren. Dat is een beetje puzzelen maar echt mogelijk. Zie het voorbeeld:
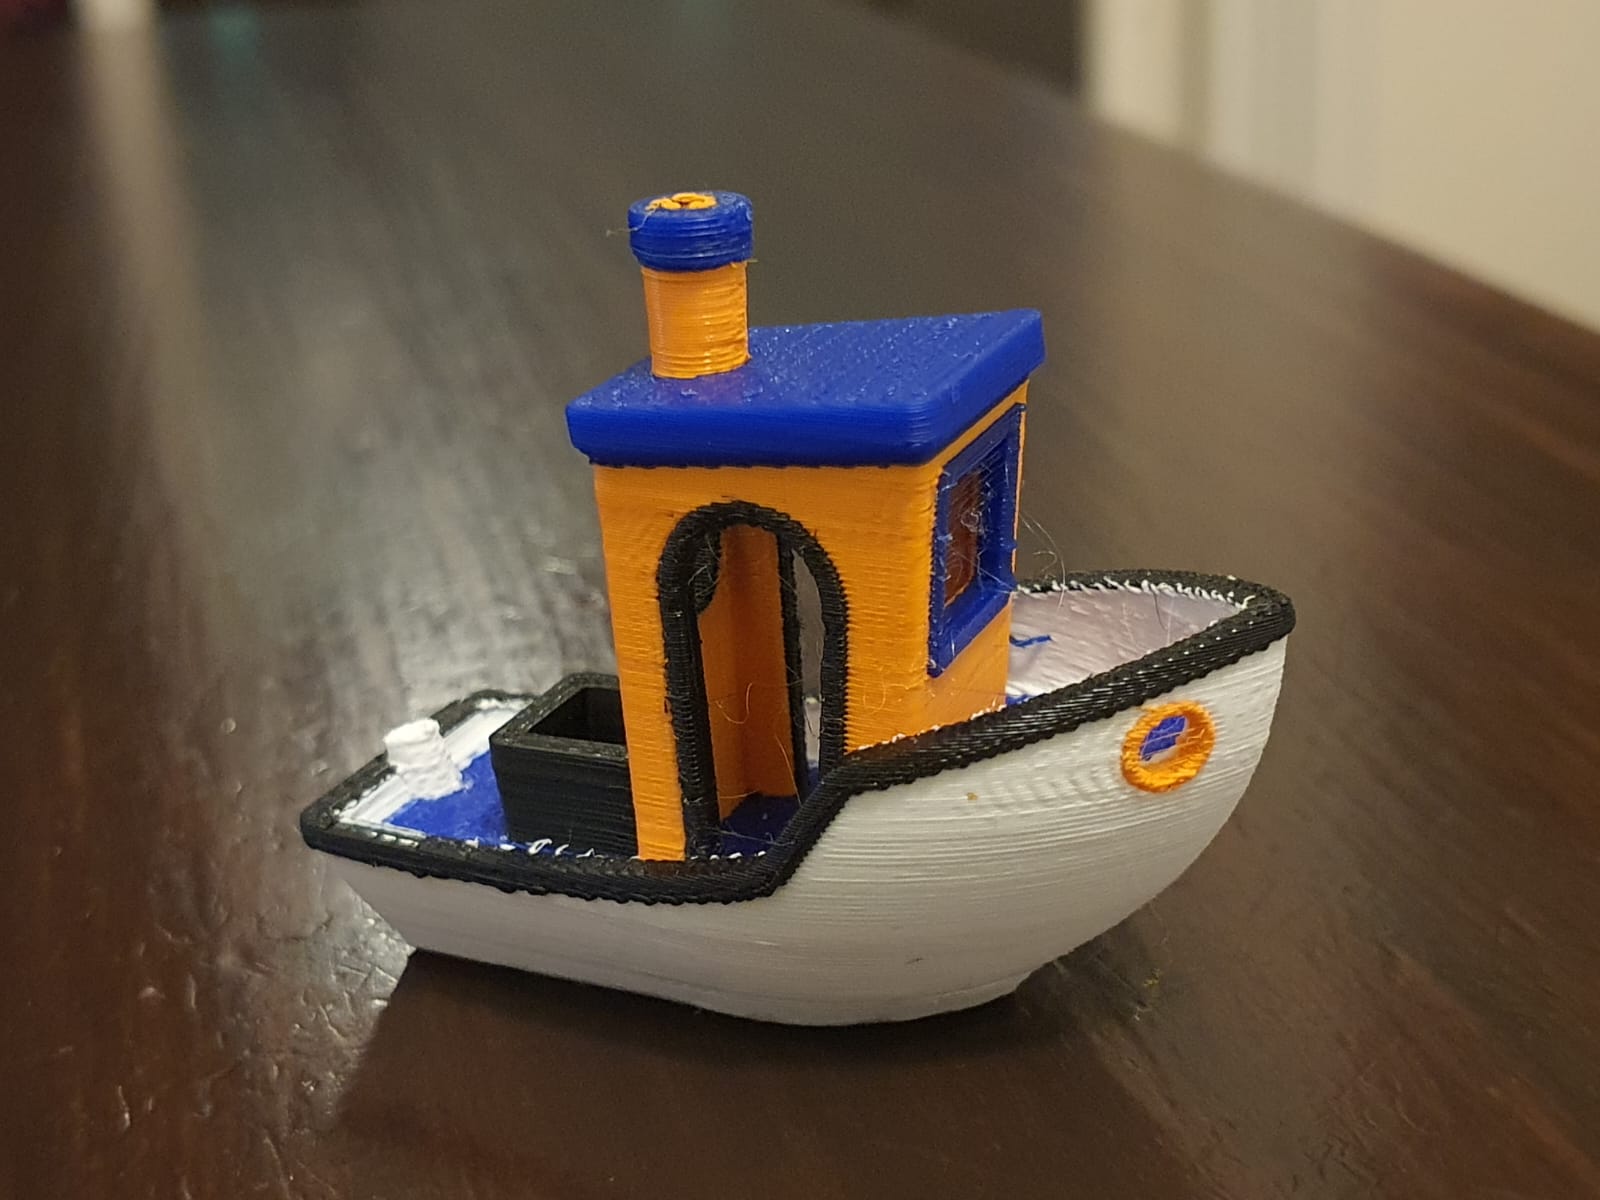
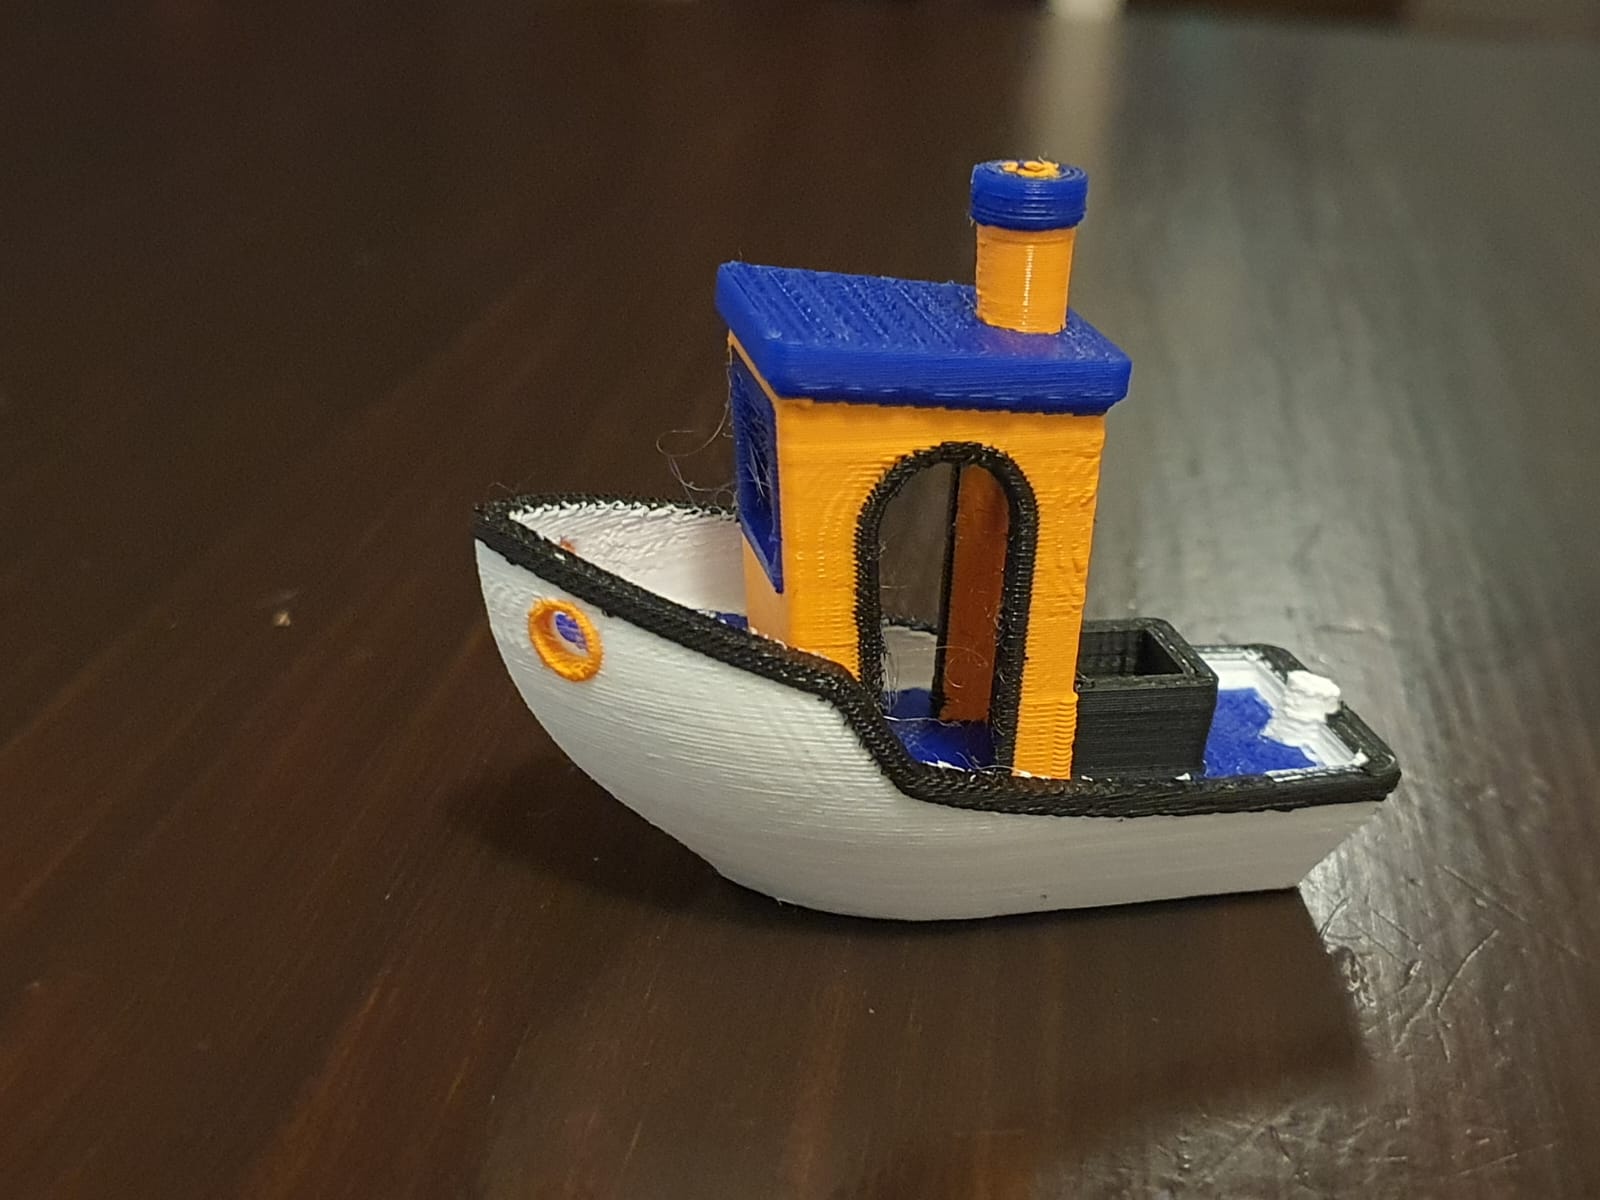
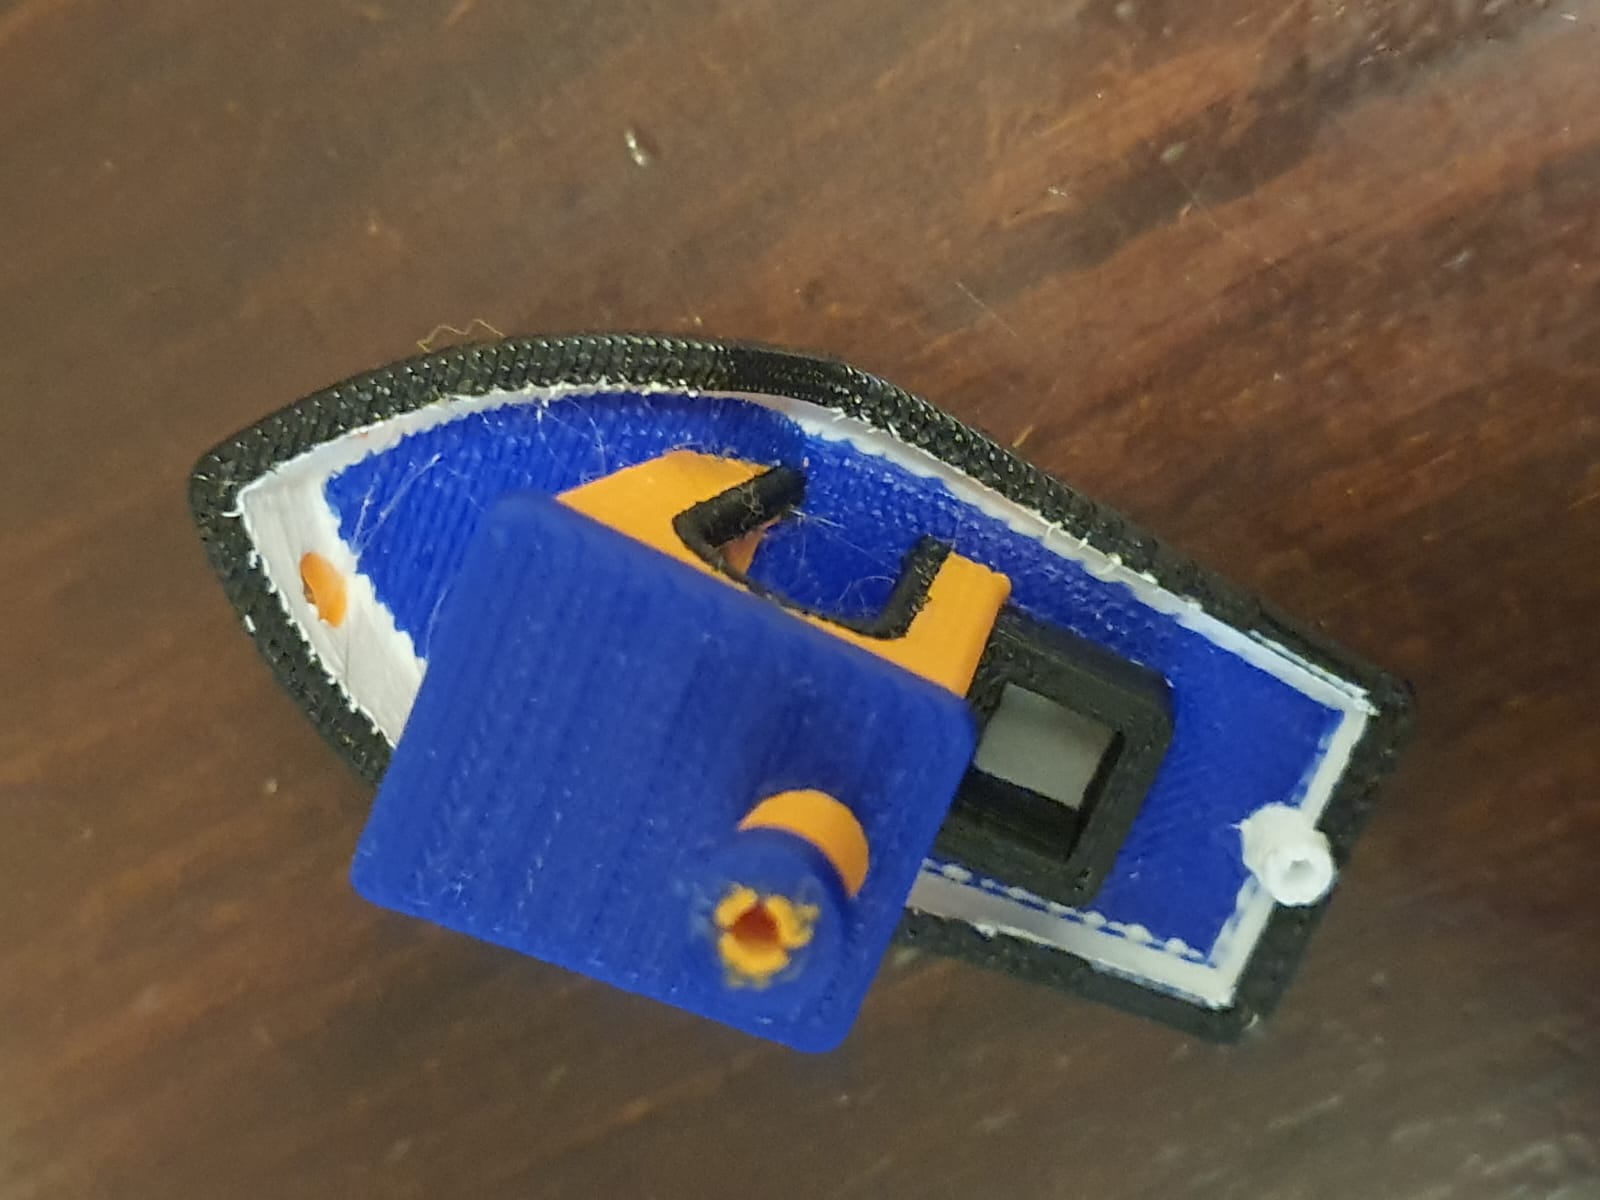
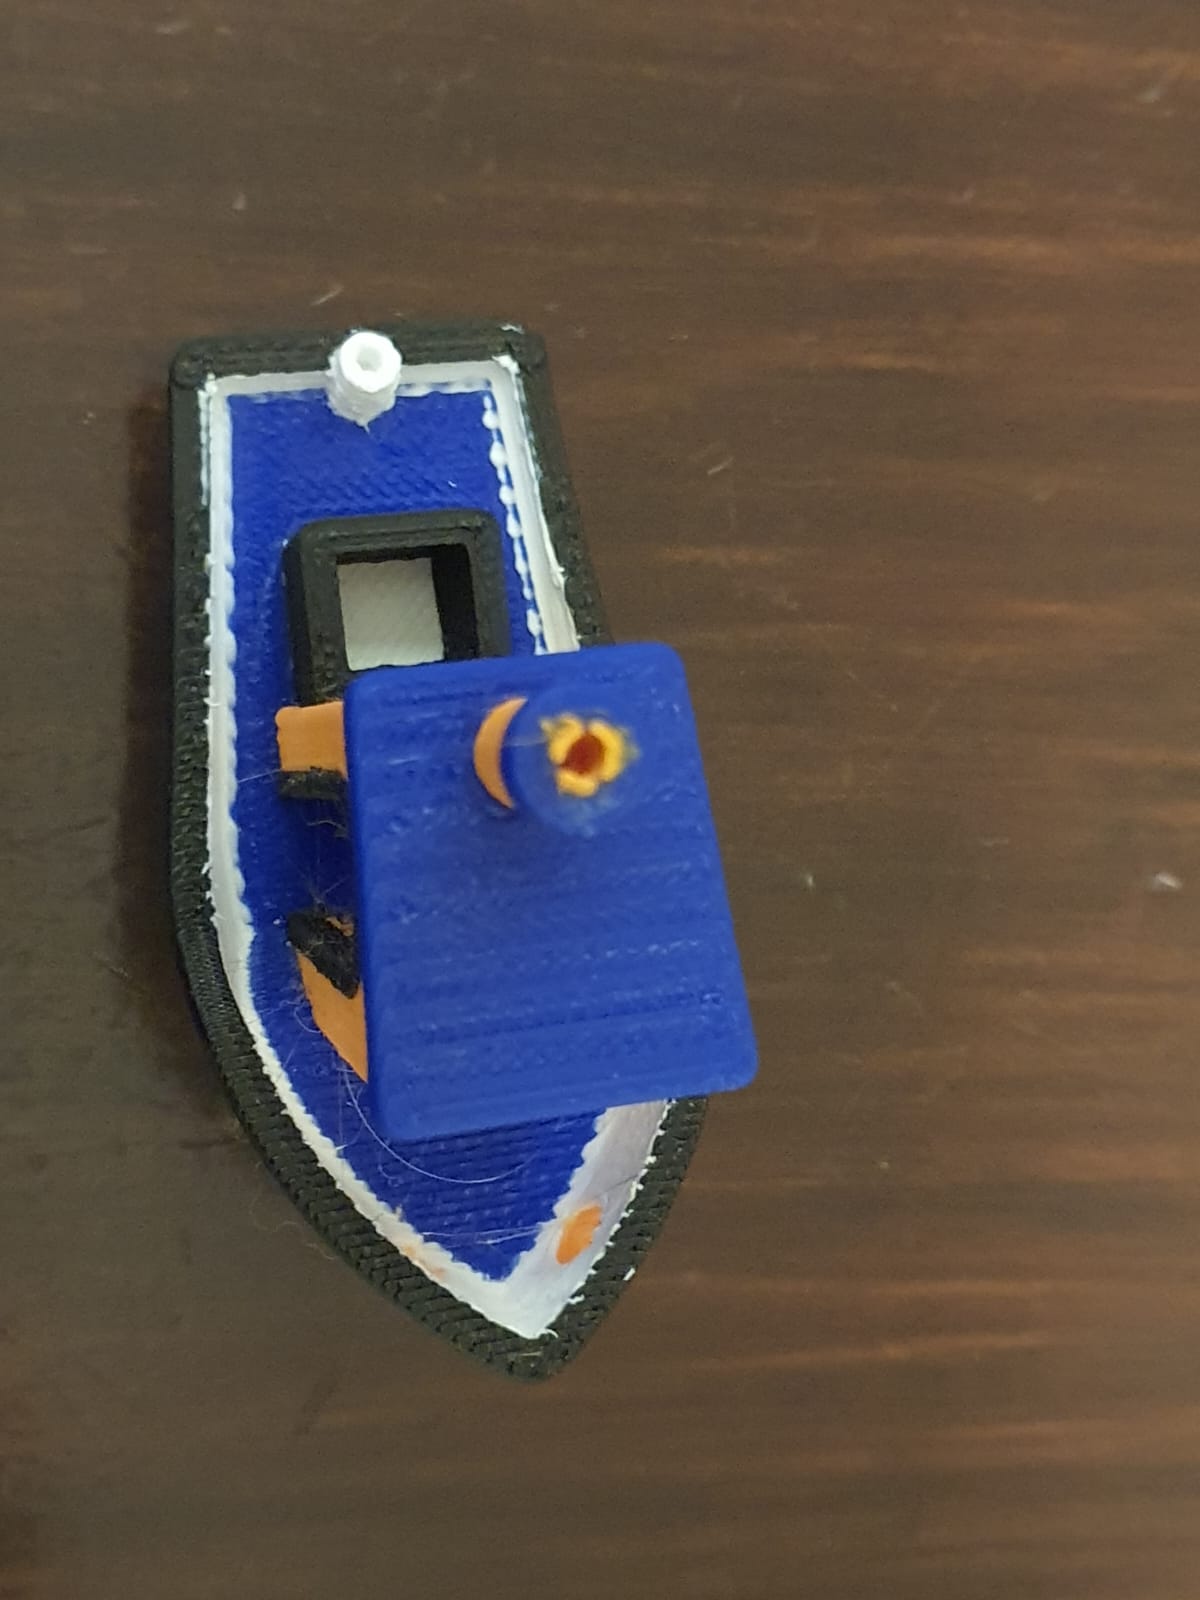
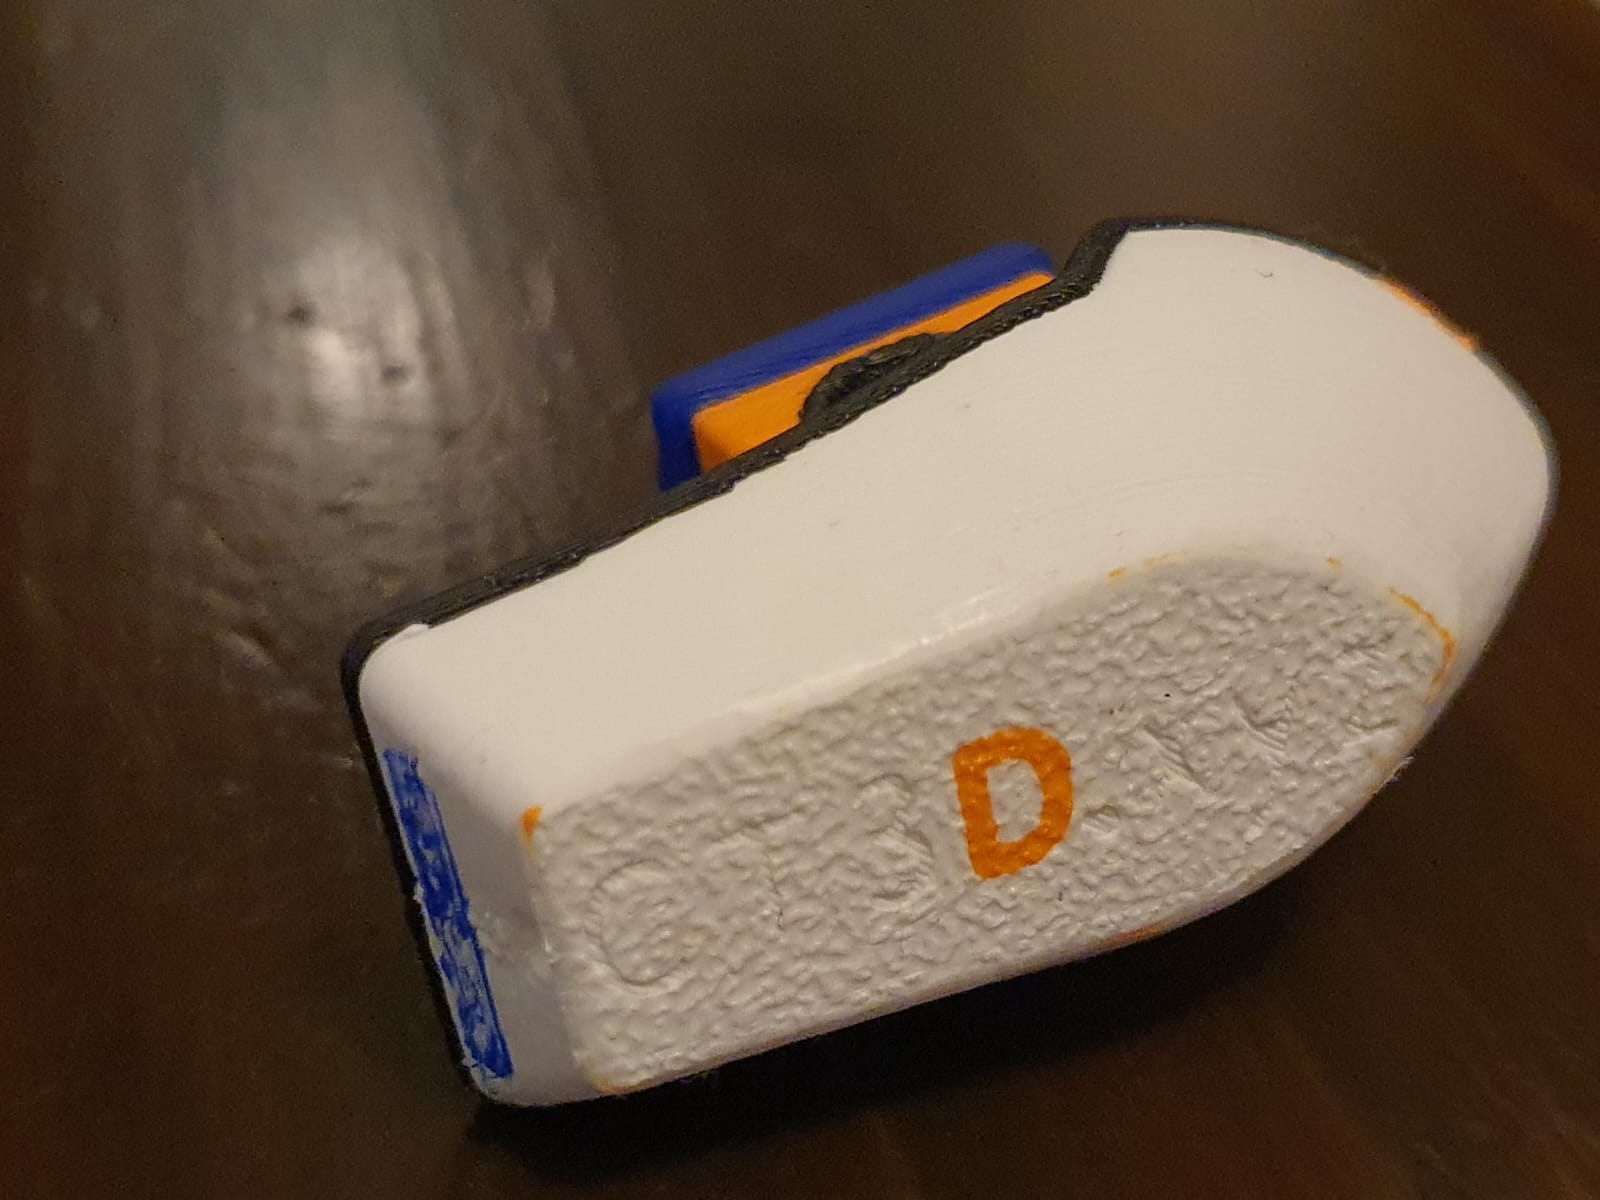
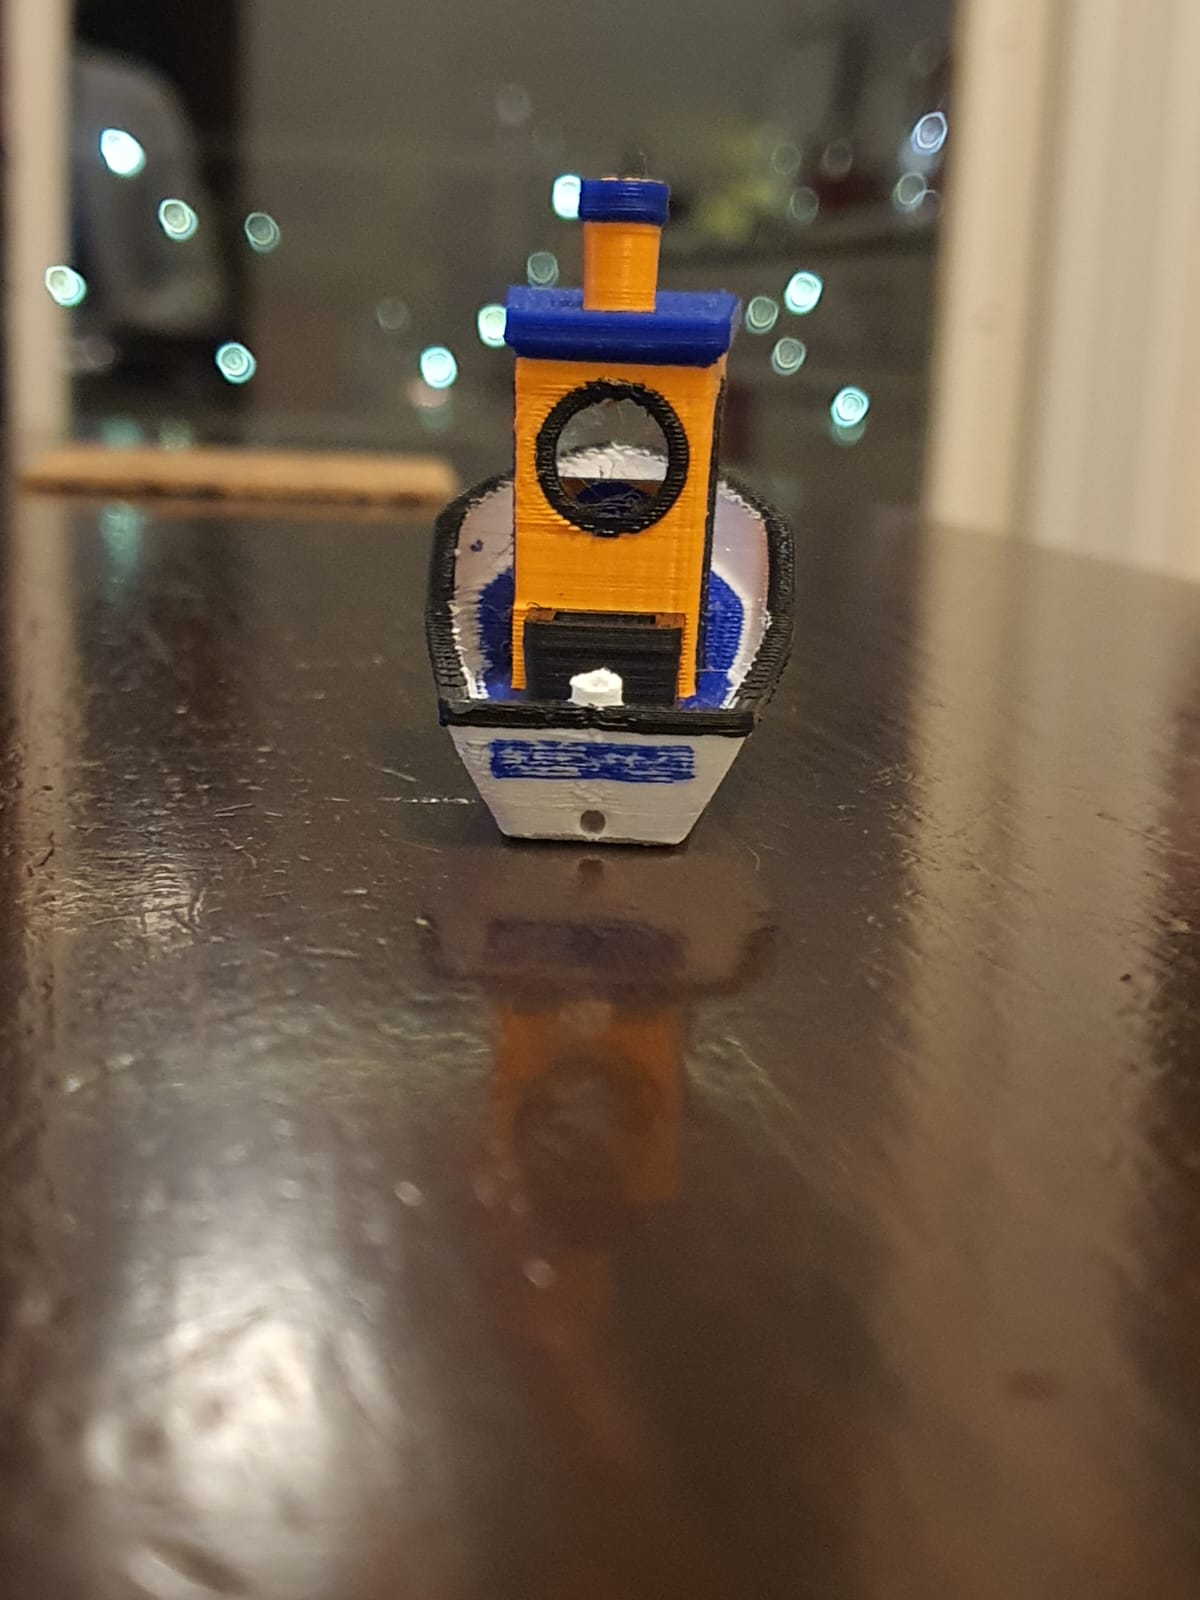
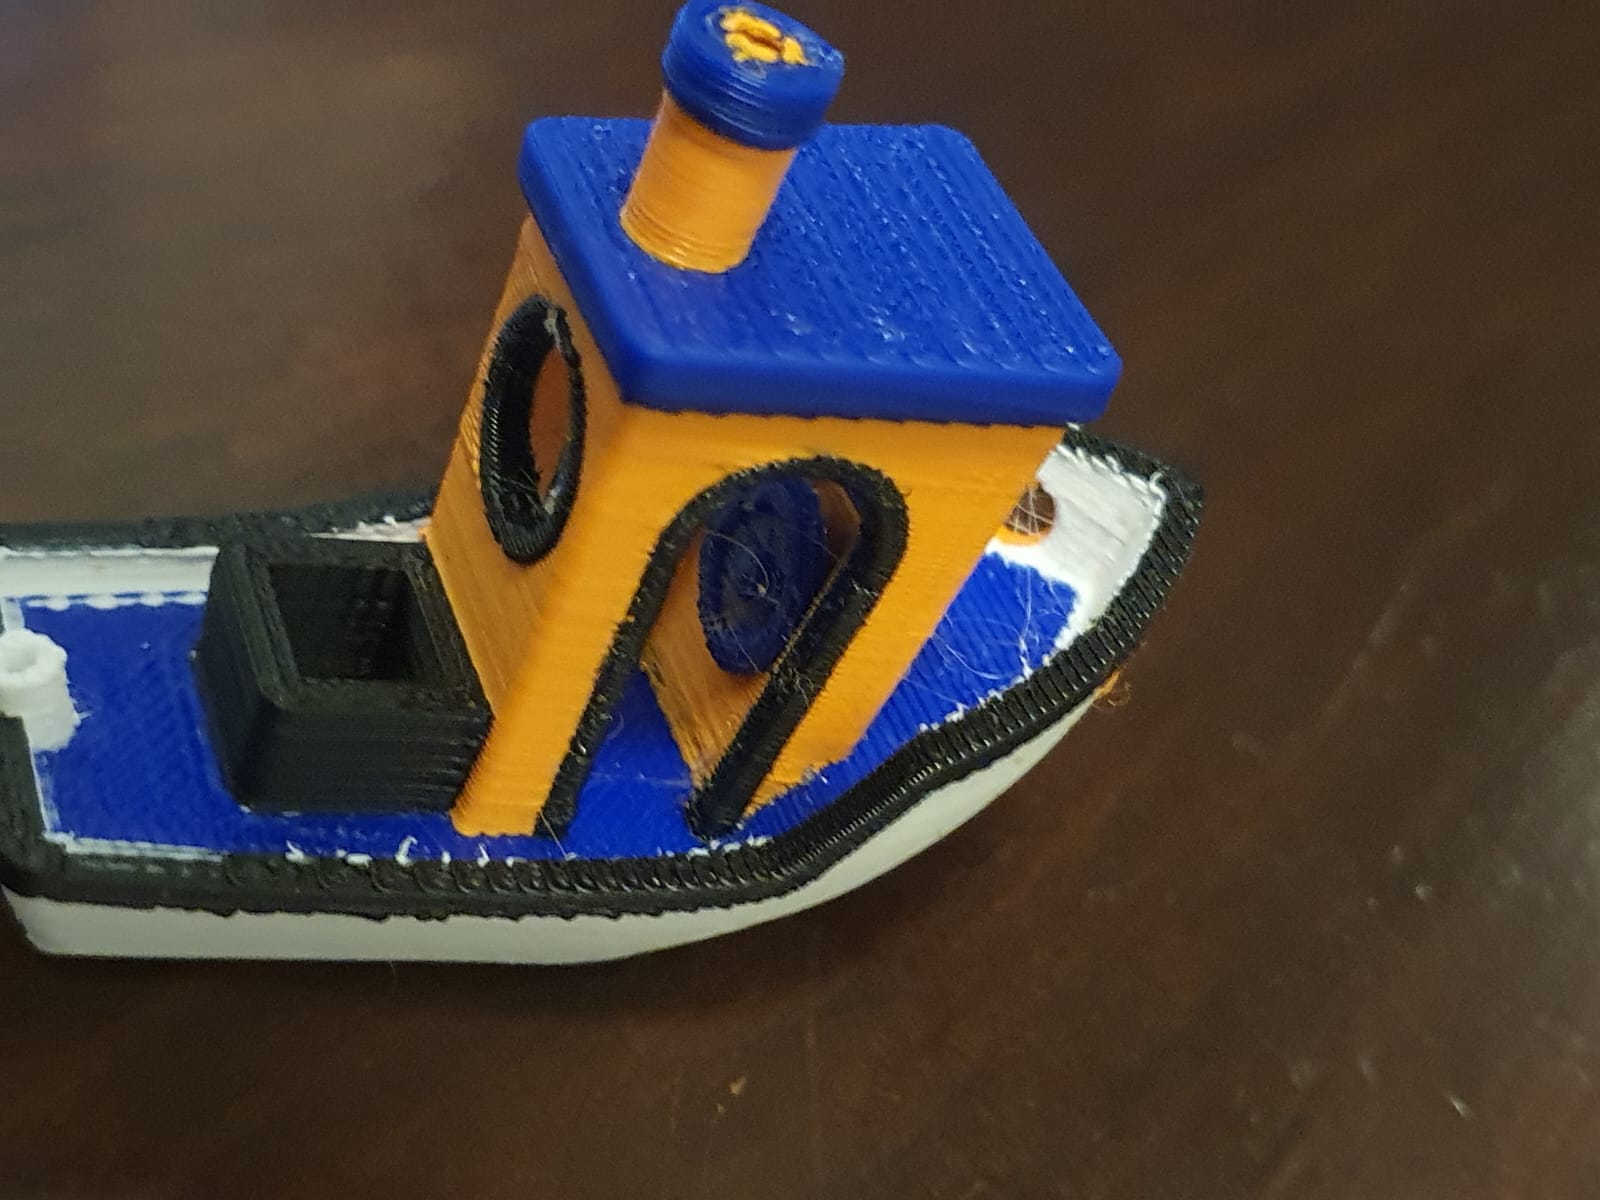
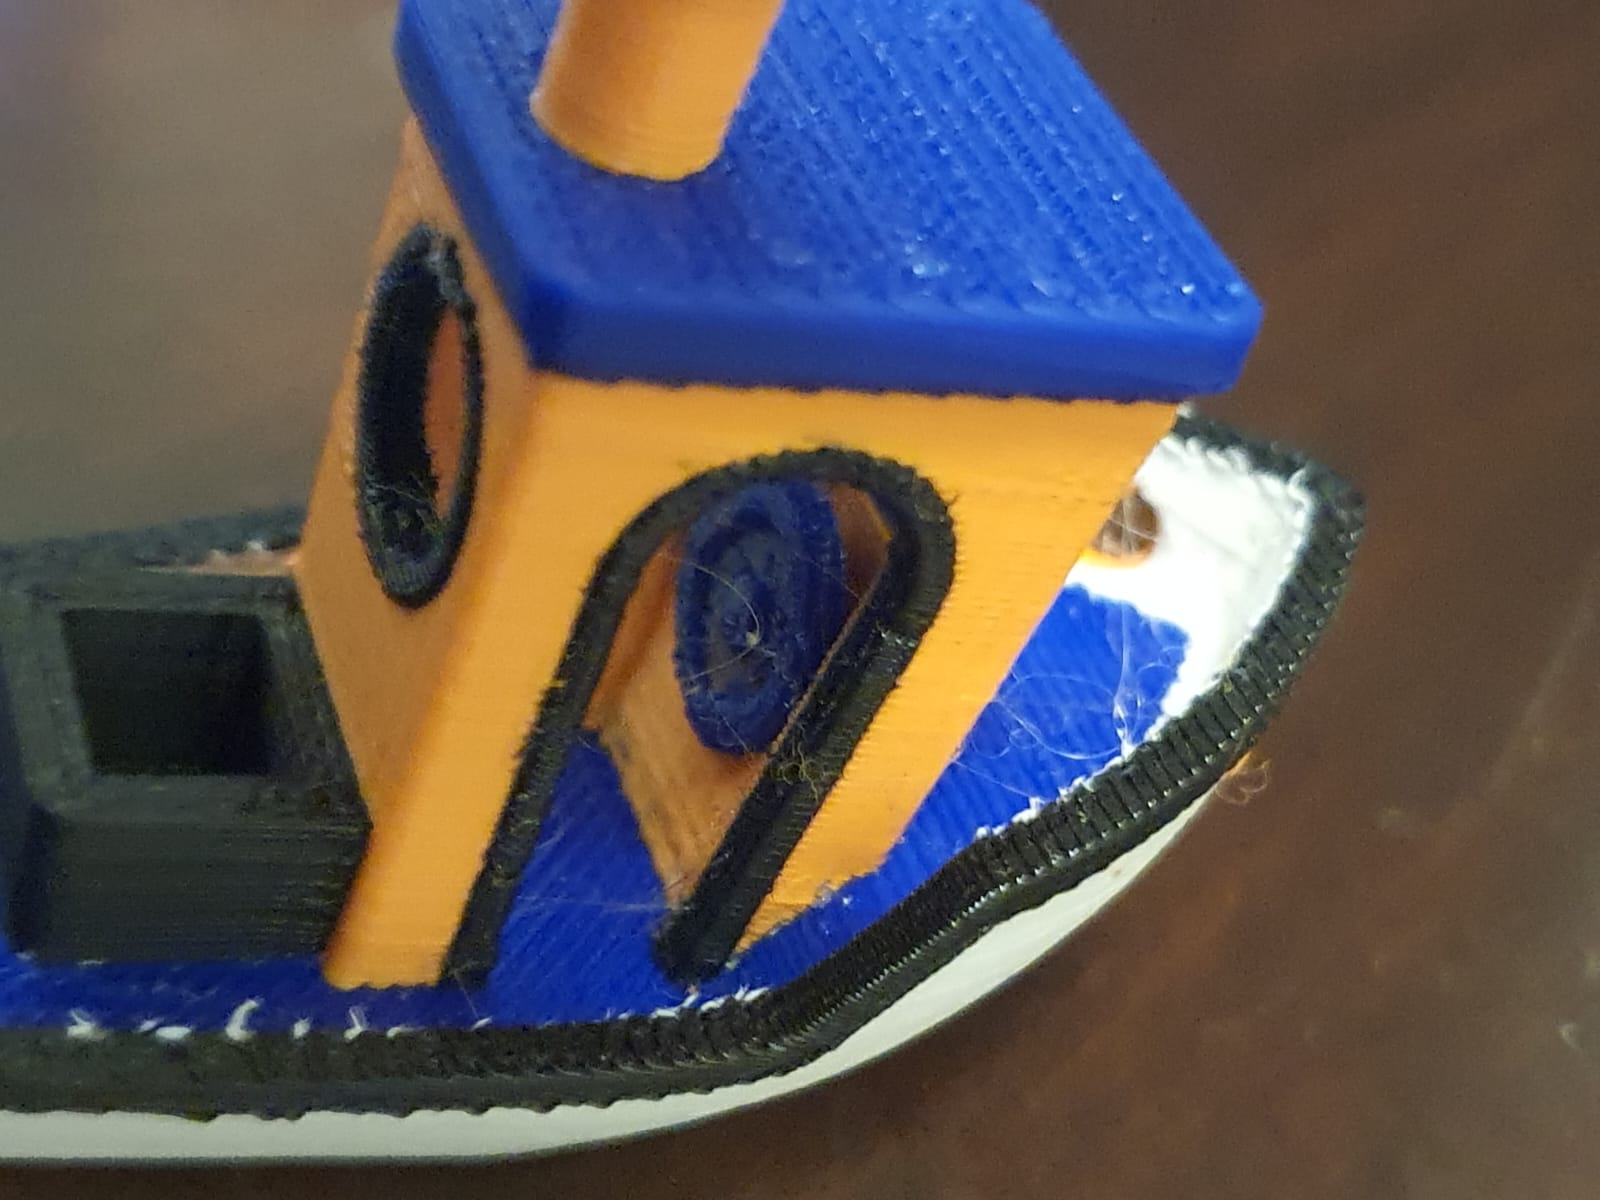
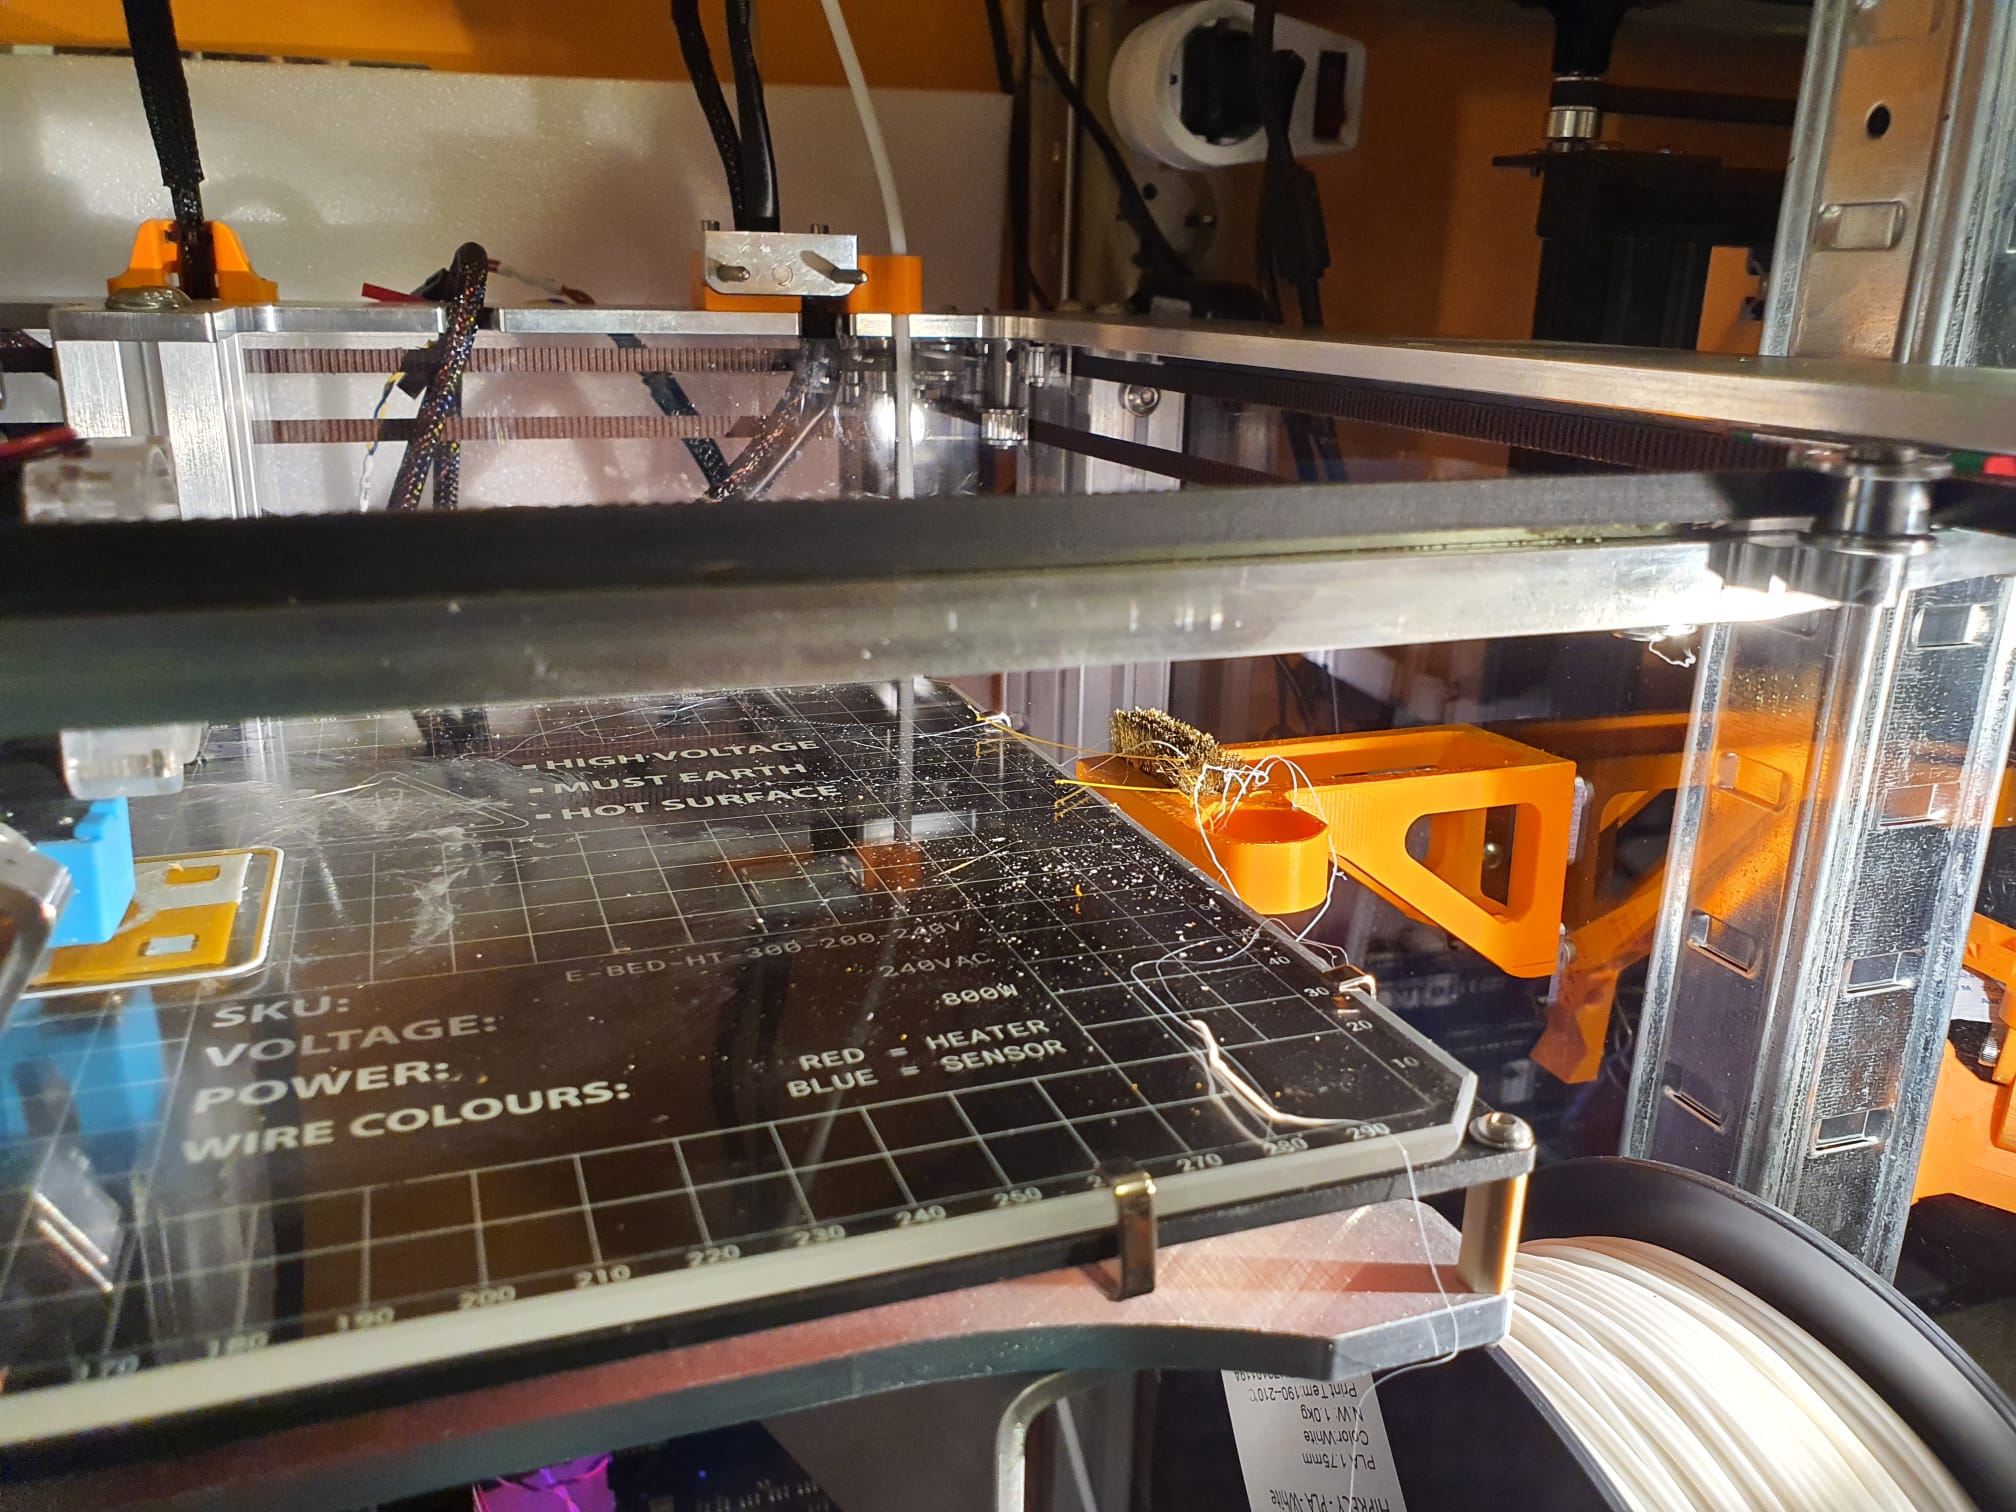
De boeg van de benchy , het witte rechter deel aan de onderkant zakt een beetje in.
De oplossing was om het hotbed op 10 graden lager in te stellen, en niet meer op 70 graden te starten met het bed.
Dus: Starten met 60 graden en na de eerste laag gelijk naar 50 graden.
Daarnaast heb ik de Benchy 180 graden omgedraaid zodat de koele lucht aan de linkerkant de boeg beter koelt.
Nu is hij qua kleurwisselingen helemaal mooi geworden.
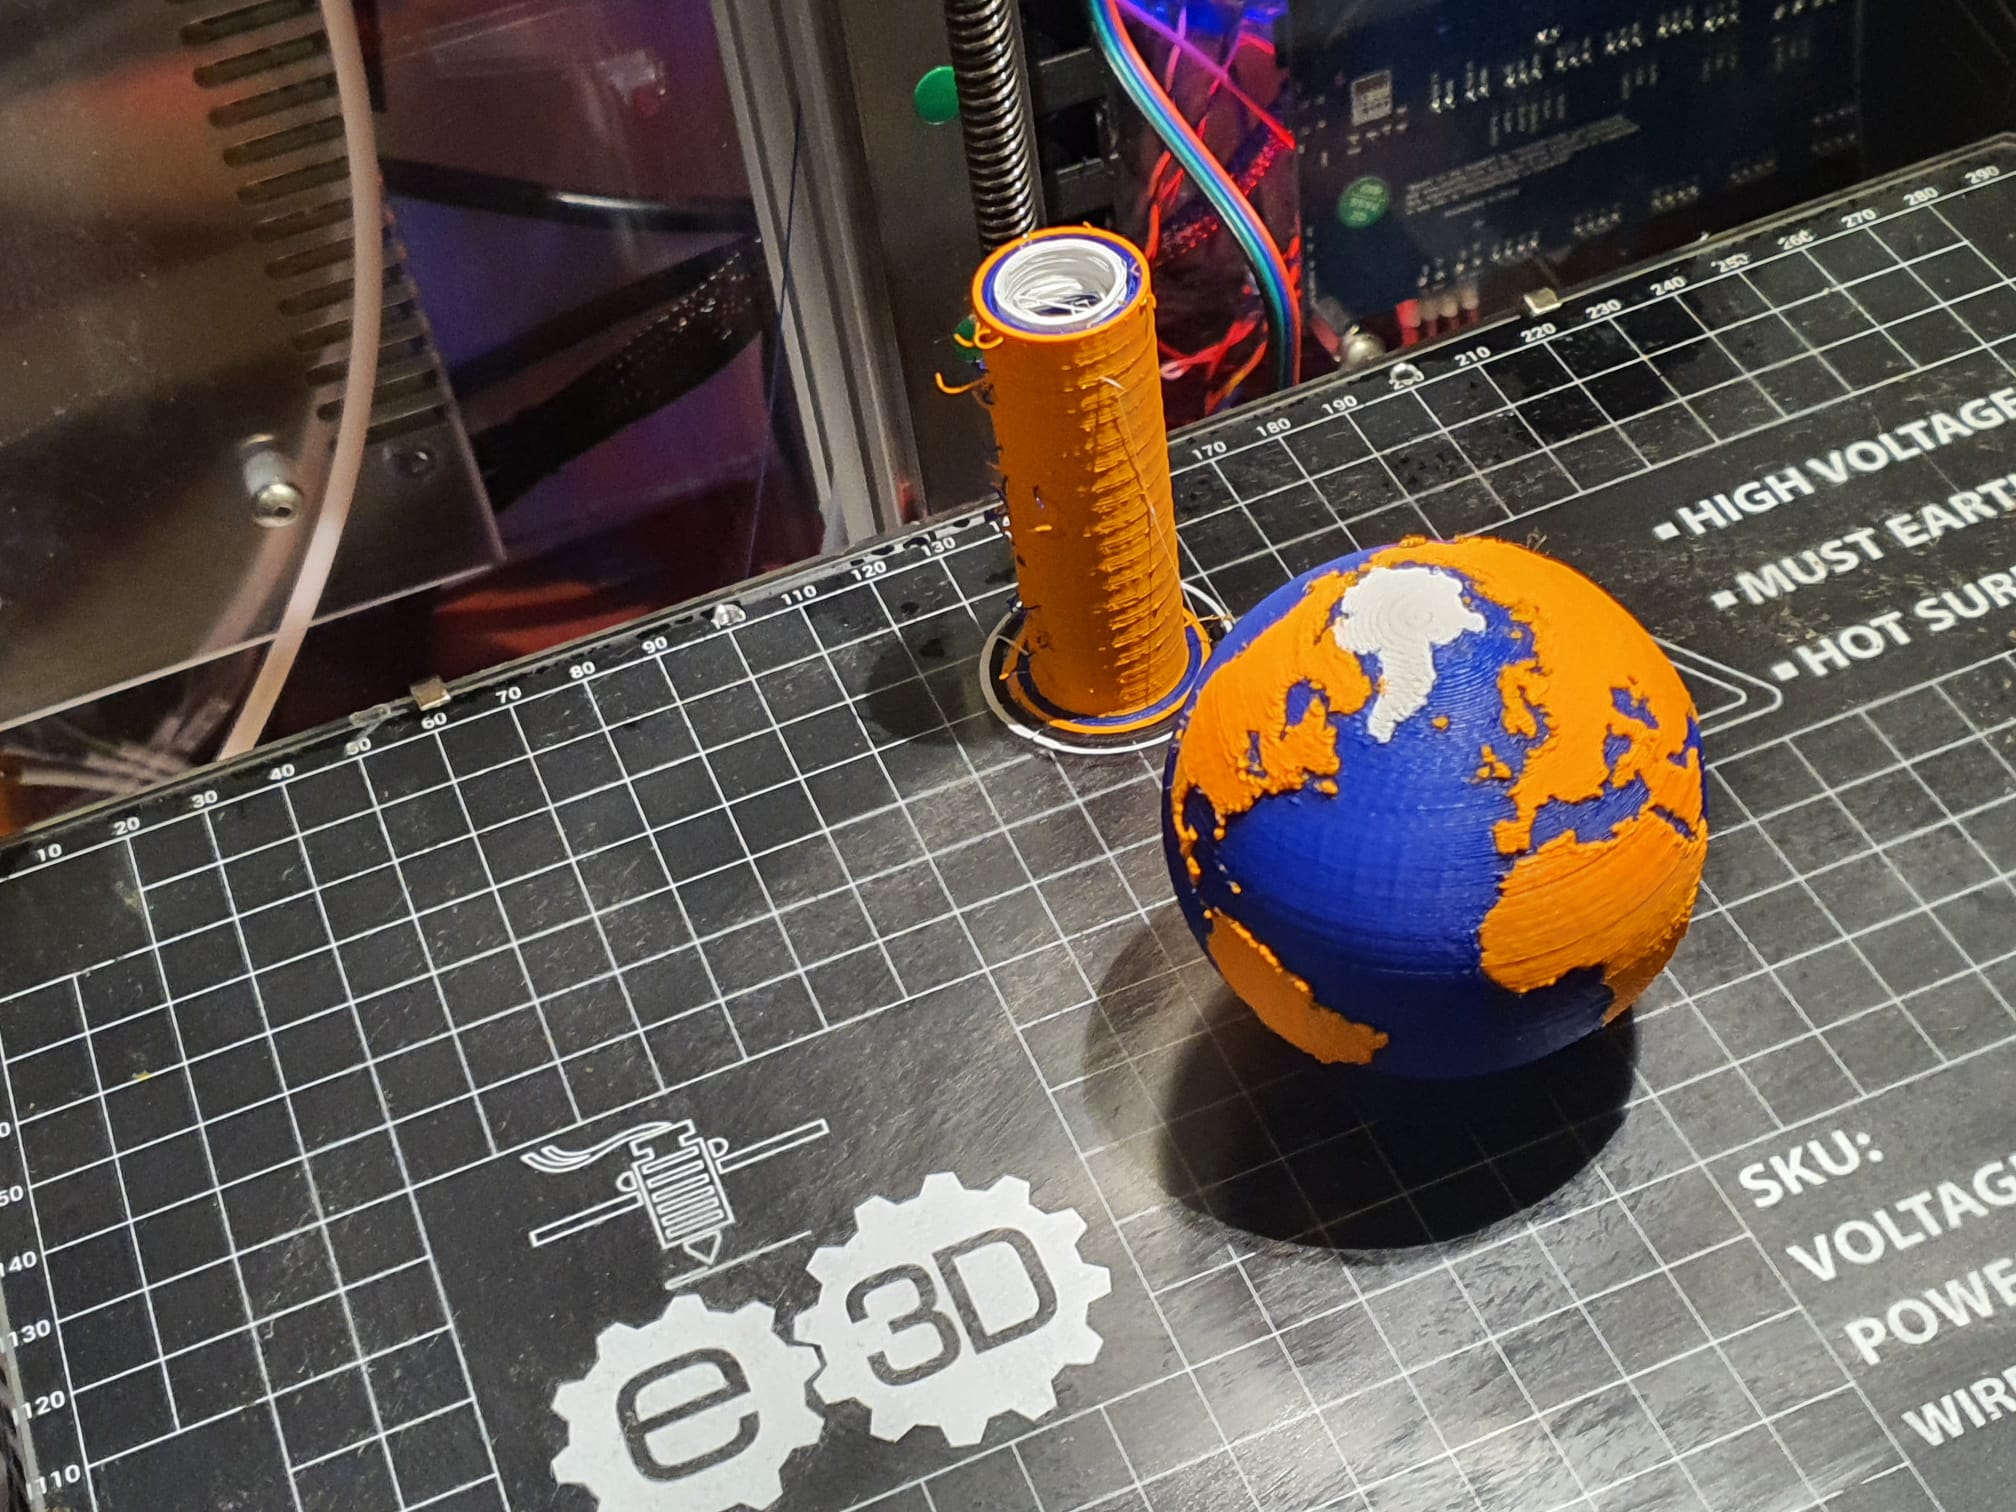
Geprint met 0,2 mm laaghoogte en een maximale printsnelheid van 120 mm/s.
Nog niet perfect maar daar komen we nog wel!
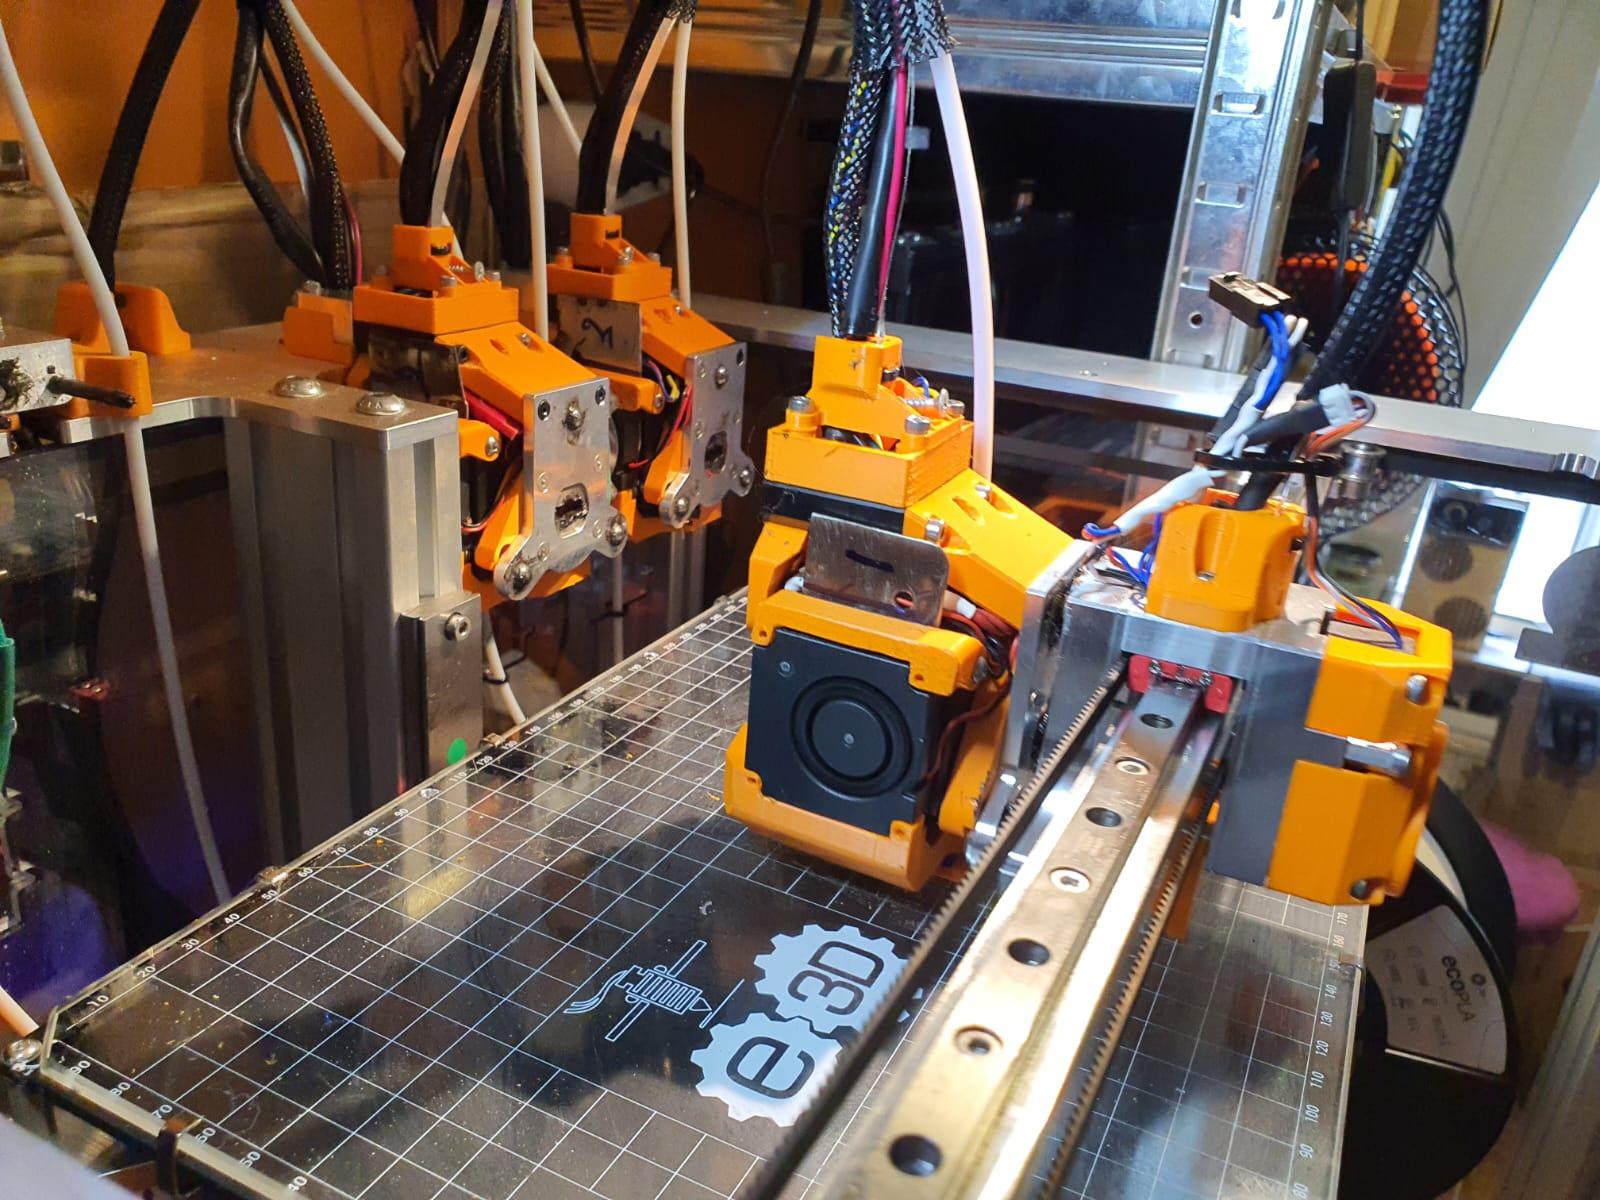
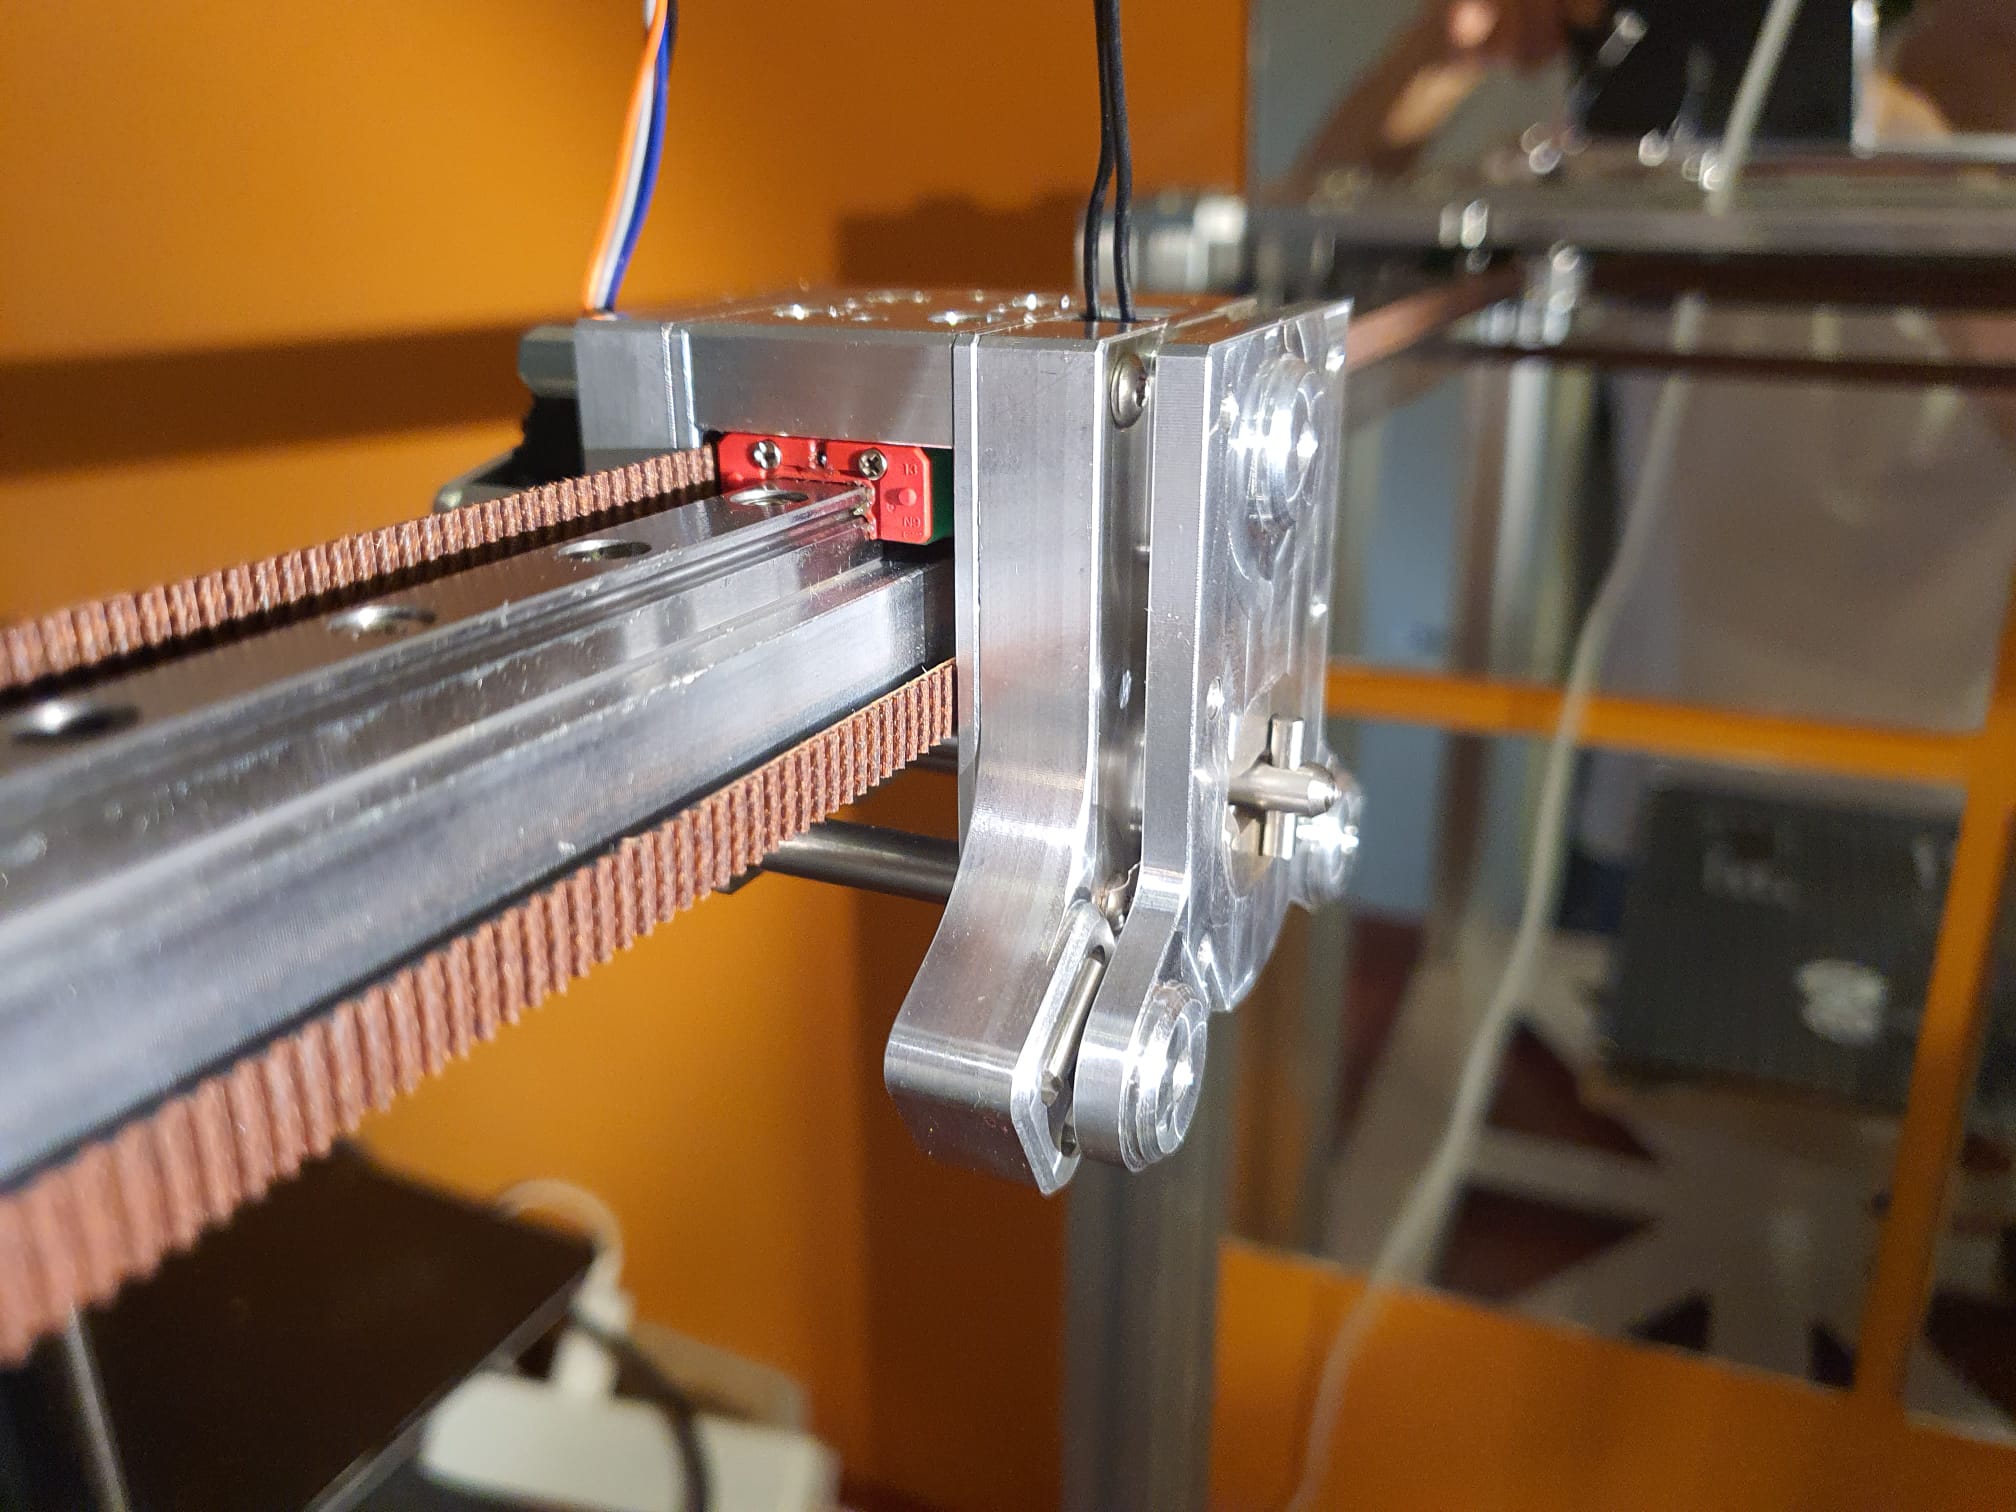
Nadat ik de homing schakelaars voor X en Y op de E3D toolchanger had geïnstalleerd, had ik eindelijk een fatsoenlijk startpunt om de pickup en parking van het gereedschap af te stellen.
Oorspronkelijk gebruikte ik sensorloze homing, maar dit veroorzaakte wisselende offset-waarden van de X- en Y-posities van de machine. Het gereedschap kon dus niet consequent worden opgepakt of thuisgebracht na een reset.
Nu werkt alles prima en veranderen de X-Y waarden niet meer na een reset.
Wat ik dis was om eerst wat macro’s te maken voor een eenmalige instelling van de X en Y positie van de 4 gereedschappen voor de positionering van de gereedschapskop. Als je dit niet doet, moet je elke keer dat je de waarde van X wilt veranderen, alle X waarden handmatig veranderen in 8 macro’s.
Dit is gedaan met een aantal globale variabelen. Nadat deze in een macro zijn gedefinieerd, moeten ze worden aangeroepen voordat ze worden gebruikt. In Config.g heb ik een verwijzing gemaakt om de macro van de globals.g macro aan te roepen, zodat deze telkens wordt uitgevoerd als je de Duet opstart.
In config.g heb ik na de Tool definities de M98 code toegevoegd om de globale definitie van de gebruikte variabelen te starten:
M98 P”0:/sys/globals.g” ; Maak globale variabelen aan in deze globals.g macro
Dit macrobestand ziet er in mijn geval als volgt uit en wees u ervan bewust dat de werkelijke variabelen per machine zullen verschillen, maar dit kan u een uitgangspunt geven:
global T0_X_dock=-12.3 ; X-Parkeerpositie van gereedschap 0
global T0_Y_dock=225.2 ; Y-Parkeerpositie van gereedschap 0
global T1_X_dock=80 ; X-Parkeerpositie van gereedschap 1
global T1_Y_dock=225.9 ; Y-Parkeerpositie van gereedschap 1
global T2_X_dock=212 ; X-Parkeerpositie van gereedschap 2
global T2_Y_dock=226 ; Y-Parkeerpositie van gereedschap 2
global T3_X_dock=304.7 ; X-Parkeerpositie van gereedschap 3
global T3_Y_dock=225,4 ; Y-Parkeerpositie van gereedschap 3
De bestanden tfree 1-3 en tpre 1-3 zien er dan zo uit voor T0, en je kunt de anderen maken door gewoon T1 , T2 of T3 in te vullen waar nu T0 staat:
; tfree0.g
; aangeroepen wanneer gereedschap 0 is bevrijd
G91
G1 Z4 F1000
G90
;Purge nozzle
;M98 P”purge.g”
;Move In
G53 G1 X{global.T0_X_dock} Y150 F50000
G53 G1 X{global.T0_X_dock} Y200 F50000
G53 G1 X{global.T0_X_dock} Y220 F50000
G53 G1 X{global.T0_X_dock} Y{global.T0_Y_dock} F1000
G53 G1 Y{global.T0_Y_dock} F1000
;Koppeling openen
M98 P”Coupler – Unlock.g”
;ventilator uit
M106 S0
;Move Out
G53 G1 {global.T0_X_dock} Y175 F50000
;tpre0.g
;opgeroepen voordat gereedschap 0 is geselecteerd
;Koppeling ontgrendelen
M98 P”Coupler – Unlock.g”
;Verplaatsen naar locatie
G1 X{global.T0_X_dock} Y200 F50000 ; was X-10.5
;Naar binnen
G1 X{global.T0_X_dock} Y220 F50000
;Verzamelen
G1 X{global.T0_X_dock} Y229.2 F1000 ;was f2500
G1 Y{global.T0_Y_dock} F1000
;Koppeling sluiten
M98 P”Coupler – Lock.g”
WAARSCHUWING! WAARSCHUWING! WAARSCHUWING! WAARSCHUWING! WAARSCHUWING! WAARSCHUWING! WAARSCHUWING! WAARSCHUWING! WAARSCHUWING! WAARSCHUWING! WAARSCHUWING! WAARSCHUWING!
Als u niet-standaardlengte hotends gebruikt, moet u ervoor zorgen dat het bed voldoende is verlaagd VOORDAT u het gereedschap loskoppelt!
G91
G1 Z10 F1000
G90
;Verplaatsen
G1 X{global.T0_X_dock} Y150 F10000; was 4000
En ik heb wat macro’s gemaakt om te controleren waar de gereedschapskop staat, recht voor de gereedschappen T0-T3:
; fit_T0.g
;aangeroepen om het gereedschap vlak voor het dock te plaatsen
G91
G1 Z4 F1000
G1 Y-10 F2000
G90
G53 G1 X150 Y100 F20000
;Naar binnen
G53 G1 X{global.T0_X_dock} Y150 F10000
G53 G1 X{global.T0_X_dock} Y200 F10000
G53 G1 X{global.T0_X_dock} Y220 F10000
Als u wilt controleren of u de juiste wijzigingen in globals.g hebt aangebracht, moet u weten dat de nieuwe waarden in de variabelenmacro globals.g pas worden gelezen als u opnieuw opstart. [Als u de waarden op een andere manier wilt herdefiniëren zonder opnieuw op te starten, hebt u een ander type aanroepfunctie nodig].
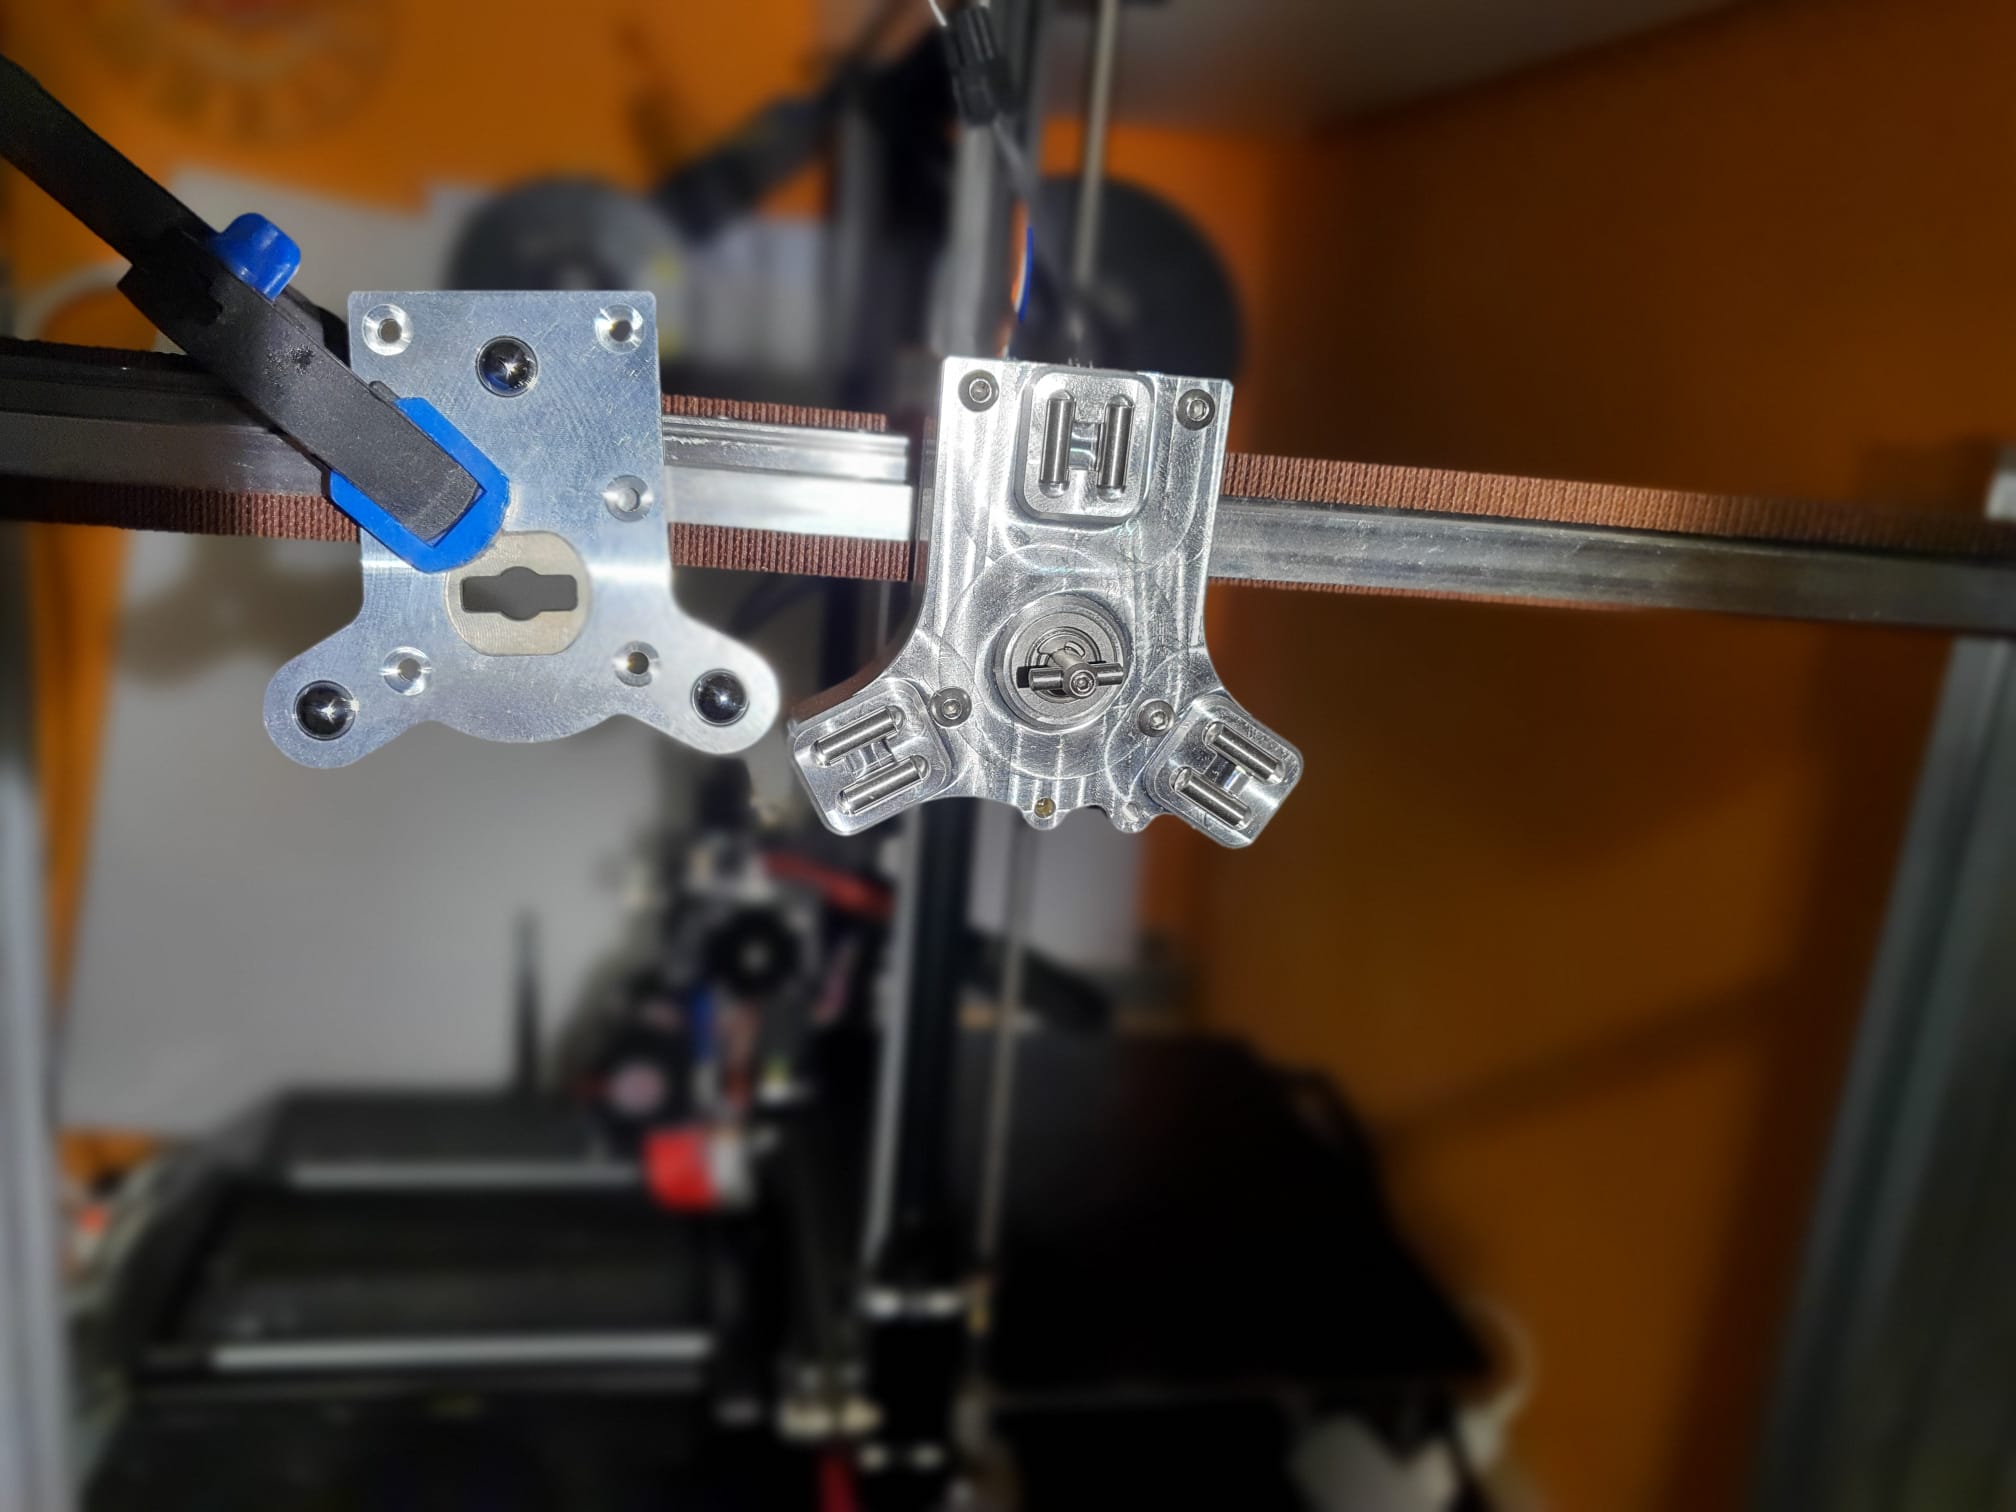
Mijn E3D toolchanger bleek steeds wat af te wijken van de exacte X-Y locaties elke keer dat ik een homing van de machine uitvoerde,.
Dit werd duidelijk nadat ik probeerde de exacte posities van de pickup van het gereedschap af te stellen, nadat ik had gehomed.
Elke keer als ik de pick-up posities opnieuw afstelde, werkte hij goed en de volgende dag was hij net weer een beetje anders. Dan stemde ik hem opnieuw af, en na een dag zat hij er weer naast. Niet veel, maar slechts 0,1 mm of iets meer. Maar het gaf wel problemen met het wisselen van de Tools.
Dus- na wat lezen vond ik dat anderen dit probleem ook hadden en kwam met een oplossing: Gewoon een paar goede X- en Y-homeschakelaars plaatsen!
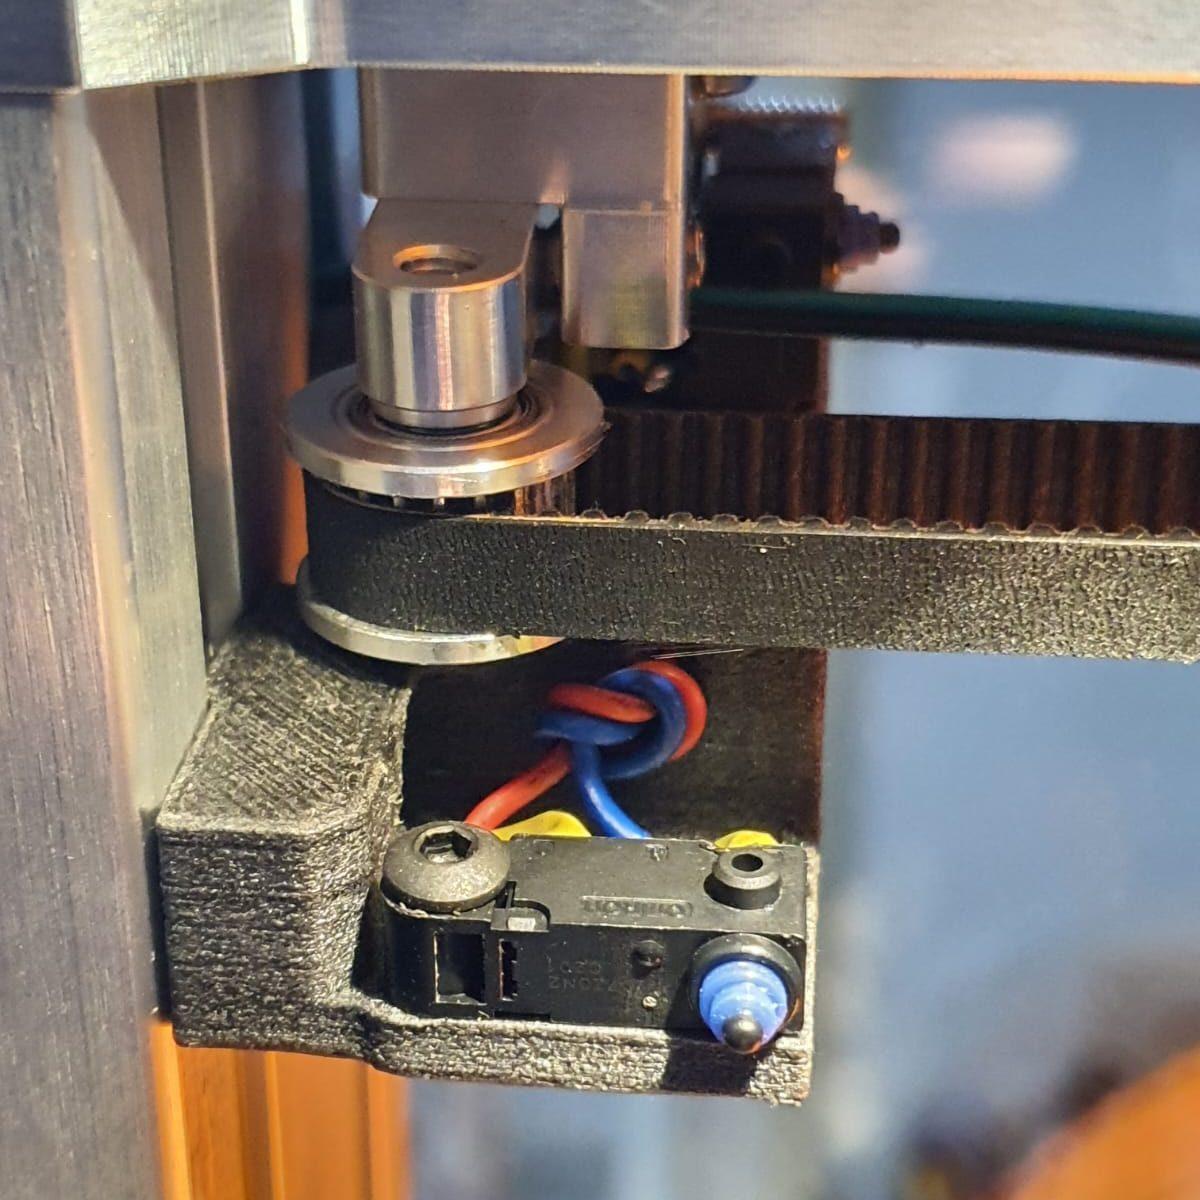
Ik vond zelfs de te printen 3d-onderdelen voor de montage van deze schakelaars. Bedankt hiervoor, mensen!
De schakelaars zijn van hetzelfde type als voor de Z-schakelaar.
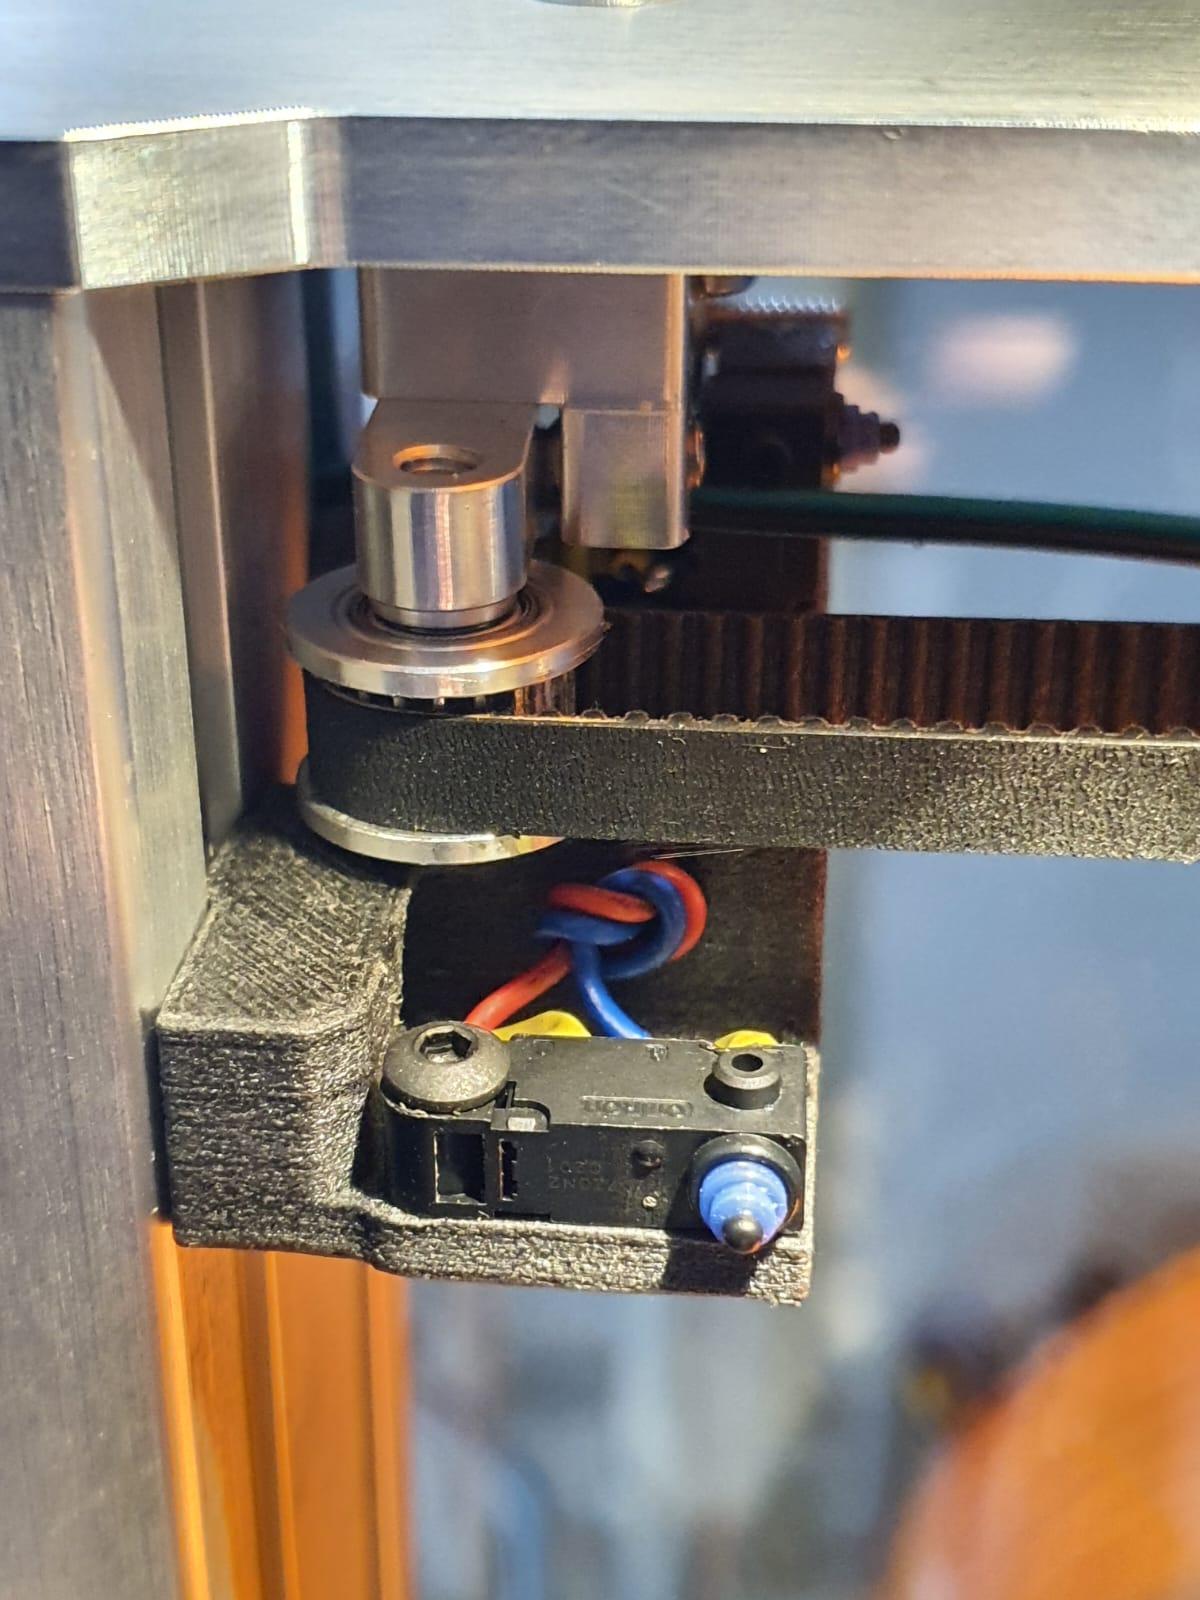
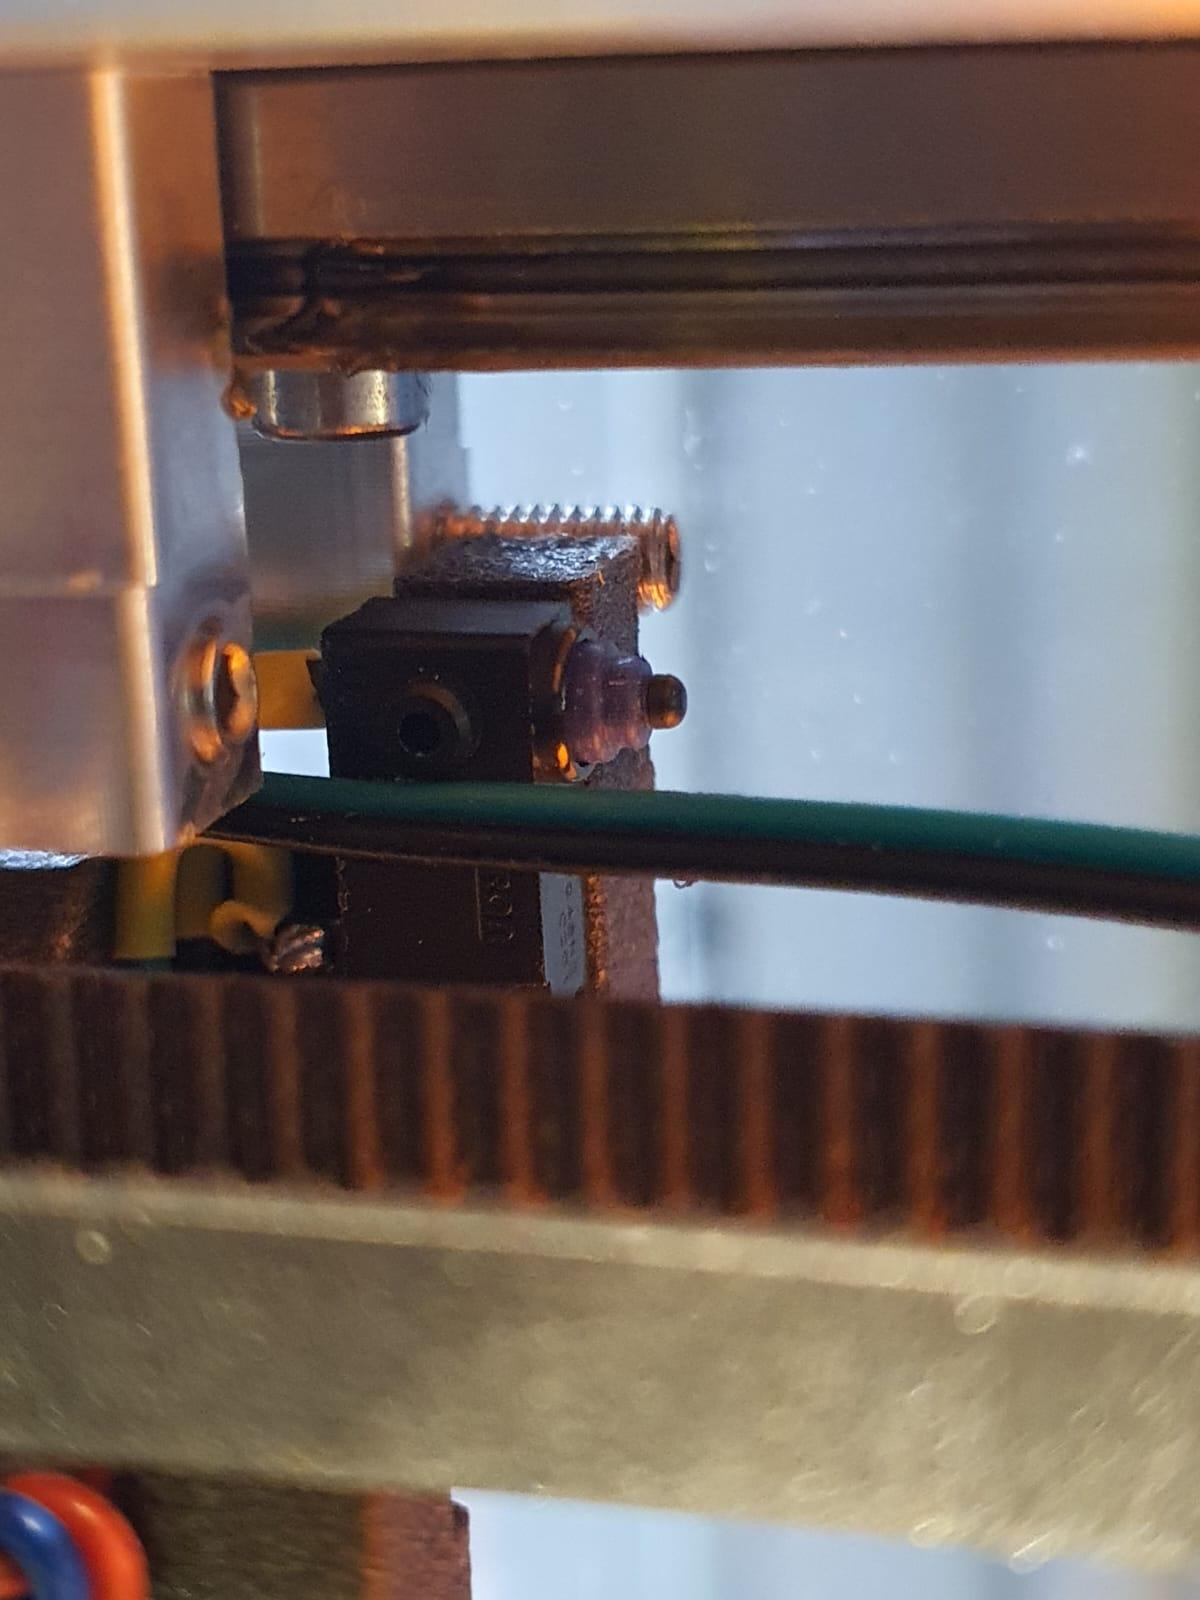
Ik heb de mounts in PETG carbon geprint op mijn Prusa mini en beide schakelaars op de E3D toolchanger gemonteerd.
Hierna heb ik config. g en de homing files aangepast, zie hiervoor de rest van mijn post:
CONFIG.G CHANGES
; Endstops
M574 X1 S1 P”xstop” ; X min active high endstop switch
M574 Y1 S1 P”ystop” ; Y min active high endstop switch
M574 C0 ; no C endstop
M574 Z0 P”nil” ; no Z endstop switch, free up Z endstop input as Z endstop switch. (I changed this part for correct working with RRF3.3+)
NEW HOMING FILES:
; homex.g
; called to home the x axis
M98 P”homey.g” ; Home Y always before homing X
G91 ; use relative positioning
G1 H2 Z3 F5000 ; lift Z 3mm
G1 H1 X-400 F15000 ; move left 400mm, stopping at the endstop
G1 X5 F15000 ; move away from end
G1 H1 X-400 F2000 ; move left 400mm, stopping at the endstop
G1 X2 F2000 ; move away from end
G1 H2 Z-3 F1200 ; lower Z
G90 ; back to absolute positioning
; homeall.g
; called to home all axes;
M98 P”homec.g” ; Home C (ToolHead)
M98 P”homex.g” ; Home X
M98 P”homez.g” ; Home Z
G1 X150 Y-49 Z20 F15000 ; Park
; homey.g
; called to home the Y axis
G91 ; use relative positioning
G1 H2 Z3 F5000 ; lift Z 3mm BED DOWN
G1 H1 Y-400 F15000 ; move to the front 400mm, stopping at the endstop
G1 Y5 F15000 ; move away from end
G1 H1 Y-400 F2000 ; move to the front 400mm, stopping at the endstop
G1 Y2 F2000 ; move away from end
G1 H2 Z-3 F1200 ; move Z BED UP
G90 ; back to absolute positioning
Z homing did not change and remains as is:
; homez.g
; called to home the Z axis
M98 P”Coupler – Unlock.g” ; Open Coupler
G91 ; Relative mode
G1 H2 Z5 F5000 ; Lower the bed
G90 ; back to absolute positioning
G1 X150 Y100 F50000 ; Position the endstop above the bed centre
M558 F1000 ; speed to 1000
G30 ; probe x 1
M558 F300 ; speed to 300
G30 ; probe x 1
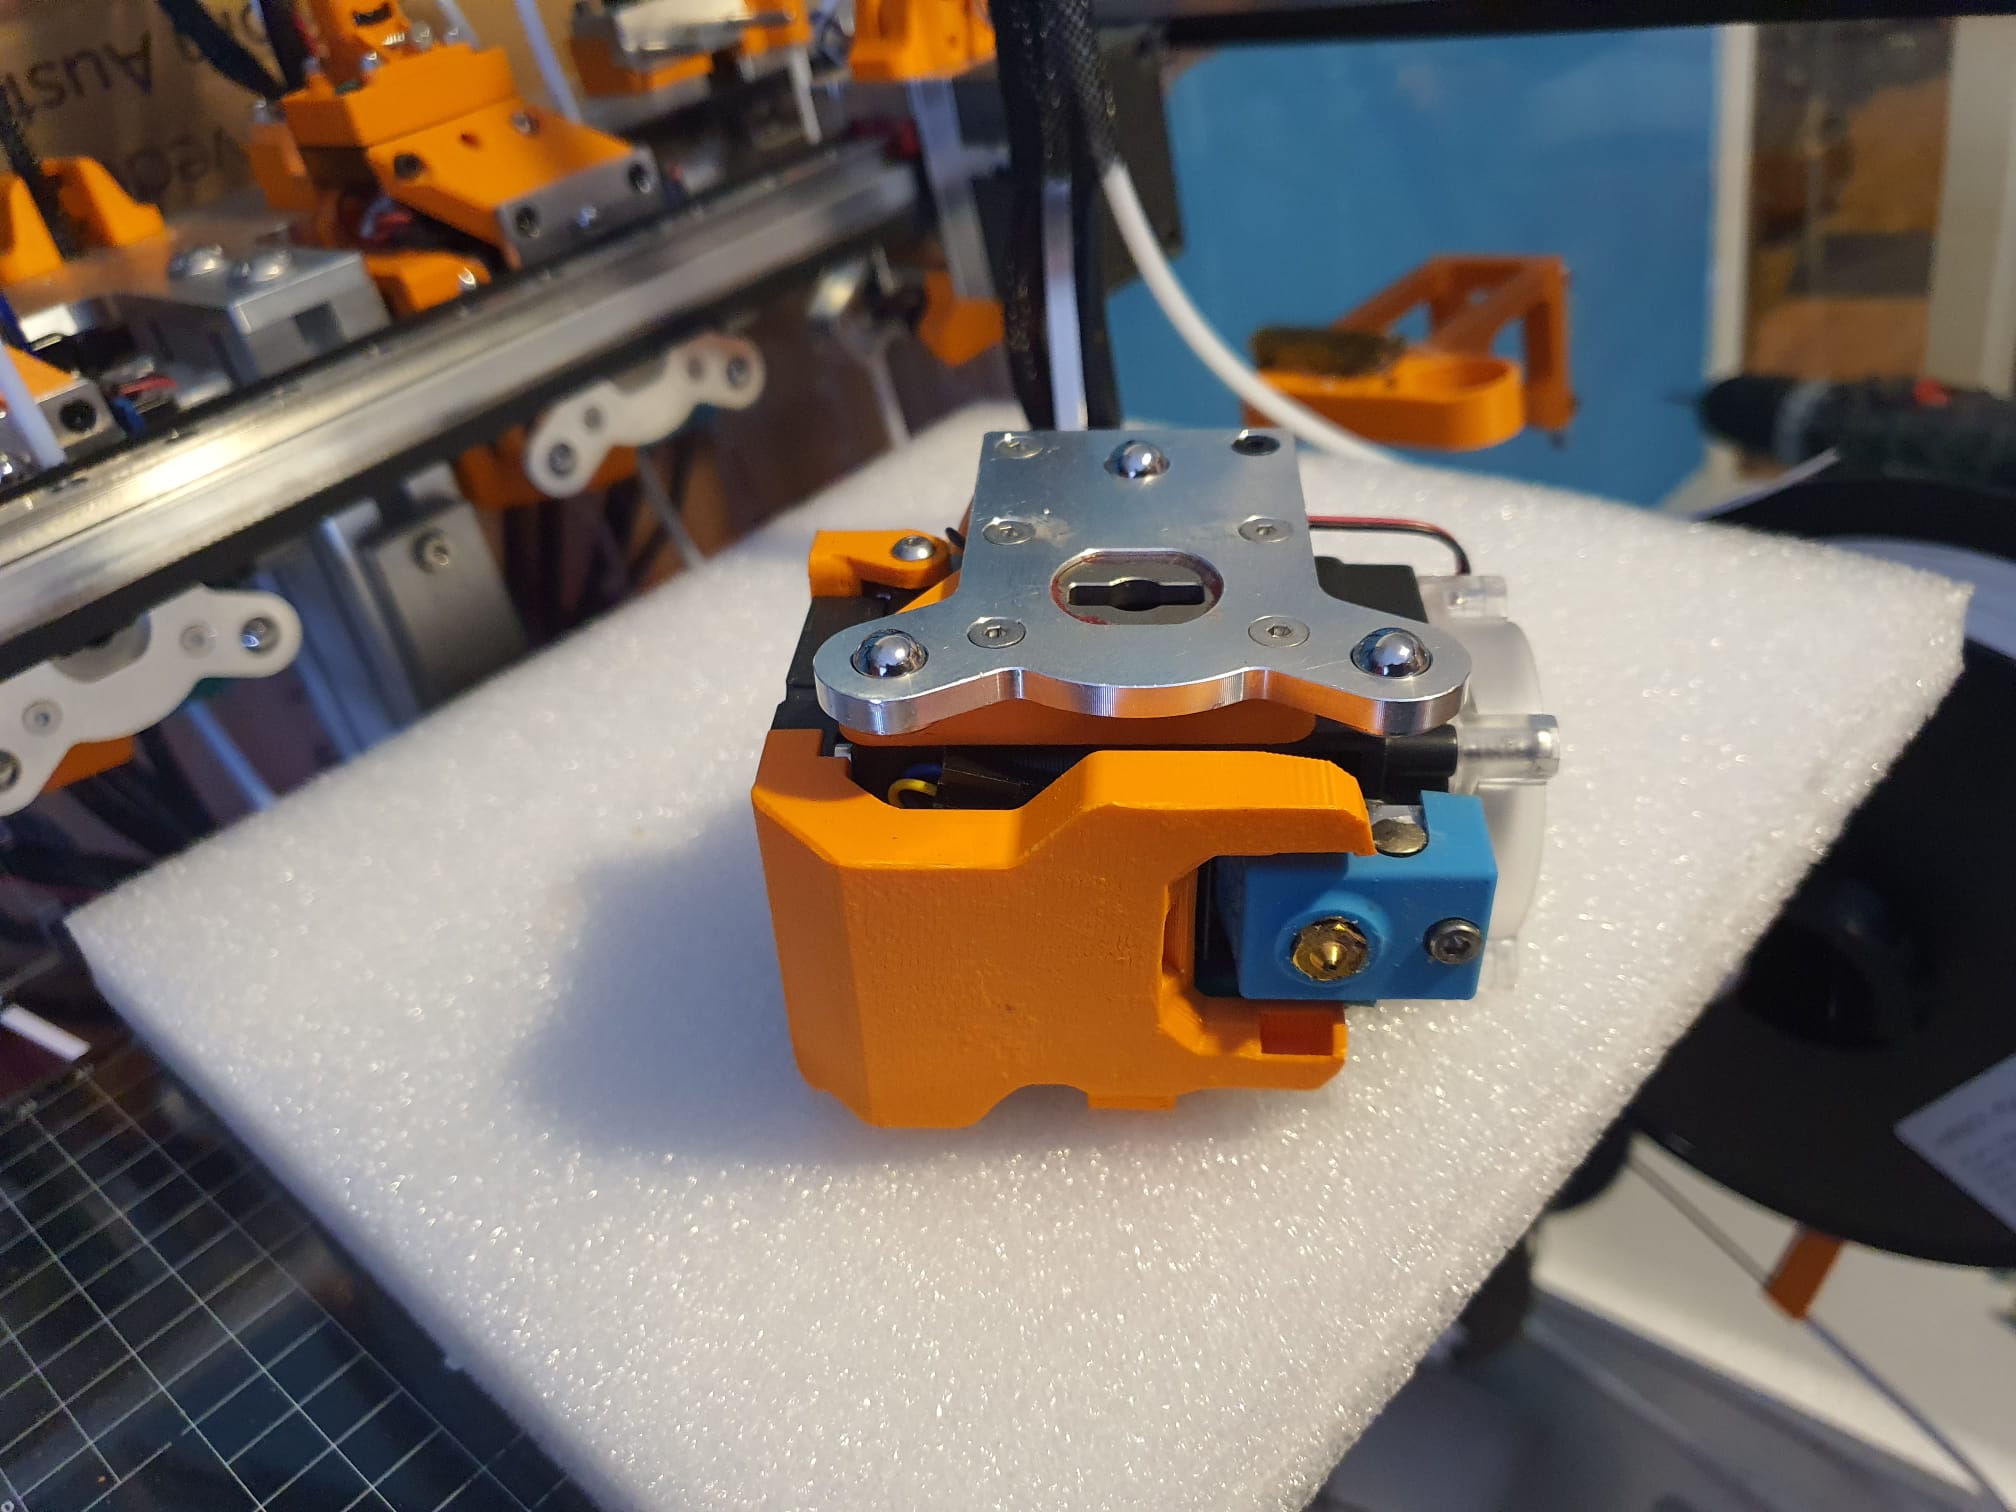
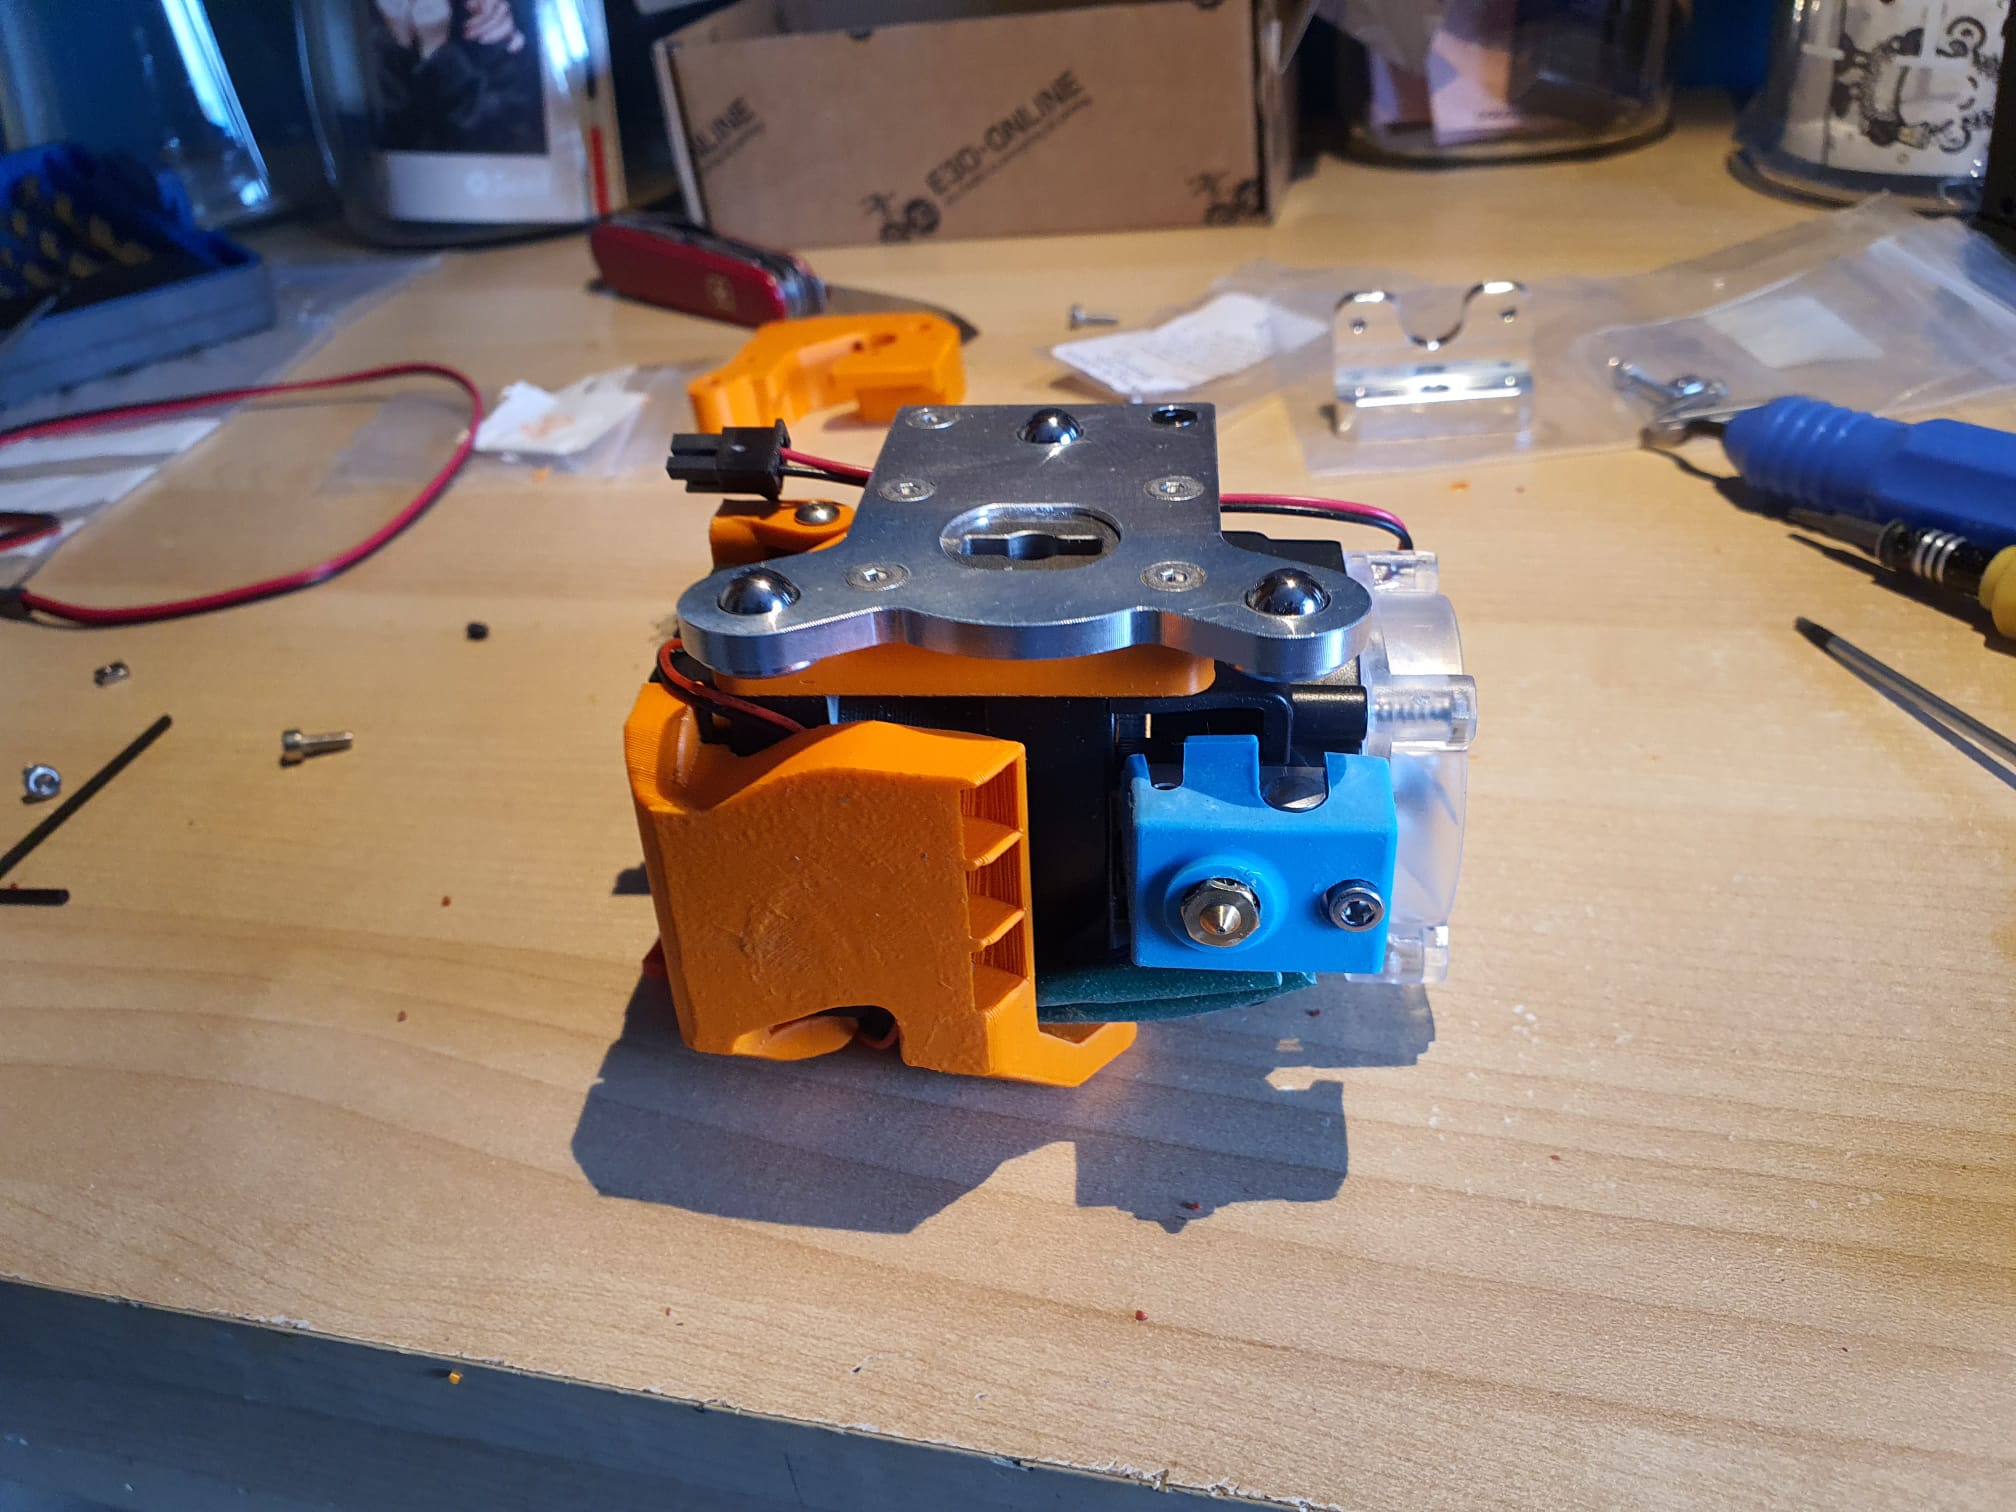
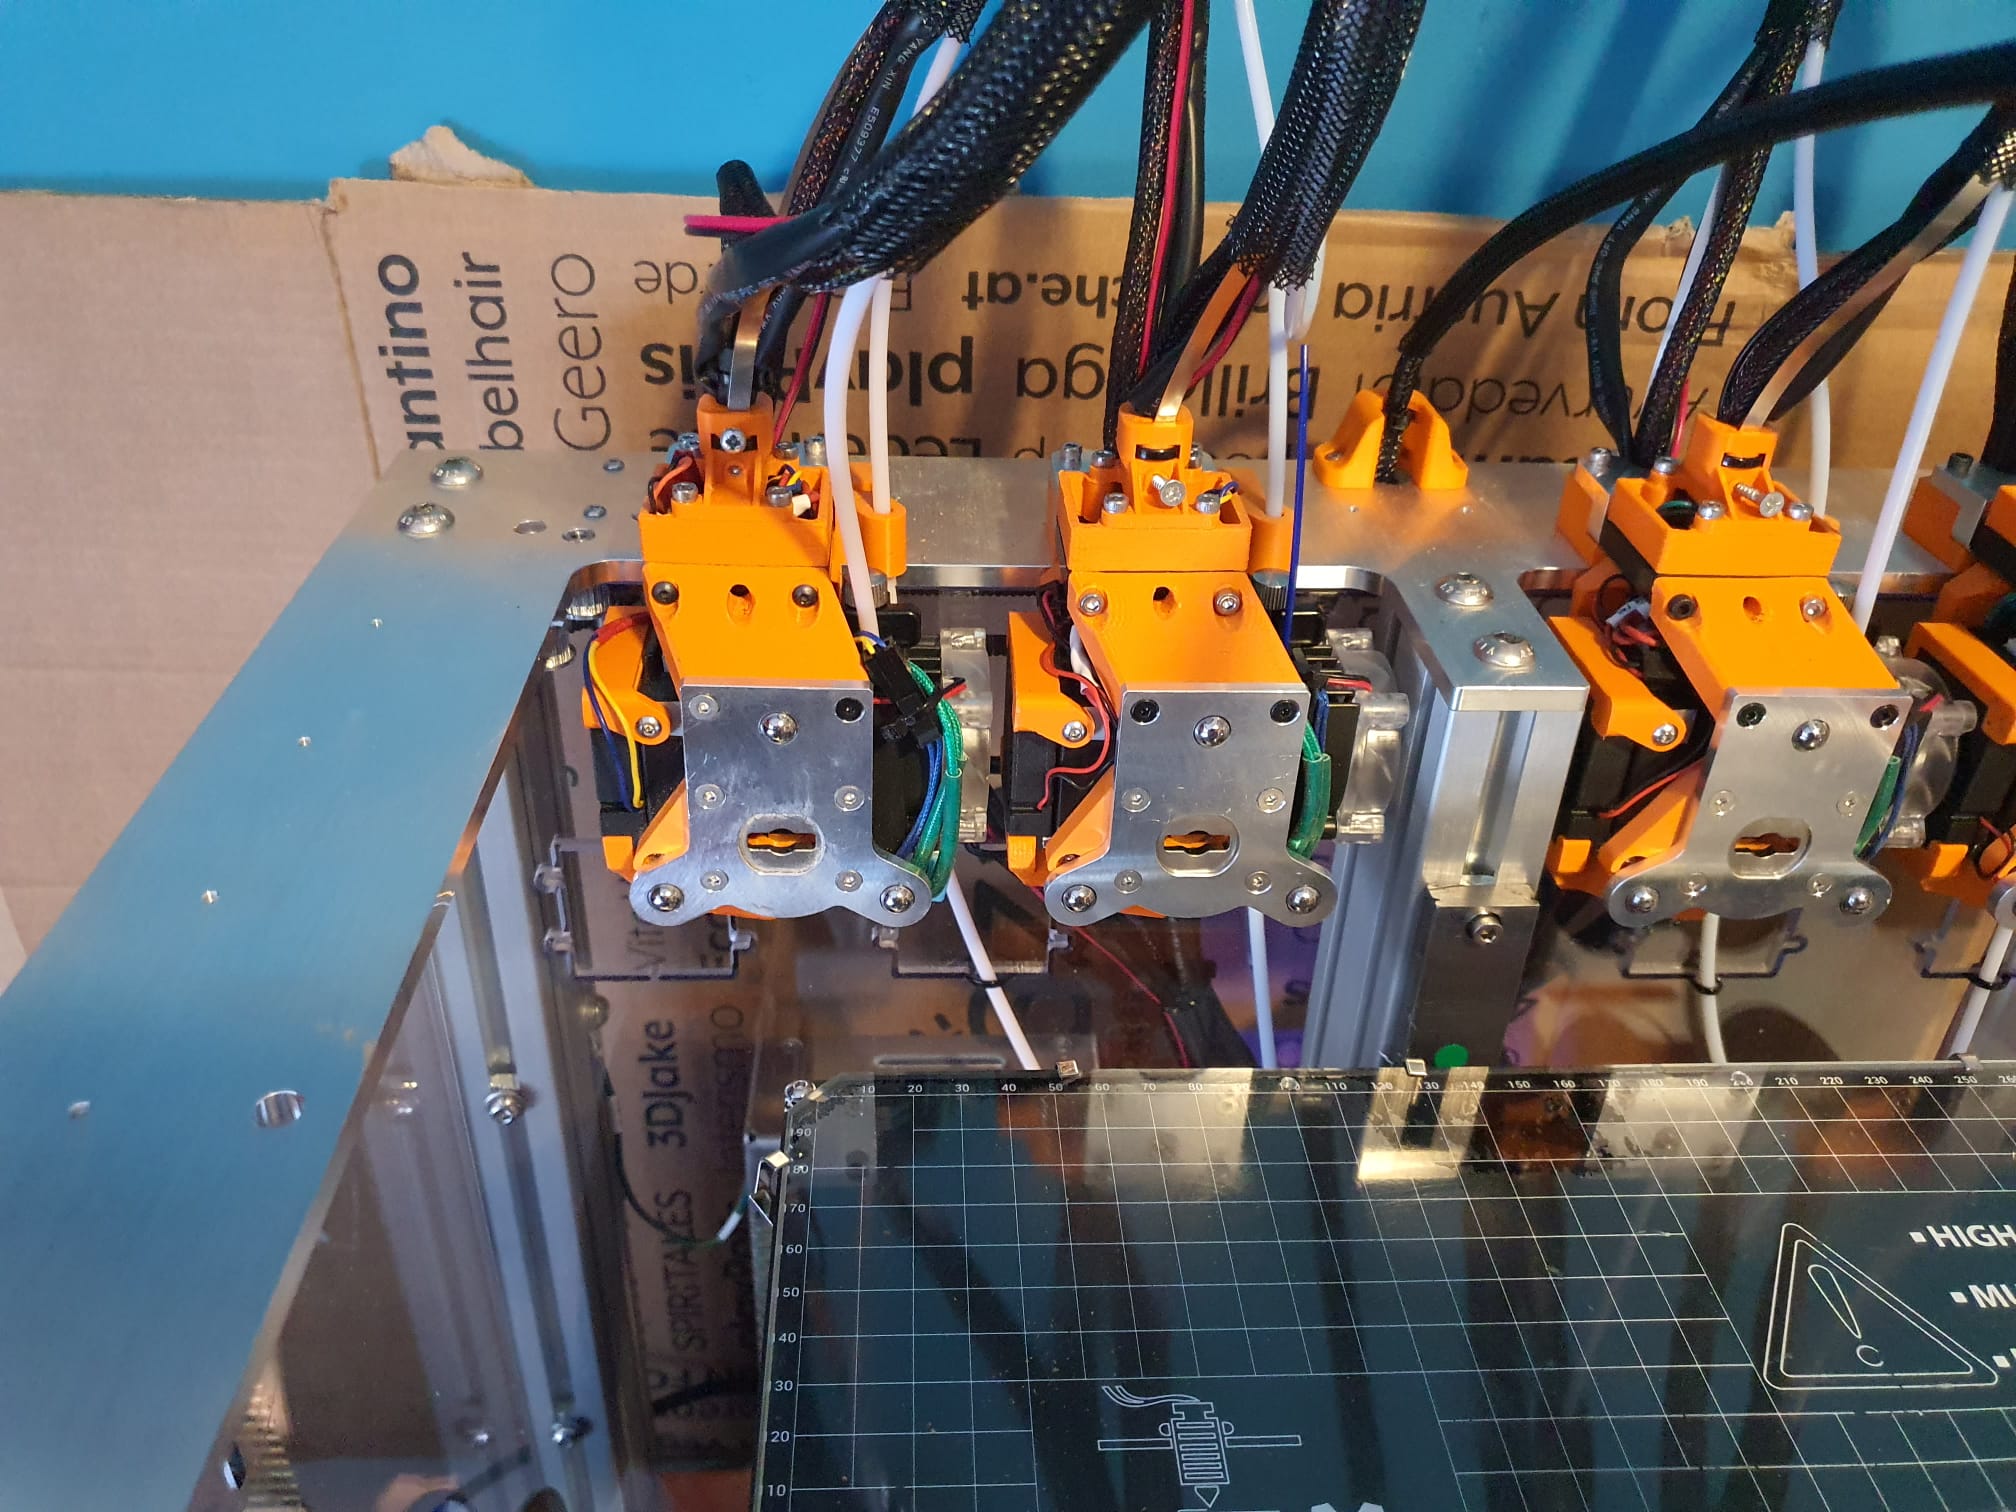
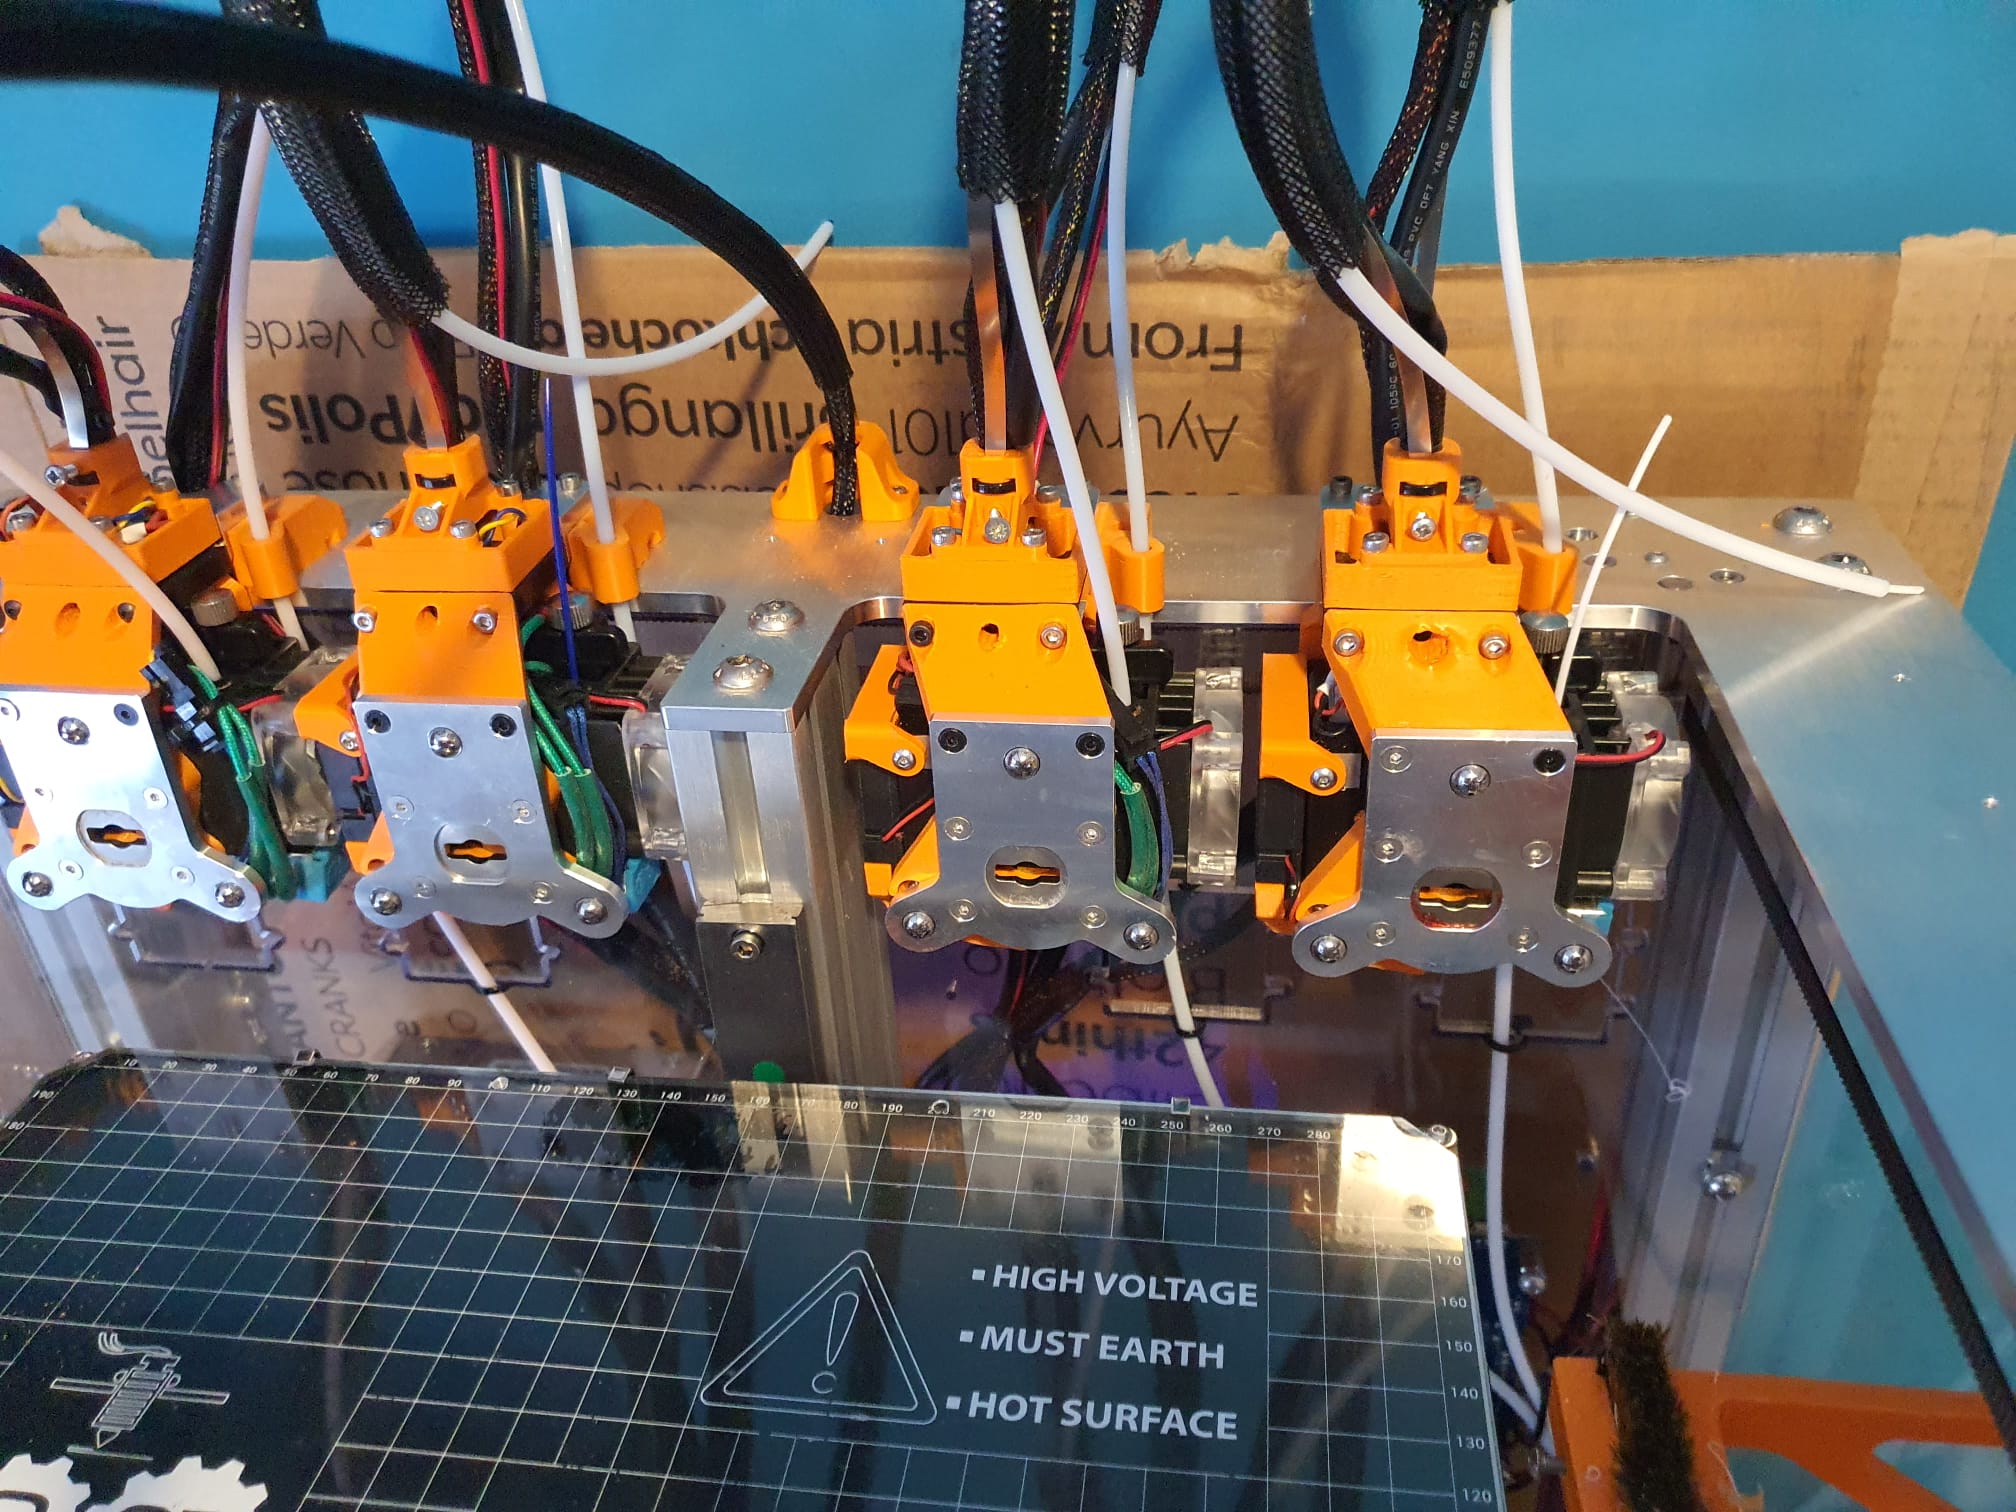
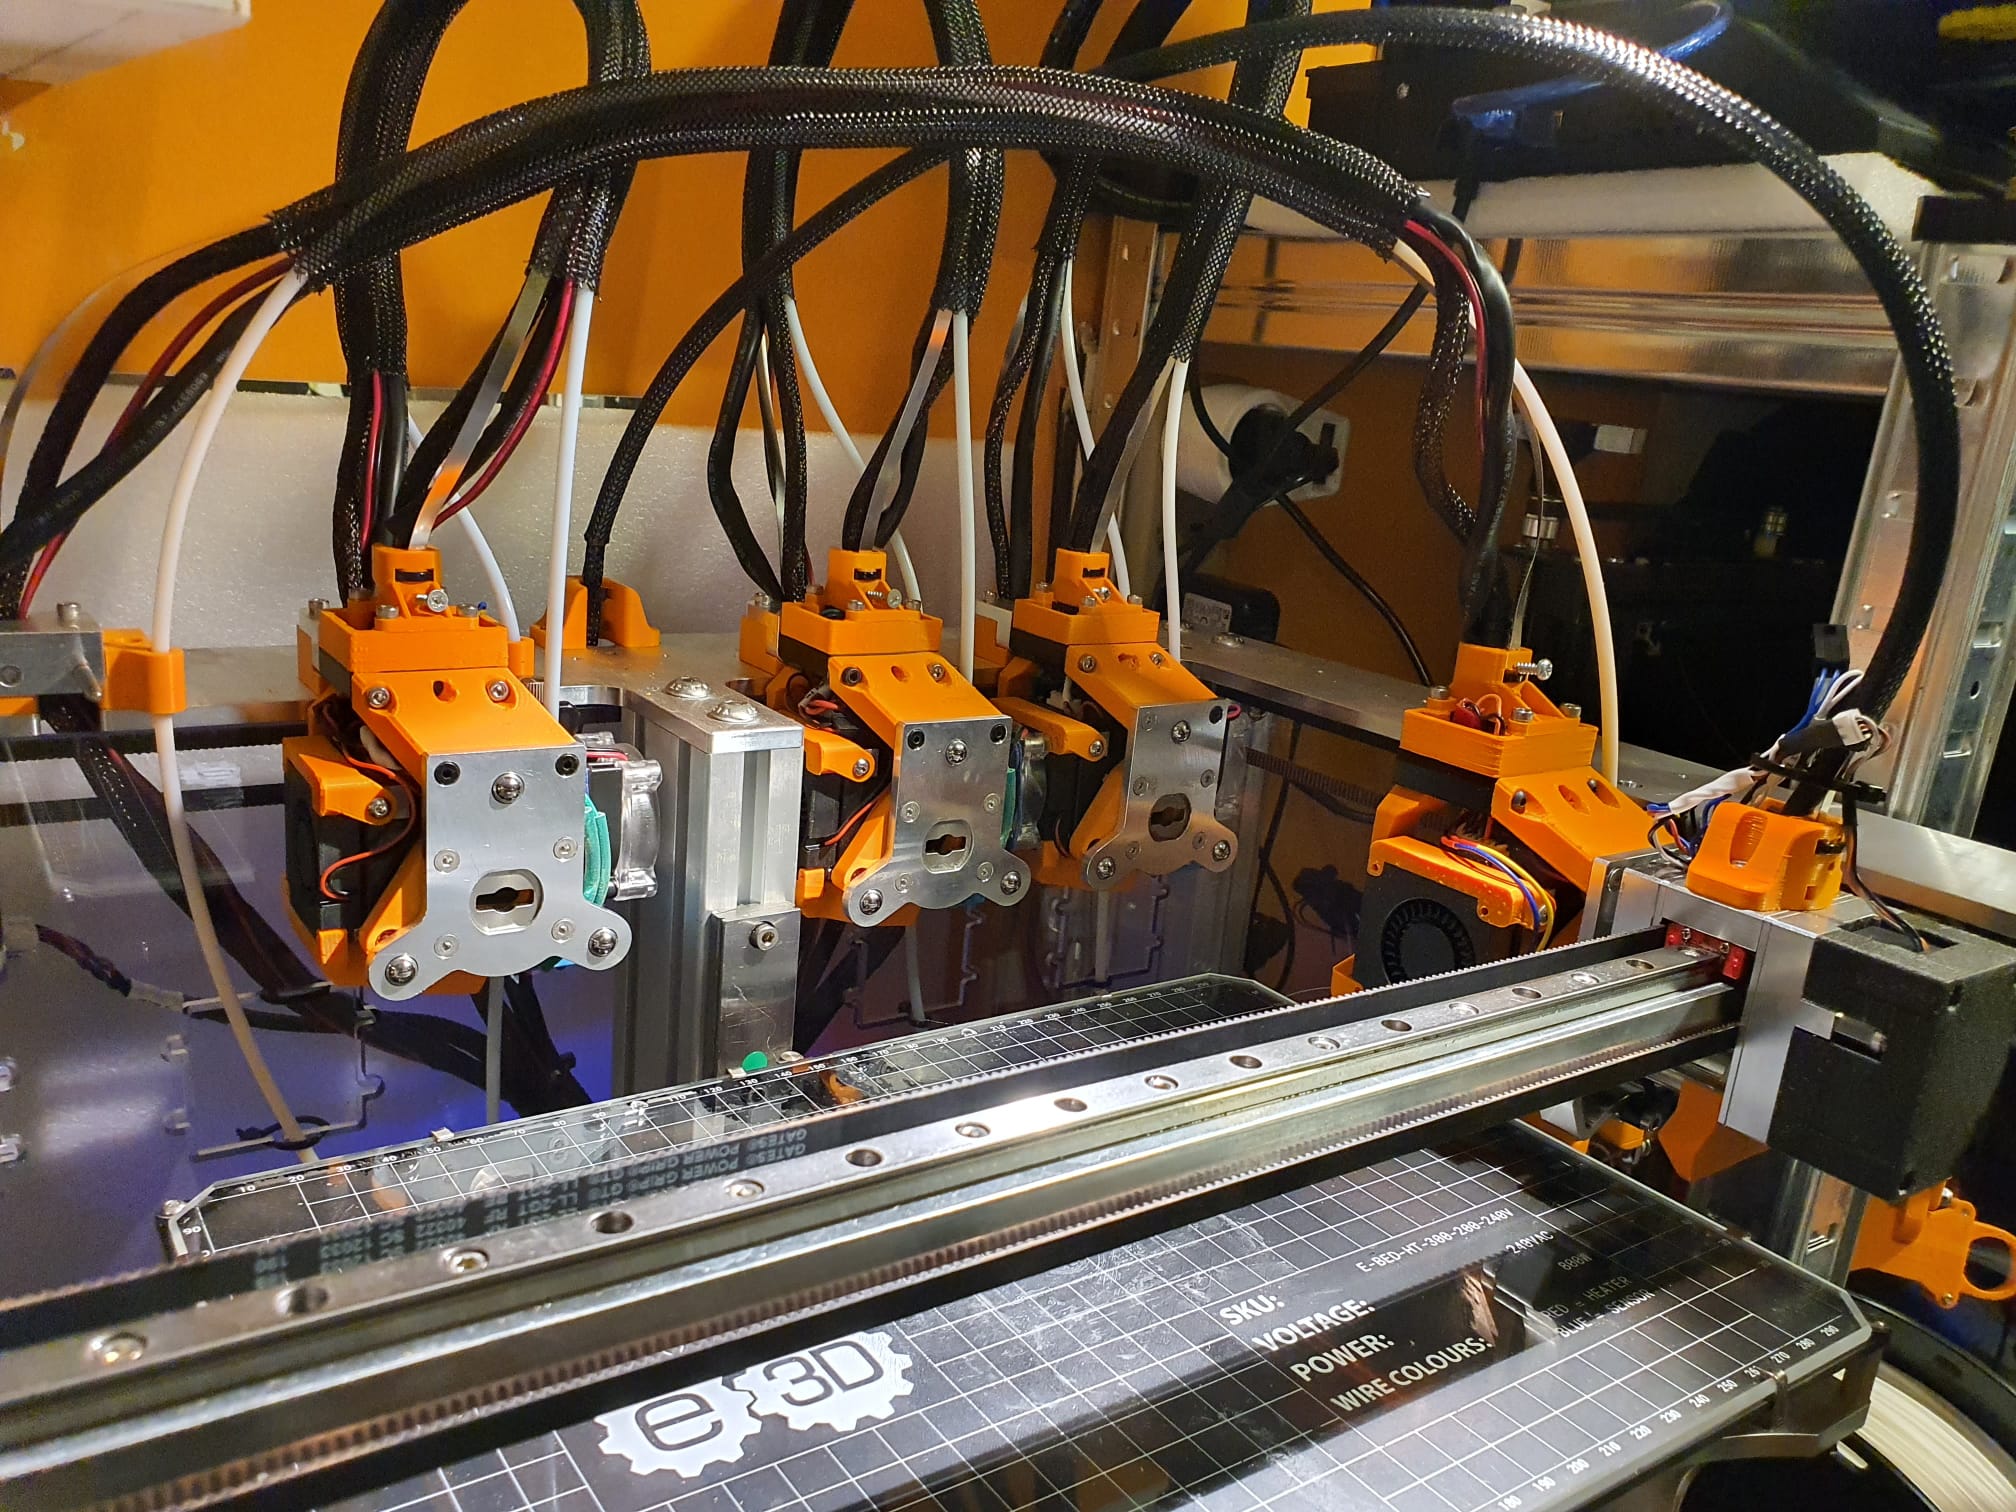
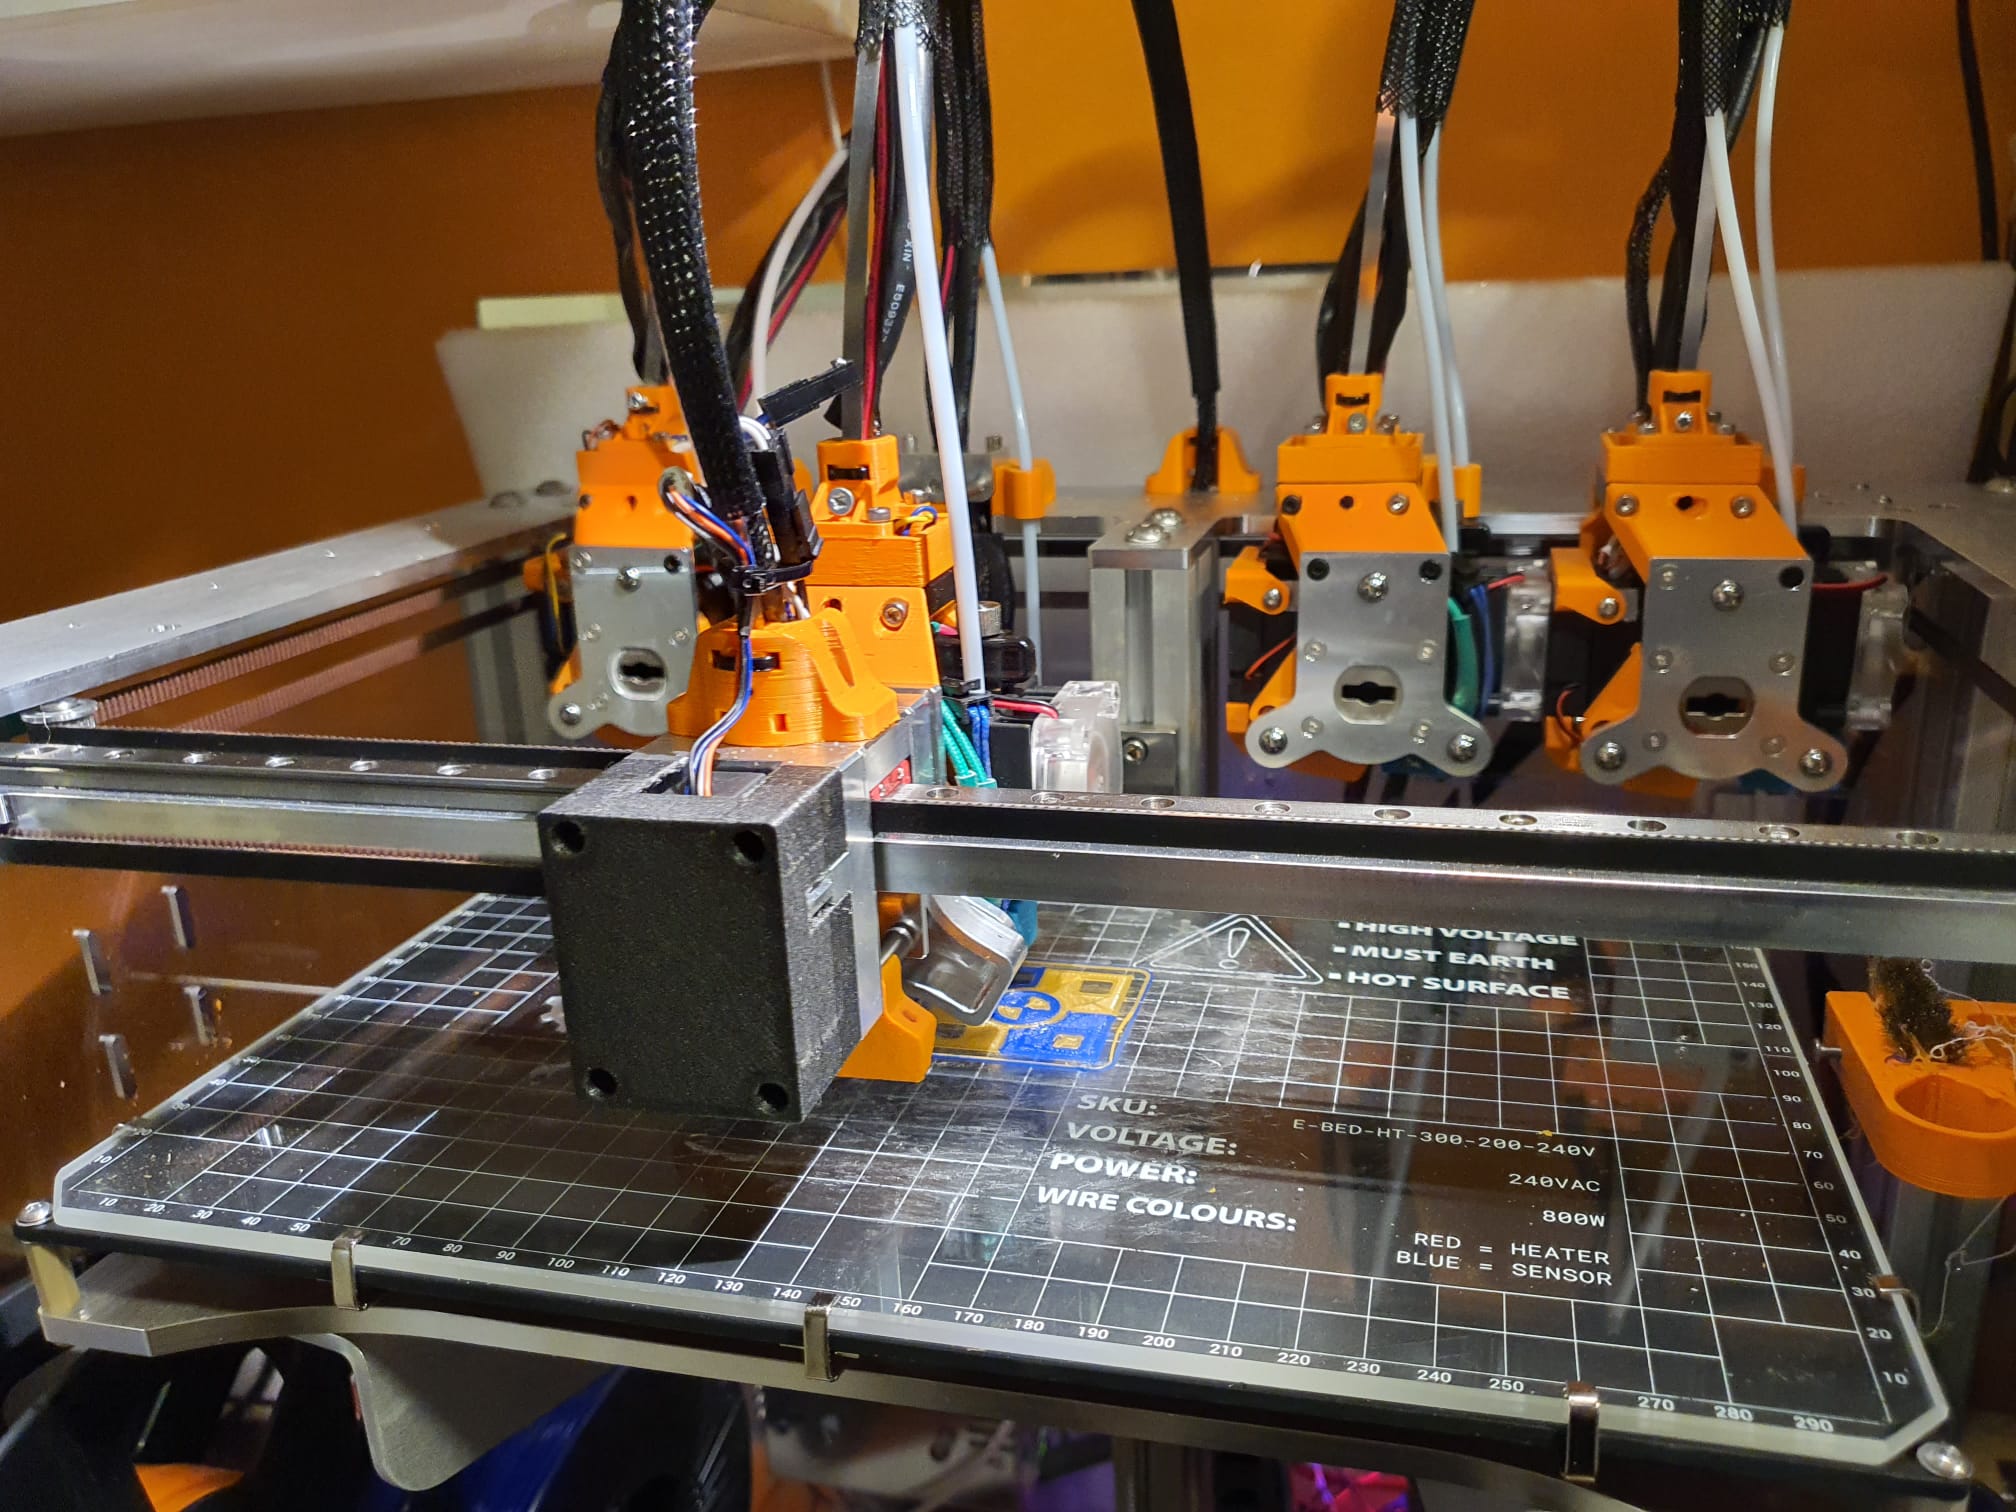
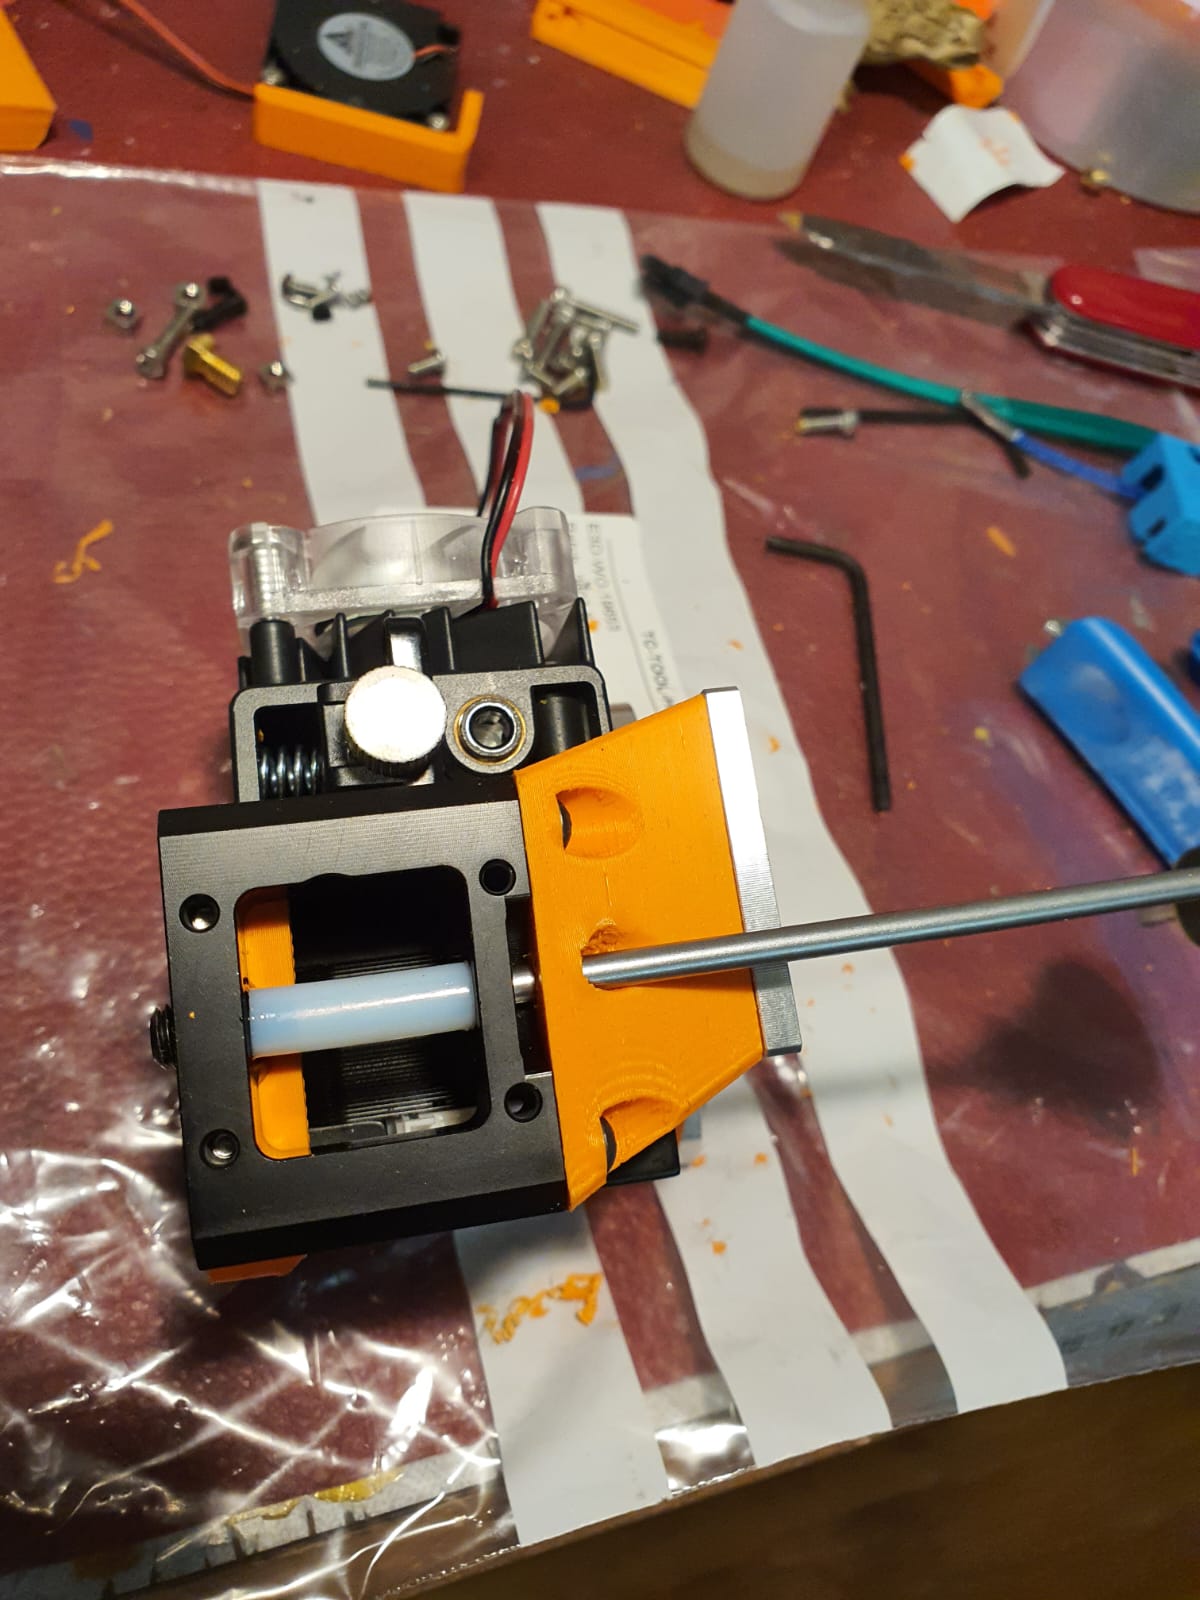
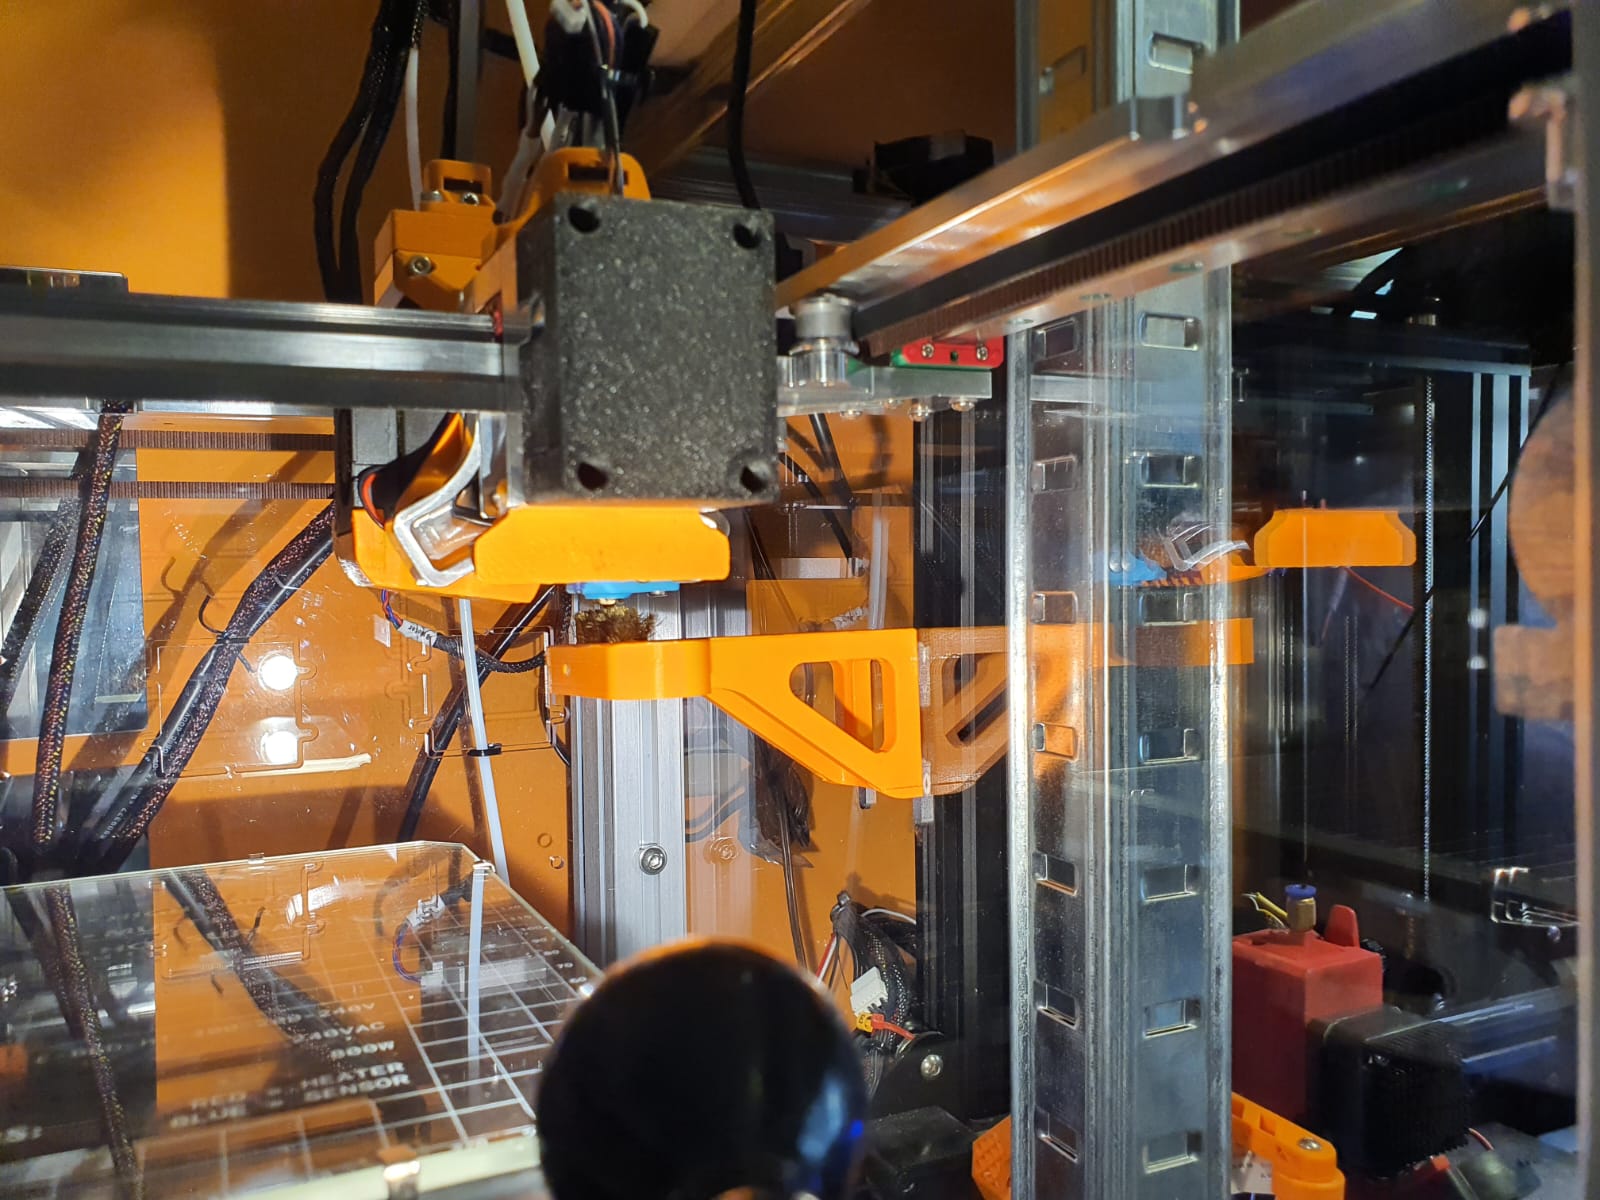
Een groot verschil, de originele object fan duct lay-out en de verbeterde fan duct voor de Hymera Direct Drive extruder/hotend combinatie!
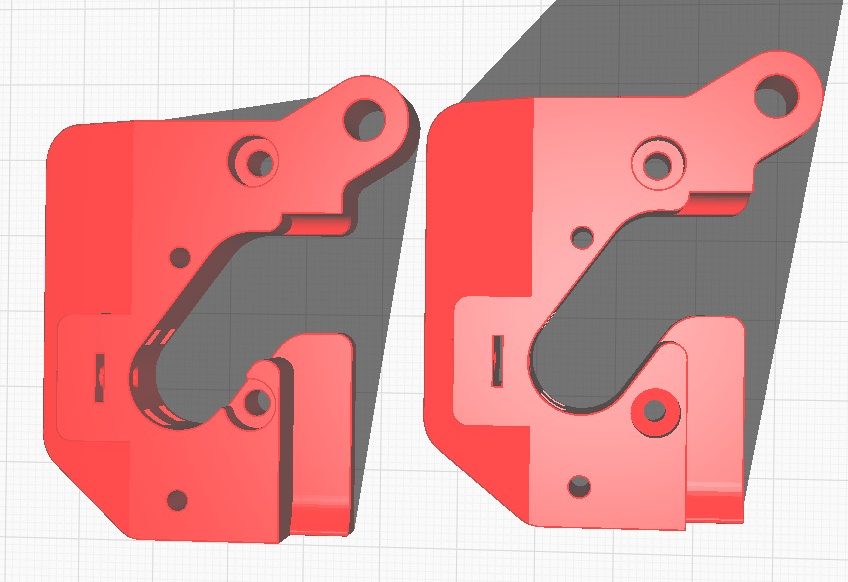
Jantec.nl E3D toolchanger Hymera DD DOCK adapter and 3mm shifted adapter download
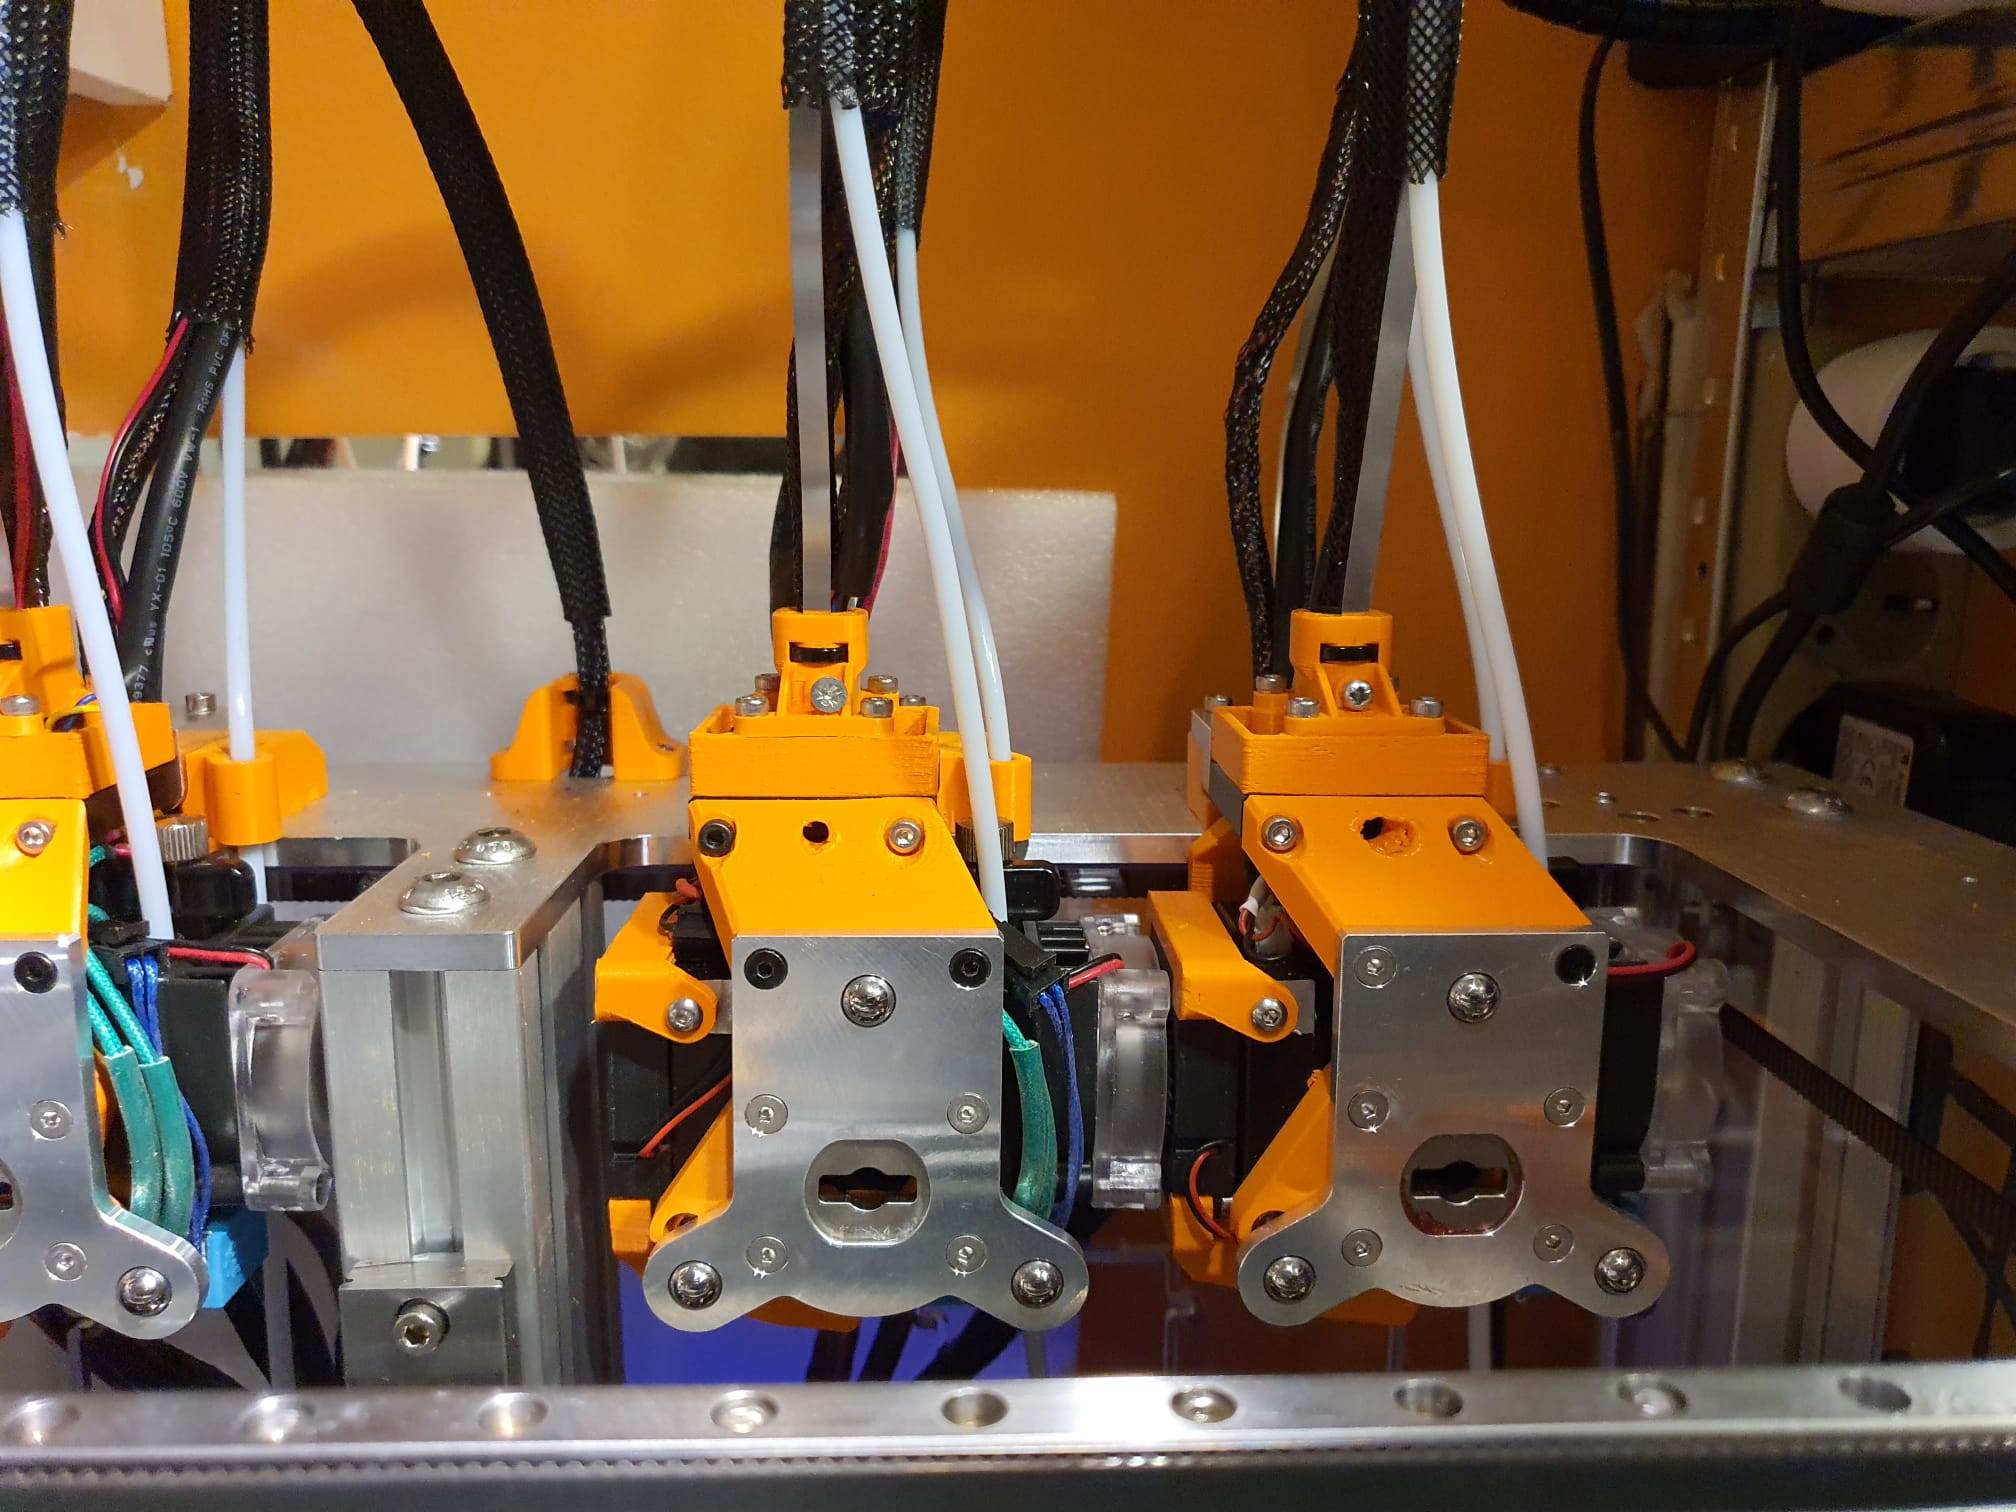
Tool T2 en T3 (3e en 4e van links) zitten bij de standaard bouw op ca 1.5 mm van elkaar waardoor de toolfan van T2 vrijwel geen lucht meer kan aanzuigen. De rechter tool T3 komt met de nieuwe aangepaste adapter 3 mm naar rechts, waardoor de linker tool T2 weer lucht kan aanzuigen met de doorzichtige fan en het koelblok van T2 kan koelen van de Hymera Direct Drive extruder.Met deze aangepaste adapter schuift de betreffende tool 3 mm op, waardoor je ten opzichte van de linker tool 3 mm extra ruimte krijgt.
Daarmee is er net genoeg ruimte gemaakt voor de toolfan van de links naastgelegen tool om het koelblok te koelen.
Plaats deze adapter dus op de 2e en 4e plek bij Tool 1 en 3.
Daarmee zijn de eerste (T0) en 3e tool (T2) qua koeling gered!
Het resultaat:
Downloads:
Jantec.nl E3D toolchanger Hymera DD DOCK adapter and 3mm shifted adapter

Ik ben bezig met het kalibreren van de gereedschappen, de algemene instellingen enzovoorts, zodat ik verder kan gaan met de rest van de tools.
Daarbij stel ik altijd alle tools in op instellingen die ik afleid ten opzichte van de eerste tool T0.
Op deze manier, mocht er iets veranderen, heb ik een solide referentie.
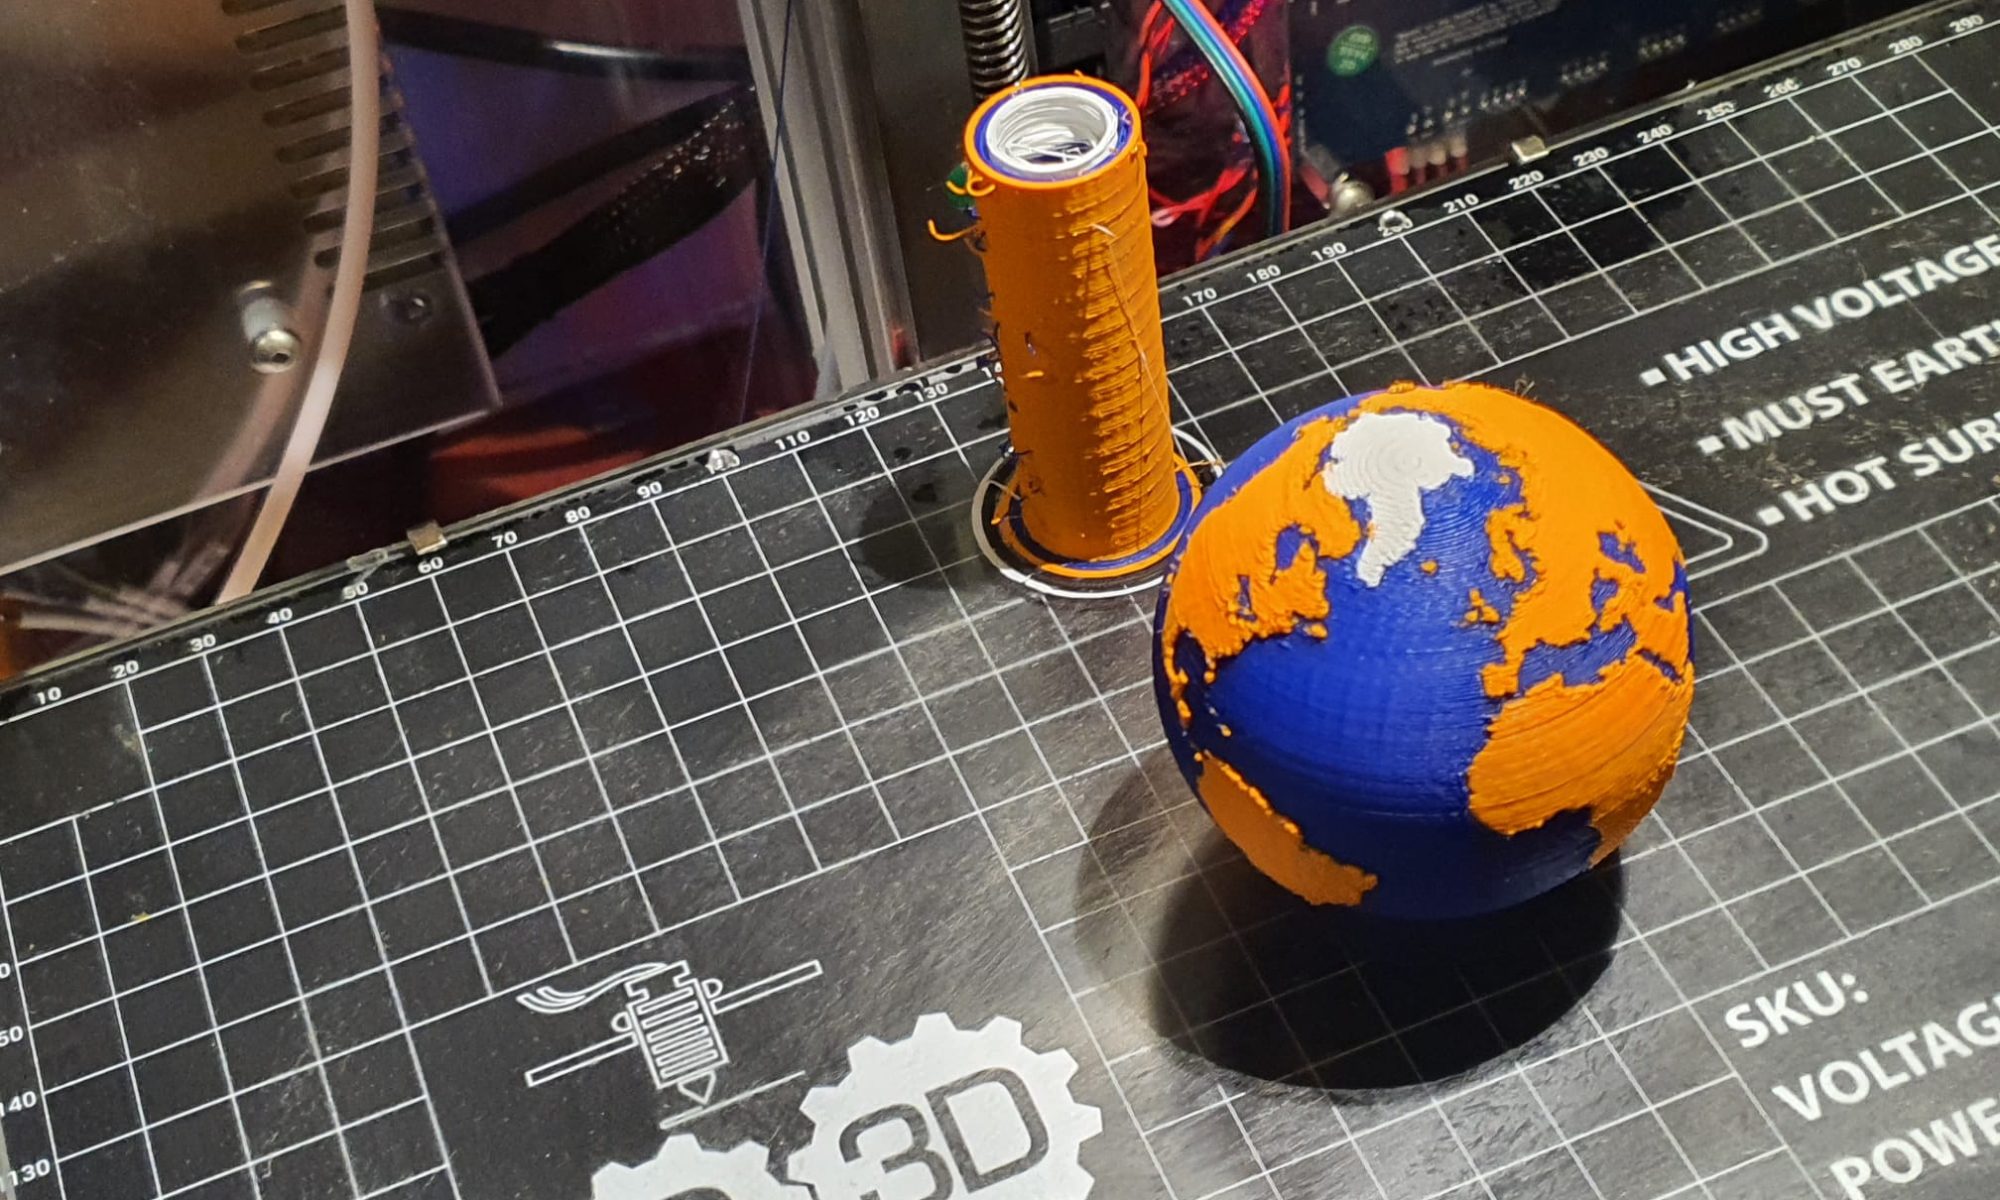
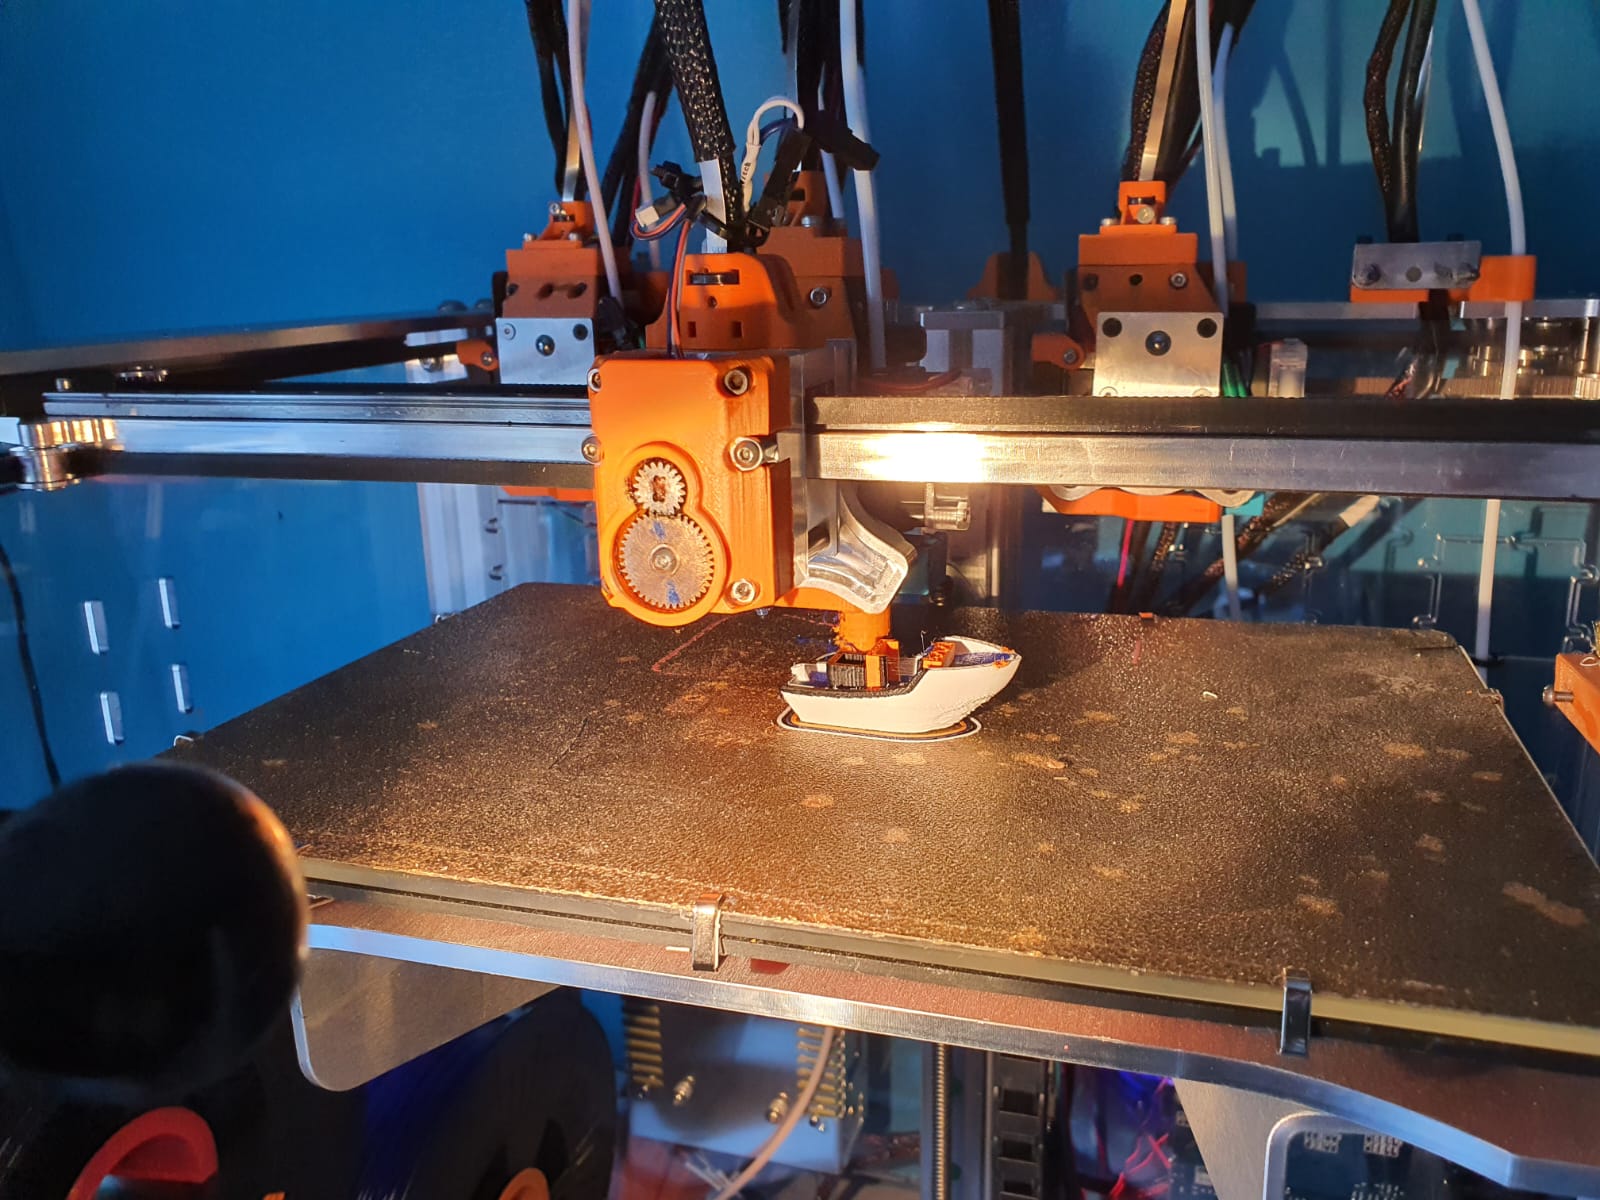
Morgen ga ik de 2 andere Hemera direct drive tools bouwen en installeren en mogelijk kan ik dan eindelijk mijn Benchy testpint printen met alle 4 de tools!
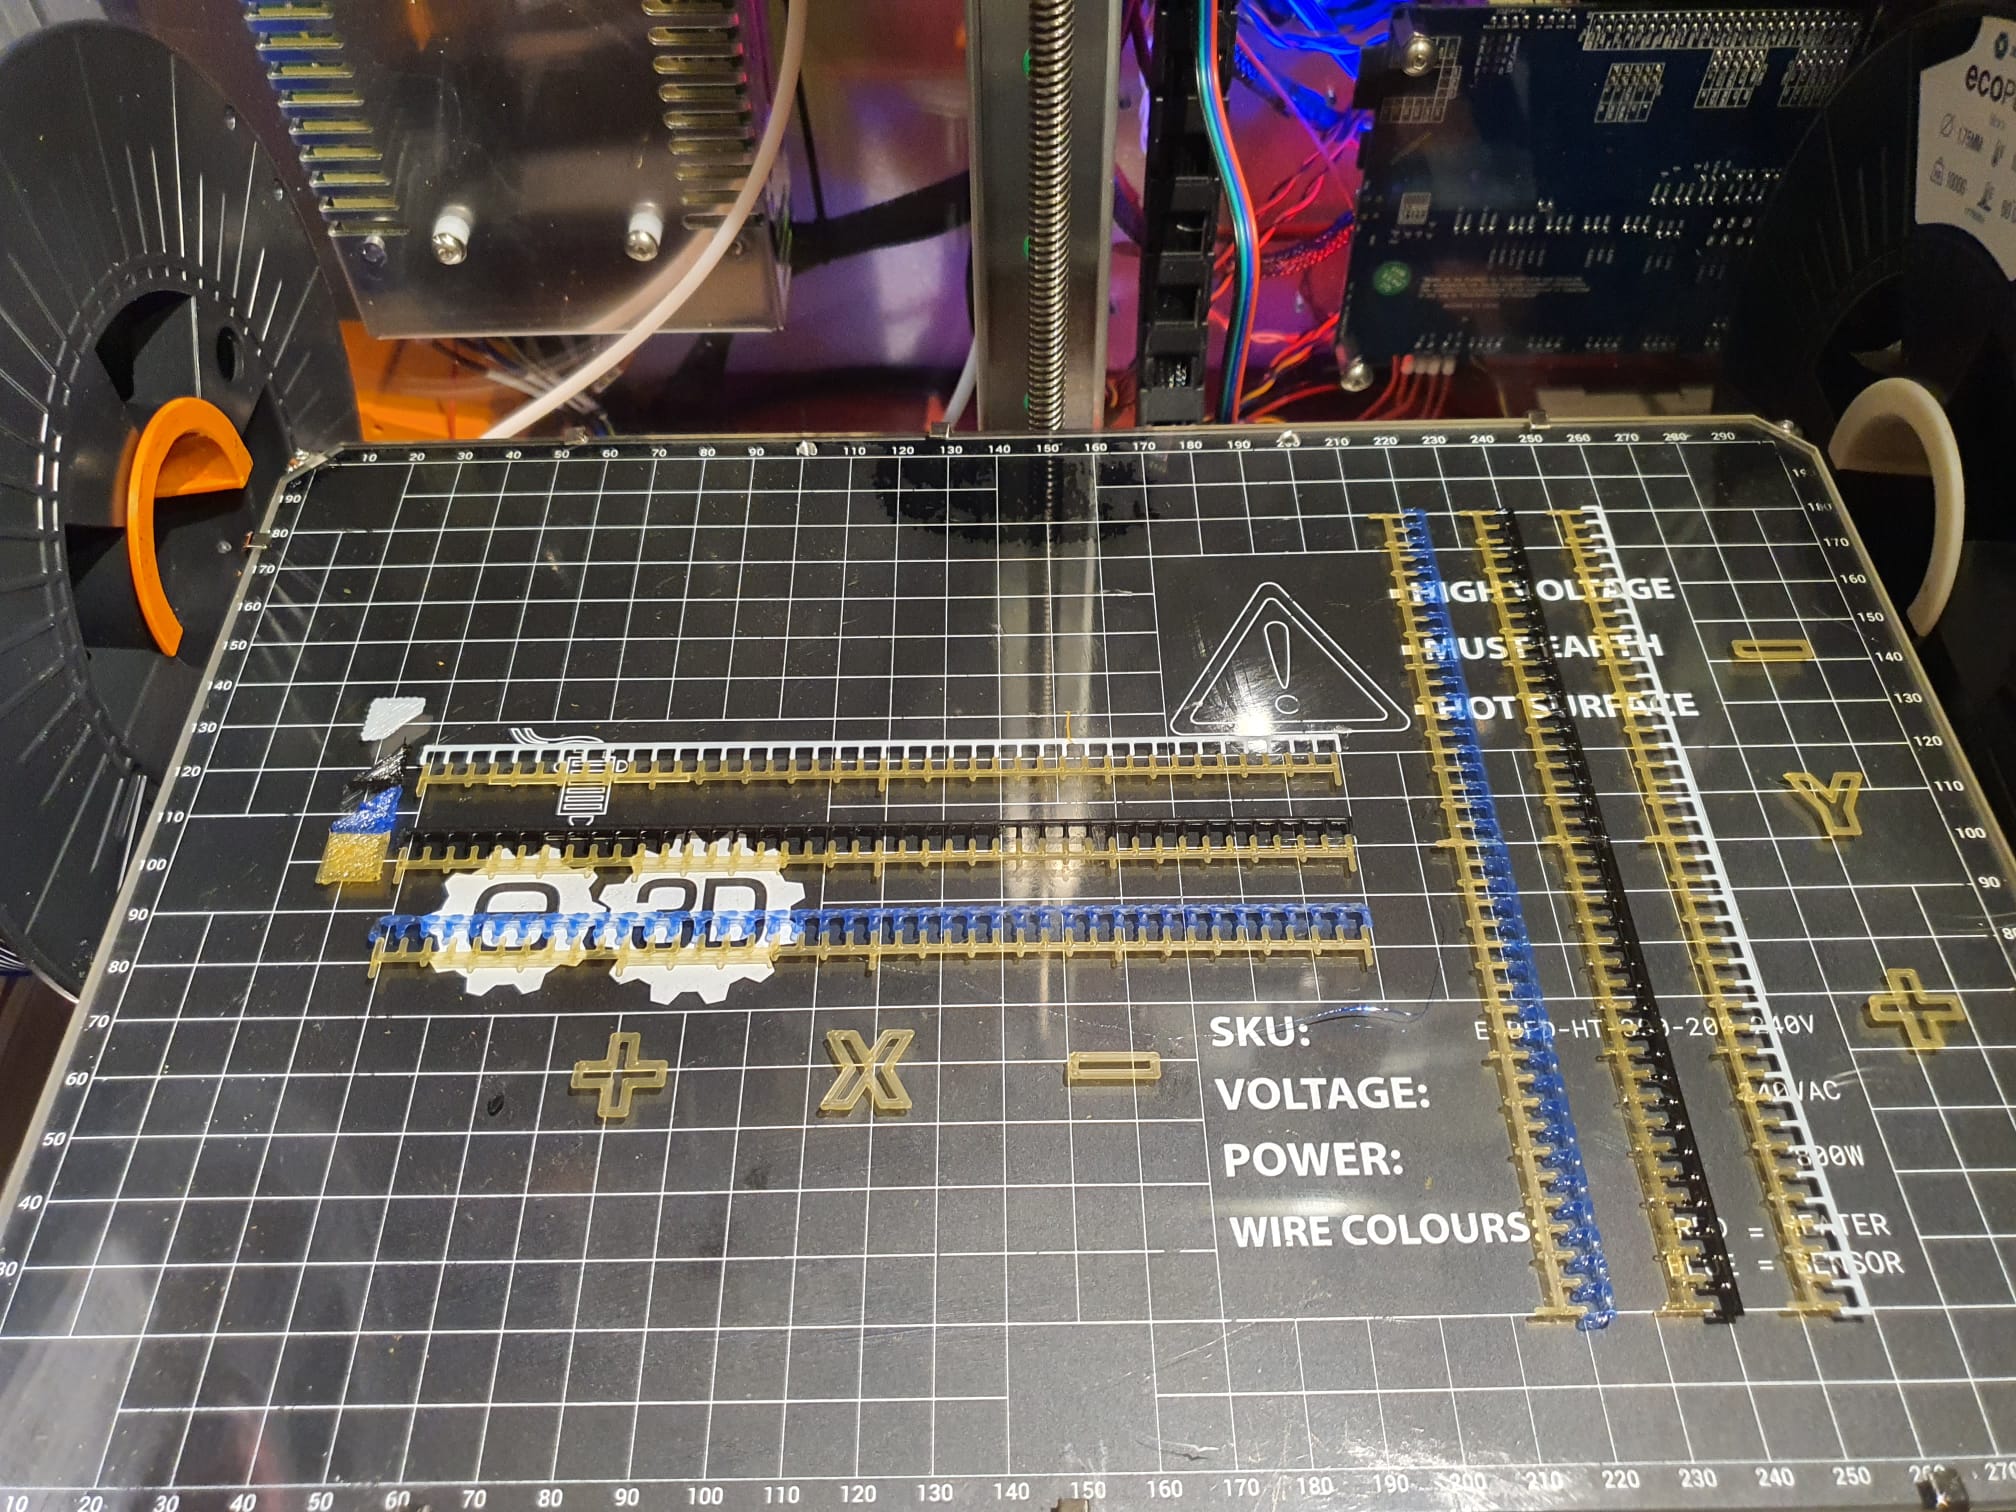
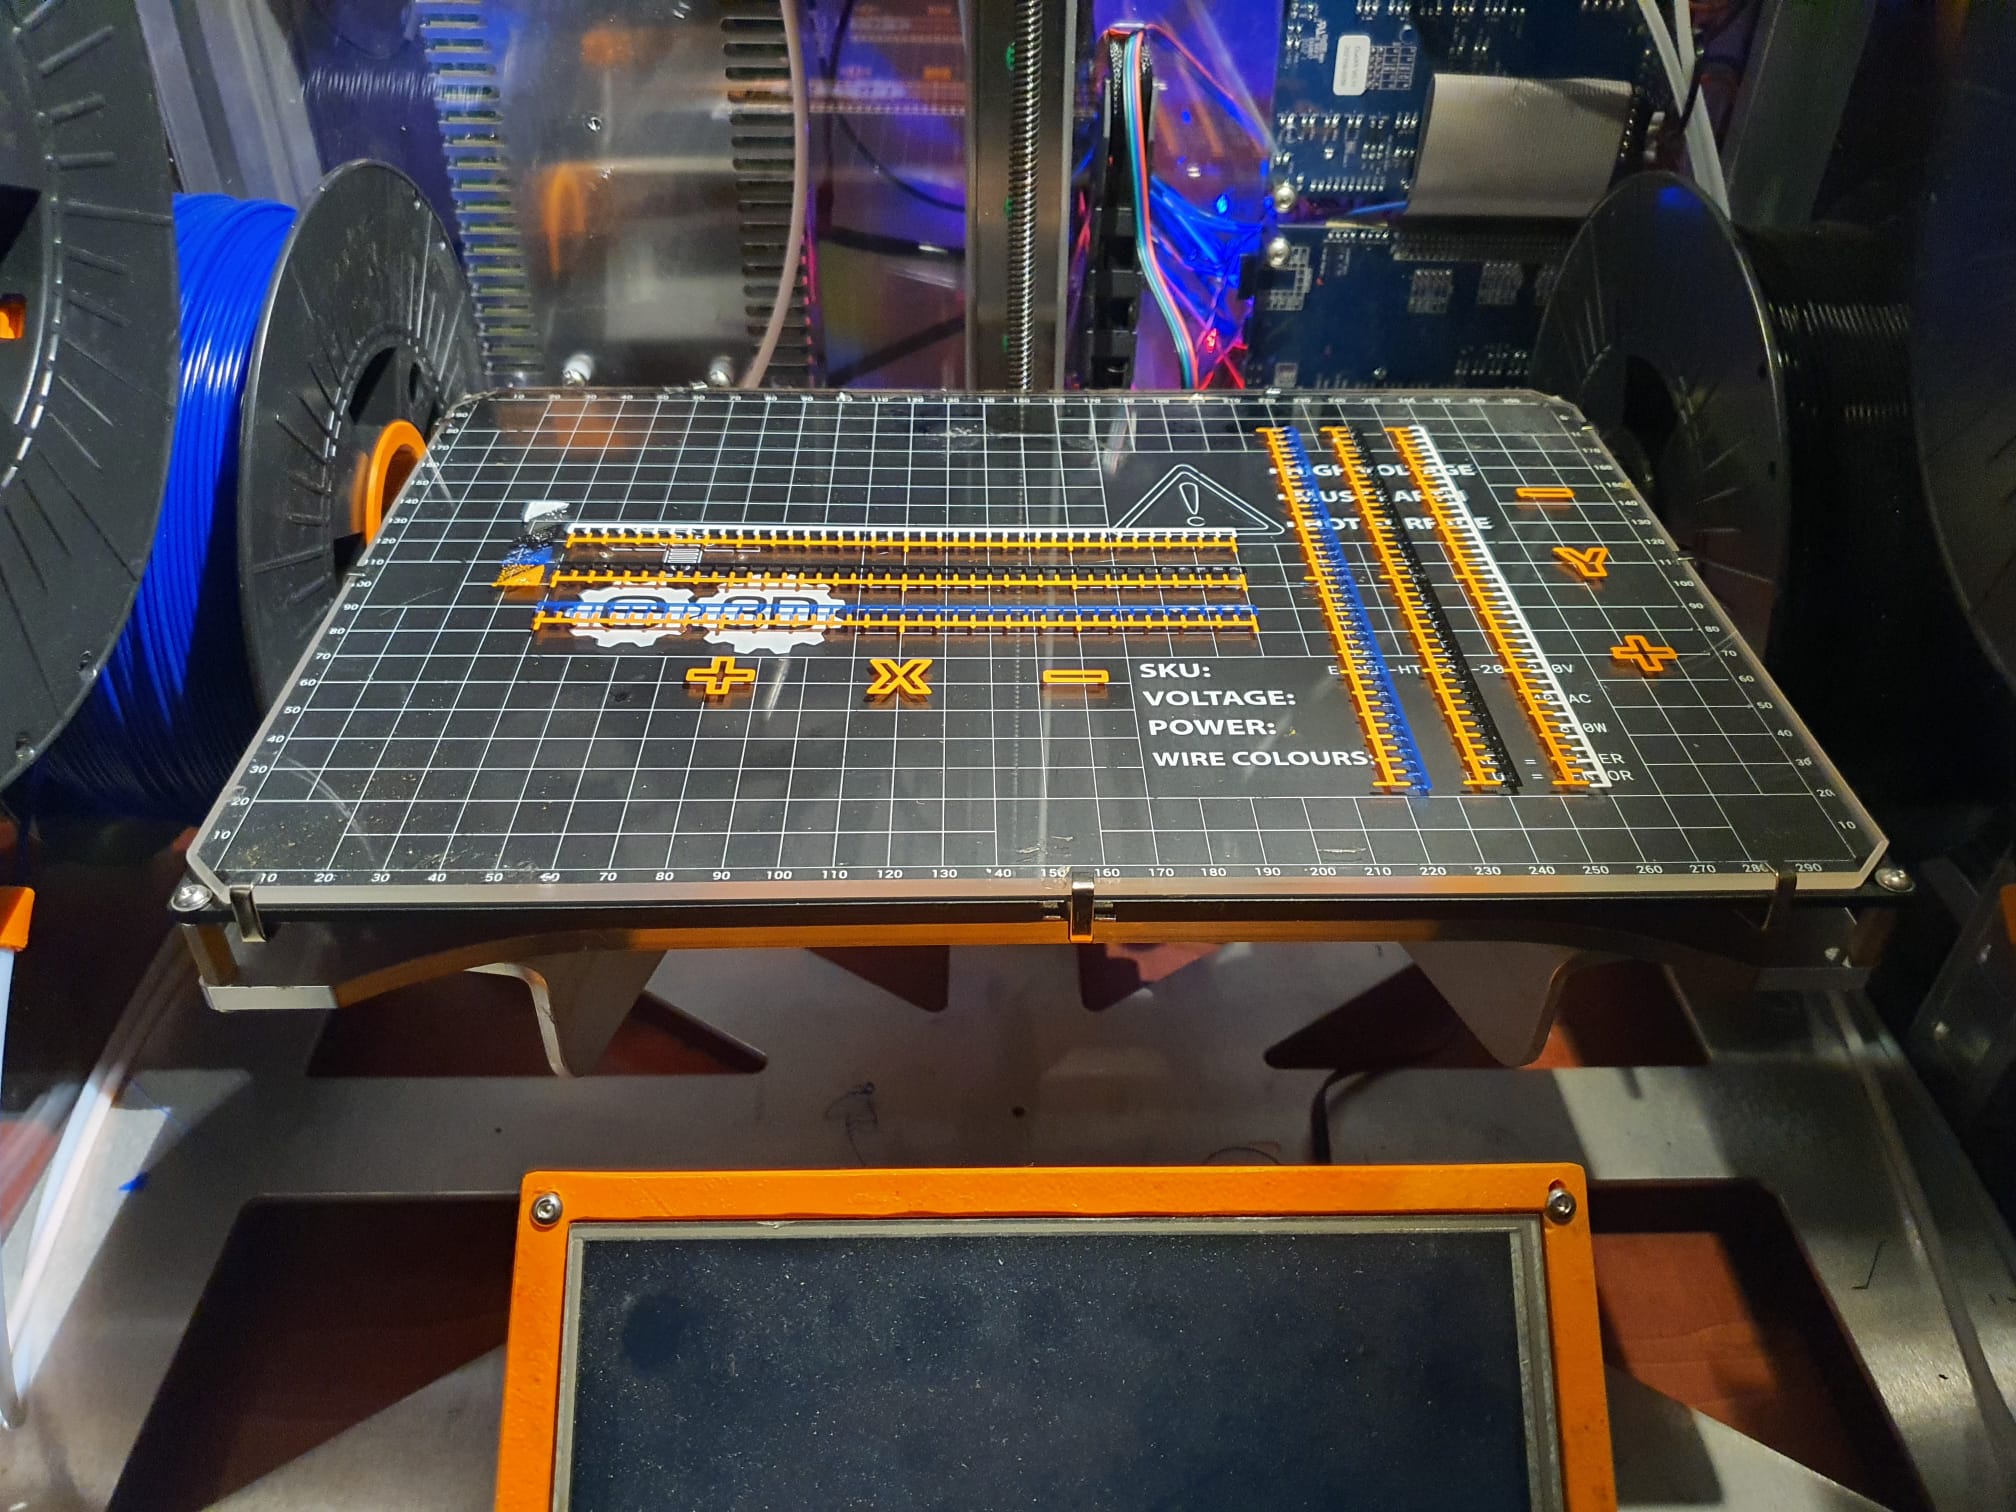
En met 4 actieve tools, na alle calibraties:
E3D toolchanger Z-homing met Voron TAP mogelijk?
E3D toolchanger 4xHemera direct drive eerste 4-kleuren prints
E3D toolchanger: Afstellen van de tool pickups met reprap global variables
Fysieke X- en Y- homing schakelaars op mijn E3D toolchanger
Aangepaste E3D toolchanger Dock adapter plate
Calibreren E3D coreXY 4-toolchanger 3d printer
Mutiring stl en Gcode files voor 6- of minder kleuren 3d printer
First layer testfiles STL voor multicolor printer met 4 Tools
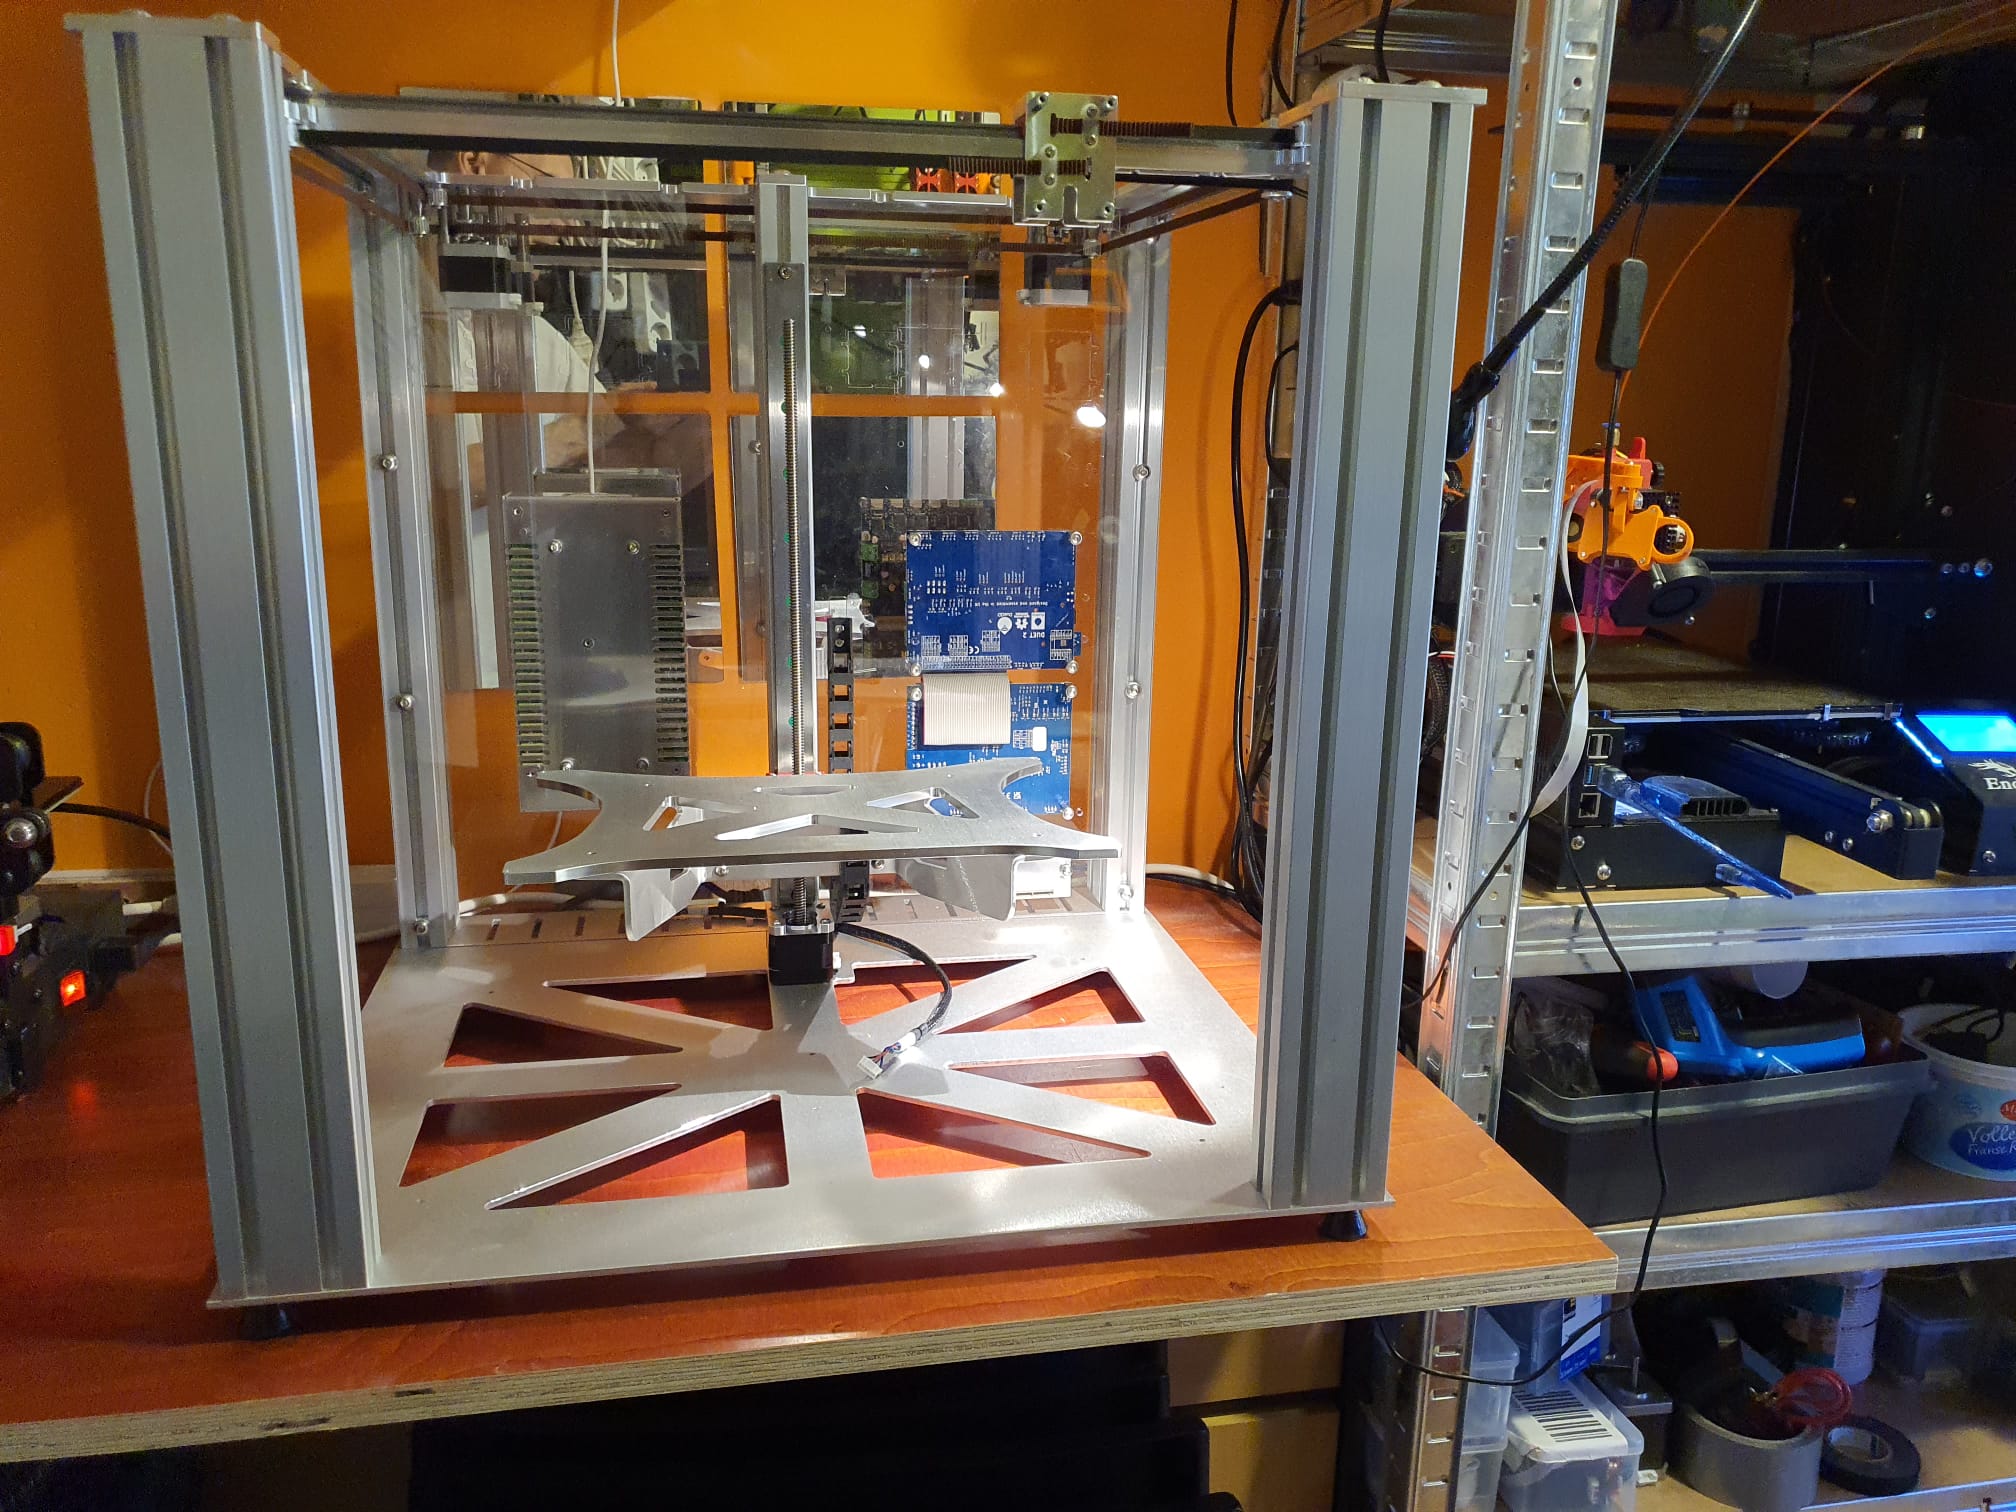
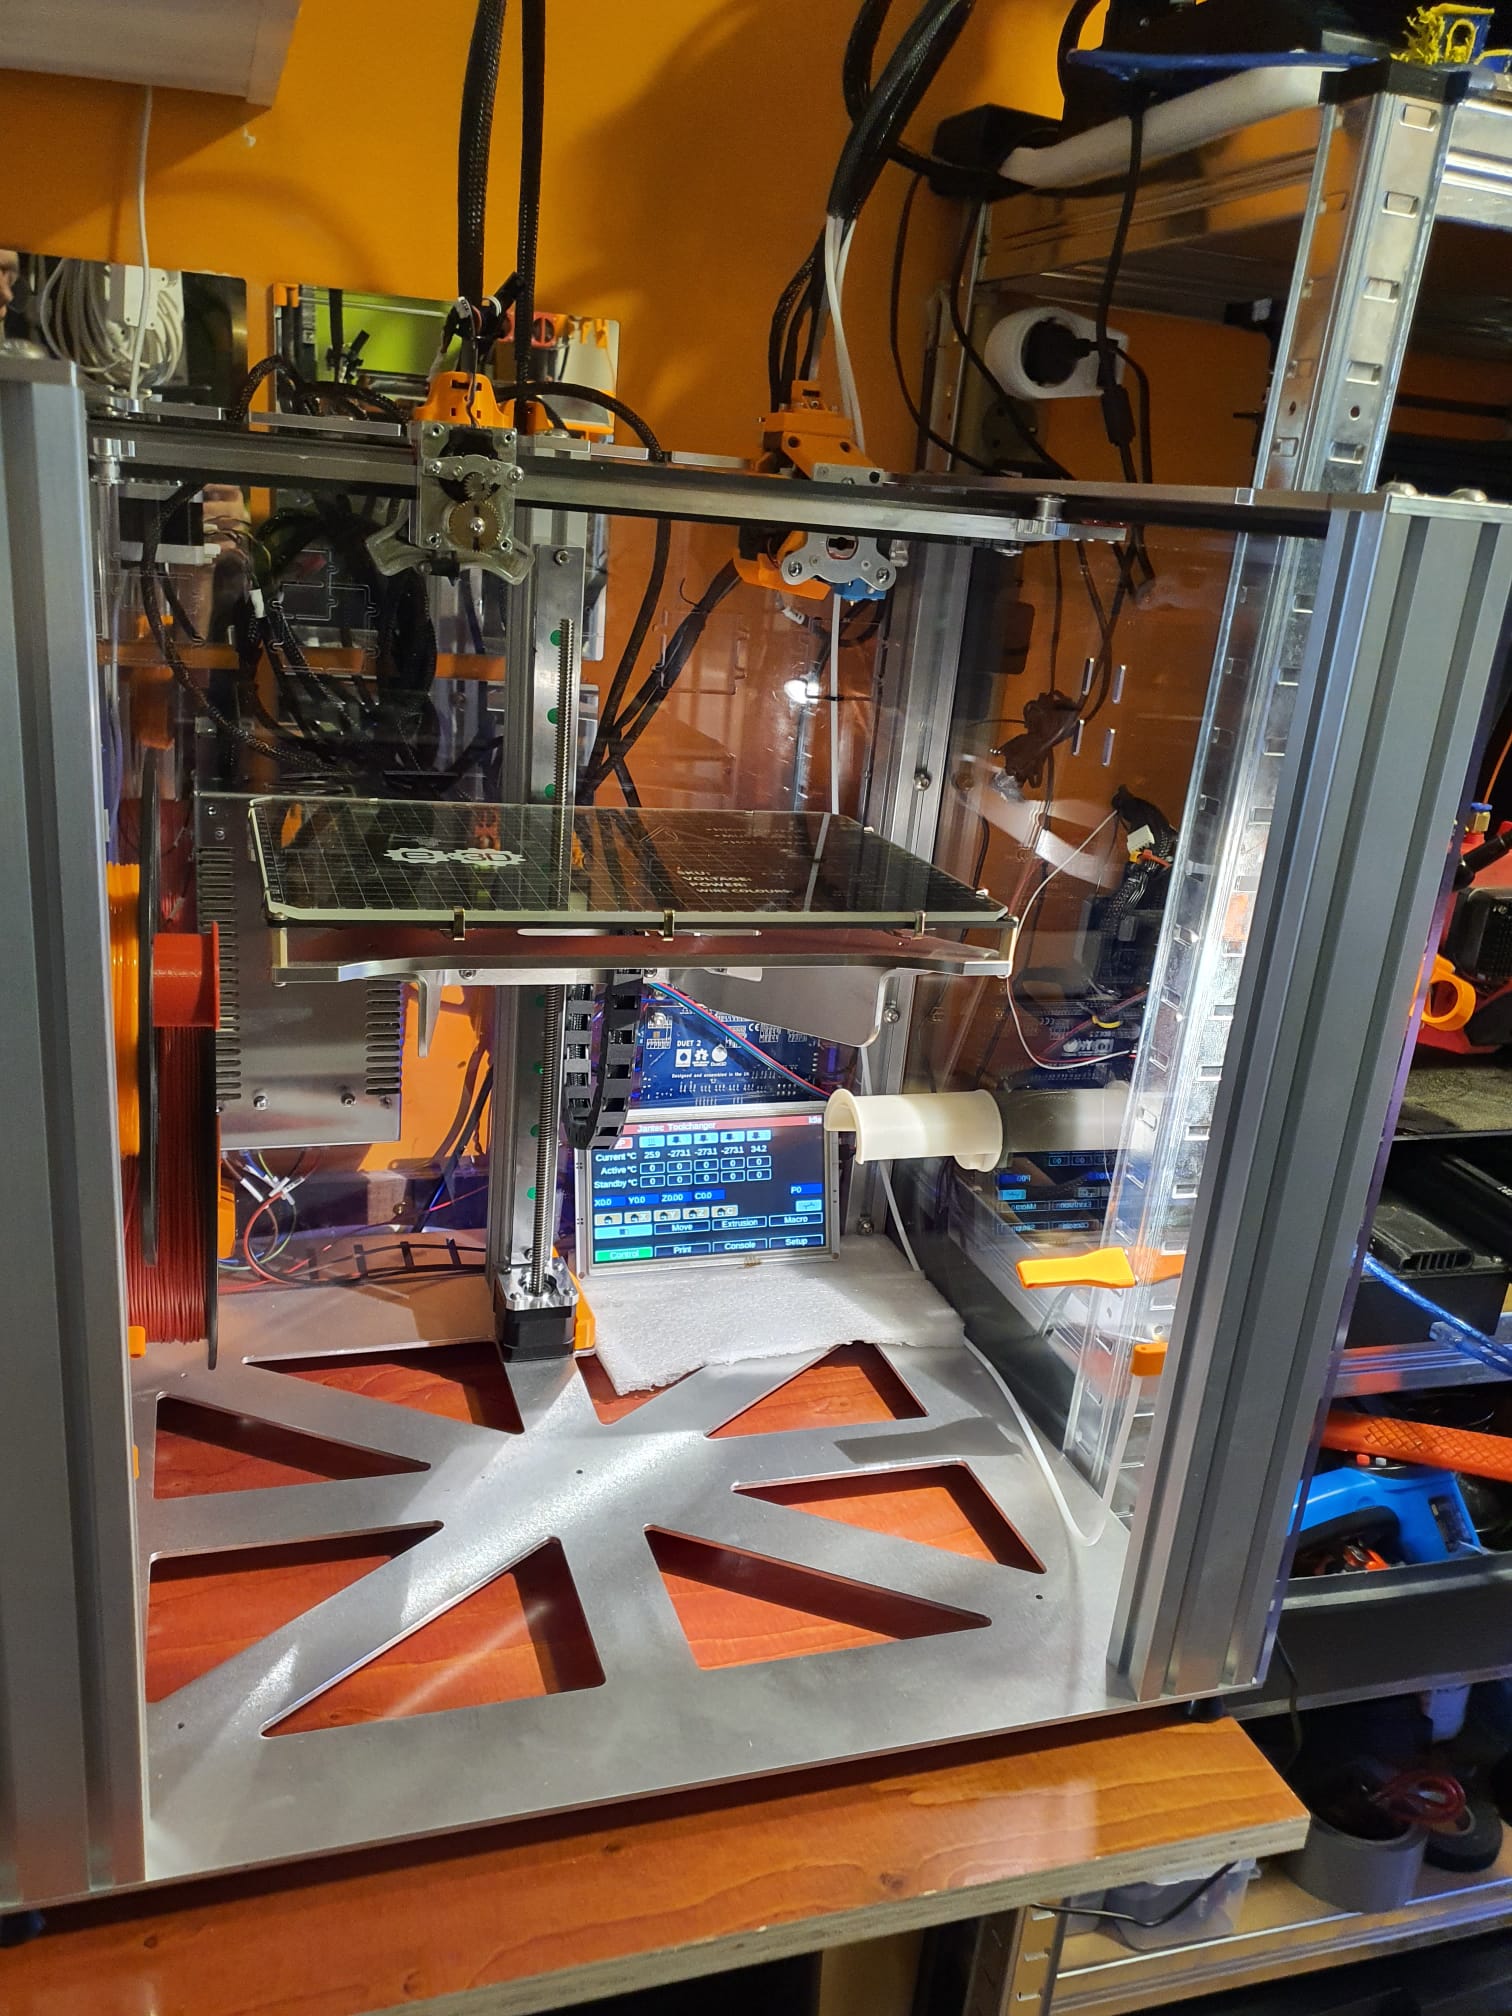
Juni 2022: Vorige week heb ik de E3D toolchanger 3d printer kit besteld en vandaag heb ik hem (bijna helemaal) gebouwd.
De levering ging wat stroef vanuit Engeland, vanwege de BTW en inklaringskosten die je tegenwoordig in NL moet betalen.
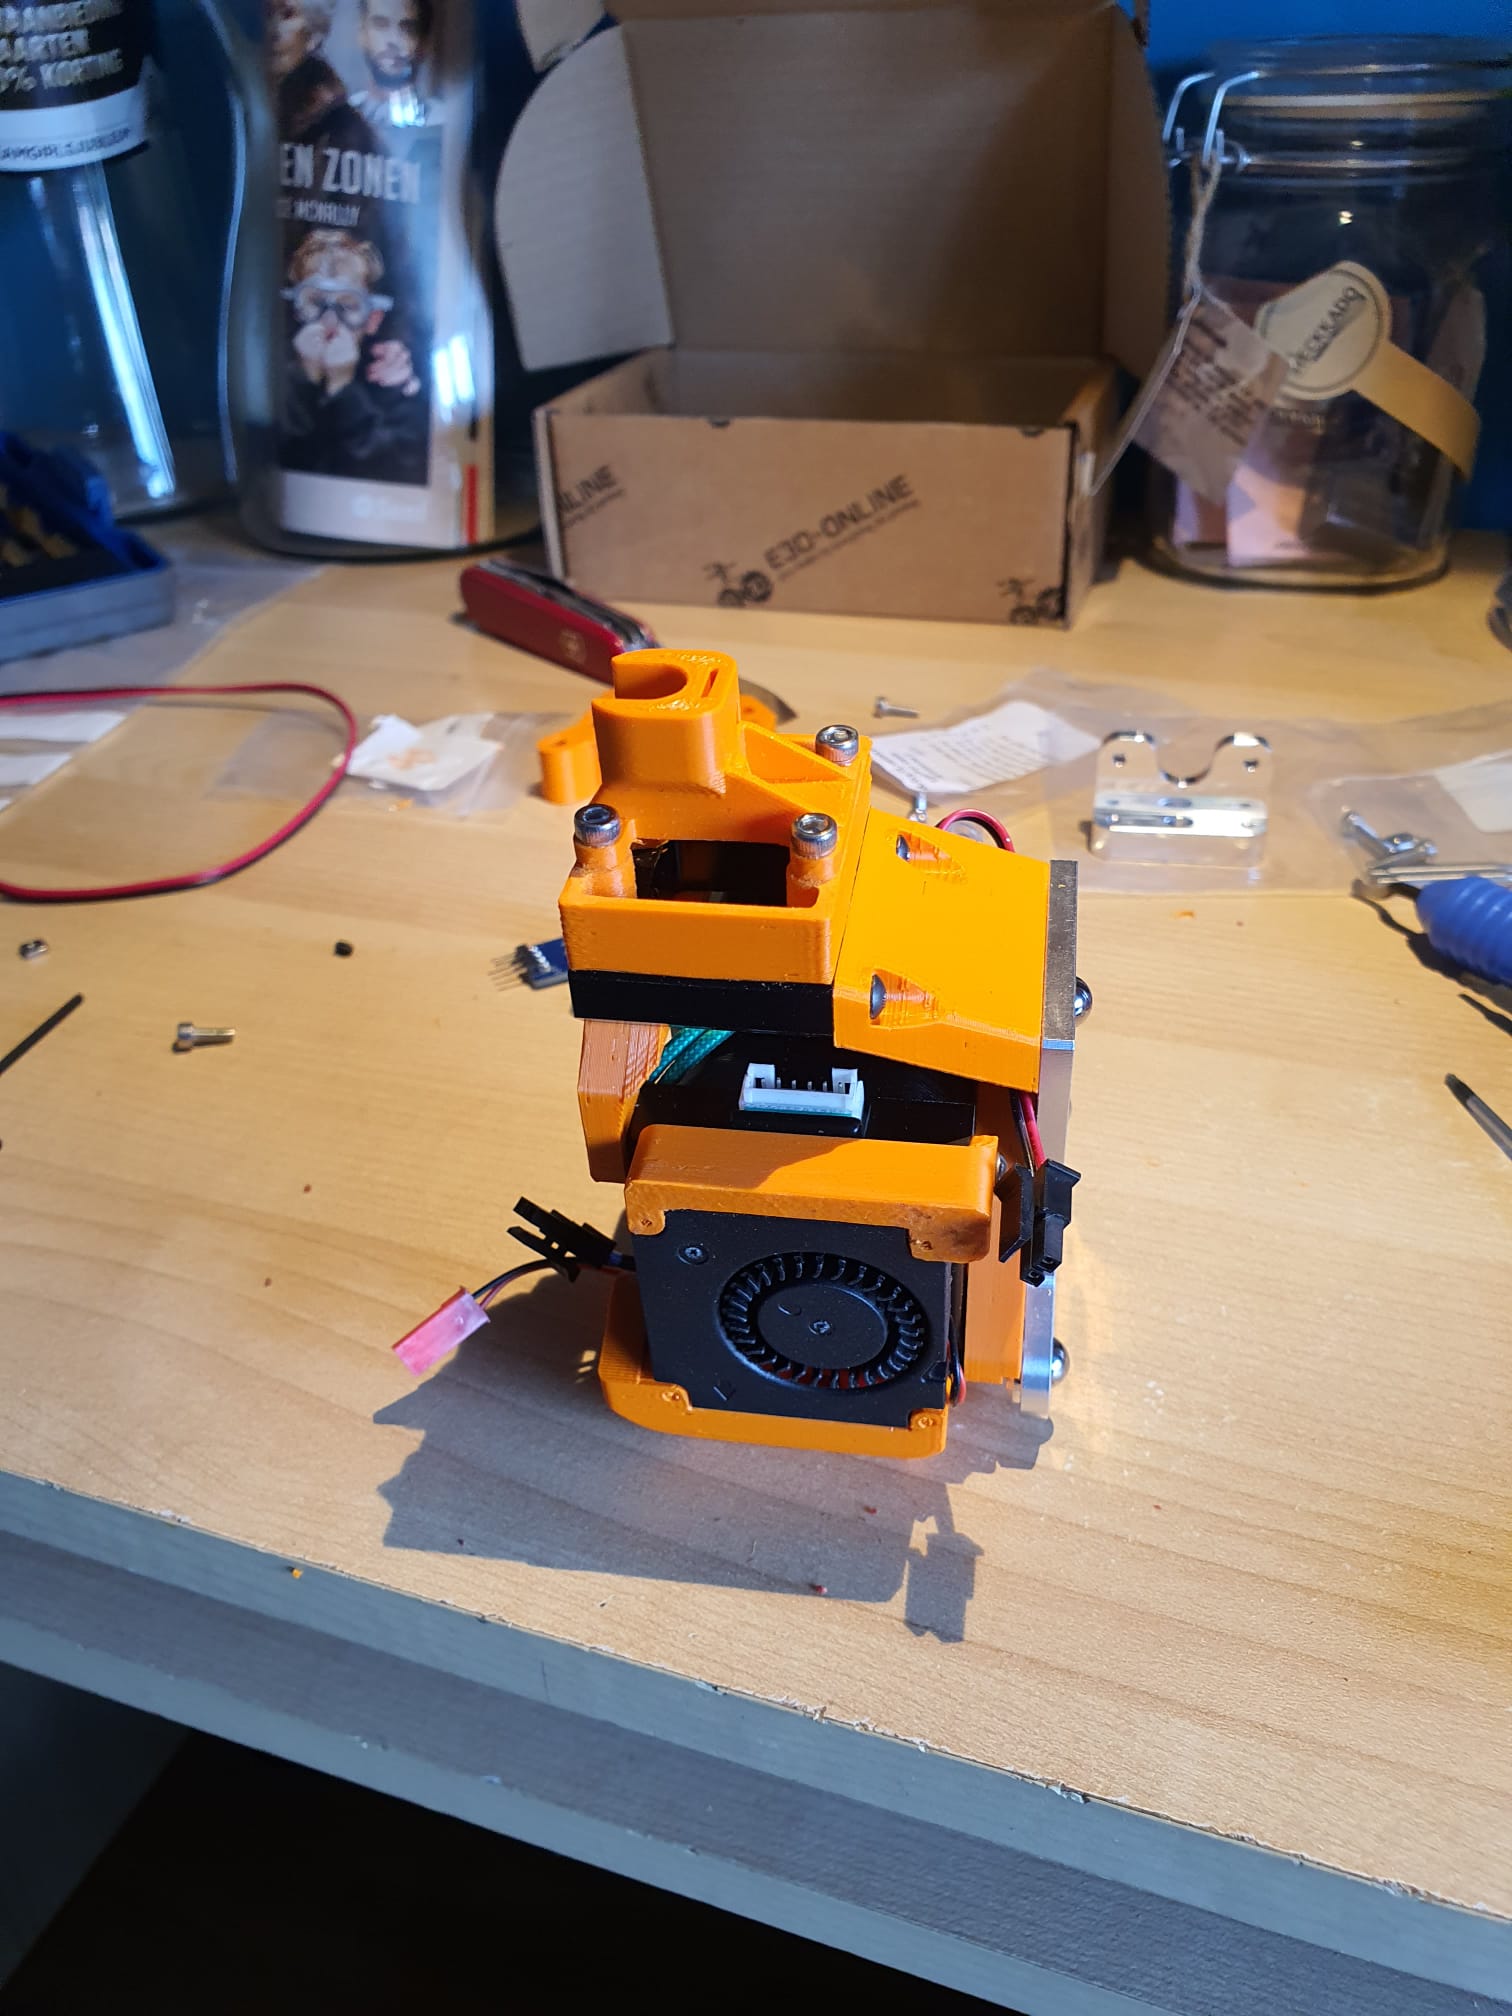
Omdat mijn Voron 2.4 wel snel is, maar niet alles in één dag kon printen, moet ik nog 3 extruders in elkaar zetten.
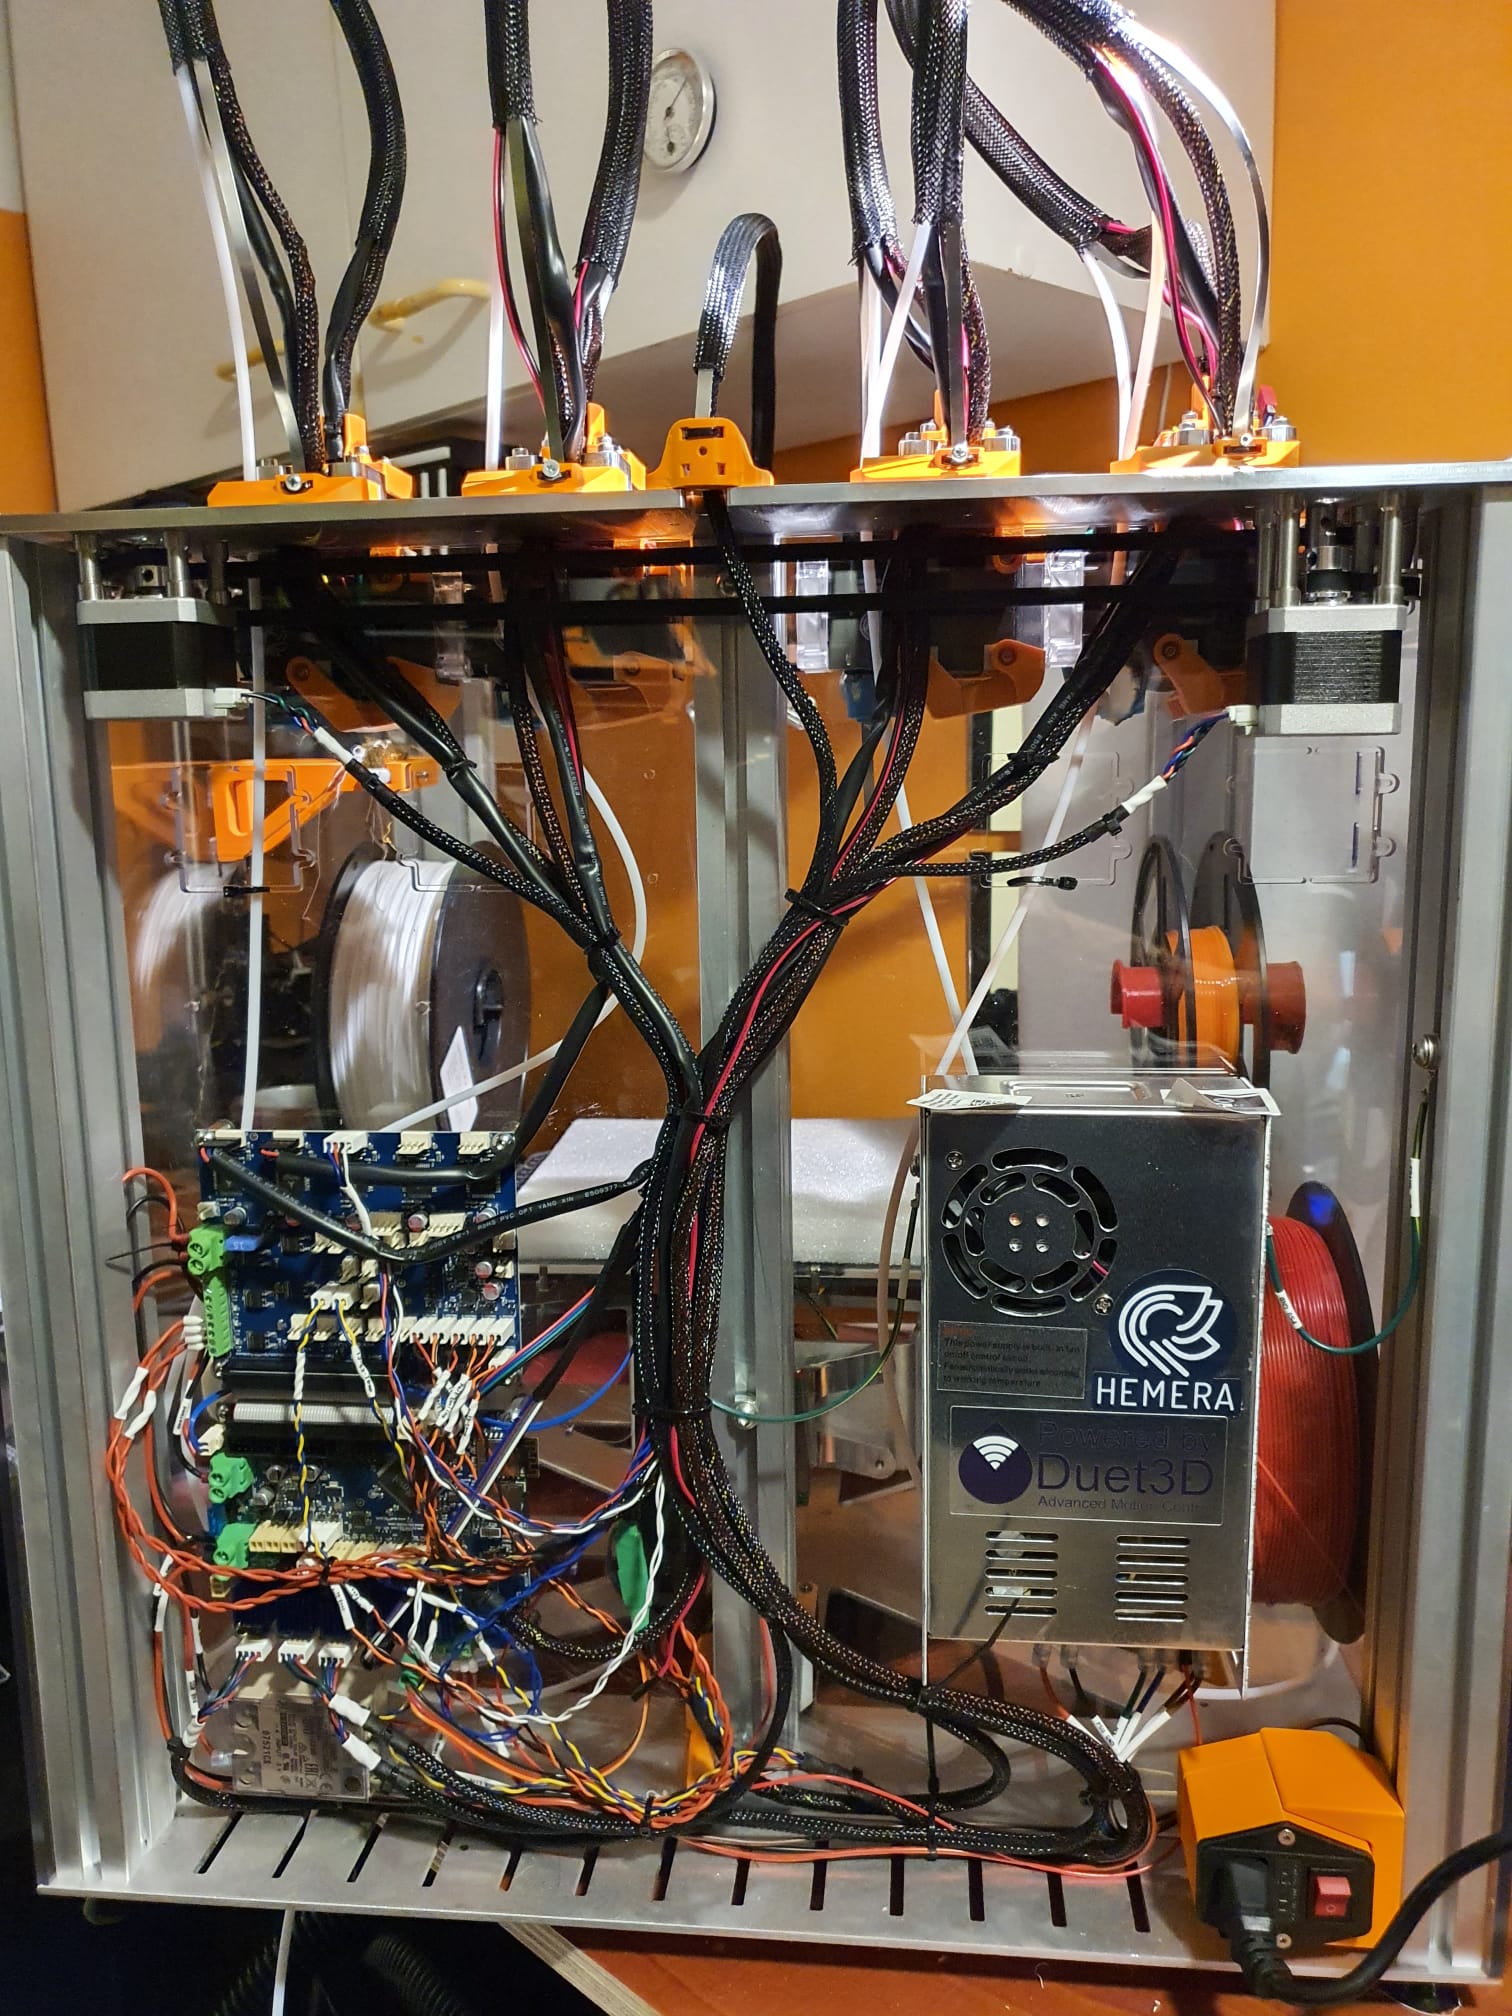
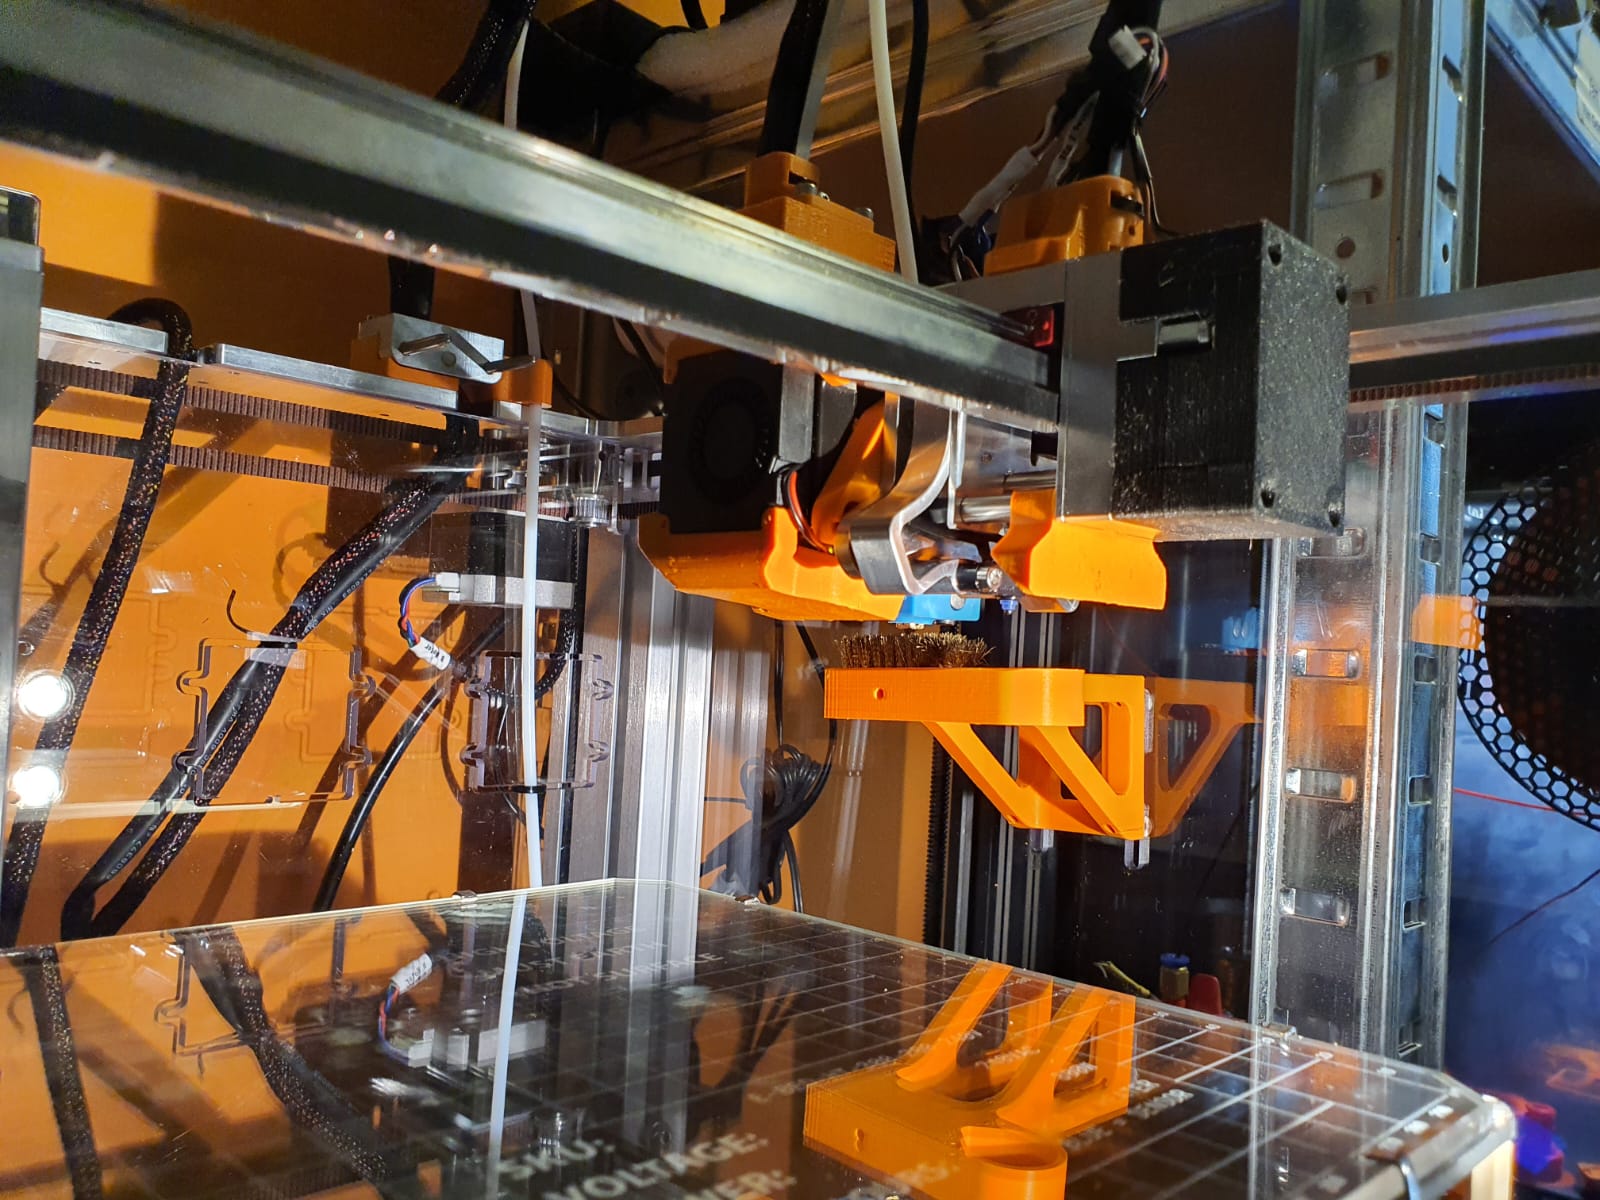
Hieronder zie je mijn opname met een Hemera direct drive extruder aan de rechterkant gemonteerd.
Om alles te kunnen volgen op de video heb ik alle snelheden van de tool change even 10x langzamer gezet.
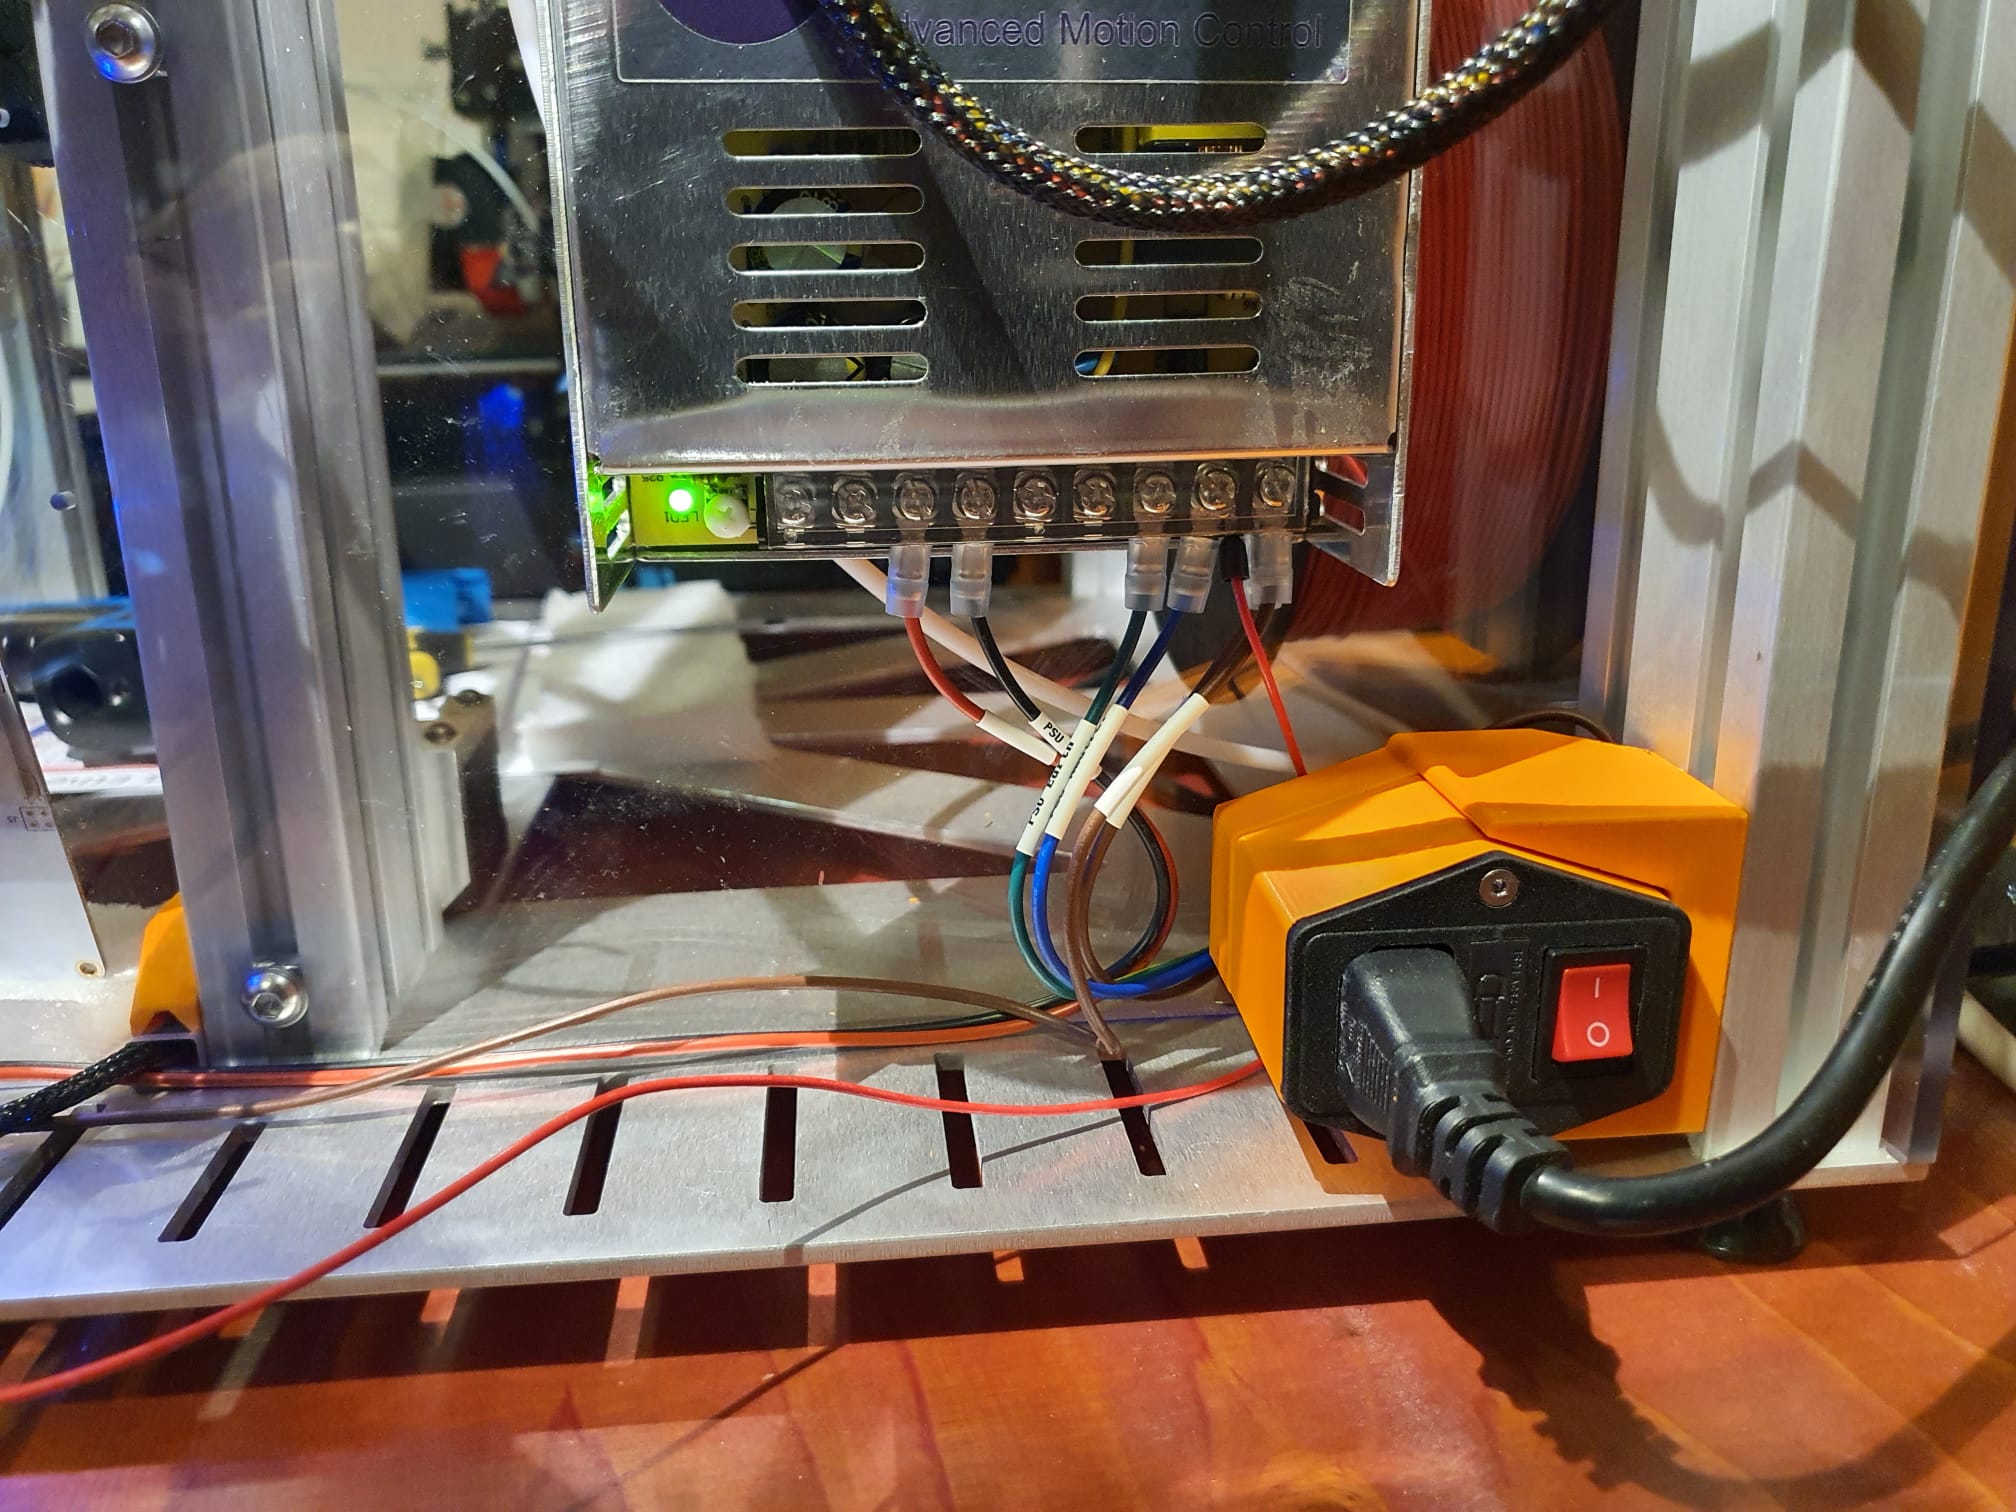
Na de eerste dag proefdraaien heb ik het originele Duet2wifi board gewisseld voor een Chinese clone.
Van de clone is de wifi onberispelijk, maar de nieuwe updated wifi module op de originele Duet2wifi is ook met alle updates niet goed aan de praat te krijgen.
Elke keer wanneer ik na een config aanpassing een remote reboot uitvoer loopt de wifi vast en connect het board uiteindelijk fictief naar IP adres 255.255.255.255.
Alle sites nagezocht voor hulp, maar niets gevonden.
Gebrek aan ervaring kan het bijna niet zijn, ik heb voldoende printers prima op duet2wifi draaien.
Voor de zekerheid heb ik een originele Duet ethernet print besteld, dan kan ik het originele board ombouwen naar duet2ethernet en kan ik het i.i.g. nog gebruiken.
Ik heb de versie met 4 tools besteld, de direct drive hemera’s. Ik wil namelijk ook met soft filament werken.
Het fijne van deze experimentele printer is dat alles met Duet werkt, en ik heb daar behoorlijk wat ervaring mee opgedaan.
De E3D TC wordt mijn eerste semi-pro multicolor printer.
Ik heb een Ender3 pro met MMU2S, een A30M met Chimera dual nozzle en een I3BearV3 met dual magnetic carriages.
Maar van deze 3 systemen is er geen welke echt perfecte prints maakt. Ze hebben wel elk hun specifieke kwaliteiten en kenmerken.
De Ender3/MMU2S kan snel PLA en PETG printen met 5 kleuren maar vergt een filament spillage tower op het bed en is erg omslachtig en langzaam in gebruik.
DeA30M met Chimera is lekker snel en groot (300x300x400mm) in bouwvolume. Maar de printkwaliteit is op zijn best redelijk te noemen. De dual nozzle Chimera met de nozzles op gelijke hoogte raakt bij elke beweging toch net met de niet gebruikte nozzle het topje van het door de actieve extruder neergelegde filament. En dat geeft vegen met als resultaat een minder mooie print. Toch gebruik ik dit redelijk veel, met name voor snelle proefprints en op 0,2 0f zelfs 0,3 mm layer height. Dat gaat prima.
DE I2Bear met de magnetic hotends is een mooie machine, redelijk snel maar lawaaiig vanwege de x-homing op basis van sensorless homing klapt dit met behhrlijkw at herrie bij elke tool change. Verder een prima printer met goede dual color resultaten. Ook het gebruik van verschillende soo1rten filament is mogelijk.
De eerste foto’s van de bouw van de E3D toolchanger:

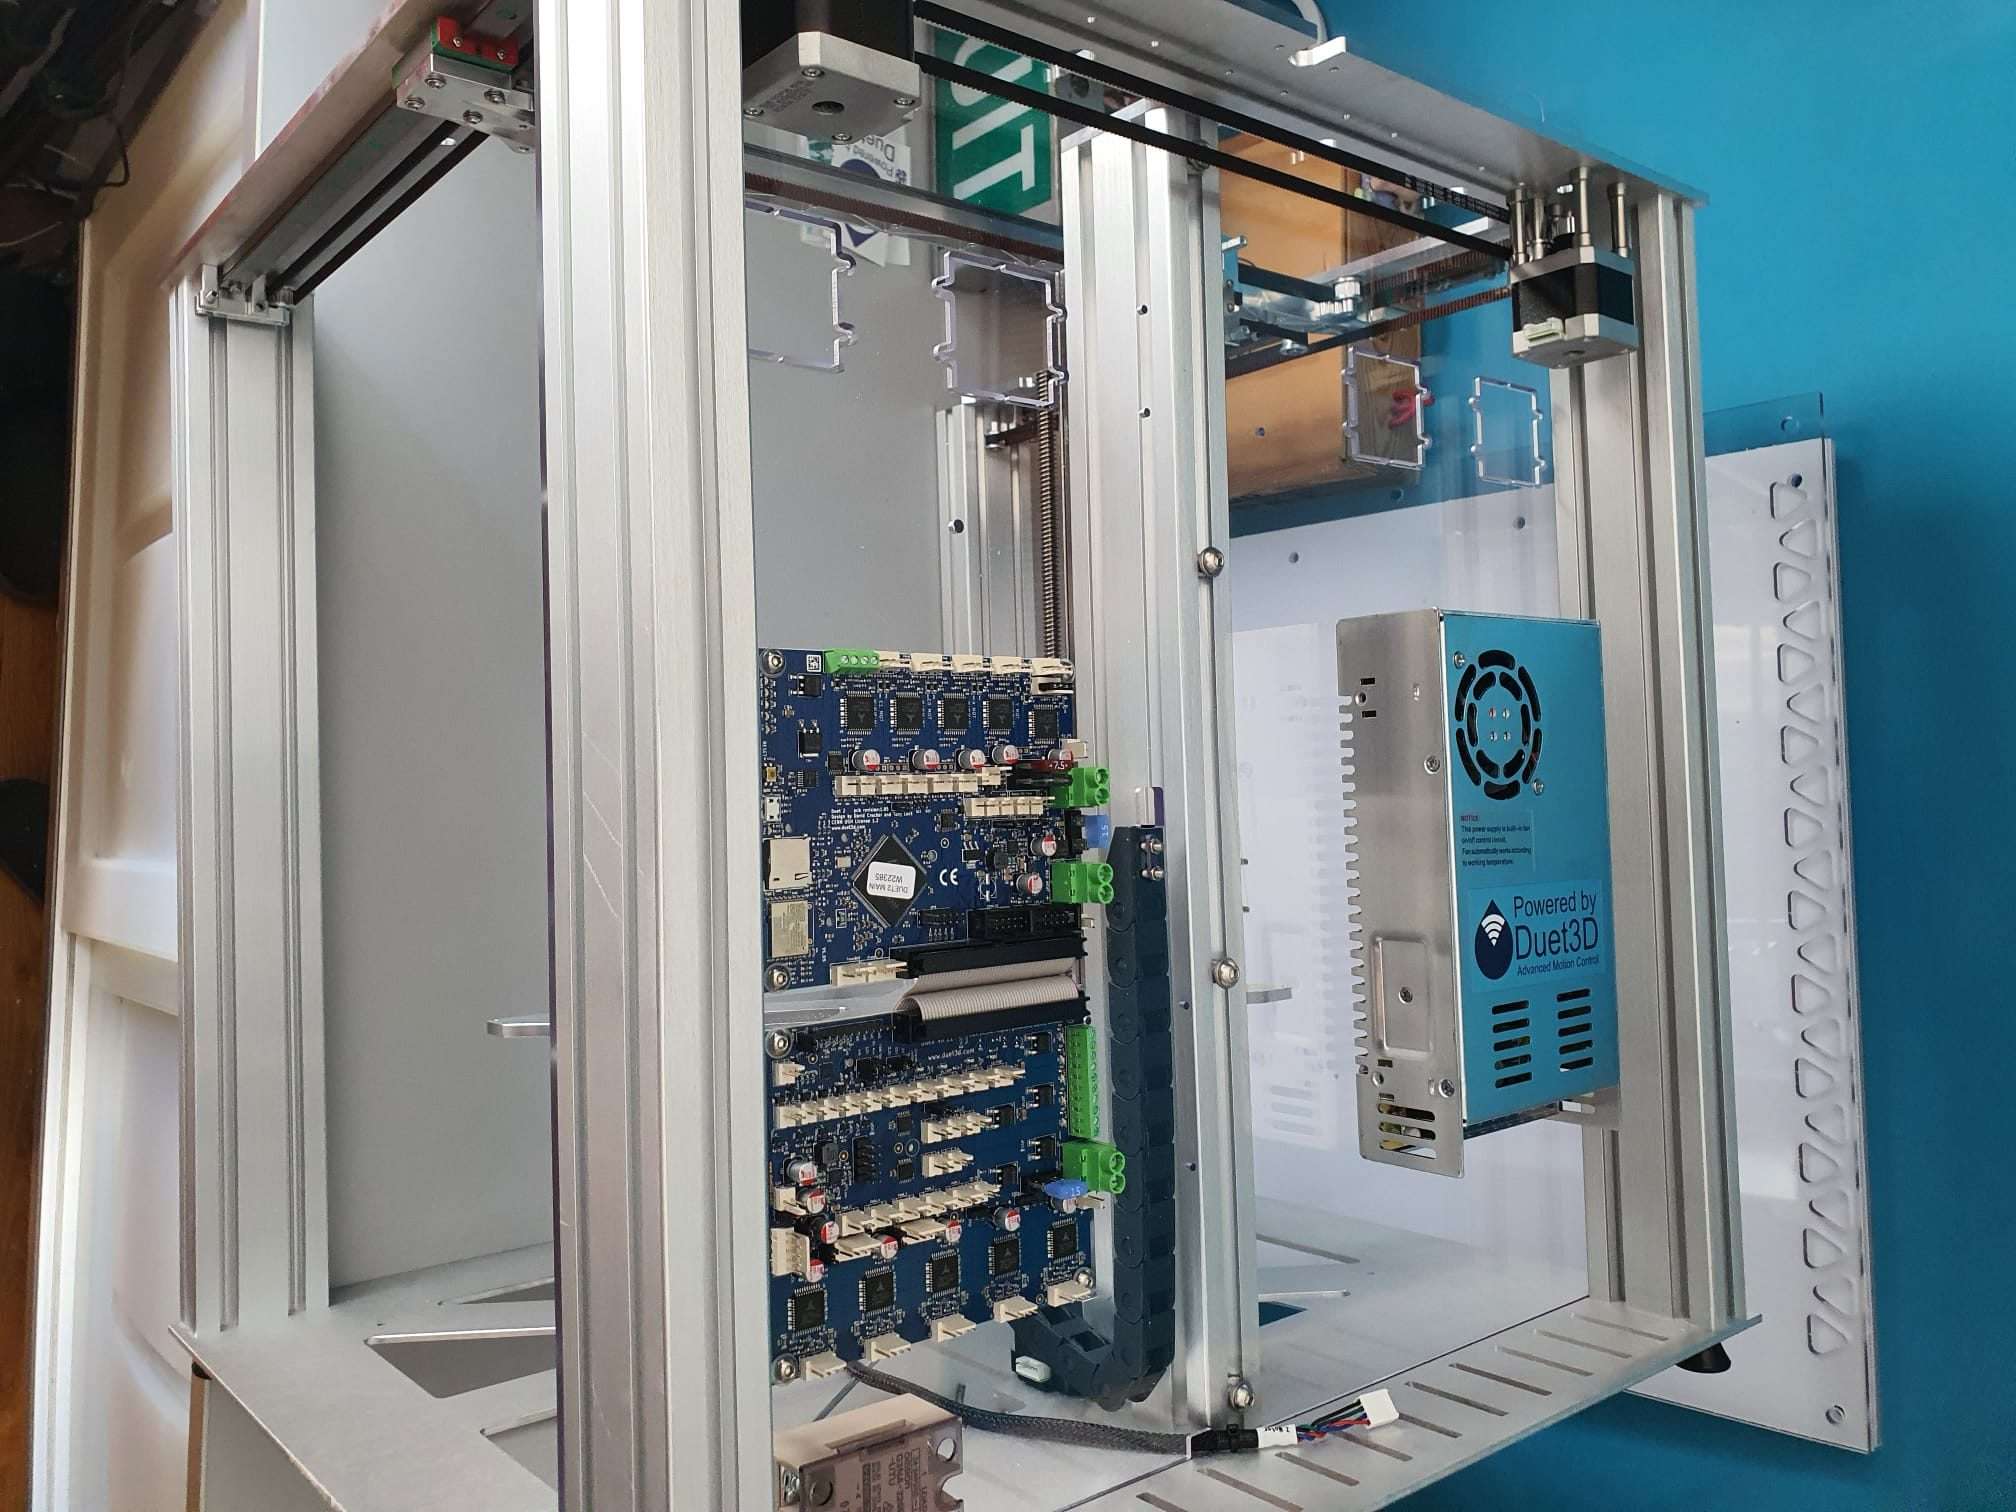
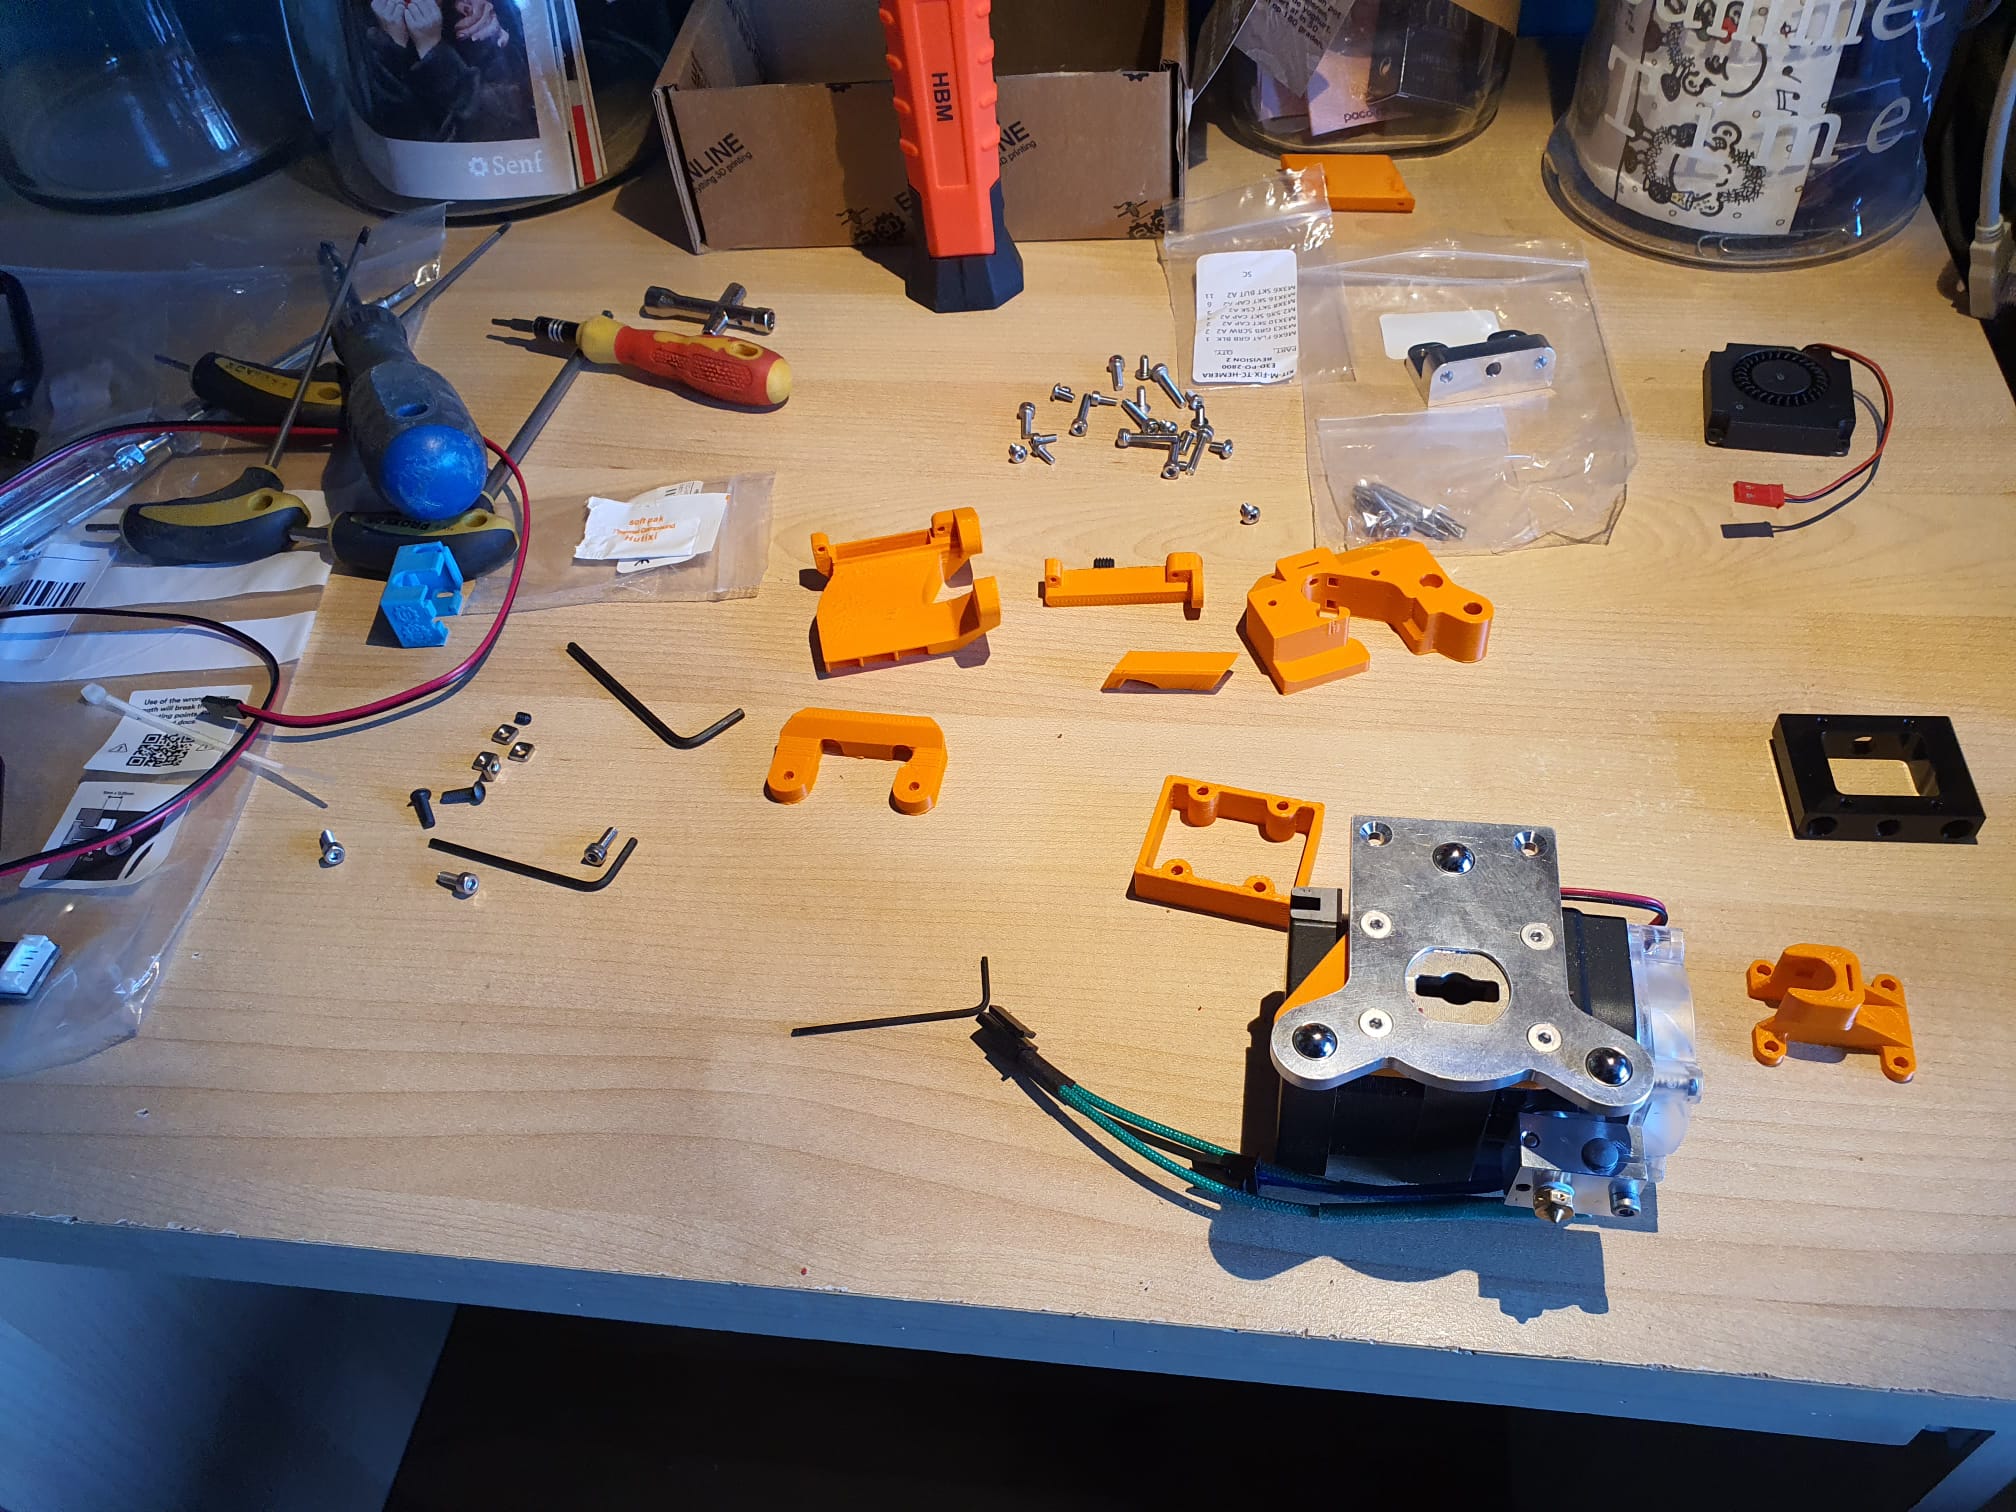


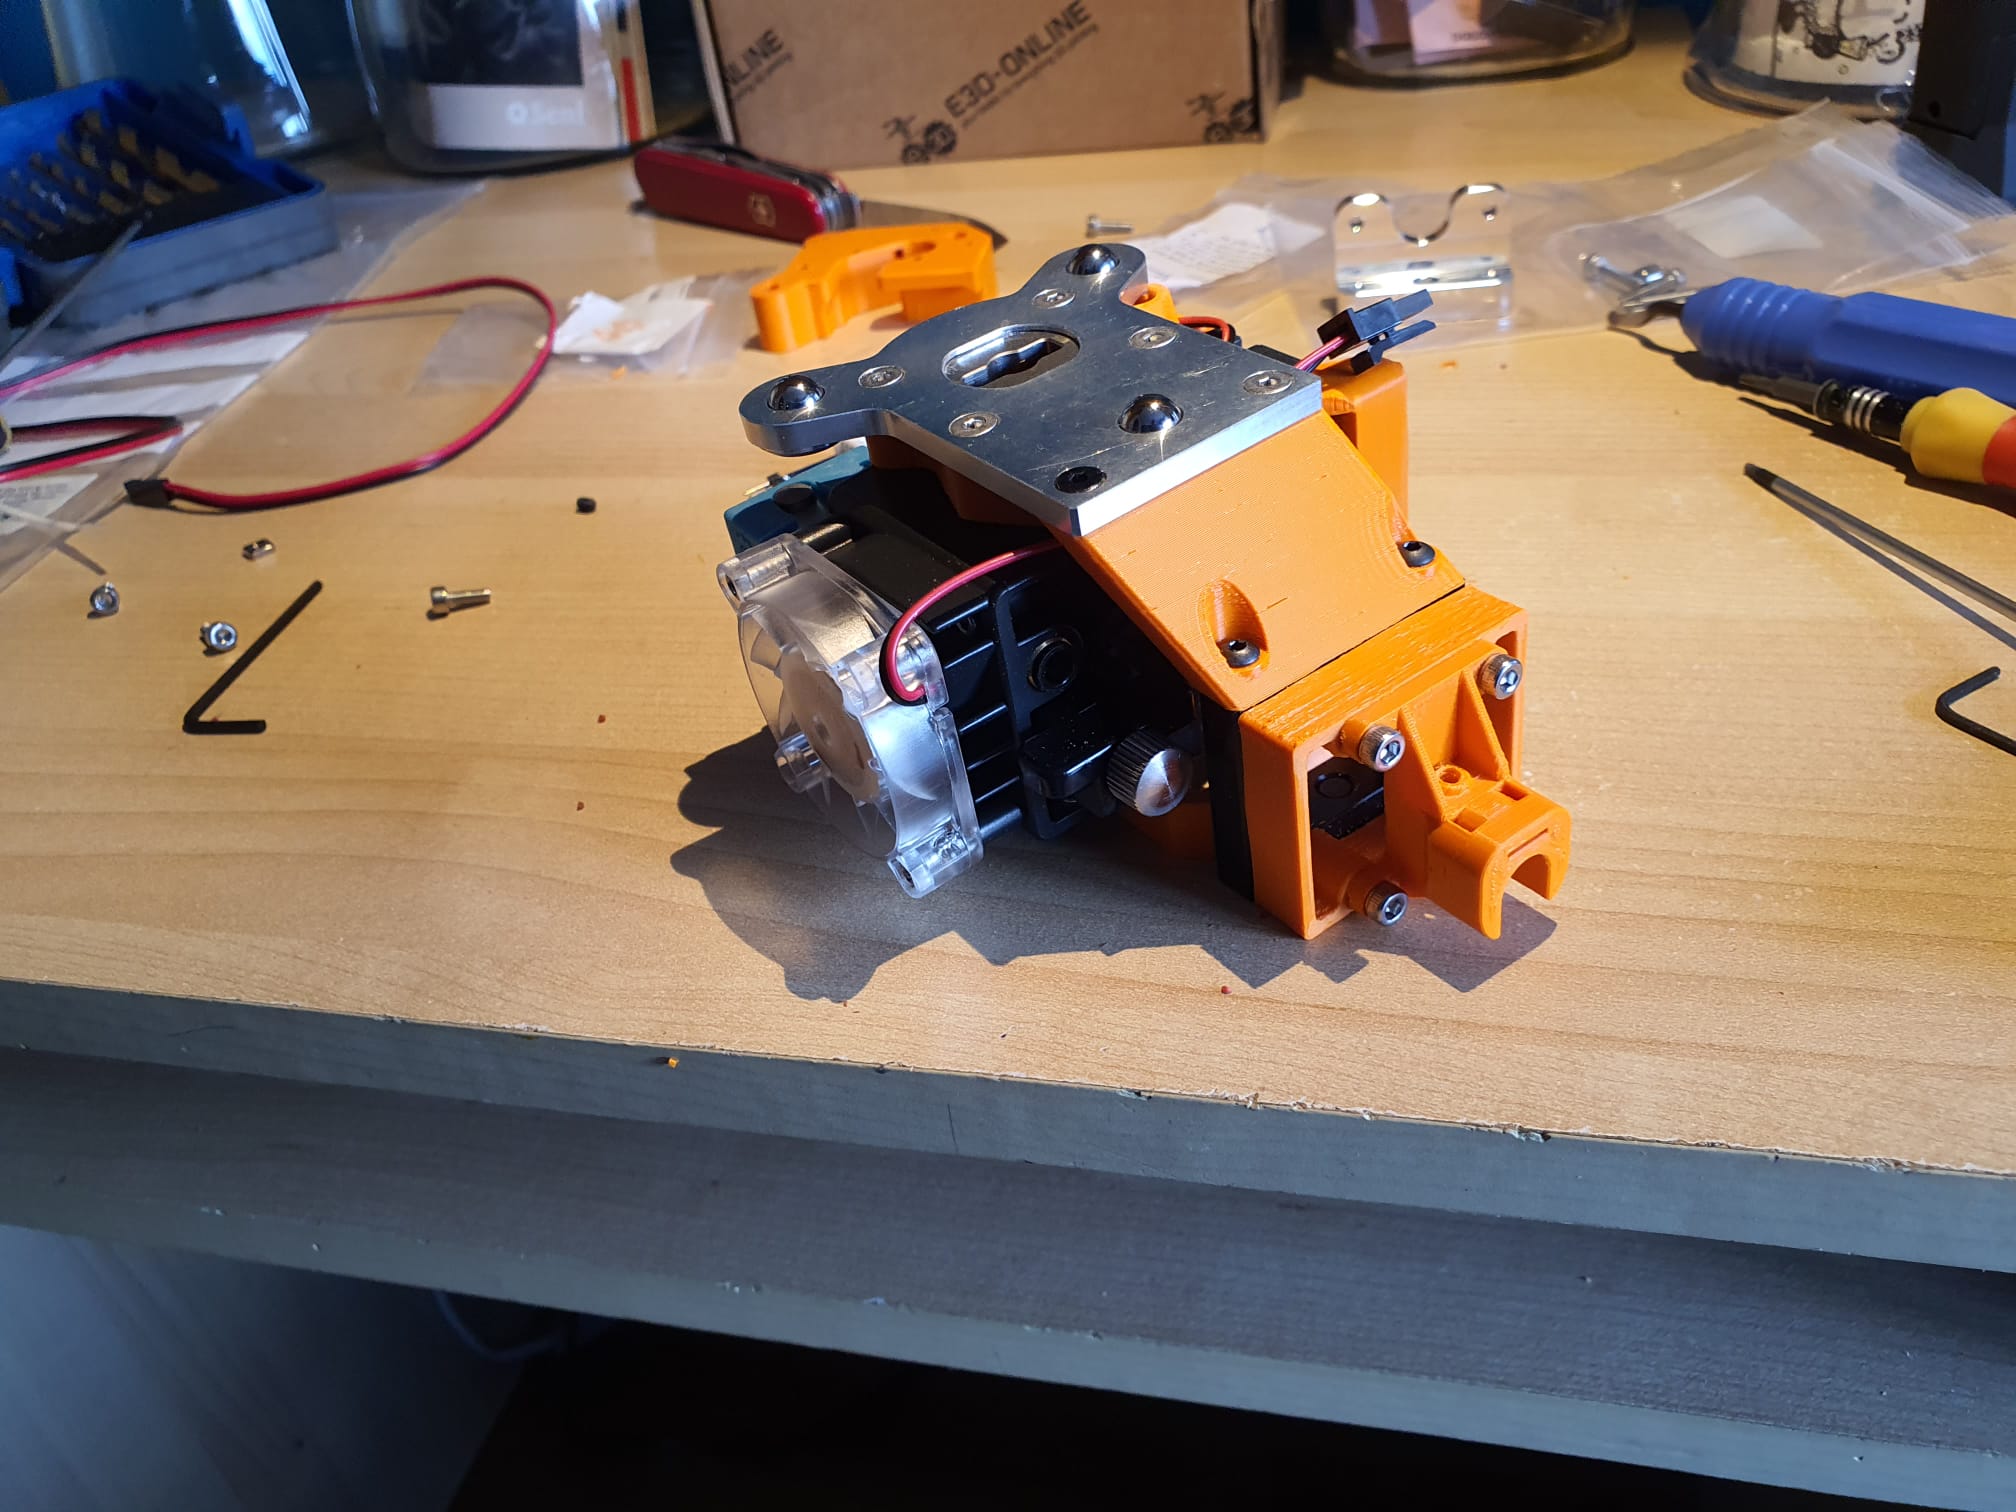
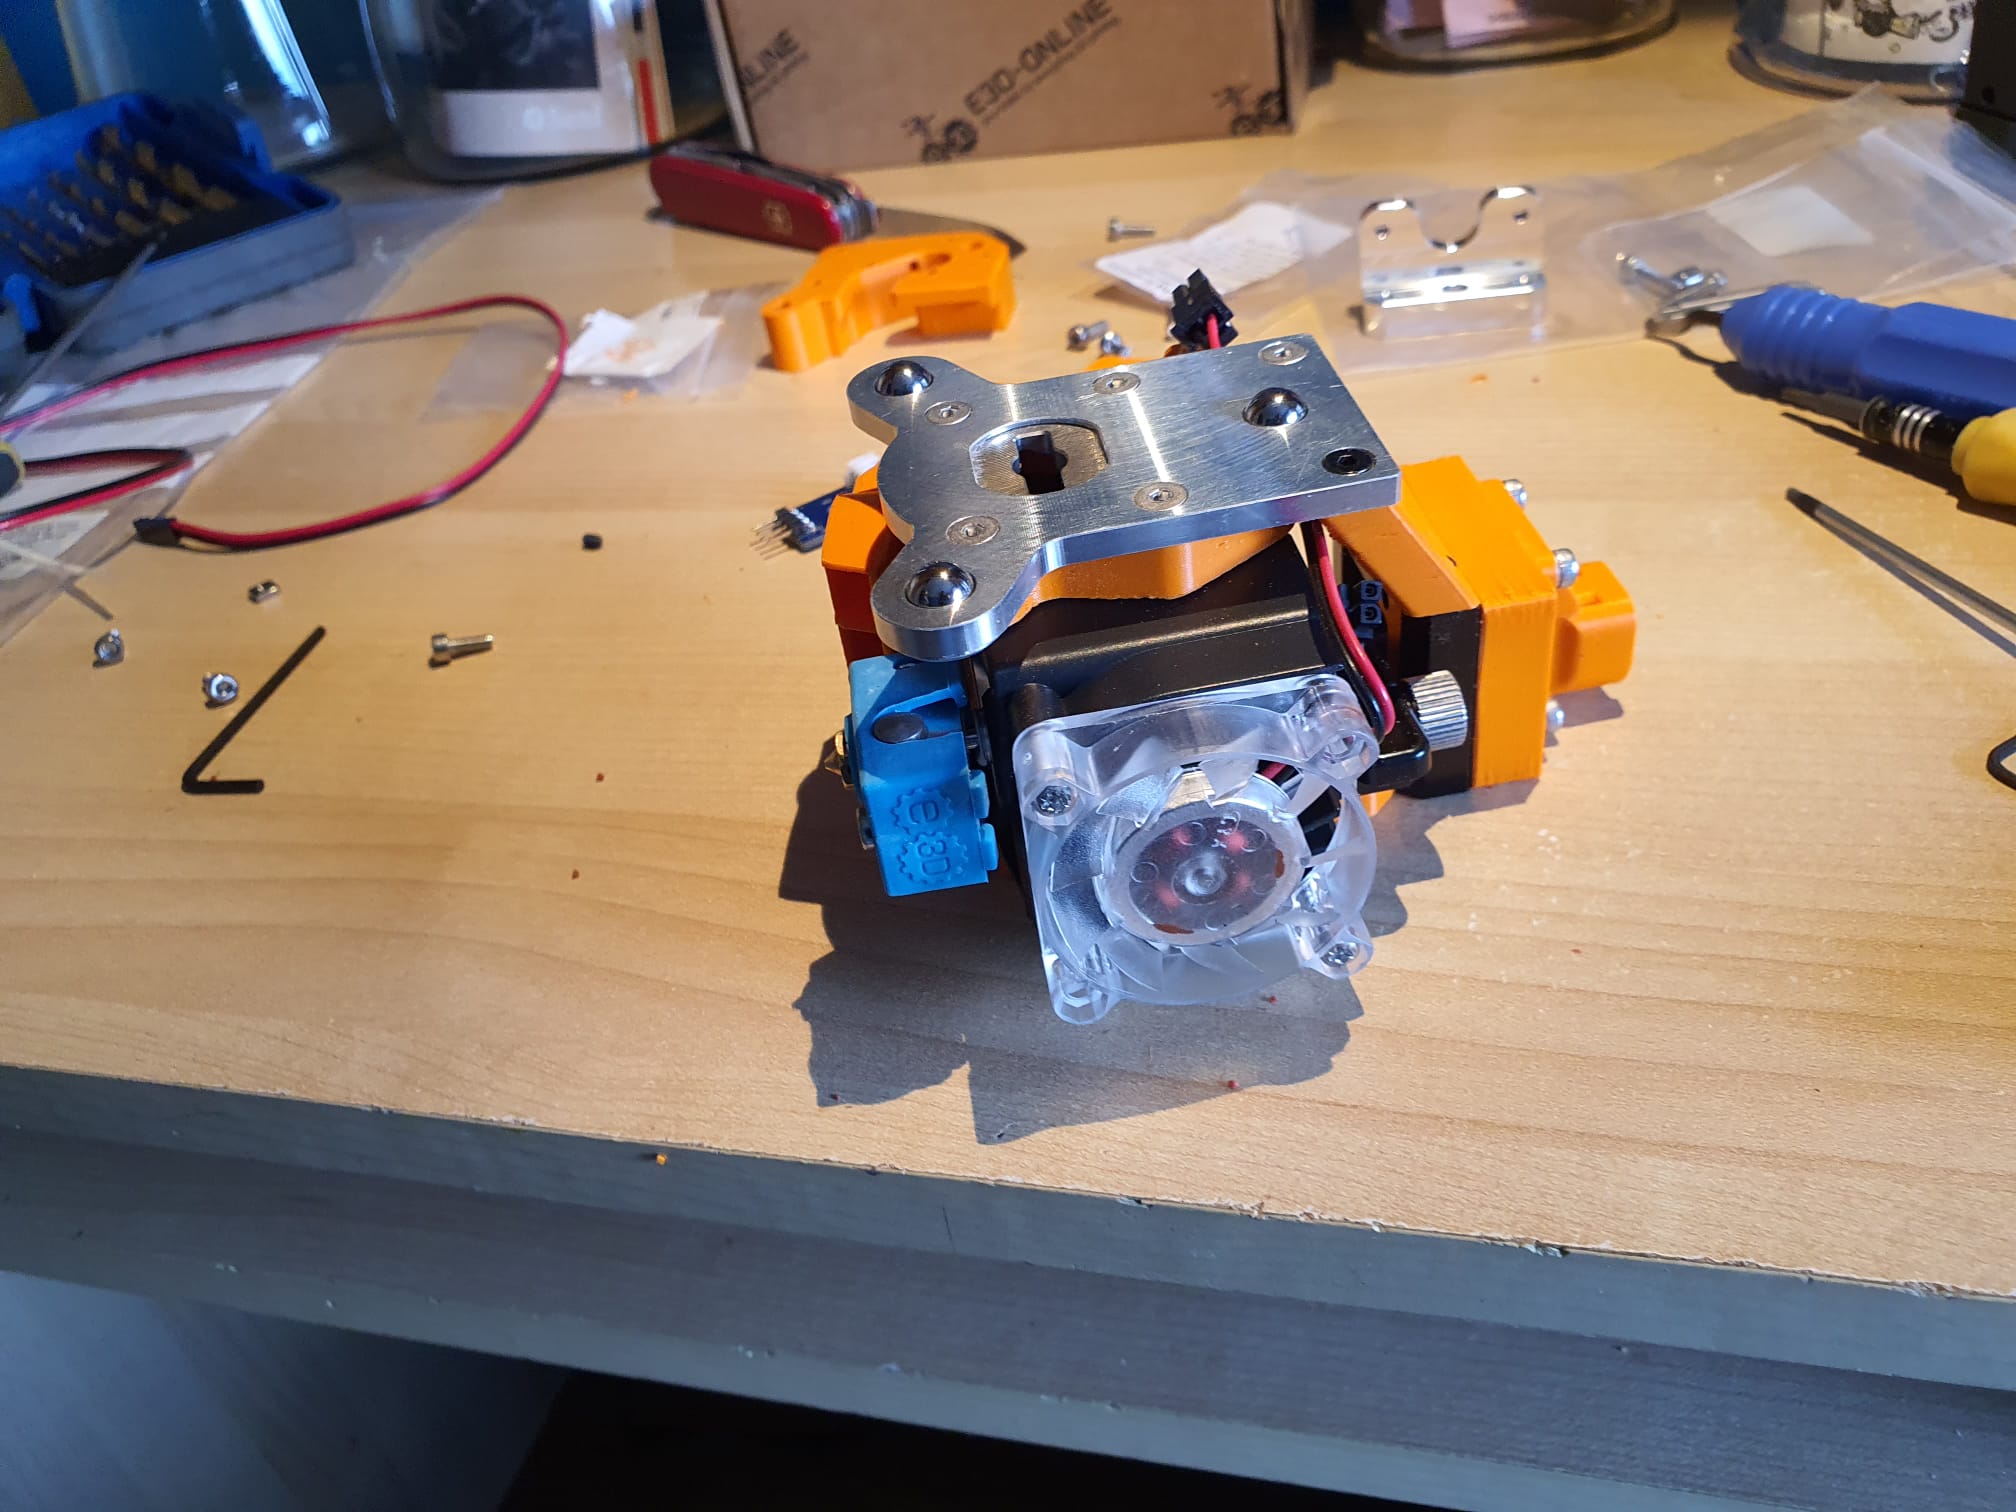

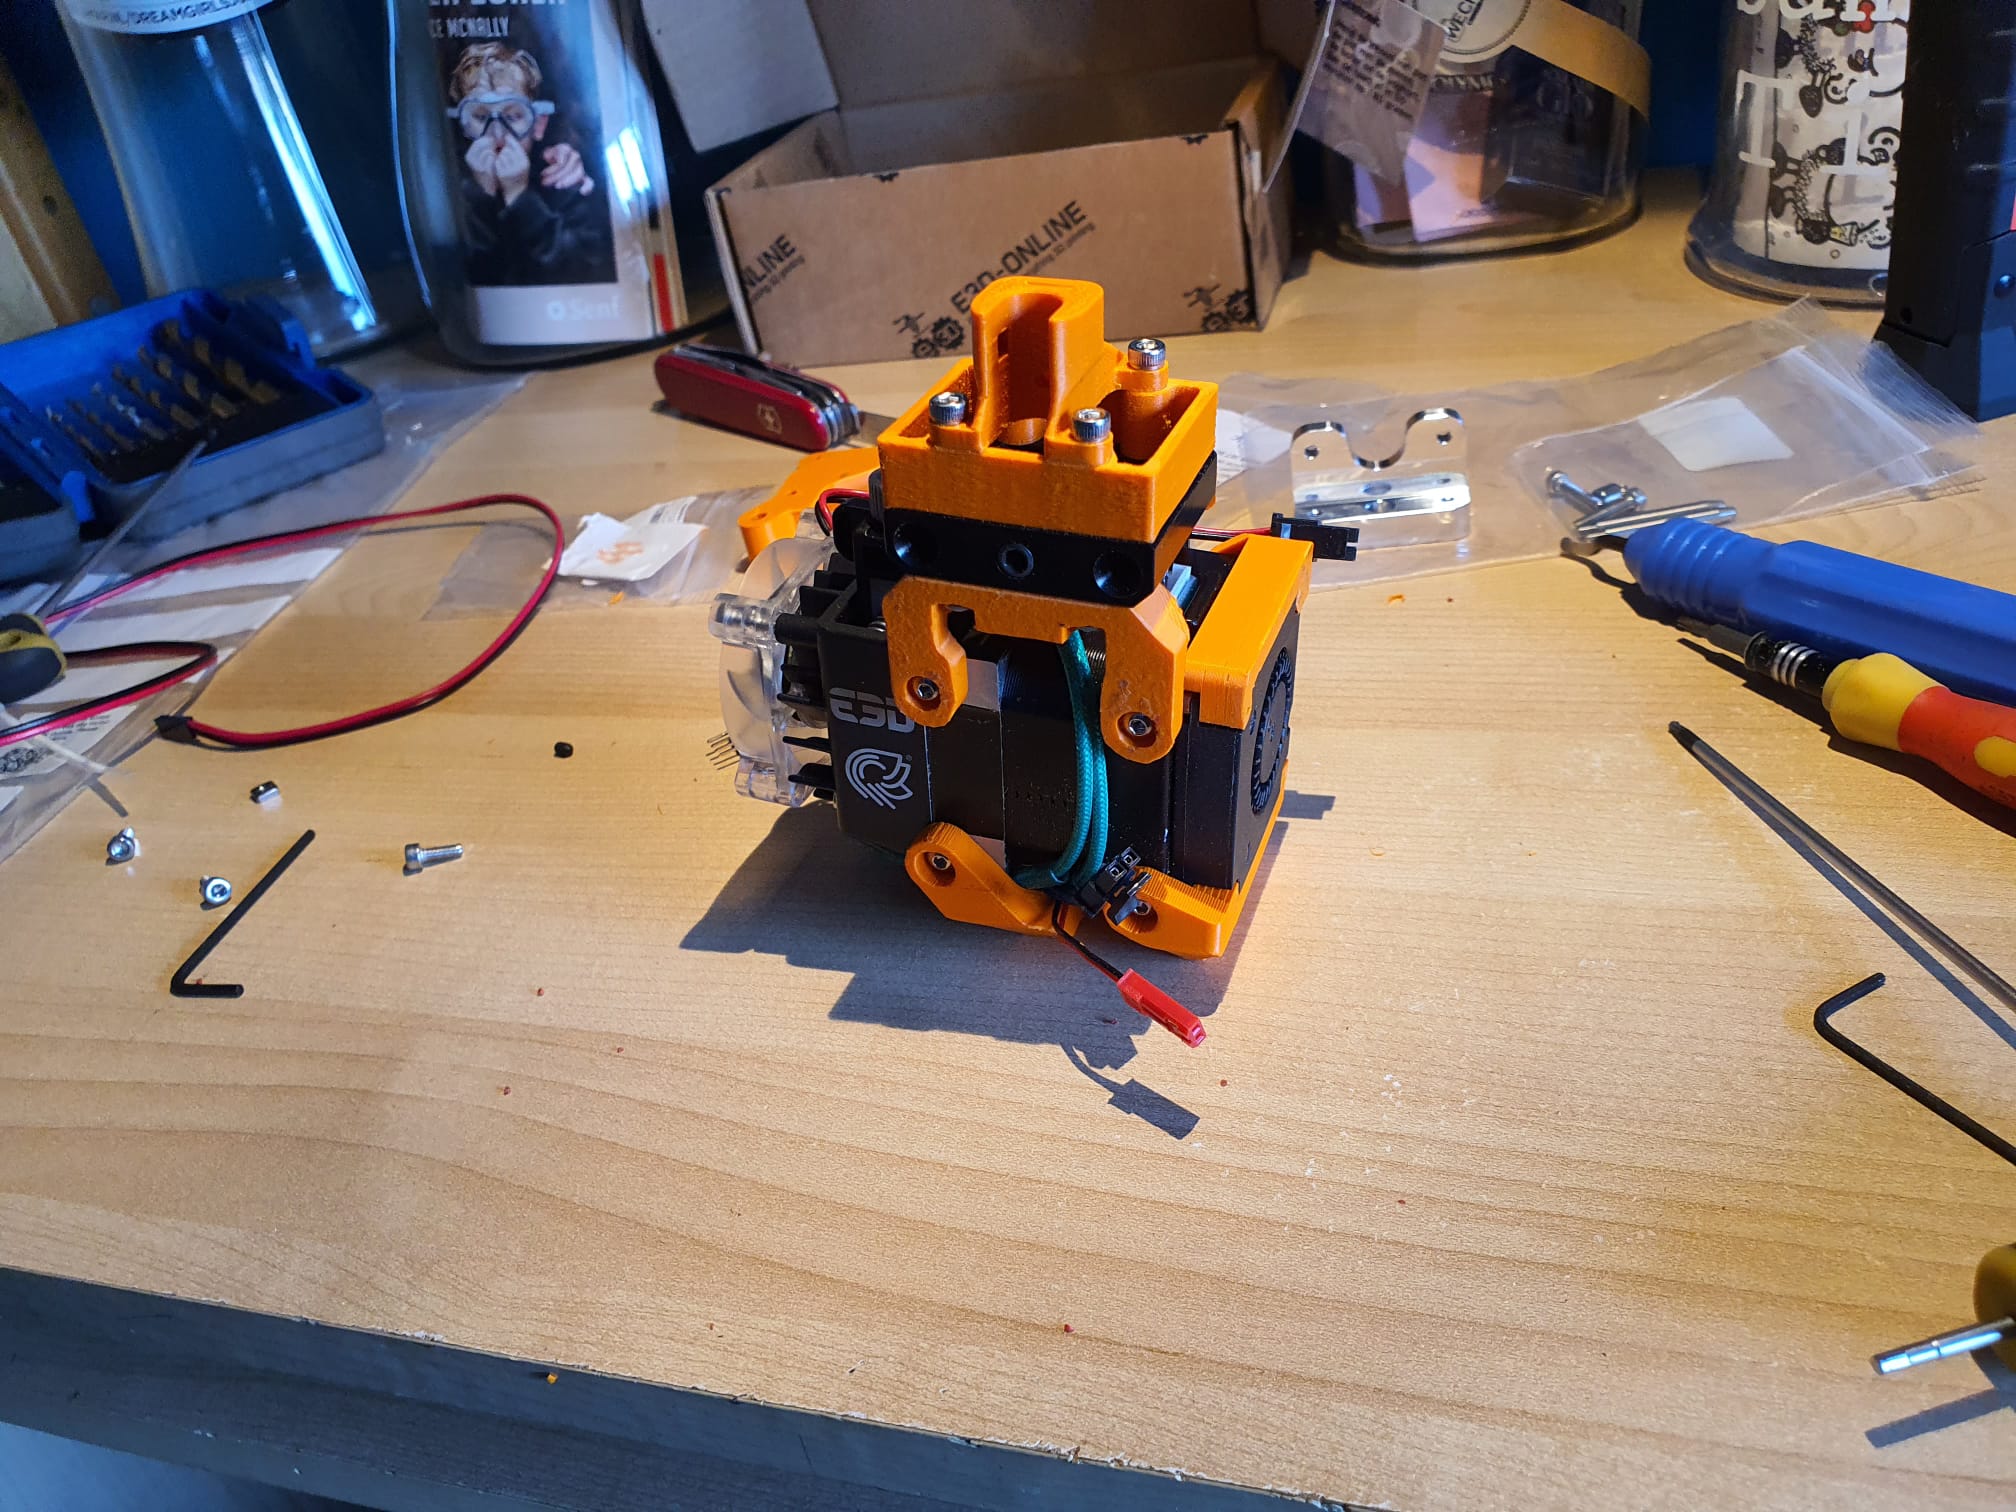

Ik heb alles met oranje ASA geprint op de Voron 2.4 op 150mm/s en 0,2mm met de E3DV6 direct drive Voron extruder en een 0.4 mm koperen nozzle. Dat ging weer prima!
Overigens valt er wel wat op te merken over deze kit.
Het is absoluut geen ‘out of the box’ werkend systeem.
De hardware is voortreffelijk, de handleidingen ook, beter dan alles dat ik ooit gezien heb.
De Duet en Duex combinatie is perfect en alle kabeltjes en schroefjes, moertjes, palletjes, tandwieltjes enzovoorts zijn mooi gelabeld en van prima kwaliteit.
De beschikbare config files, macro files en voorbeeld print files zijn ook prima om mee te starten.
En daar zit het probleem voor niet- kundigen: Alle waarden staan op de best mogelijke configuratie ingesteld.
En afhankelijk van je keuzes qua extruder, wel of geen bowden enzovoorts heb je hier en daar wat aanpassingen te doen.
Ik heb alles moeten herijken qua ophaal Y-waarden in de tool changer files voordat de tool ook echt netjes werd opgepakt en teruggebracht.
Daarnaast bleek dat de tool pickup heel nauwkeurig moet worden afgesteld om het slot in en uit te kunnen van de extruder platen.
Daarvoor moet je snappen hoe dat is gebouwd, vooral ook in de firmware.
Dan snap je dat het systeem elke keer bij de start moet resetten naar de startstand, en dat maakt het systeem dan het referentiepunt. Vrevolgens moet je meten waar 1) de open stand zit en 2) de op slot stand zit. Die waarden moet je als C waarden invullen in de pickup-én terugbreng macro’s.
Wat ik ook lastig vind is dat er (nog) geen sensors bij zitten om te checken of de tools in gebruik zijn of geparkeerd zijn.
Dat betekent dat je zomaar een commando kan geven om een homeall te doen terwijl er nog een tool aan de pickup hangt.
Dat zou ik graag willen weten want dan programmeer je daaromheen.
En zo zijn er nog wat zaken zoals geen filament sensor op de tools, geen led verlichting aan de pickup maar daar heb ik al een handig beugeltje voor gezien.
Dus een heel leuk en goed systeem, z’n geld waard en kwalitatief hoogstaand materiaal, design ook mooi en nog veel aan te sleutelen. Gelukkig!
Ik ga in ieder geval mijn Z-homing files van de eerder gebouwde mullti- extruder machines met Duet hergebruiken.
Omdat deze E3D met een pre-homing werkt zonder dat de tools aan de pickup hangen, zul je af en toe een Tool op Z-afstand ten opzichte van de pickup-waarde moeten calibreren.
En ook de onderlinge verschillen in X en Y natuurlijk, ten opzichte van Tool0.
Daar heb ik ook een paar leuke macro knutsels voor liggen!
Volgende week weer verder!
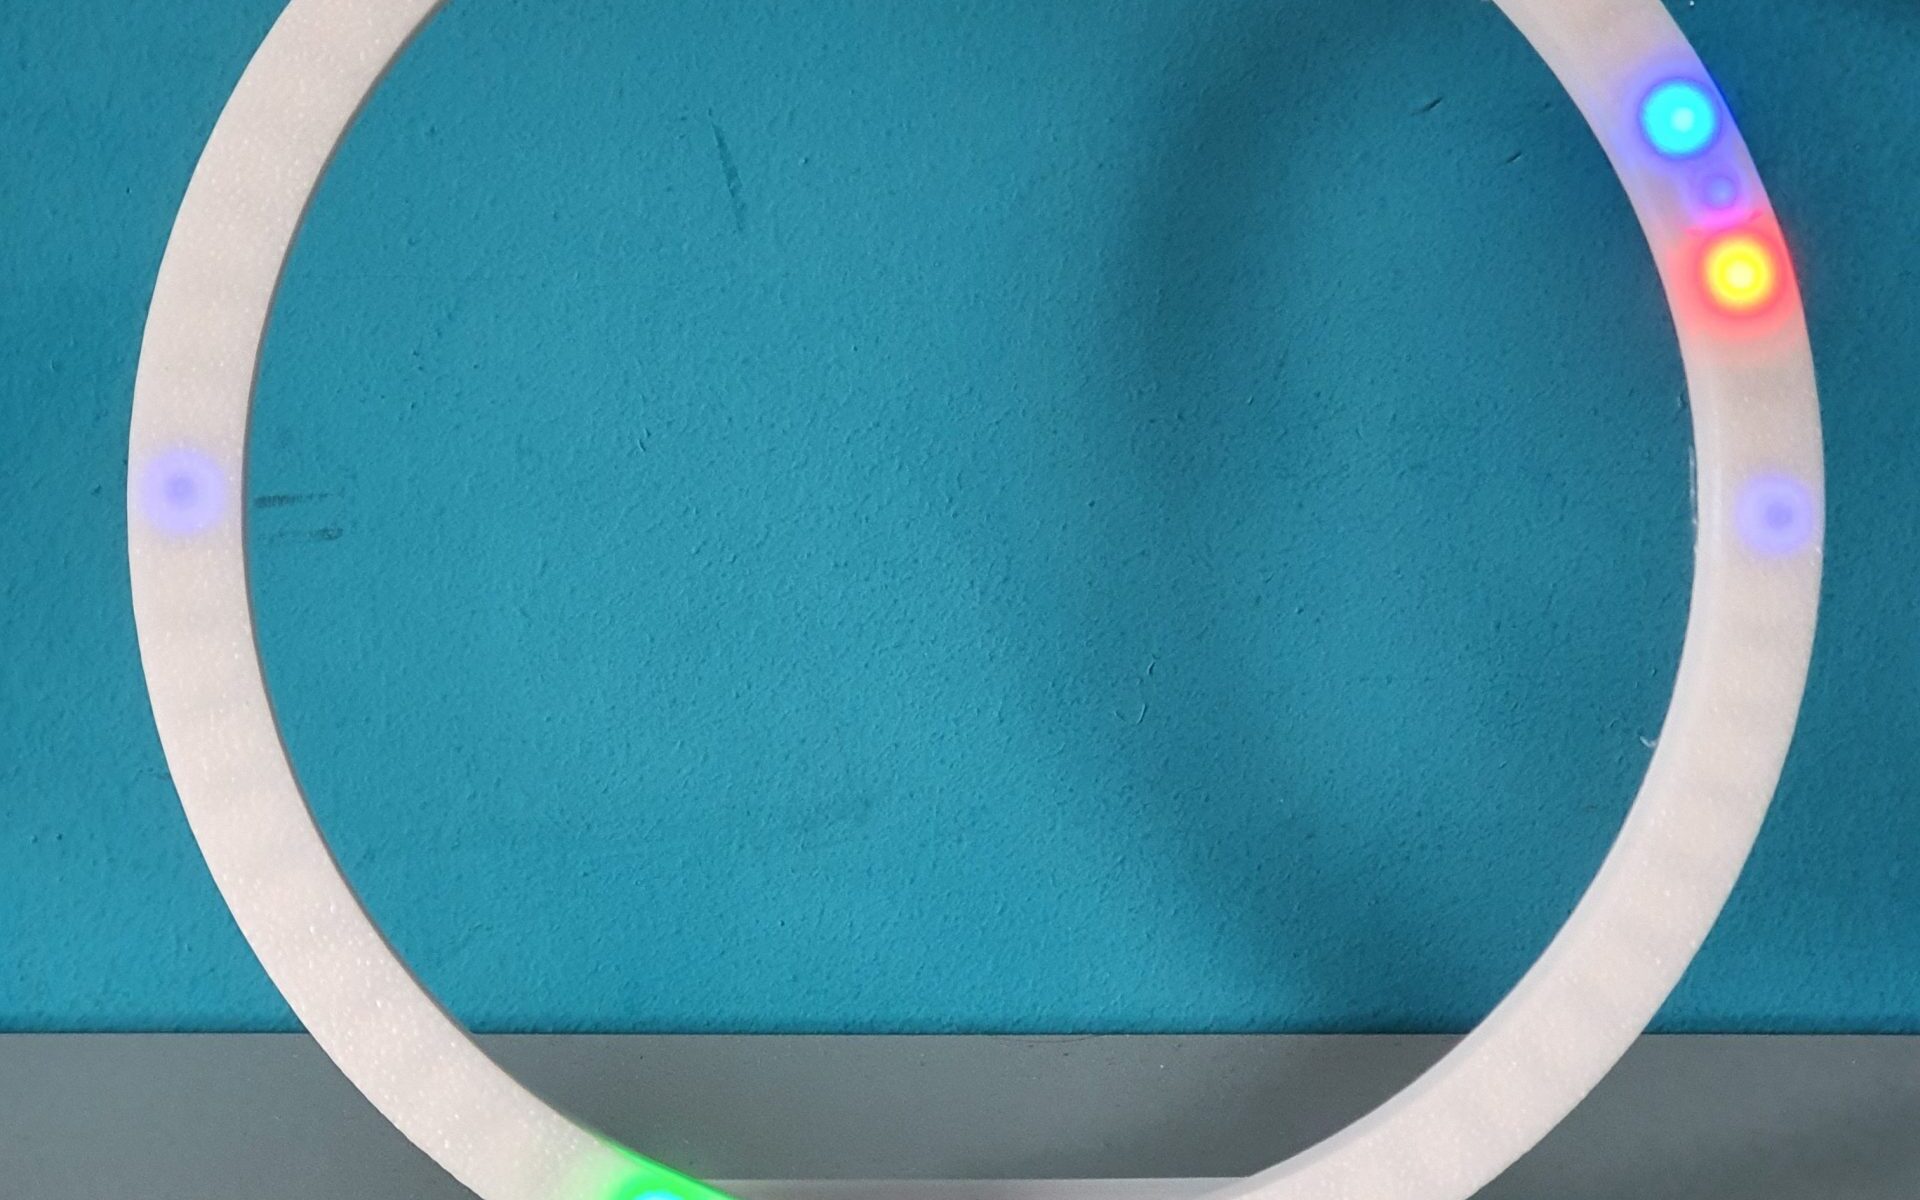
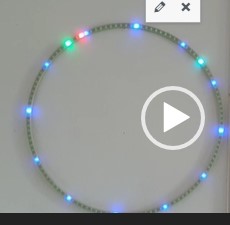
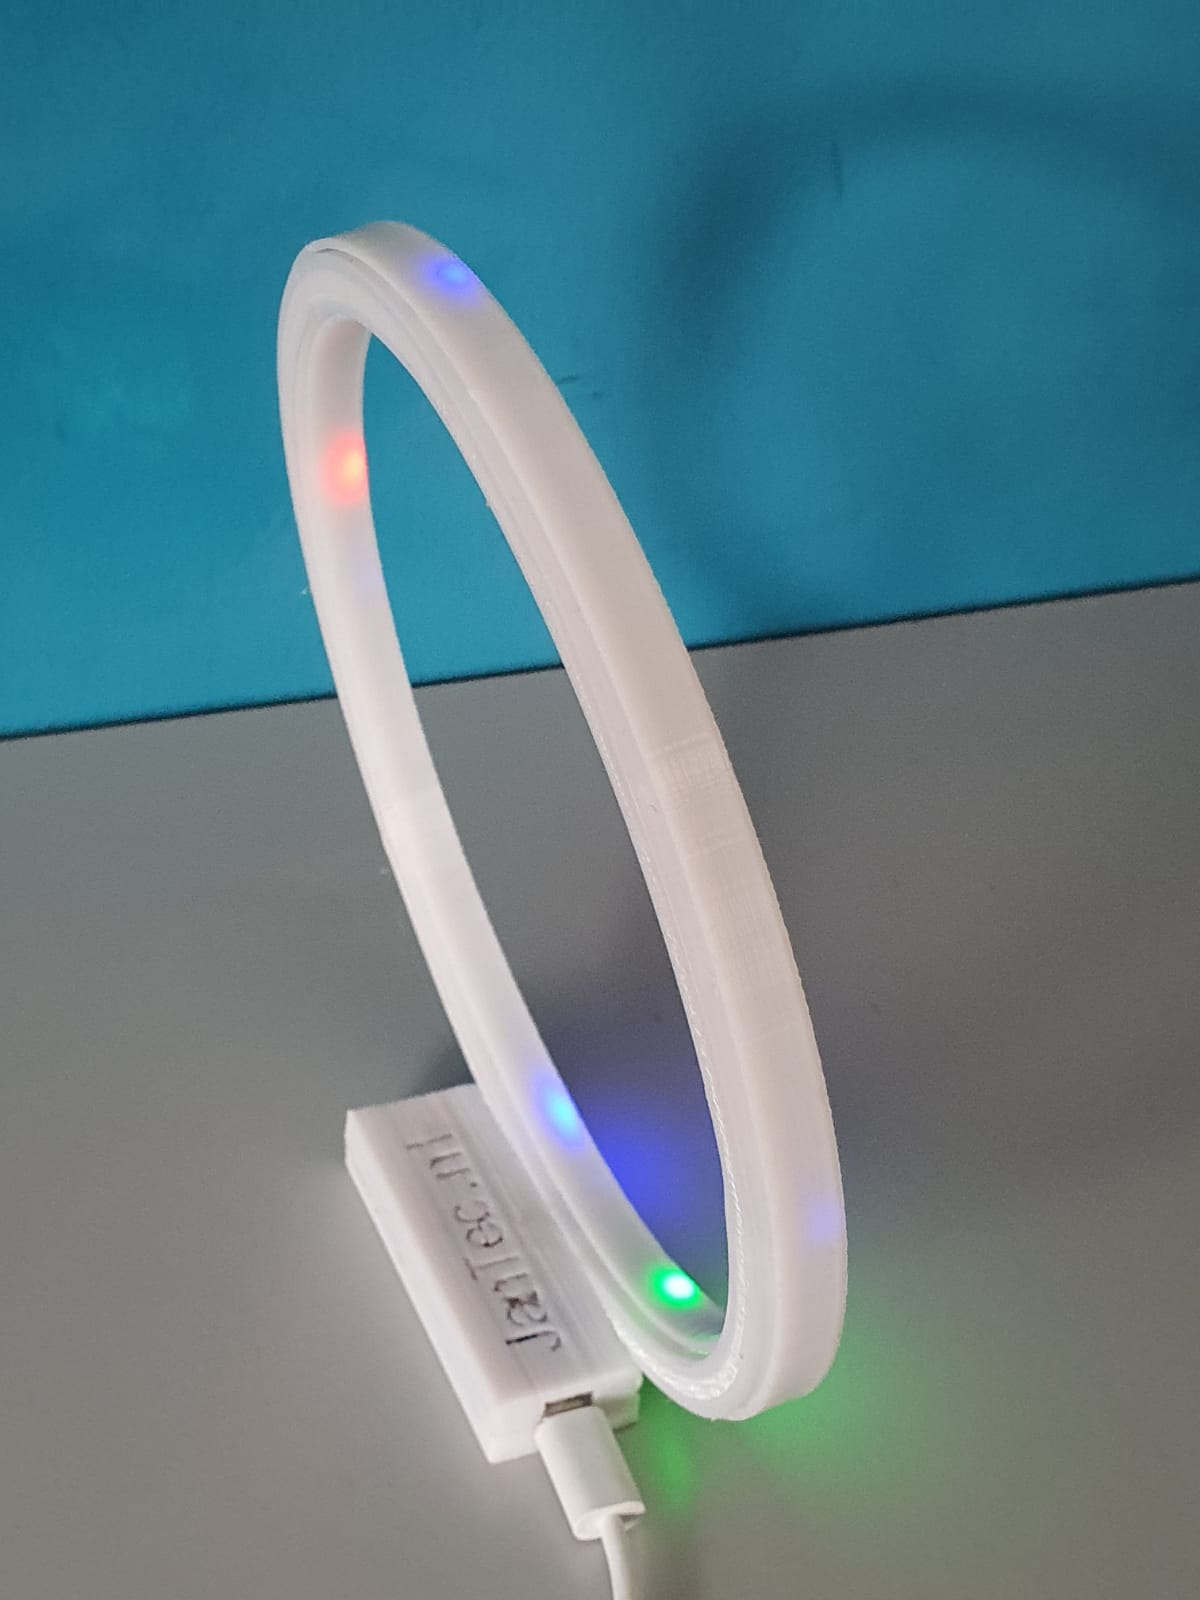
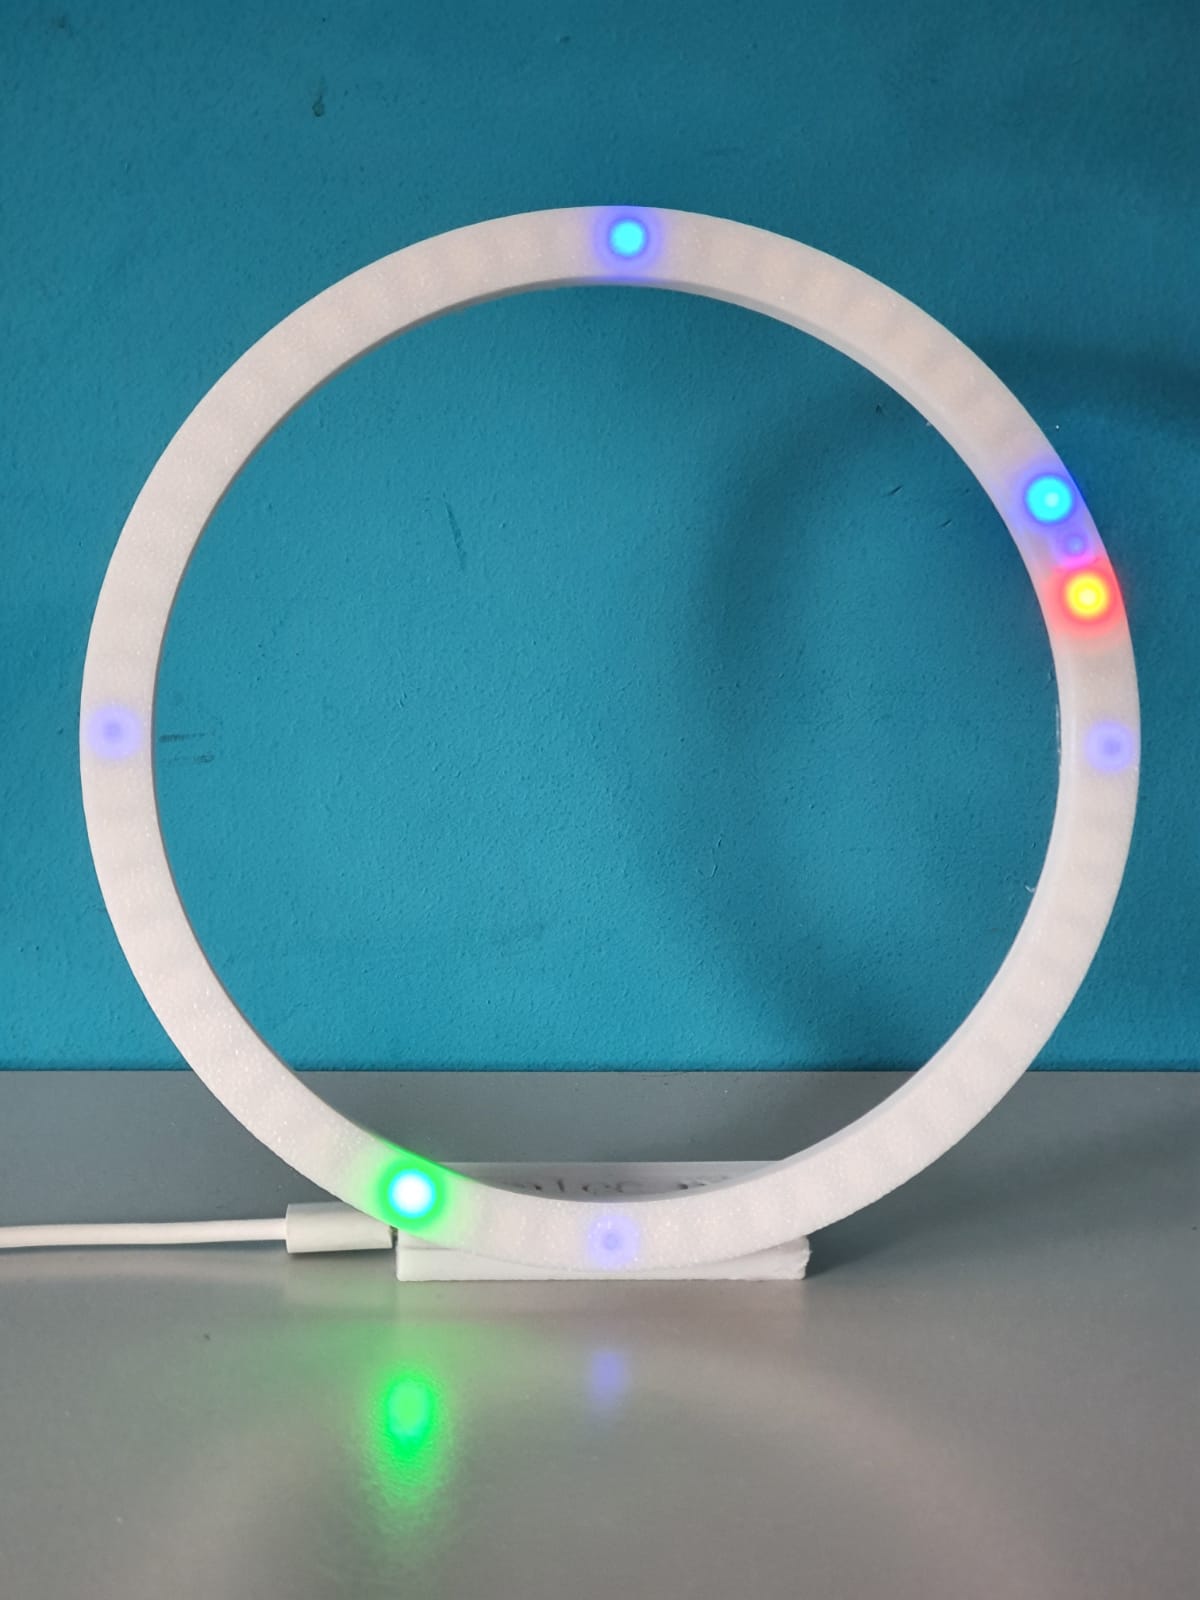
ABOVE: Circular clock, completed project, reading 05h:41m and crossing to 05h:42m. Red=hours, Green=minutes
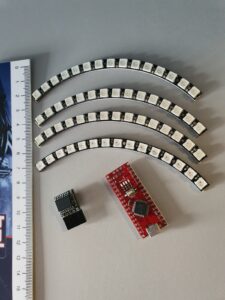
Above: Clock without case, with open components.
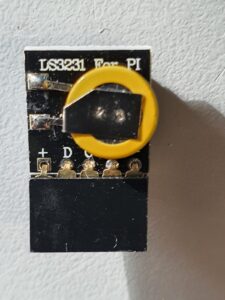
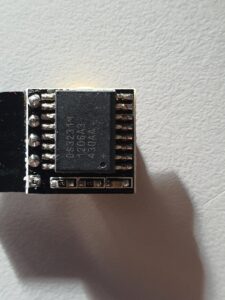
In de bovenstaande video zie je alle benodigde onderdelen voor de electronica. Een arduino Nano, een tijdmodule LS3231 met batterij back-up en een 4-delige ring met elk 15 stuks WS2812 LED’s die zorgen voor een 160mm 60 LED units klok. Je kunt hem bouwen als een open gebouwde unit zoals hierboven afgebeeld met draad of in een 3d printbare slanke behuizing die ik heb ontwikkeld. Zie de foto’s hieronder.
Voor het bouwen van deze mooie nauwkeurige klok, kun je mijn ontwerp files voor de behuizing gebruiken op elke 3d printer met een horizontale bed maat van minimaal 165x165mm.
Download de beide print STL’s OF van de Prusa gedeelde site waar ik deze ontwerpen heb geupload (zoek op de prusa site naar ws2812 circulaire arduino klok).
OF haal het STL bestand voor de VOORKANT van de klok van mijn website HIER
EN haal het STL bestand voor de ACHTERKANT van de klok van mijn website HIER
Eén STL is voor de achterkant en bevat de Nano box, de andere is voor de voorkant van de klok. Positioneer de achterste STL 180 graden (dus omhoog gaat omlaag) in uw slicer, zodat zowel de doos als de LED-behuizing op Z-0 niveau zijn, d.w.z. naar beneden gericht op hetzelfde horizontale niveau. De voorkant kan het best geprint worden met de platte kant naar beneden. ABS is niet aan te raden omdat het minder stijf is, maar zal waarschijnlijk ook werken. Voor mij werkt PETG of PLA het beste.
Gebruik wit filament voor het voorste deel, de achterkant kan elke kleur zijn die je wilt.
In de cirkel worden de 4 WS2812 LED segmenten in 1 volledige cirkel van ongeveer 160mm geplaatst.
Als je de elektronica aan de achterkant hebt aangesloten, schuift de voorkant er zo overheen. Geen lijm nodig. Maar de LED ring kan best op 4 plaatsen met een druppel hotglue aan de basis van de achterste behuizing gelijmd worden. Dit kun je het beste doen als je zeker weet dat alles goed werkt.
De LED onderdelen zijn verkrijgbaar op o.a. banggood , aliexpress en zo, zoek naar 60LED circle WS2812 die de 160 mm buitendiameter heeft.
Elke LED vertegenwoordigt een punt voor seconden, minuten of als uur indicator.
De kleuren bepalen de functie. Blauw wordt ook gebruikt als kwartier indicator met minder intensiteit, om een gevoel van positionering te hebben voor de andere LEDS als het donker is.
Kijk naar de video hierboven van het ‘open’ demonstratiemodel om te begrijpen hoe het werkt.
Hieronder vindt je de Arduino code voor de gebruikte Nano3, as-is. het werkt voor mij, en in de code vindt u ook alle benodigde elektrische aansluitingen en de specificaties van de gebruikte Time module.
Haal de Arduino code HIER
Wanneer aangesloten op je PC, kun je de Arduino programmeren en via de seriële interface kun je naderhand speciale instellingen van de klok wijzigen, zoals helderheid, speciale kwartierverlichtingsindicatoren, enzovoort. het staat allemaal in de code hieronder.
De aansturing kan via een seriële interface met de usb ingang van de Arduino, via een terminalprogramma zoals YAT of met de interface van het Arduino IDE programma.
De commando’s zijn:
f; fader UIT
F; fader AAN
m (getal); dim de 4 blauwe marker LED’s met waarde (getal)
S; synchroniseren met RTC tijd
s; synchroniseren met systeemtijd (computer)
t (tijd); systeemtijd veranderen in:
b; helderheid van alle niet-marker LED’s
Doneer a.j.b. $1 aan mijn paypal account als je (delen van) mijn ontwikkelde materialen gebruikt, zodat ik kan doorgaan met het delen van leuke dingen voor jou om te downloaden
Ik hoop dat alles goed gaat lukken!
Succes,
Jan
De Arduino code, te gebruiken voor het programmeren van de Arduino Nano3 is beschikbaar onderaan dit bericht als platte tekst om te importeren in een leeg arduino bestand (met kopiëren en plakken).
Zorg ervoor dat je alleen de bibliotheken en tijdmodule gebruikt die in de code zijn aangegeven! De gebruikte tijdmodule is van de betere generatie die de tijd zeer goed vasthoudt, ook in stand-by.
Gebruik voor het verbinden van de draden tussen de neopixel segmenten, de arduino en de tijdmodule een temperatuurgeregelde soldeerbout. Gebruik een ventilator als je aan het solderen bent en adem geen giftige gassen in tijdens het solderen.

De Arduino code is hieronder weergegeven, te importeren in Arduino IDE in een .ino bestand. Met de Arduino IDE moet je vervolgens de code compileren om de Arduino Nano geflasht te krijgen met het programma.
/**
* NeoClock
*
* Clock using 60 WS2812B/Neopixel LEDs and DS3231 RTC
* Small changes and updates made by jan Griffioen, Amsterdam Europe 2018-2021
* Libraries needed:
* * Adafruit NeoPixel (Library Manager) – Phil Burgess / Paint Your Dragon for Adafruit Industries – LGPL3
* *
* * Arduino Timezone Library (https://github.com/JChristensen/Timezone) – Jack Christensen – CC-BY-SA
* * Time Library (https://github.com/PaulStoffregen/Time) – Paul Stoffregen, Michael Margolis – LGPL2.1
*/
#include <Adafruit_NeoPixel.h>
#ifdef __AVR__
#include <avr/power.h>
#endif
#if defined(ESP8266)
#include <pgmspace.h>
#else
#include <avr/pgmspace.h>
#endif
/* for software wire use below
#include <SoftwareWire.h> // must be included here so that Arduino library object file references work
#include <RtcDS3231.h>
SoftwareWire myWire(SDA, SCL);
RtcDS3231<SoftwareWire> Rtc(myWire);
for software wire use above */
/* for normal hardware wire use below */
#include <Wire.h> // must be included here so that Arduino library object file references work
#include <RtcDS3231.h>
RtcDS3231<TwoWire> Rtc(Wire);
/* for normal hardware wire use above */
#include <TimeLib.h> //http://www.arduino.cc/playground/Code/Time
#include <Timezone.h> //https://github.com/JChristensen/Timezone
#include <EEPROM.h>
//Central European Time (Frankfurt, Paris)
TimeChangeRule CEST = {“CEST”, Last, Sun, Mar, 2, 120}; //Central European Summer Time
TimeChangeRule CET = {“CET “, Last, Sun, Oct, 3, 60}; //Central European Standard Time
Timezone CE(CEST, CET);
TimeChangeRule *tcr; //pointer to the time change rule, use to get the TZ abbrev
time_t utc;
#define PIN 5
unsigned long lastMillis = millis();
byte dimmer = 0x88;
byte hmark = 0;
byte ohour=0;
byte ominute=0;
byte osecond=0;
boolean fader=true;
Adafruit_NeoPixel strip = Adafruit_NeoPixel(60, PIN, NEO_GRB + NEO_KHZ800);
void setup() {
Serial.begin(57600);
strip.begin();
strip.setBrightness(50);
// Some example procedures showing how to display to the pixels:
// colorWipe(strip.Color(255, 0, 0), 50); // Red
//colorWipe(strip.Color(0, 255, 0), 50); // Green
//colorWipe(strip.Color(0, 0, 255), 50); // Blue
//colorWipe(strip.Color(0, 0, 0, 255), 50); // White RGBW
// Send a theater pixel chase in…
//theaterChase(strip.Color(127, 127, 127), 50); // White
theaterChase(strip.Color(127, 0, 0), 50); // Red
//theaterChase(strip.Color(0, 0, 127), 50); // Blue
//rainbow(20);
rainbowCycle(2);
//theaterChaseRainbow(50);
strip.clear();
strip.show(); // Initialize all pixels to ‘off’
Rtc.Begin();
Rtc.Enable32kHzPin(false);
Rtc.SetSquareWavePin(DS3231SquareWavePin_ModeNone);
if (!Rtc.GetIsRunning())
{
Serial.println(“Rtc was not actively running, starting now”);
Rtc.SetIsRunning(true);
}
if (!Rtc.IsDateTimeValid())
{
// Common Cuases:
// 1) the battery on the device is low or even missing and the power line was disconnected
Serial.println(“Rtc lost confidence in the DateTime!”);
}
byte eechk = EEPROM.read(0);
if(eechk == 0xAA) { //Assume this is our config and not a fresh chip
dimmer = EEPROM.read(1);
hmark = EEPROM.read(2);
fader = EEPROM.read(3);
}
timeSync();
}
void calcTime(void) {
utc = now();
CE.toLocal(utc, &tcr);
ohour = hour(utc);
ominute = minute(utc);
if(osecond != second(utc)) {
osecond = second(utc);
lastMillis = millis();
if(ominute == 0 && osecond == 0) {
//Every hour
timeSync();
}
}
}
void addPixelColor(byte pixel, byte color, byte brightness) {
color *= 8;
uint32_t acolor = brightness;
acolor <<= color;
uint32_t ocolor = strip.getPixelColor(pixel);
ocolor |= acolor;
strip.setPixelColor(pixel, ocolor);
}
void drawClock(byte h, byte m, byte s) {
strip.clear();
addPixelColor(m, 1, dimmer);
if(hmark > 0) {
for(byte i = 0; i<12; i++) {
addPixelColor((5*i), 2, hmark);
}
}
h %= 12;
h *= 5;
h += (m/12);
addPixelColor(h, 2, dimmer);
// 0x RR GG BB
if(fader) {
byte dim_s1 = dimmer;
byte dim_s2 = 0;
byte px_s2 = s+1;
if(px_s2 >= 60) px_s2 = 0;
unsigned long curMillis = millis()-lastMillis;
if(curMillis < 250) {
dim_s2 = 0;
dim_s1 = dimmer;
}else{
dim_s2 = map(curMillis, 250, 1000, 0, dimmer);
dim_s1 = dimmer – map(curMillis, 250, 1000, 0, dimmer);
}
// Add blue low intensity dots for 12(0),3, 6 and 9 O’çlock to verify where the clock is positioned..
addPixelColor(15, 128, 10);
addPixelColor(30, 128, 10);
addPixelColor(45, 128, 10);
addPixelColor(0, 128, 40);
addPixelColor(s, 0, dim_s1);
addPixelColor(px_s2, 0, dim_s2);
}else{
addPixelColor(s, 0, dimmer);
}
// add a background color
// setBrightness(Serial.parseInt());
// uint16_t j;
// for(j=0; j<60; j++) { // 1 cycles of colors on wheel
// strip.setPixelColor(j, Wheel(((j * 256 / strip.numPixels()) + j) & 255));
// }
strip.show();
}
byte rounds = 0;
void loop() {
calcTime();
if(rounds++ > 100) {
Serial.print(ohour);
Serial.print(“:”);
Serial.print(ominute);
Serial.print(“:”);
Serial.print(osecond);
Serial.println(“(C)JG-2020”);
rounds = 0;
}
//rainbow(21);
if (osecond == 59){theaterChase(strip.Color(0, 0, 127), 40); }// Blue; }
//if (ominute == 59 AND osecond == 59){theaterChase(strip.Color(0, 127, 0), 50); }// Green}
//if (ohour == 11 AND ominute == 59 AND osecond == 59){theaterChase(strip.Color(127, 127, 0), 50); }// Green}
else {drawClock(ohour,ominute,osecond);}
delay(10);
chkSer();
}
void timeSync(void) {
RtcDateTime dt = Rtc.GetDateTime();
setTime(dt.Hour(),dt.Minute(),dt.Second(),dt.Day(),dt.Month(),dt.Year());
Serial.print(“Synced to: “);
Serial.print(dt.Year());
Serial.print(“-“);
Serial.print(dt.Month());
Serial.print(“-“);
Serial.print(dt.Day());
Serial.print(“-“);
Serial.print(dt.Hour());
Serial.print(“-“);
Serial.print(dt.Minute());
Serial.print(“-“);
Serial.println(dt.Second());
}
void timeSave(void) {
utc = now();
RtcDateTime store = RtcDateTime(year(utc), month(utc), day(utc), hour(utc), minute(utc), second(utc));
Rtc.SetDateTime(store);
Serial.print(“Synced to: “);
Serial.print(year(utc));
Serial.print(“-“);
Serial.print(month(utc));
Serial.print(“-“);
Serial.print(day(utc));
Serial.print(“-“);
Serial.print(hour(utc));
Serial.print(“-“);
Serial.print(minute(utc));
Serial.print(“-“);
Serial.println(second(utc));
}
void setBrightness(byte brightness) {
dimmer = brightness;
}
void chkSer(void) {
unsigned int iy;
byte im,id,iH,iM,iS;
if(!Serial.available()) return;
switch(Serial.read()) {
case ‘b’:
setBrightness(Serial.parseInt());
Serial.print(F(“Brightness changed to: “));
Serial.println(dimmer);
EEPROM.put(0, 0xAA);
EEPROM.put(1, dimmer);
break;
case ‘t’:
iy = Serial.parseInt();
im = Serial.parseInt();
id = Serial.parseInt();
iH = Serial.parseInt();
iM = Serial.parseInt();
iS = Serial.parseInt();
setTime(iH,iM,iS,id,im,iy);
Serial.println(F(“System time changed”));
break;
case ‘f’:
fader = false;
EEPROM.put(0, 0xAA);
EEPROM.put(3, 0);
Serial.println(F(“Fader off”));
break;
case ‘F’:
fader = true;
EEPROM.put(0, 0xAA);
EEPROM.put(3, 1);
Serial.println(F(“Fader on”));
break;
case ‘m’:
hmark = Serial.parseInt();
EEPROM.put(0, 0xAA);
EEPROM.put(2, hmark);
Serial.println(F(“HMark changed”));
break;
case ‘s’:
timeSync();
Serial.println(F(“Synced RTC to System”));
break;
case ‘S’:
timeSave();
Serial.println(F(“Synced System to RTC”));
break;
default:
Serial.println(‘?’);
}
}
// Fill the dots one after the other with a color
void colorWipe(uint32_t c, uint8_t wait) {
for(uint16_t i=0; i<strip.numPixels(); i++) {
strip.setPixelColor(i, c);
strip.show();
delay(wait);
}
}
void rainbow(uint8_t wait) {
uint16_t i, j;
for(j=0; j<256; j++) {
for(i=0; i<strip.numPixels(); i++) {
strip.setPixelColor(i, Wheel((i+j) & 25));//255
}
strip.show();
delay(wait);
}
}
// Slightly different, this makes the rainbow equally distributed throughout
void rainbowCycle(uint8_t wait) {
uint16_t i, j;
for(j=0; j<256*5; j++) { // 5 cycles of all colors on wheel
for(i=0; i< strip.numPixels(); i++) {
strip.setPixelColor(i, Wheel(((i * 256 / strip.numPixels()) + j) & 255));
}
strip.show();
delay(wait);
}
}
//Theatre-style crawling lights.
void theaterChase(uint32_t c, uint8_t wait) {
for (int j=0; j<4; j++) { //do 4 cycles of chasing
for (int q=0; q < 3; q++) {
for (uint16_t i=0; i < strip.numPixels(); i=i+3) {
strip.setPixelColor(i+q, c); //turn every third pixel on
}
strip.show();
delay(wait);
for (uint16_t i=0; i < strip.numPixels(); i=i+3) {
strip.setPixelColor(i+q, 0); //turn every third pixel off
}
}
}
}
//Theatre-style crawling lights with rainbow effect
void theaterChaseRainbow(uint8_t wait) {
for (int j=0; j < 256; j++) { // cycle all 256 colors in the wheel
for (int q=0; q < 3; q++) {
for (uint16_t i=0; i < strip.numPixels(); i=i+3) {
strip.setPixelColor(i+q, Wheel( (i+j) % 255)); //turn every third pixel on
}
strip.show();
delay(wait);
for (uint16_t i=0; i < strip.numPixels(); i=i+3) {
strip.setPixelColor(i+q, 0); //turn every third pixel off
}
}
}
}
// Input a value 0 to 255 to get a color value.
// The colours are a transition r – g – b – back to r.
uint32_t Wheel(byte WheelPos) {
WheelPos = 255 – WheelPos;
if(WheelPos < 85) {
return strip.Color(255 – WheelPos * 3, 0, WheelPos * 3);
}
if(WheelPos < 170) {
WheelPos -= 85;
return strip.Color(0, WheelPos * 3, 255 – WheelPos * 3);
}
WheelPos -= 170;
return strip.Color(WheelPos * 3, 255 – WheelPos * 3, 0);
}