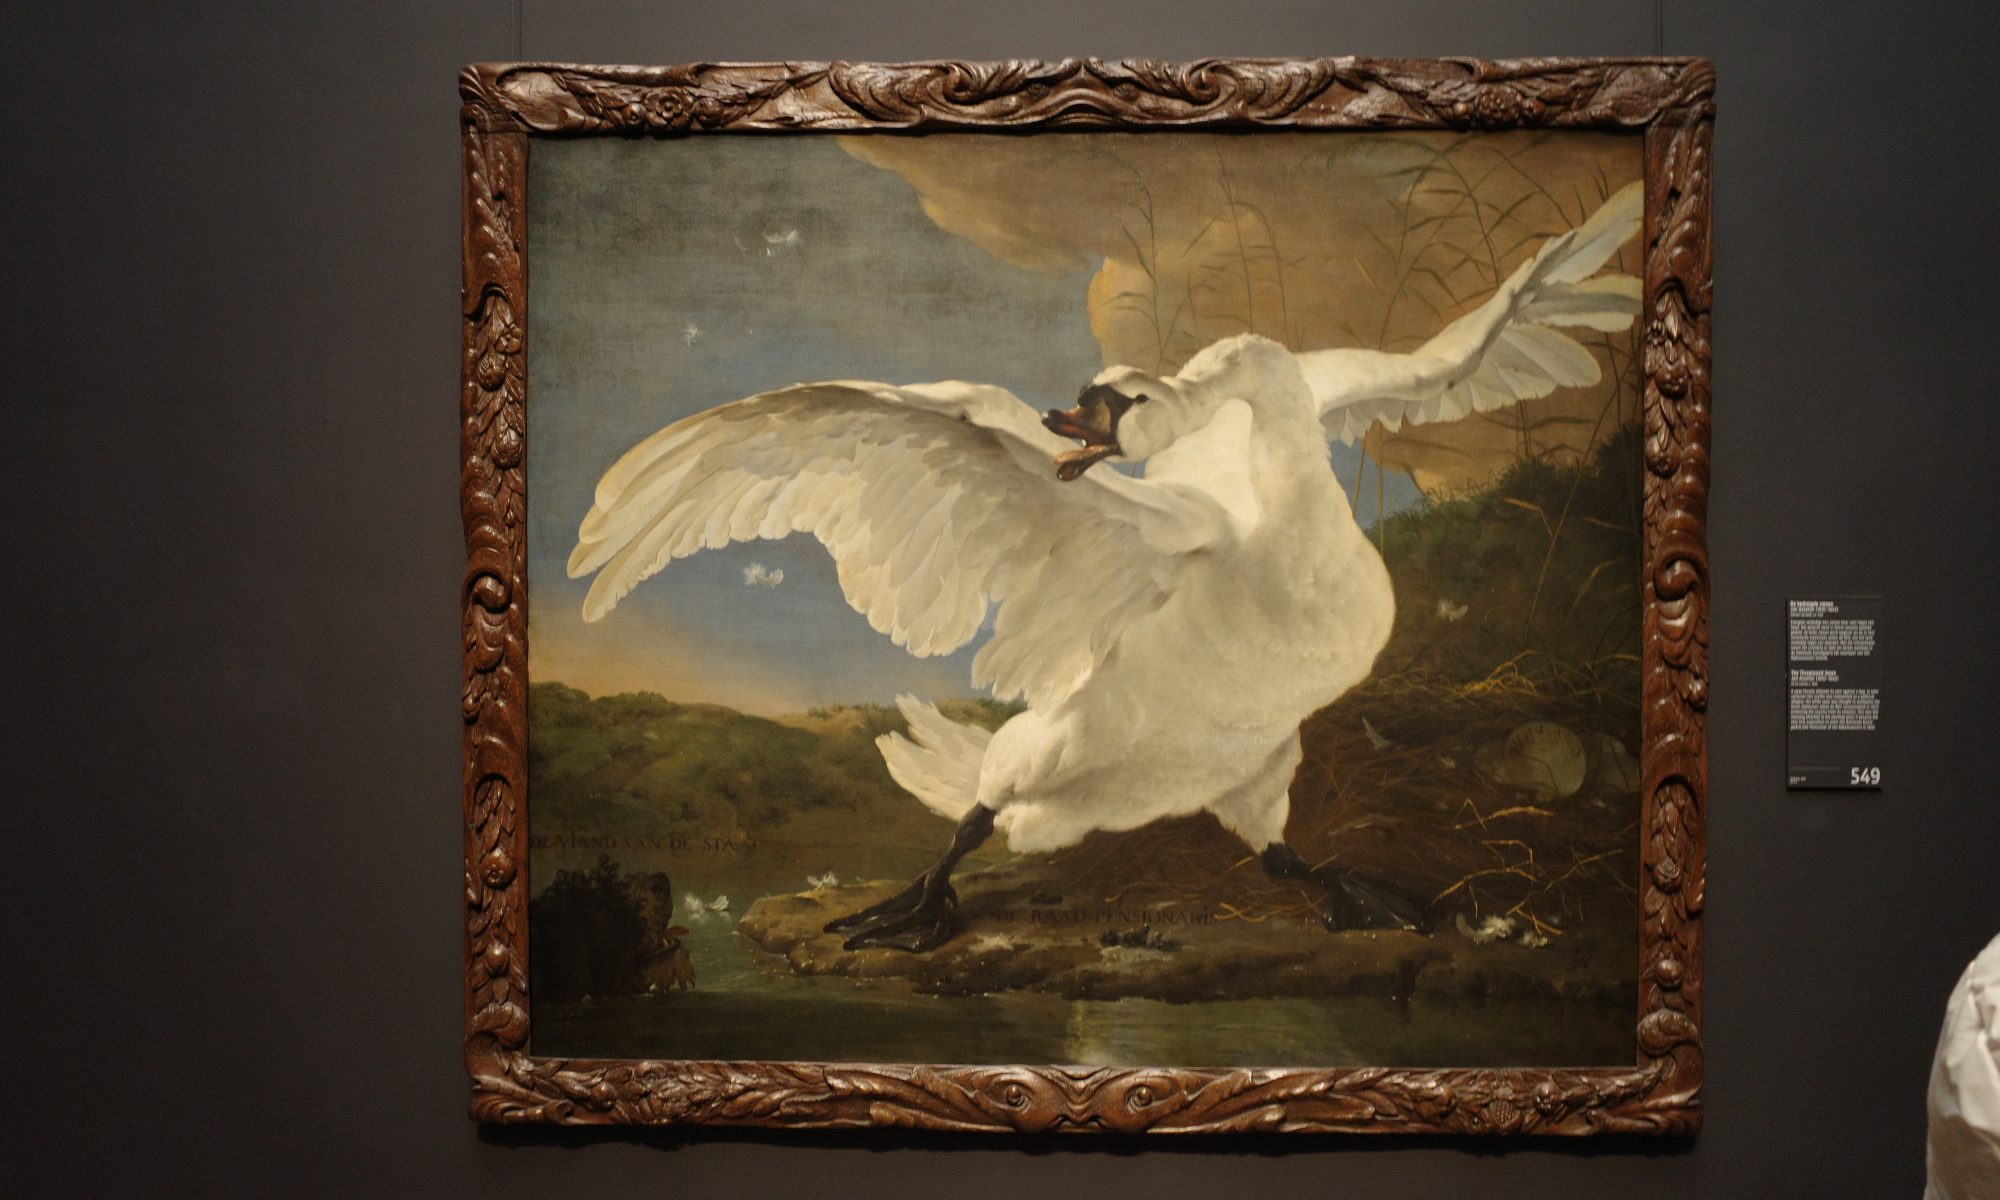
Rijksmuseum Amsterdam, September 8th 2022

3D modeling, scanning and printing
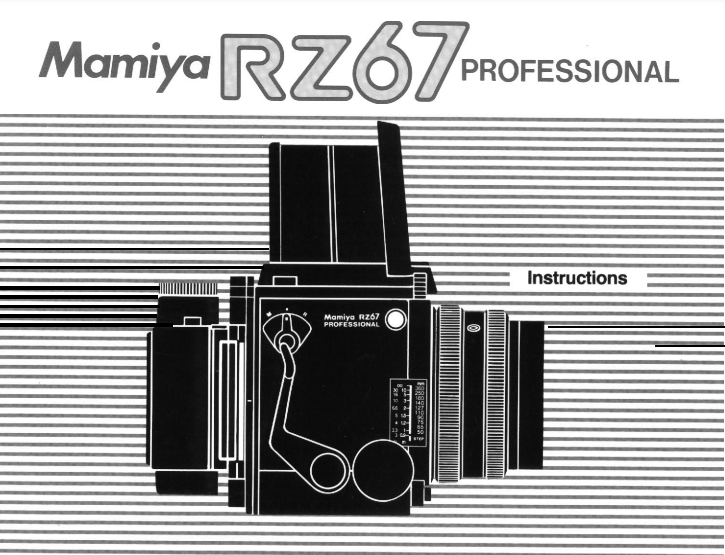
RZ67_Pro_v4 original user manual
Mamiya-RZ67-pro- repair_manual
A complete Mamiya RZ67 Pierre-Gilles guide to the Mamiya RZ67 Pro part one deep system overview
A complete guide to the Mamiya RZ67 part two film holder system
A complete guide to the Mamiya RZ67 part 3 lenses filters and accessories
A complete guide to the Mamiya RZ67 part 4 maintenance and miscellaneous accessories
A complete guide to the Mamiya RZ67 part 5 conclusion and Pierre Gilles’s personal stories
Mamiya_RZ67_AE_Prism_Finder_II_Product_Sheet
Mamiya_RZ67_AE_Prism_Finder_Product_Sheet
Mamiya RZ67 Pro II Electrical Contact Cover
Mamiya RZ67 Teleconverter 1.4x
Mamiya_RZ67_140mm_Macro_MLA_Product_Sheet
Mamiya_RZ67PRO IID_Instructions
Mamiya RZ67 Pro II Instructions
mamiya_rz67_250_apo_lens_repair_diagram
mamiya_rz67_37mm_fisheye_lens_repair_diagram
Mamiya-RZ67-repair-manual-part1
Mamiya-RZ67-repair-manual-part2
Mamiya_RZ67_Z_Interchangeable_Lenses_Product_Sheet
Pierre Gilles’s emulsive pages
Description Leaf_Raw_Converter_1_2_6 PDF only
Leaf_Raw_Converter_1_2_6_installer_PC ZIP_file
STL files RZ67 CAPS, and a lot more for 3D printing
My Mamiya RZ67 Professional received a digital back recently.
After a long search, I decided to get a V-mount digital back (originally for Hasselblad, old version cameras) version since an original Mamiya adapter plate to a Mamiya 645 mount is extremely expensive.
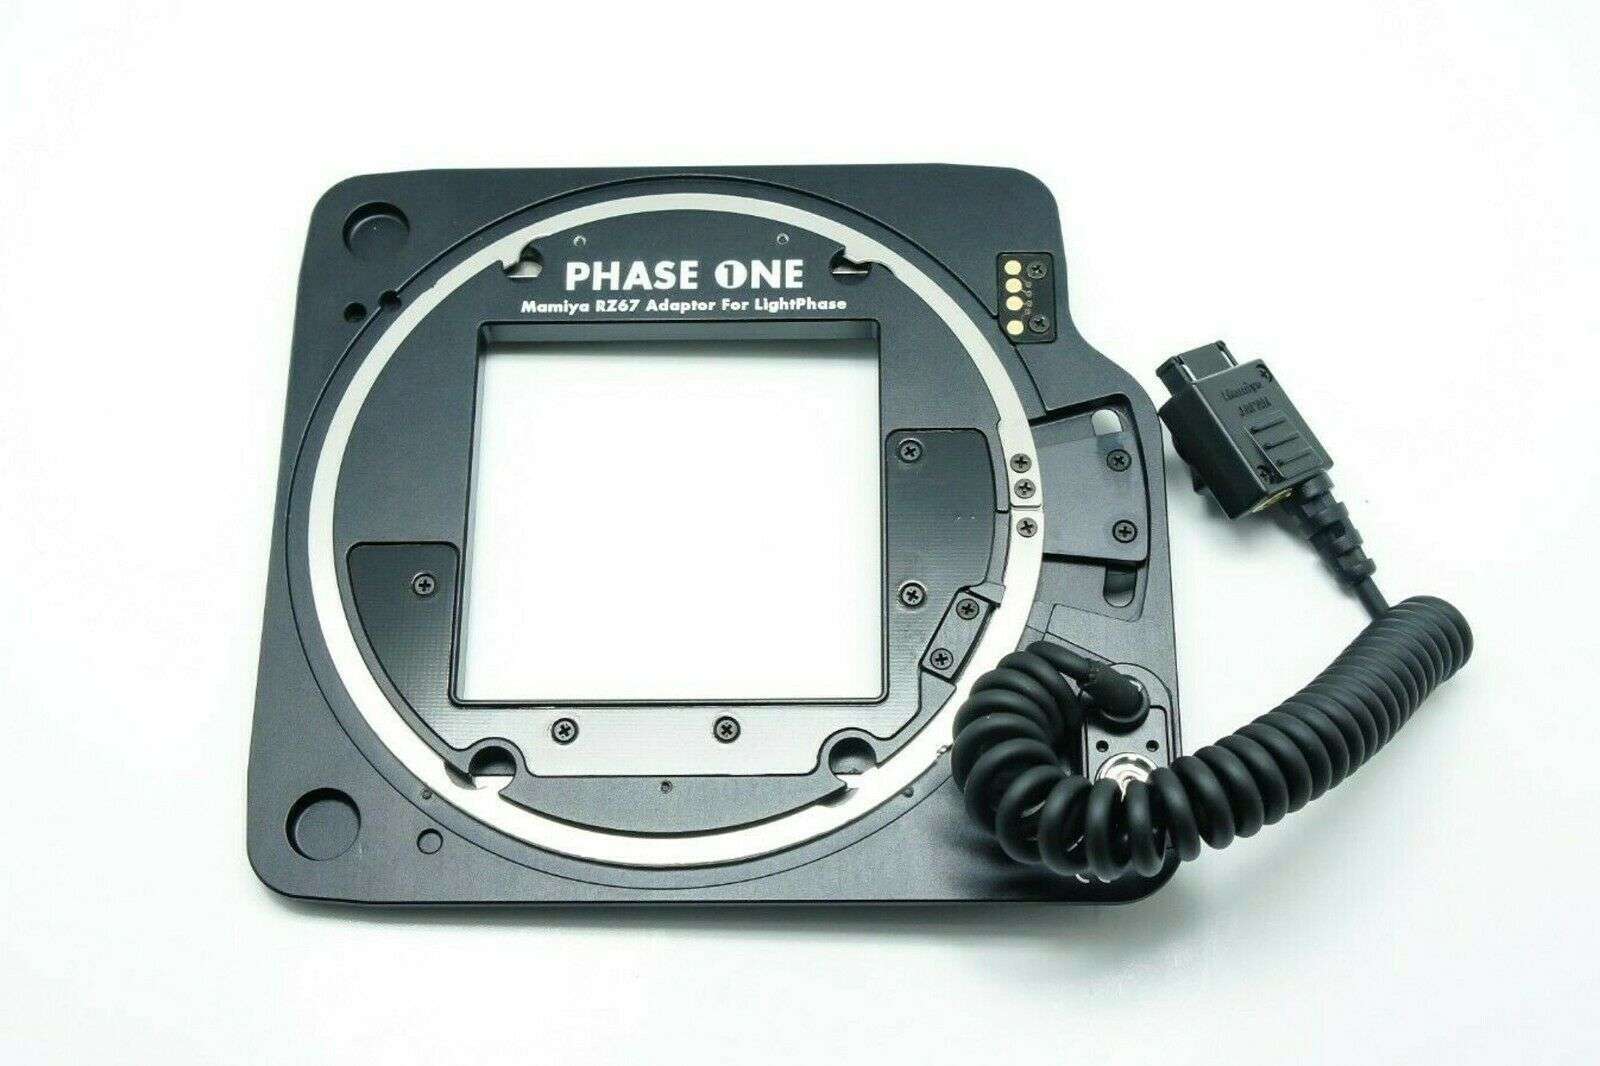
And an adapter for or a Hasselblad more poular H-mount is not very well supported, electrically. I know that shutter release will work BUT the Phase One adapter plate that connects the Mamiya RZ67 Phase 1 Professional to the V-mount digital back is around 300 US Dollars and was available on eBay .
It took me some time to get everything working, since I did not have a P-P cable to connect the 2.5mm entry of the digital back to the shutter contact on the camera or lens. This is required to get the digital back triggered at the moment that the shutter opens.
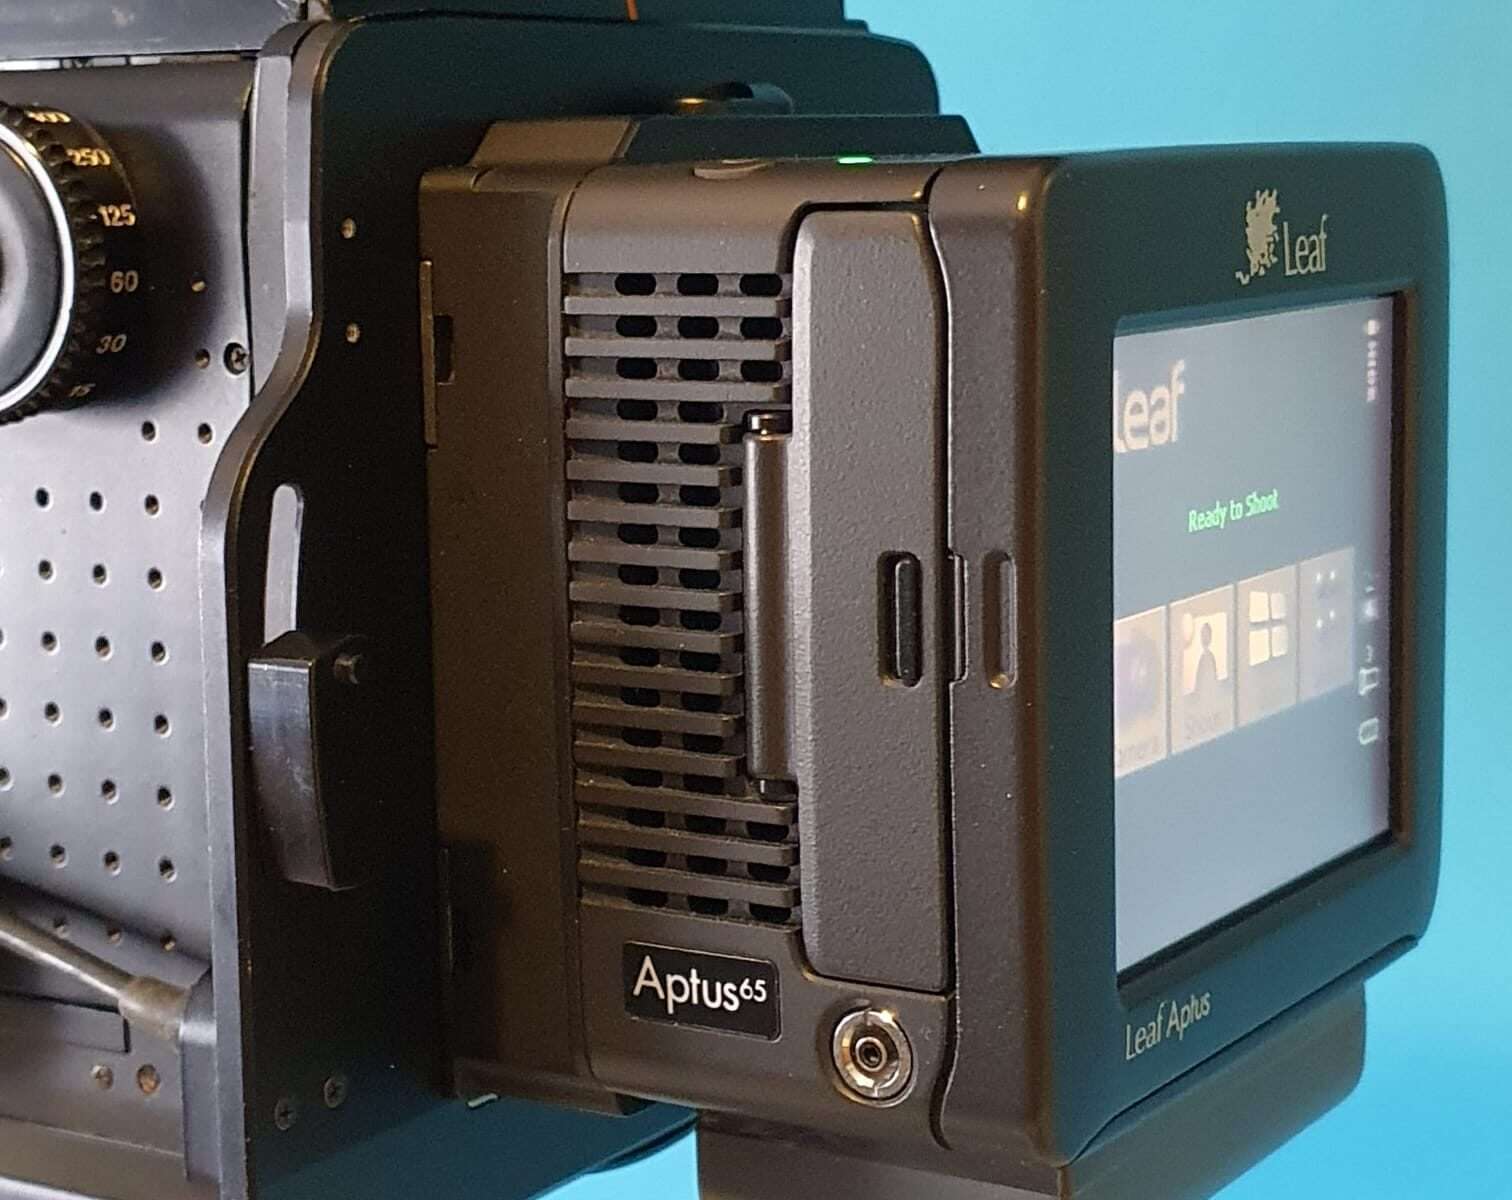
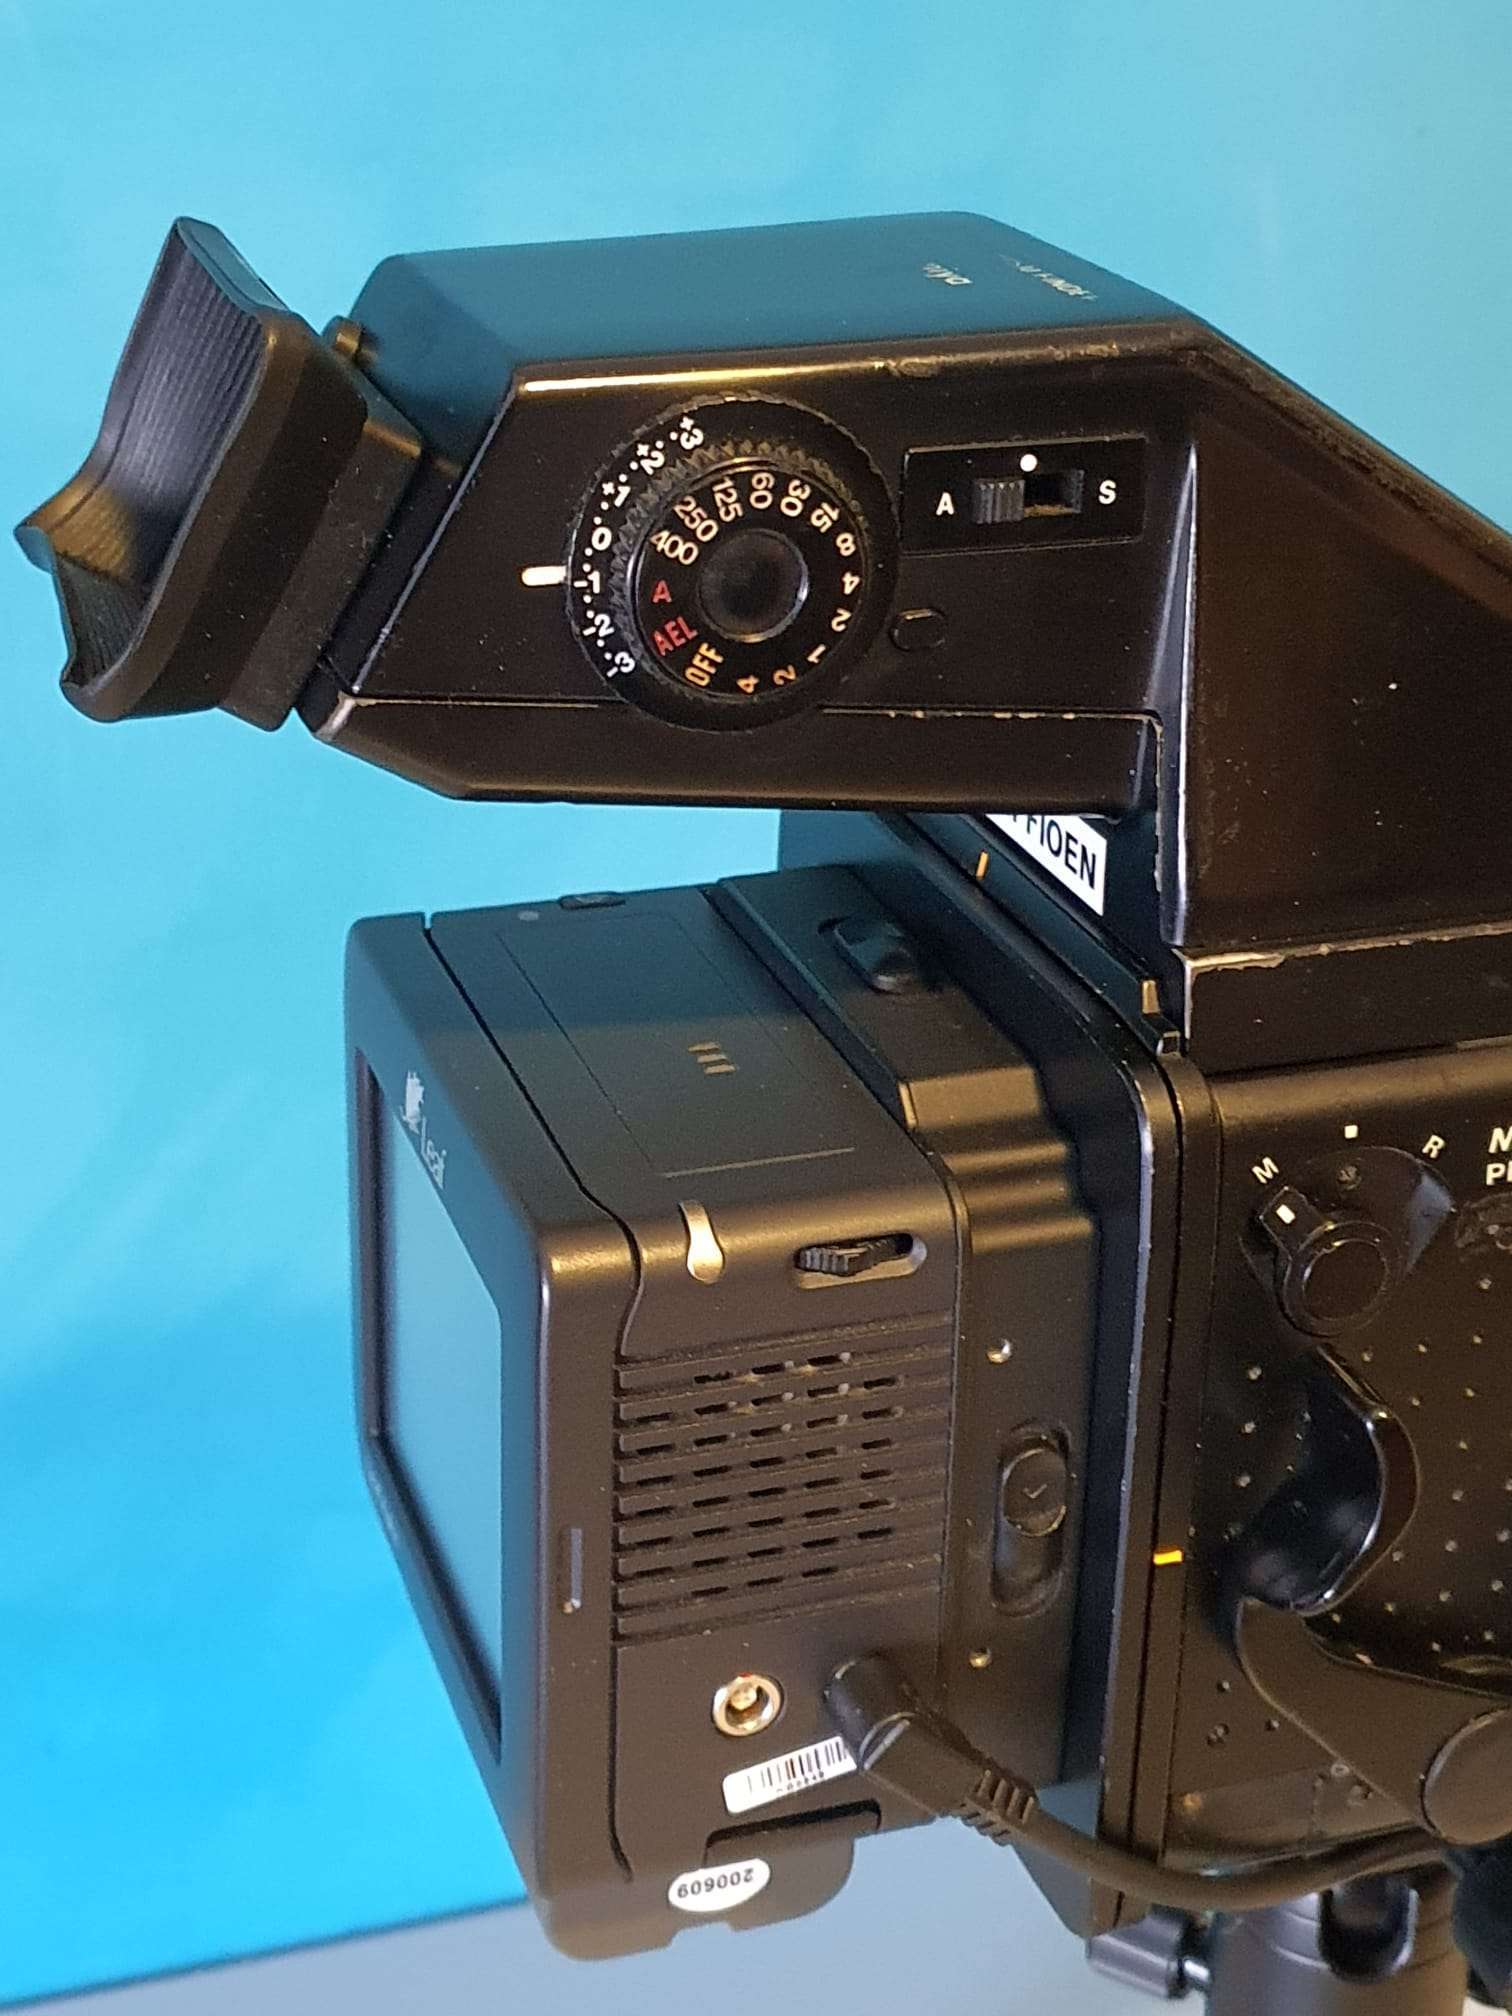
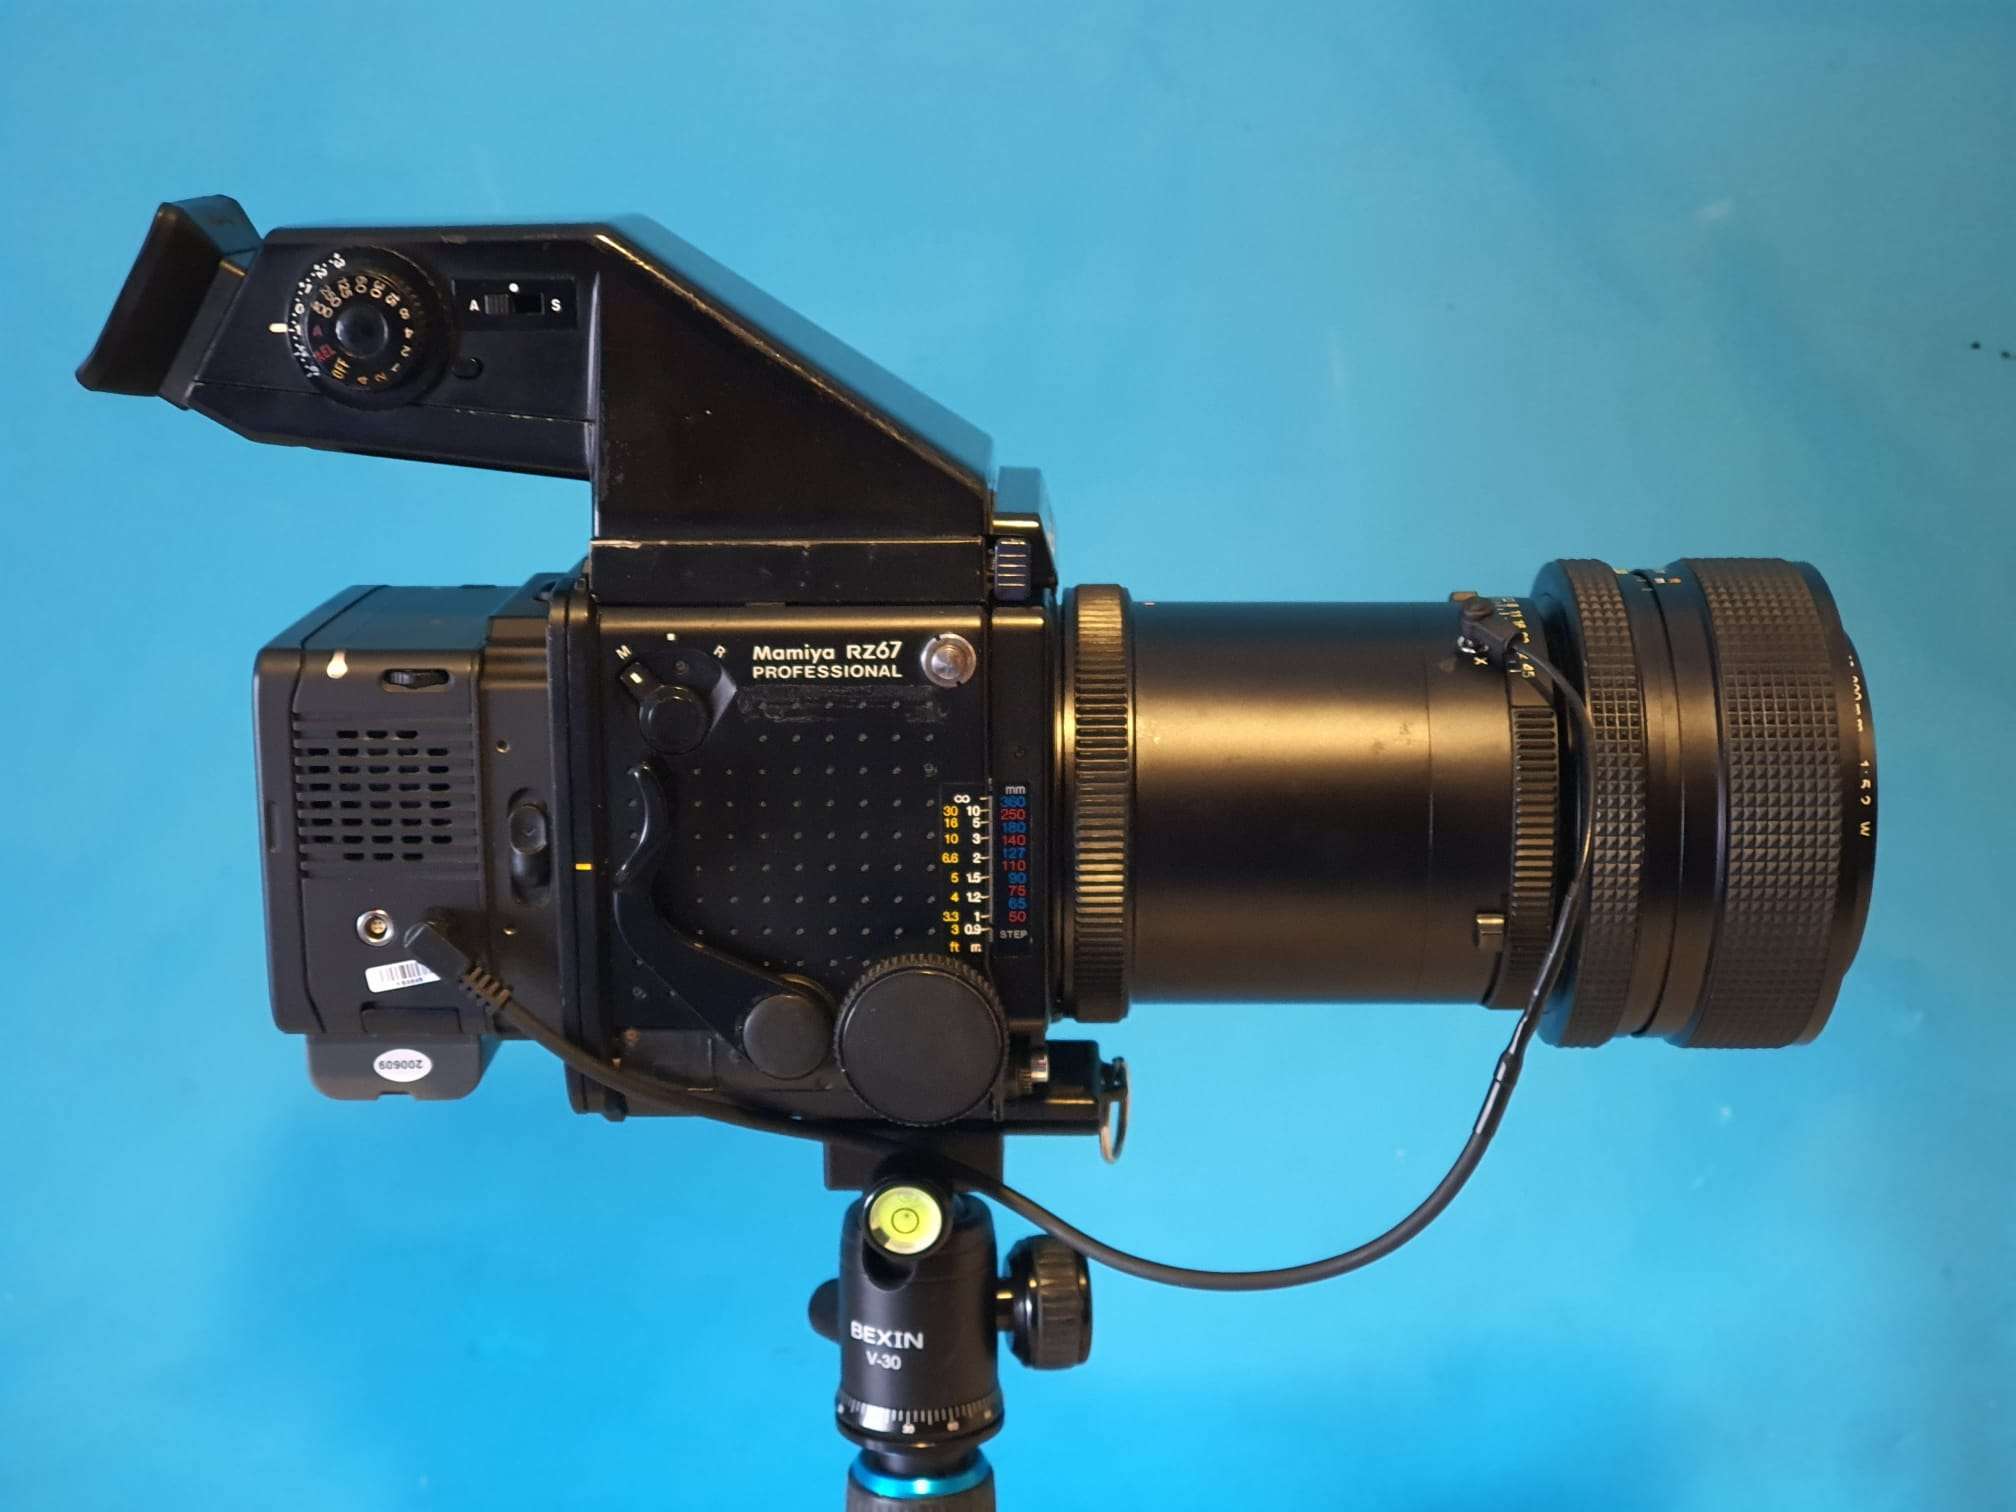
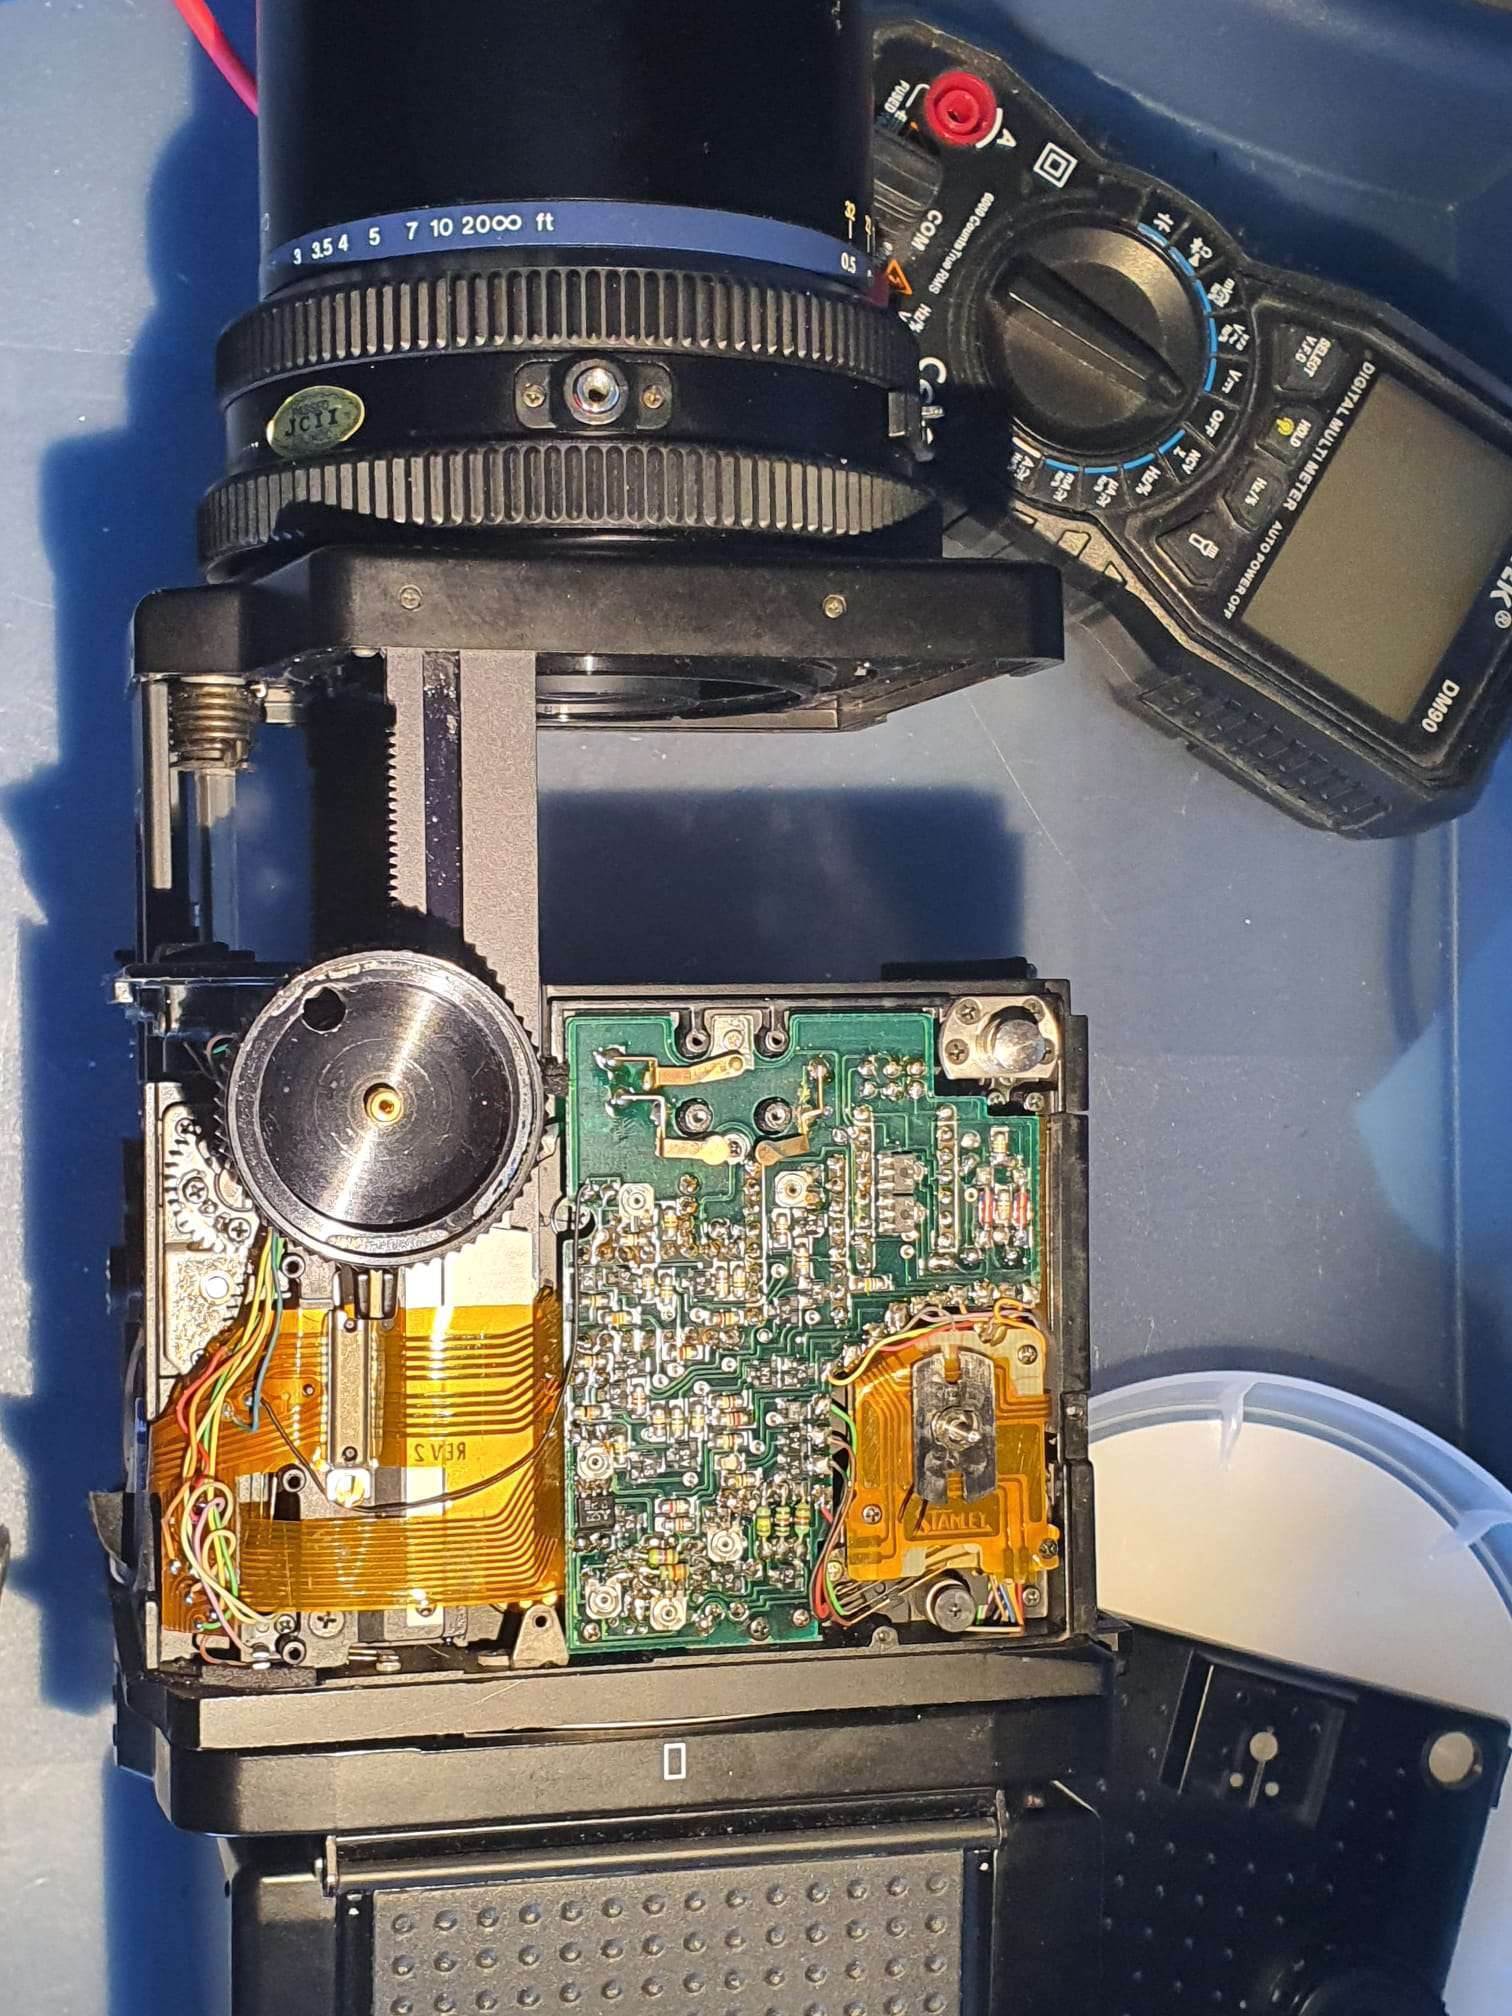
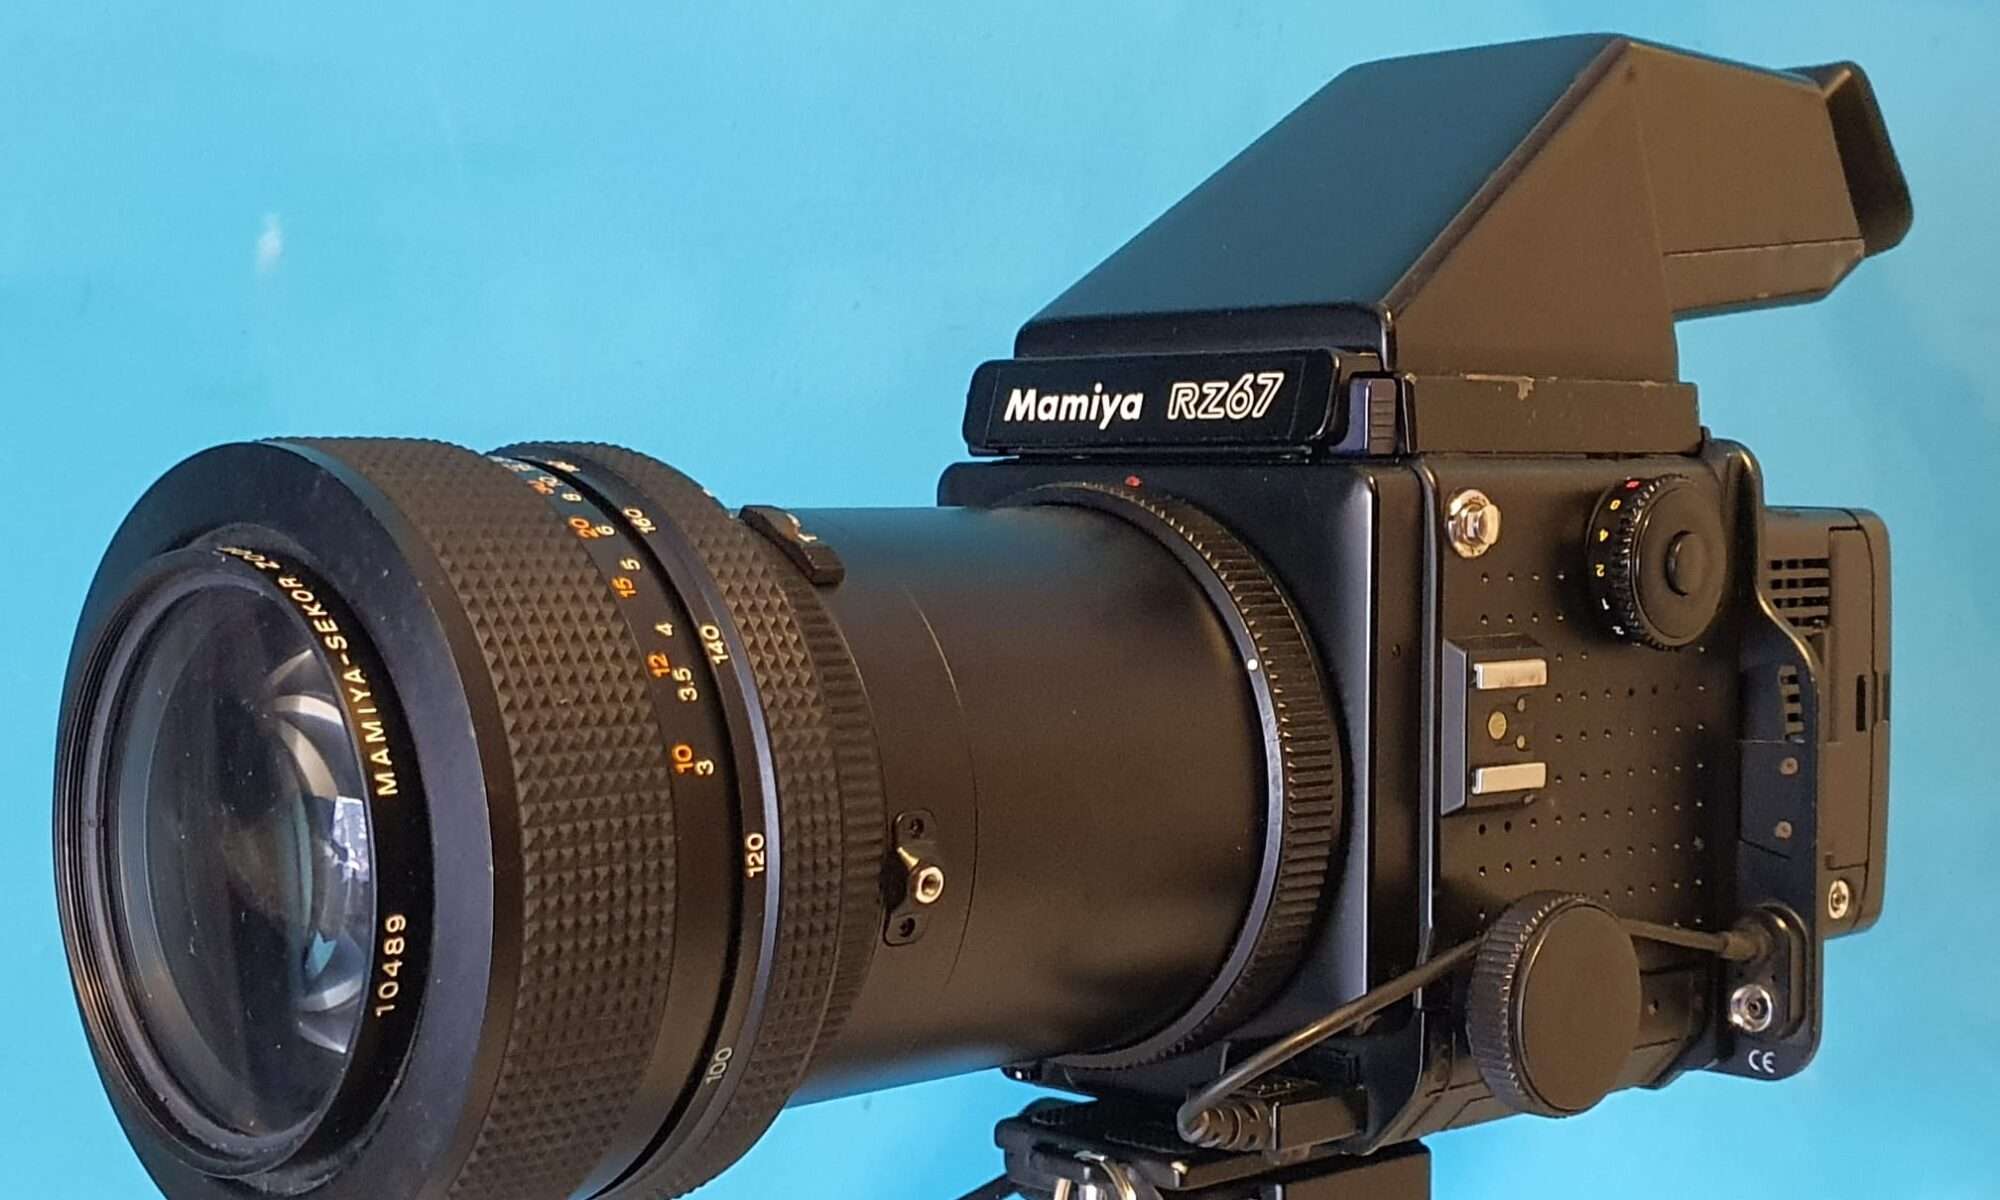
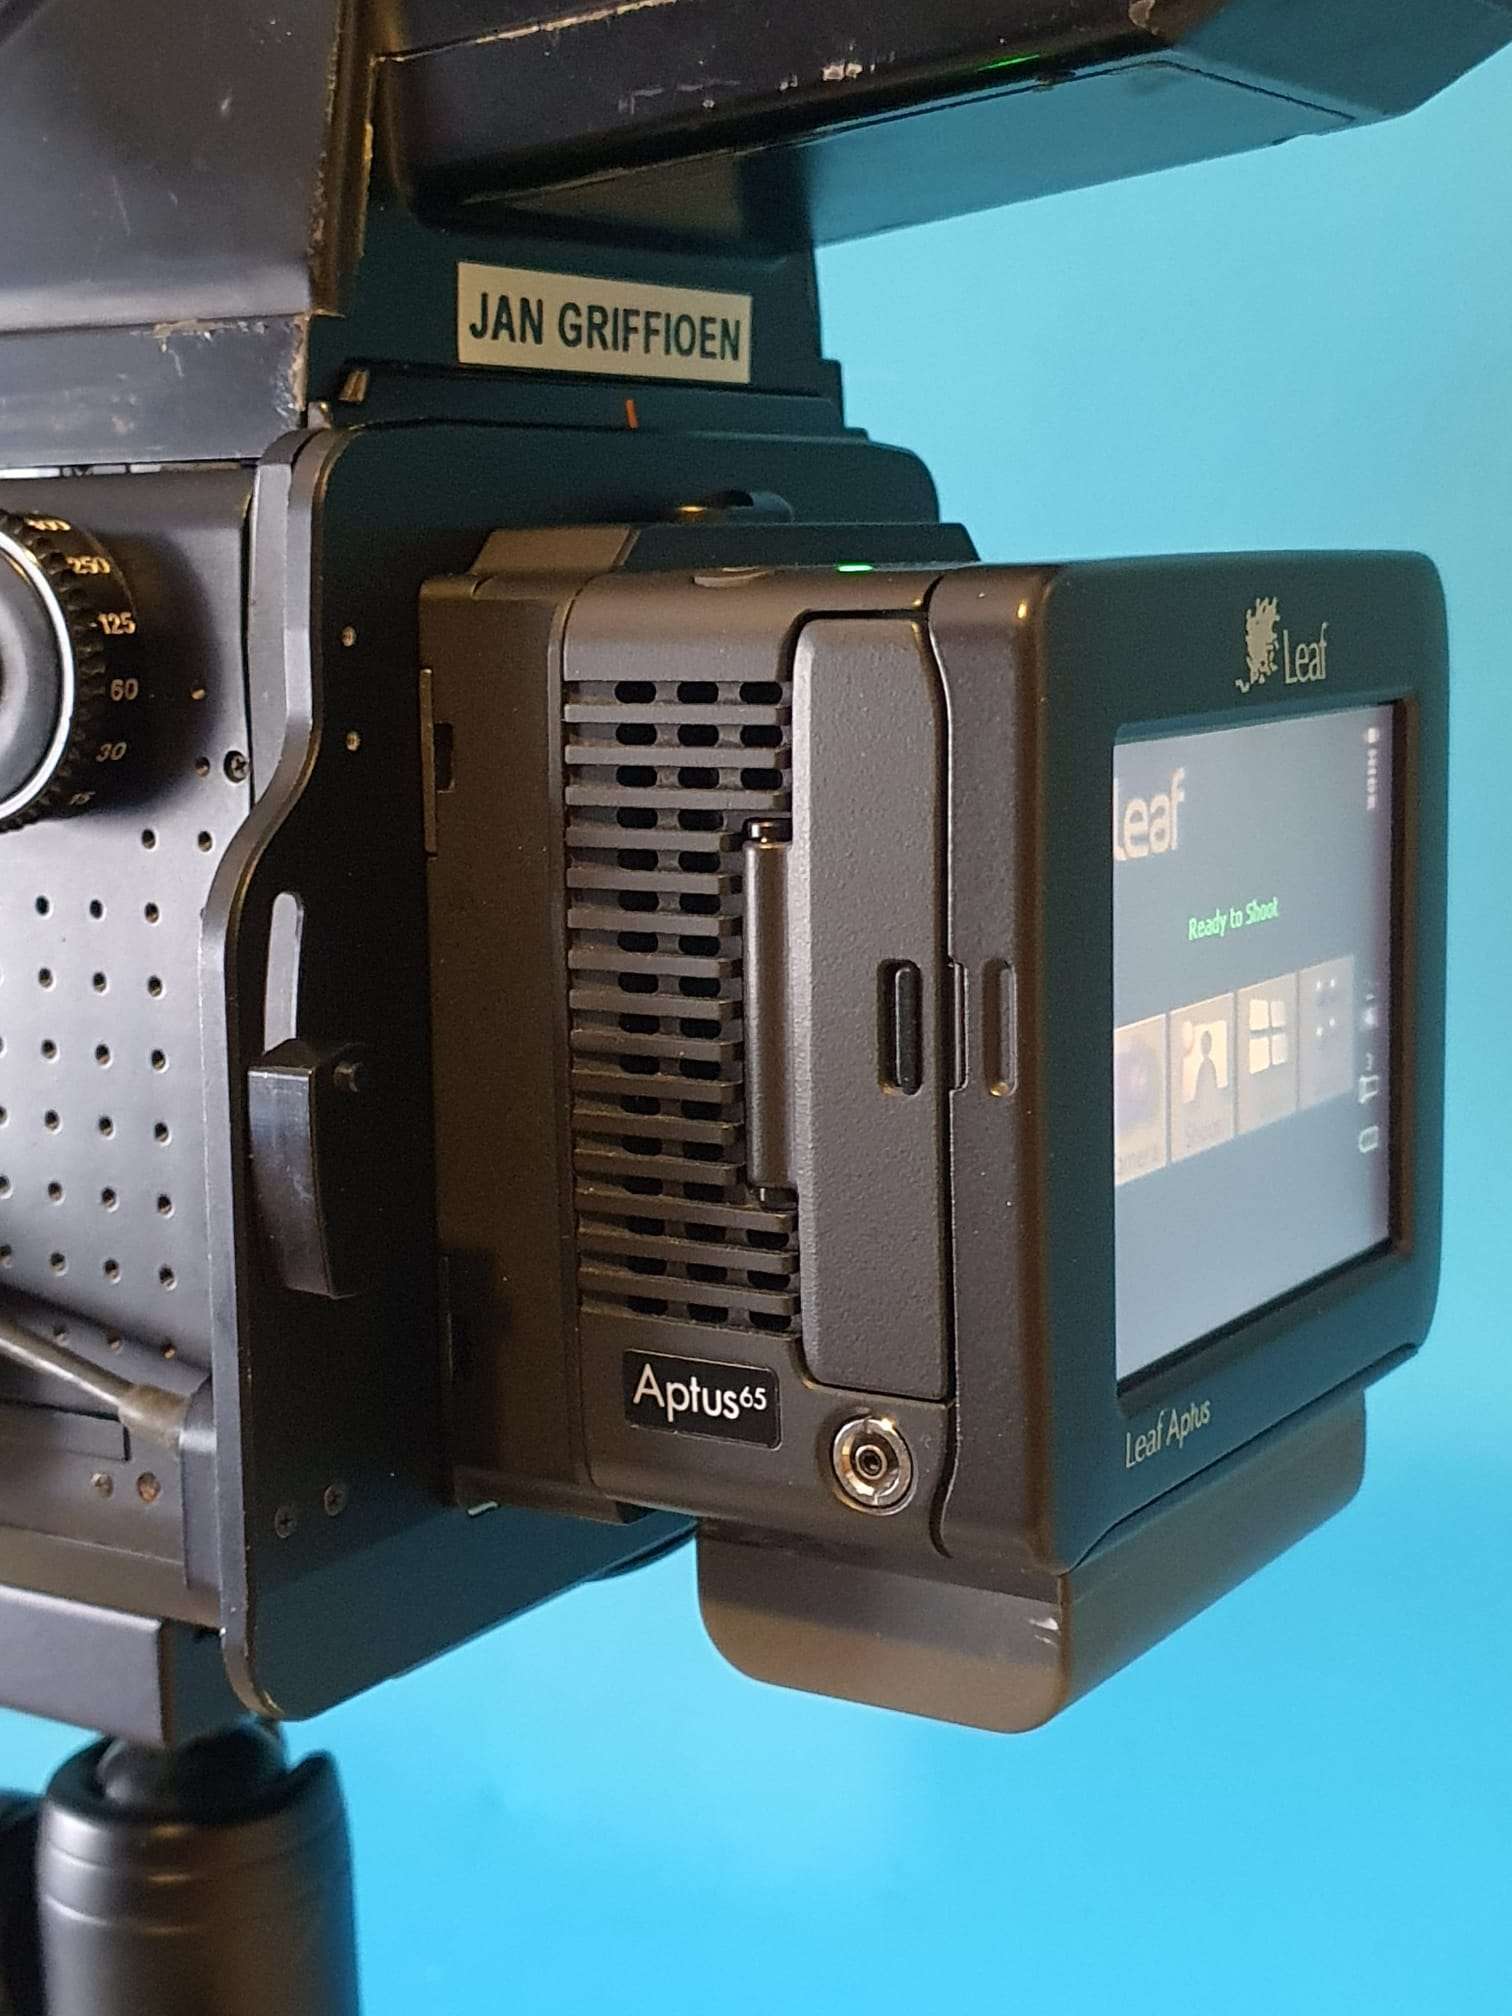
The setup looks like this:
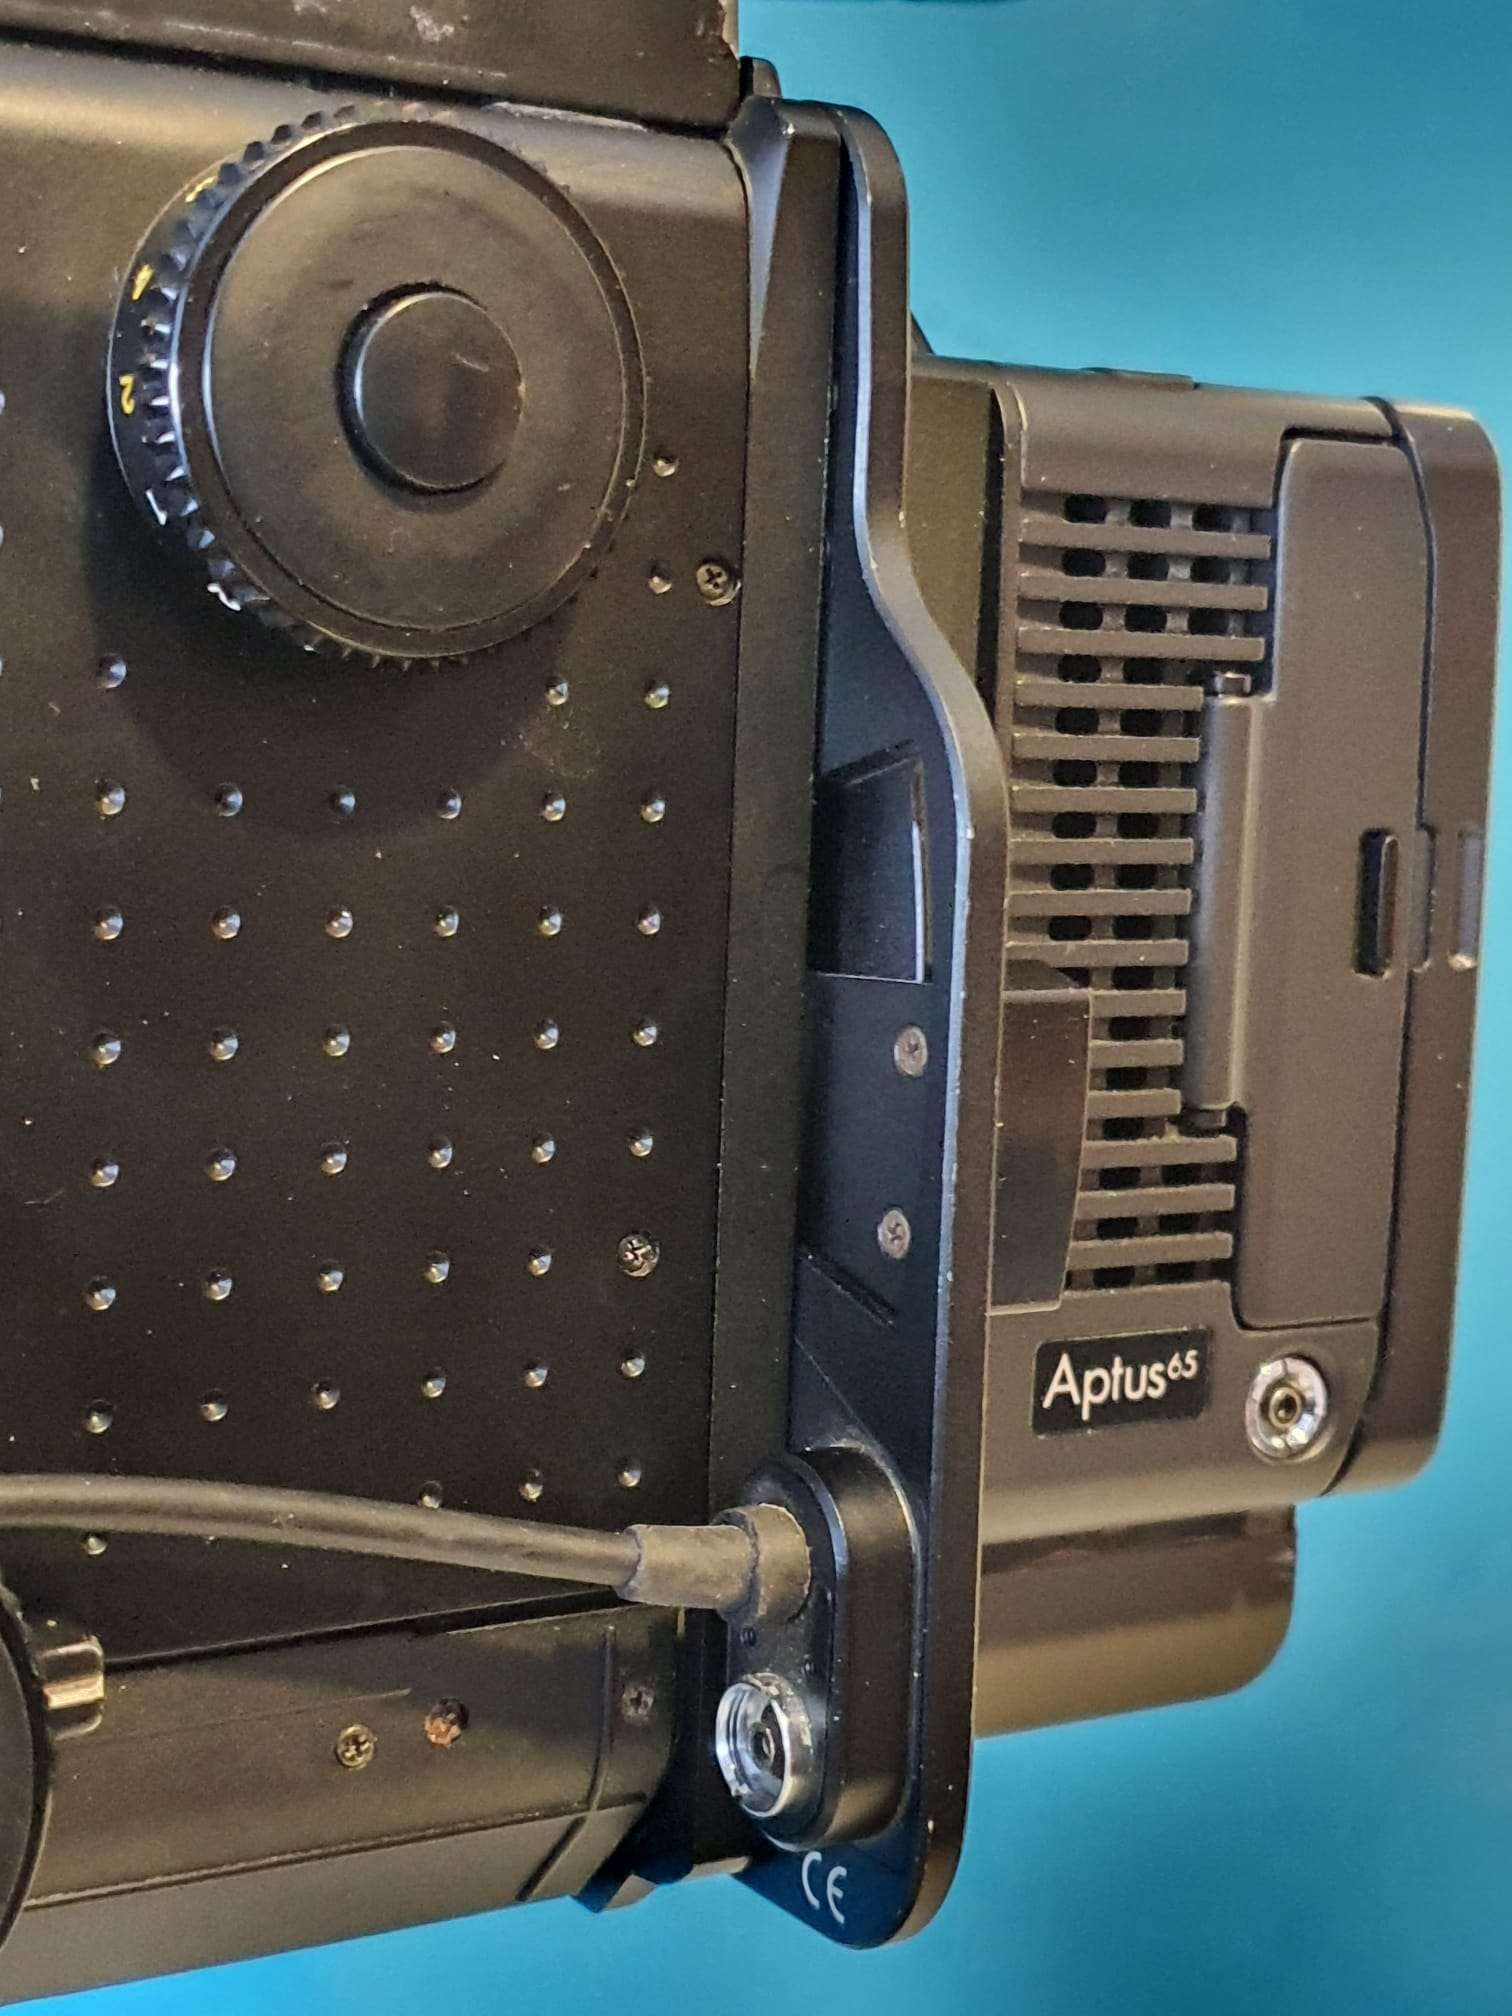

The aptus65 works with standard samsung batteries of which I ordered a couple of the largest possible.
I also bought me a 64GB Compact Flash card, which works much better than the CF to SD adapter I used before.
Getting the pictures onto my PC works easy: put the card in the CF reader , copy the files. Then the tricky part begins: You must transform the imported files with a decoding program that is fortunately downloadable on the mamiya leaf website, but it is a bit hard to find.
Then, import the required app for windows to edit the .MOS files in the regular image viewer, save a copy as jpg and you’re done.
It is also possible to use lightroom, or any other good imaging software package.
I also have a firewire cable setup that I used before for my digital8 camera’s. This also works for the Aptus65, but I don’t expect to ever use this.
Firewire is btw the only way to power the Aptus65, if you don’t wanna use the batteries. But you will need a very good power source on the USB-C connector to get this to work.
The images are very good, as to be expected. the 28Mpix sensor is more tha adequate to get good results. BUT it is a pity that the sensor is only 44×33 mm while the POV of theRZ67 is 7×6 cm. This also means that you get only half the image (more or less) of what you see in the viewfinders’s image.
I printed a mask for the viewfinder at a crop of 1.3 vs. a 645’s normal view so the view resembles the taken pictures
That is exactly what is needed here, since the Aptus leaf65 has a crop of 1.3 when it would be used on a 645DF camera (which this V-mount version cannot, obviously do) with an (almost) 60x45mm medium format.
Which in fact is quite a bit less (53.7×40.2) in real image size, see the below table.
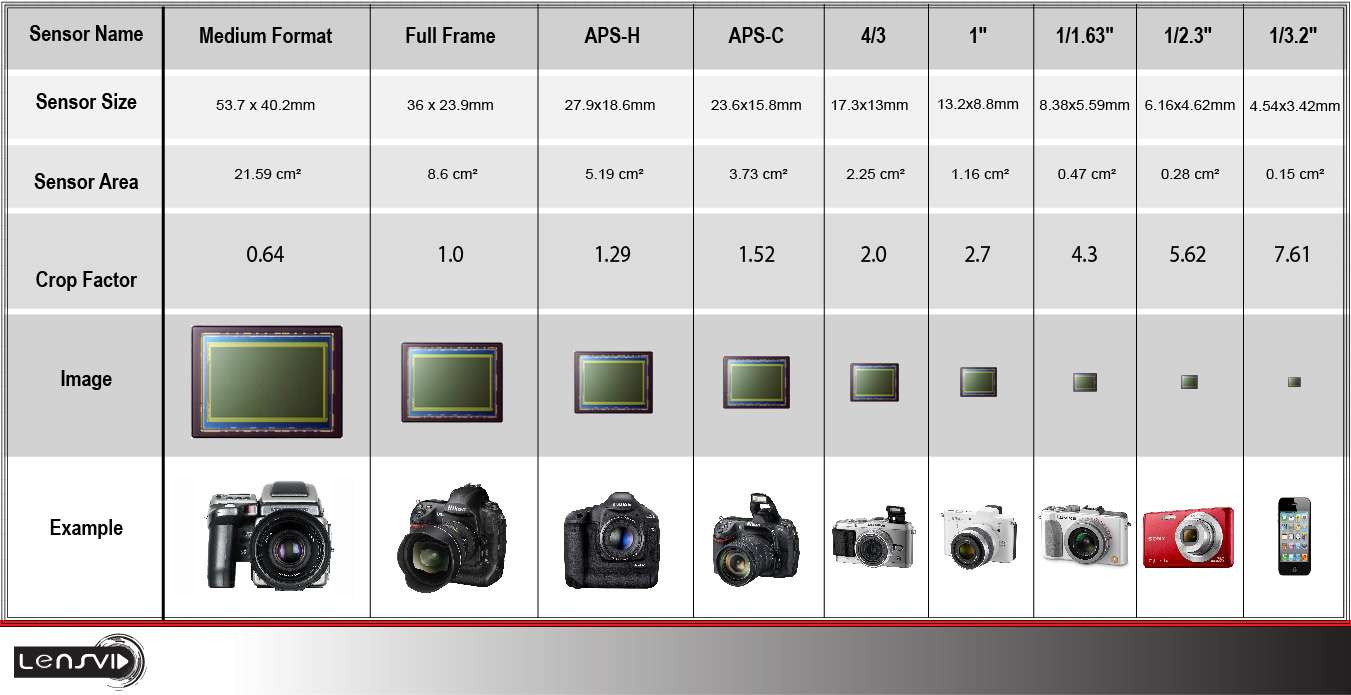
44×33 relates to 53.7×40.2 as a crop of 1.3, as the seller states in the folder of the Aptus 65.
Negatives: Well, the rotating back does not work with the Phase One adapter plate, of course. And I still have some cleaning to do on most of my lenses before I attempt to do any serious shooting outside. And the entire setup gets quite heavy for outside use.
Positives: It helps me a lot to work and learn with the RZ67, using the digital back. I can shoot and shoot on, experimenting with light settings, flash, counterlights and so on without destroying any real film.
My intent is, though, to use the RZ67 with normal film and the full 7×6 capabilities.
And use it for architecture, mostly in Amsterdam.
I already have quite a lot of pictures, taken with my Sony A77RII &35 mm pro-lens and with my old Panasonic dual GX8 setup, but I am very much looking forward to get some great shots with the RX67 on large(r) format film in B&W!
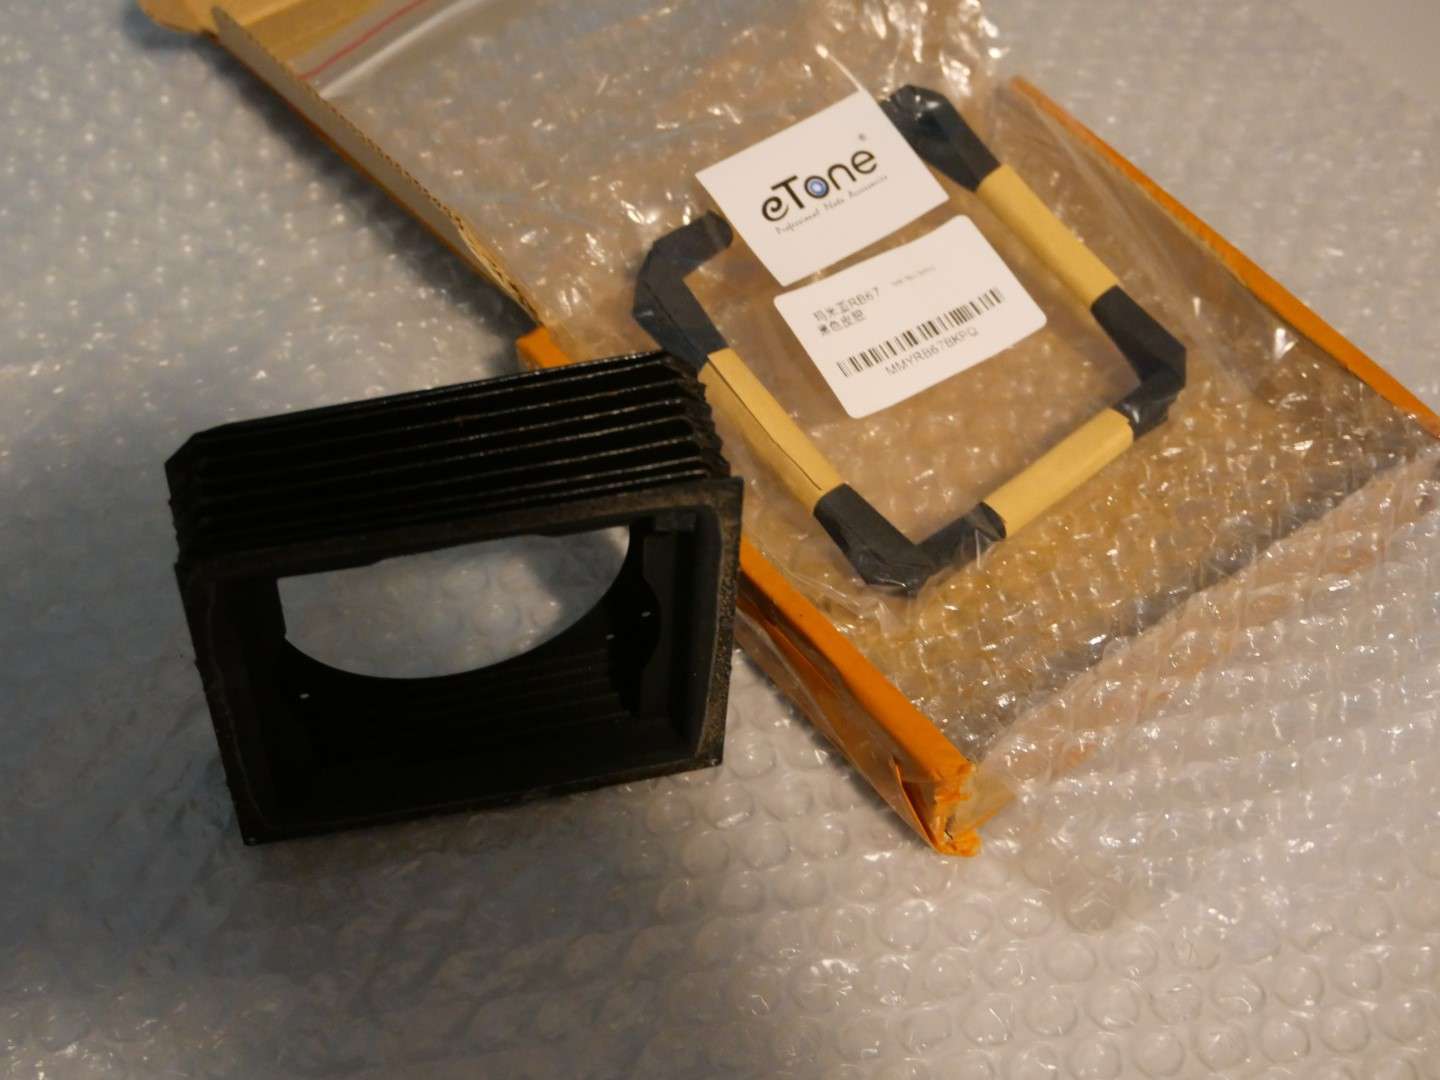
Replacing the bellows of the RZ67 camera can be broken up in two parts:
1) The actual replacing as taking it out and in again, where the steel plates that hold the bellows are taken out and in with the actual bellows attached to this. this procedure is described in the repair manual.n You will need a very long X screwdriver for this, with a small nose. And some patience, good lighting and (in my case) additional glasses. And- if you replace the internal cloth part of the bellows: You will require some special light-blocking foam when mounting the bellows back in again.
2)The more complex replacement is taking the in-between cloth part of the bellows off the steel plating and replacing this with a new bellows unit, as you can buy on ebay/ aliexpress et cetera. That’s what I will describe and show you in this post.

Steps to take:
Remove the cloth from upper-and lower part with use of dessicant, and tricloorethane or any other solvent that does not affect the paint on the steel plating. ‘debonding might do the trick here.
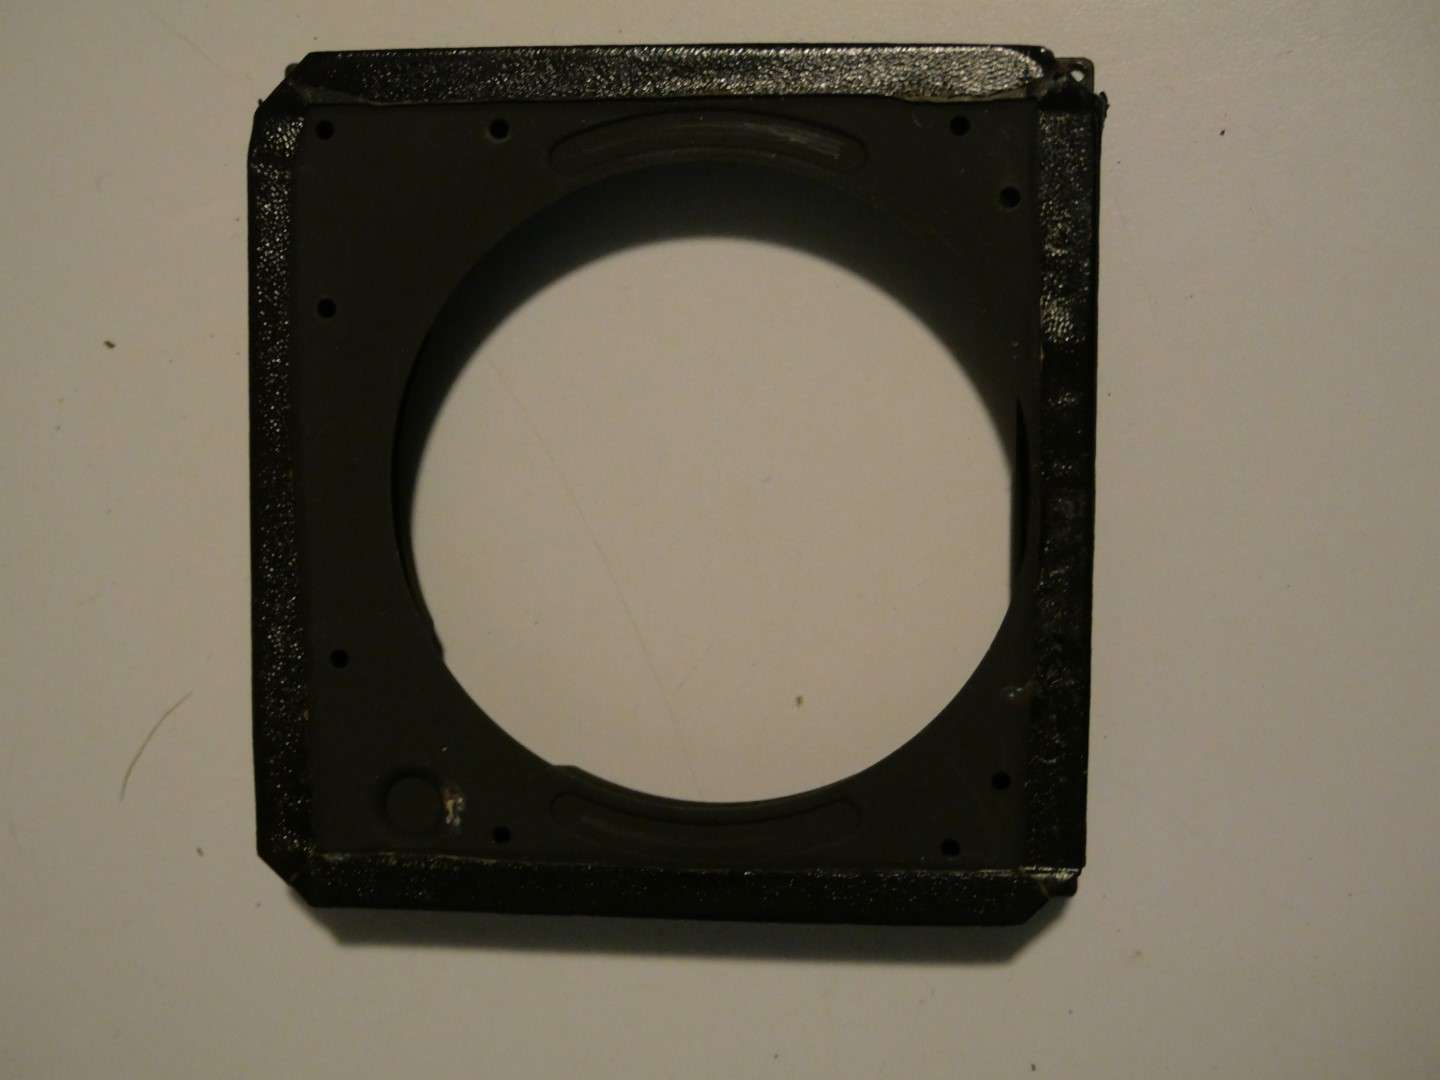
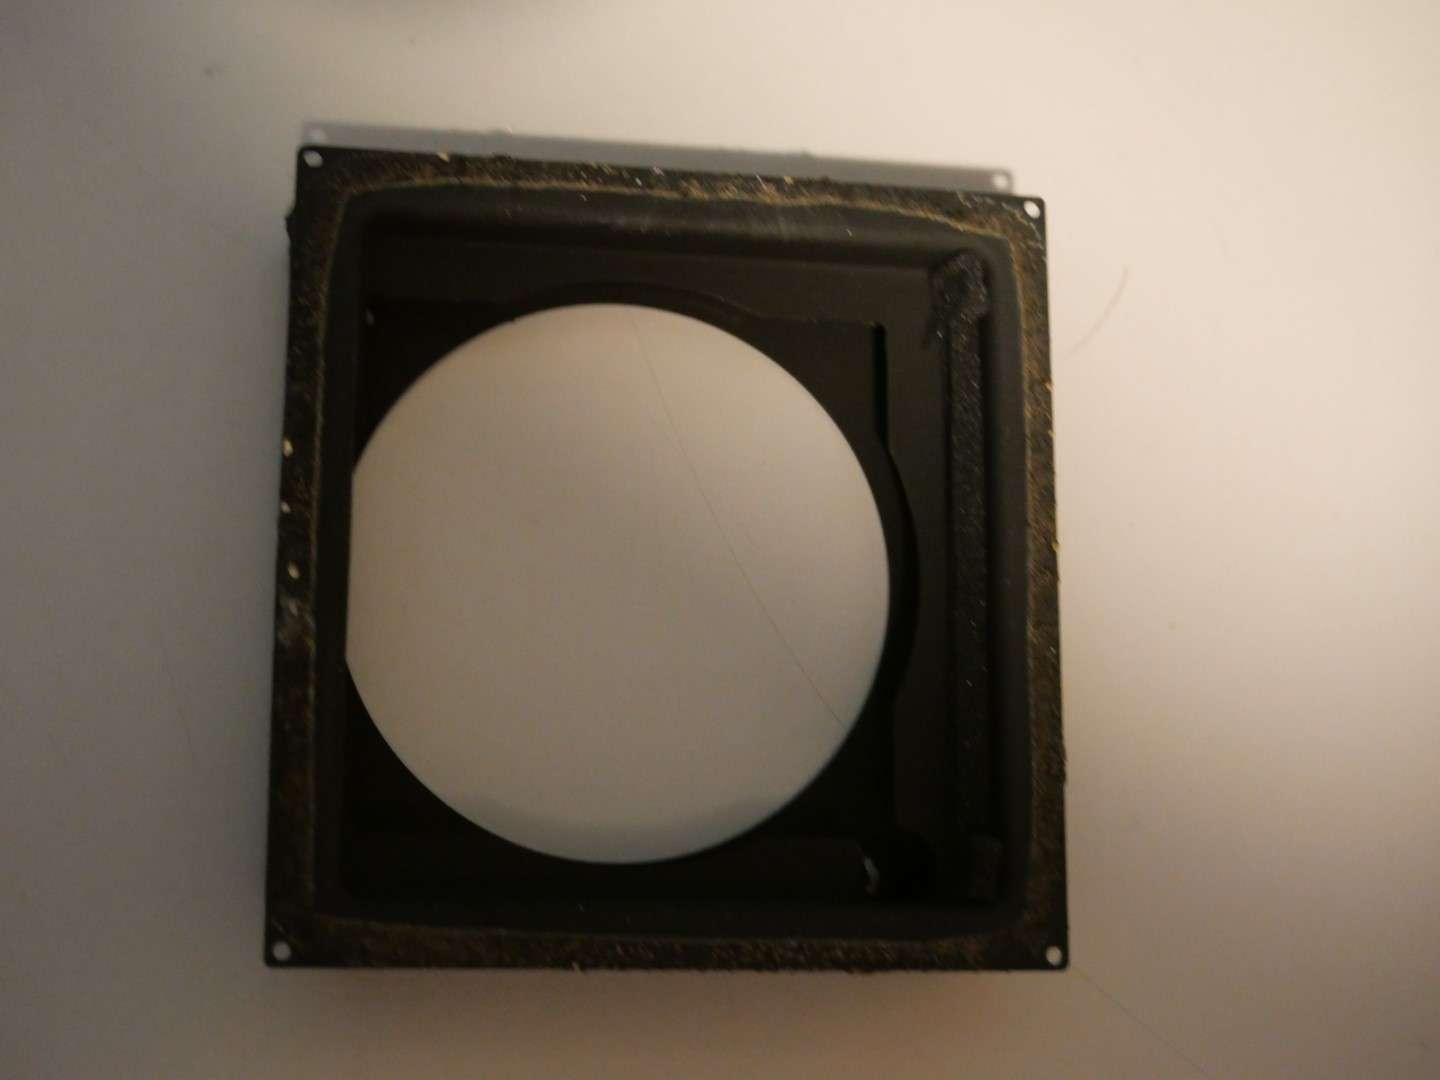
Clean the steel plating.
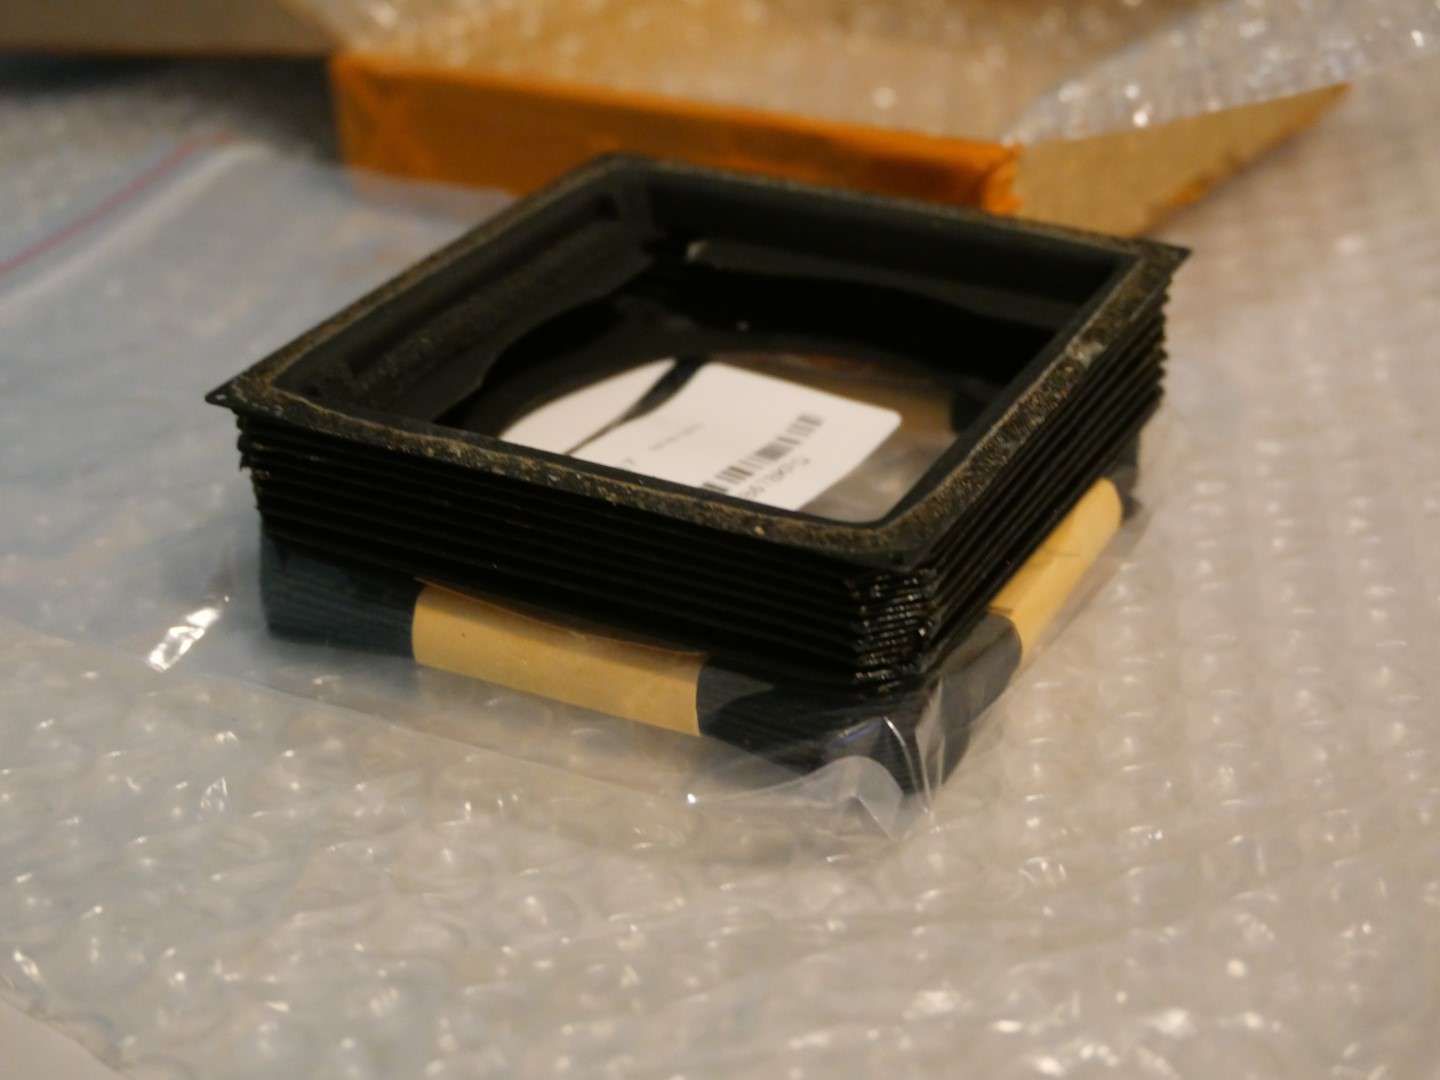
Test-fit the new bellows on the steel plates;
put some glue on the rear steel plate, where the connection was in the old situation.
Put the bellows on the glued plate and use a brush with a bit of glue to attach the bellows to the steel plate.
Let it dry.
Do the same for the other steel plate.
Let it all dry.
Mount some foam as lightshield on the connecting part of the steel plates
First, mount the bellow to the camera’s largest part with the 4 screw in the corners( only 4 screws on this side!)
Then, extend the front to maximum and screw the bellows with the 9 screws to the front, through the camera’s inside. Just screw the screws in a little bit, do not yet tighten. First do 3 or 4 on the outside, then the rest. After the last is in, tighten them all.
You’re done!
After the new bellows is glued on the steel frame, part 1 will be done.
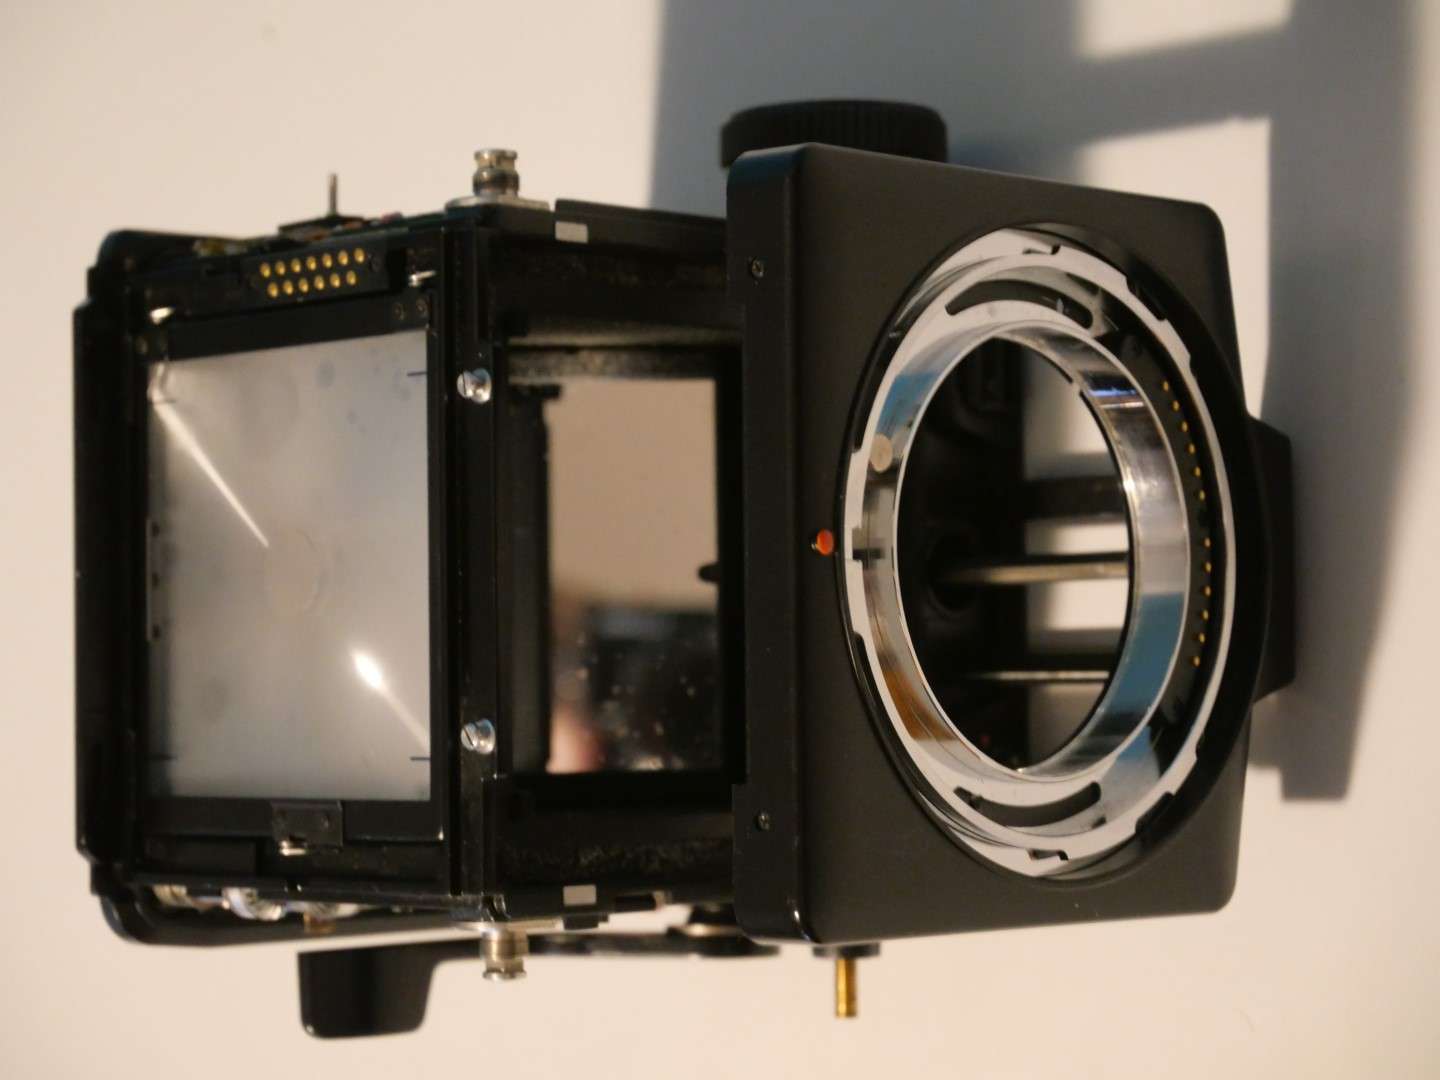
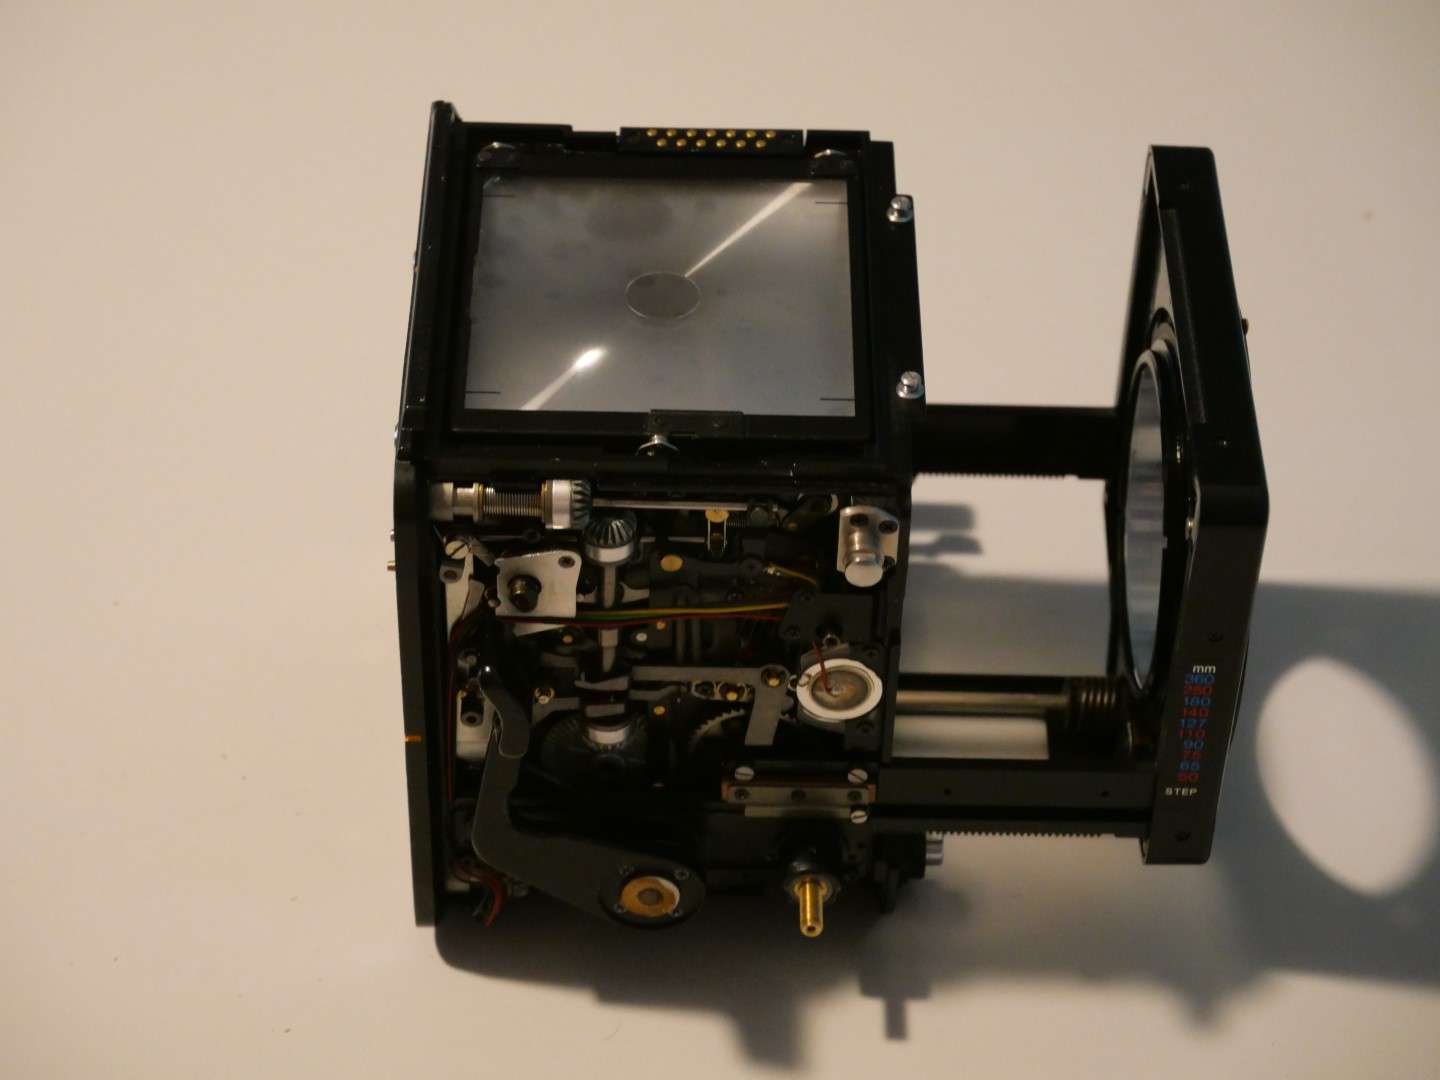
Now there is just a gap in the camera where the bellows used to be:
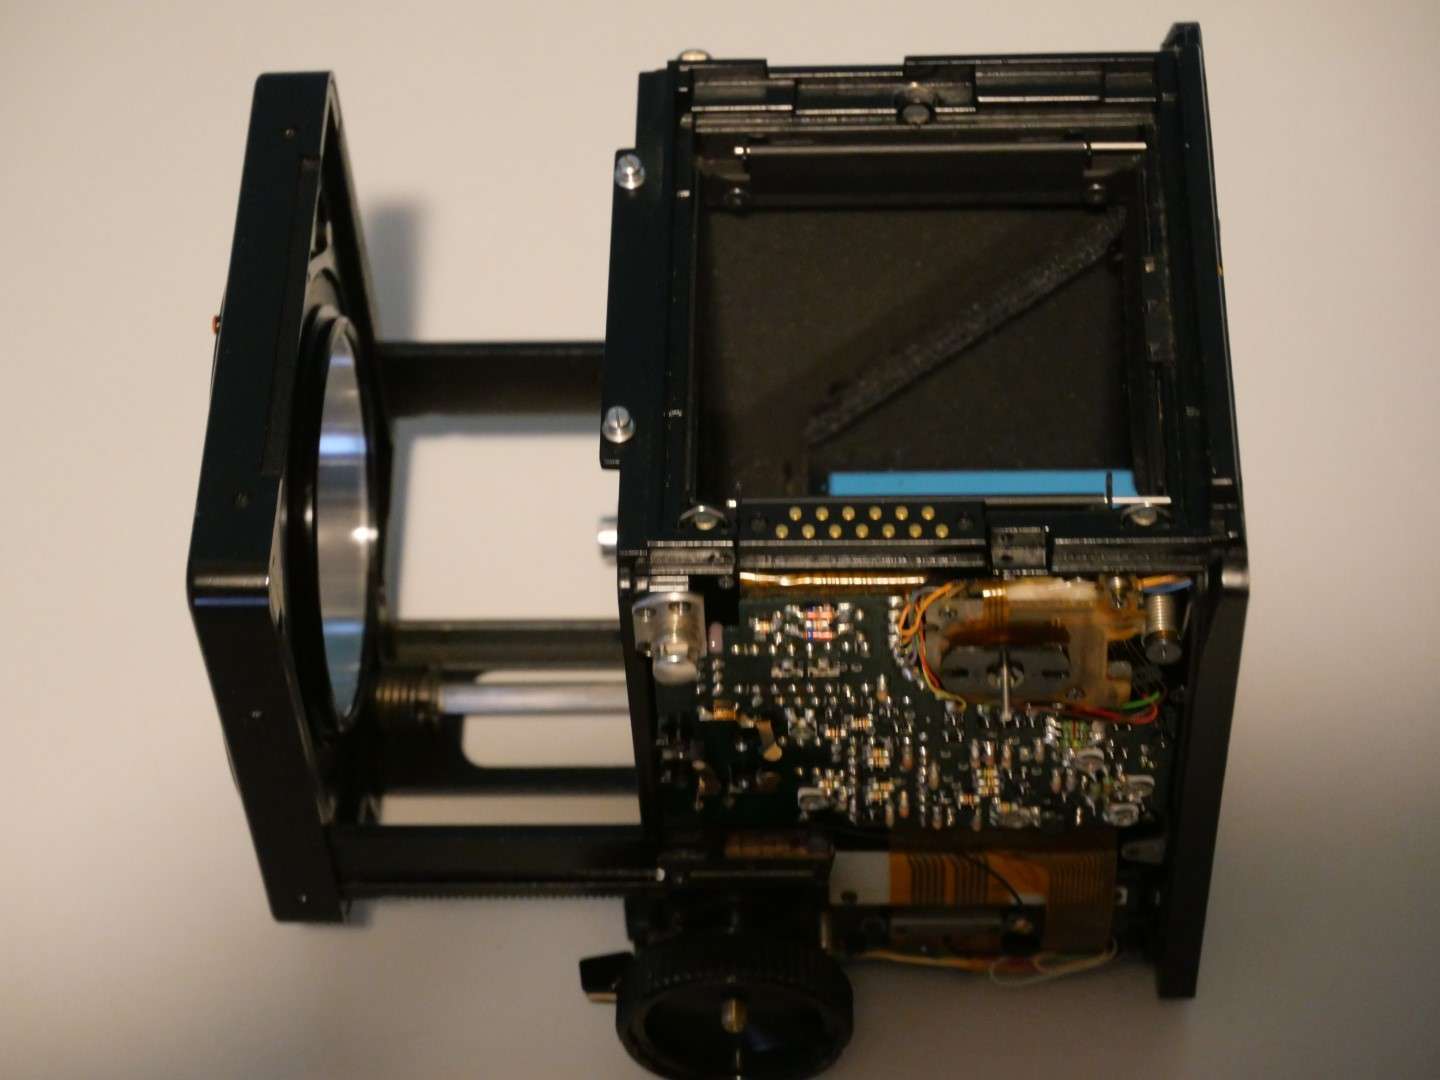
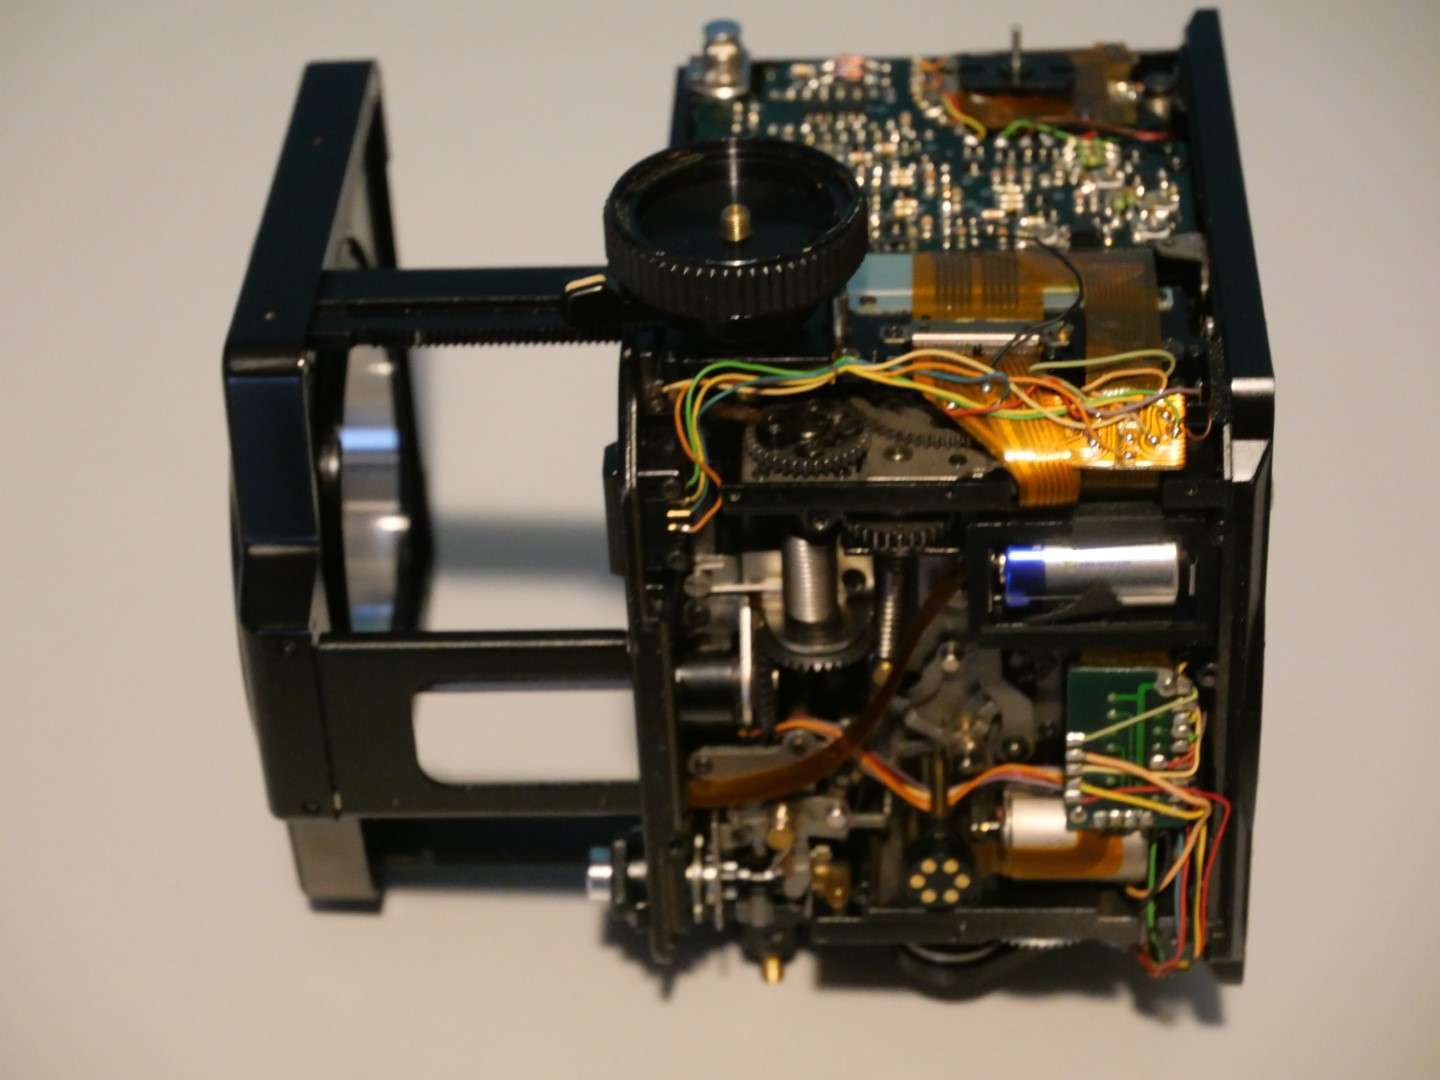
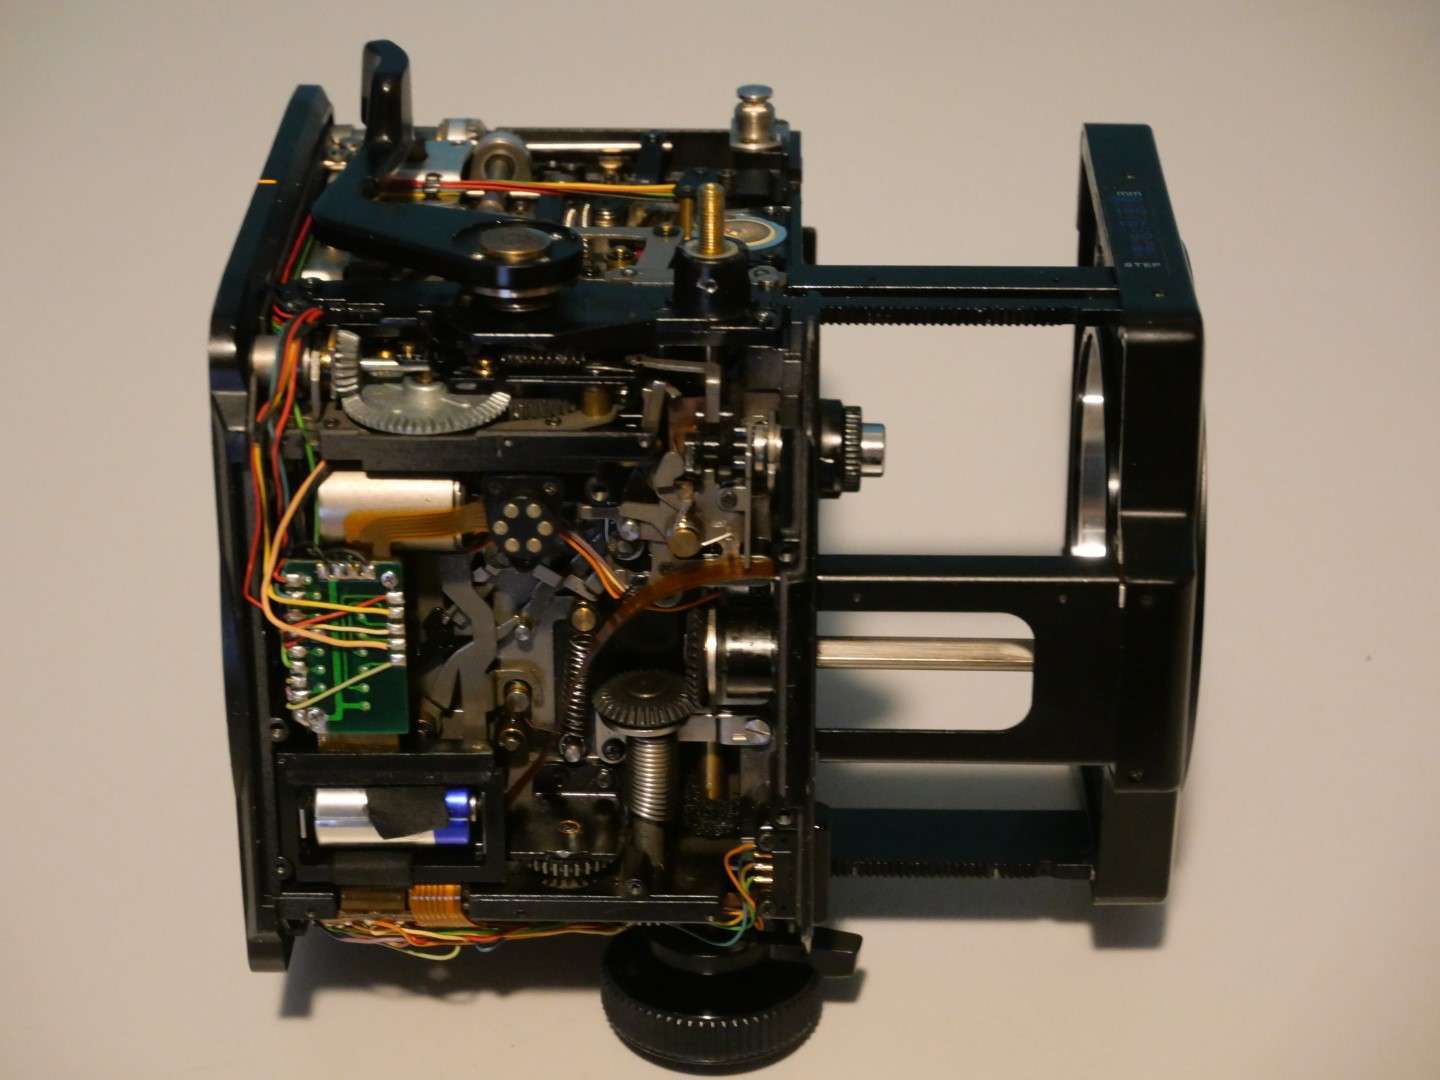
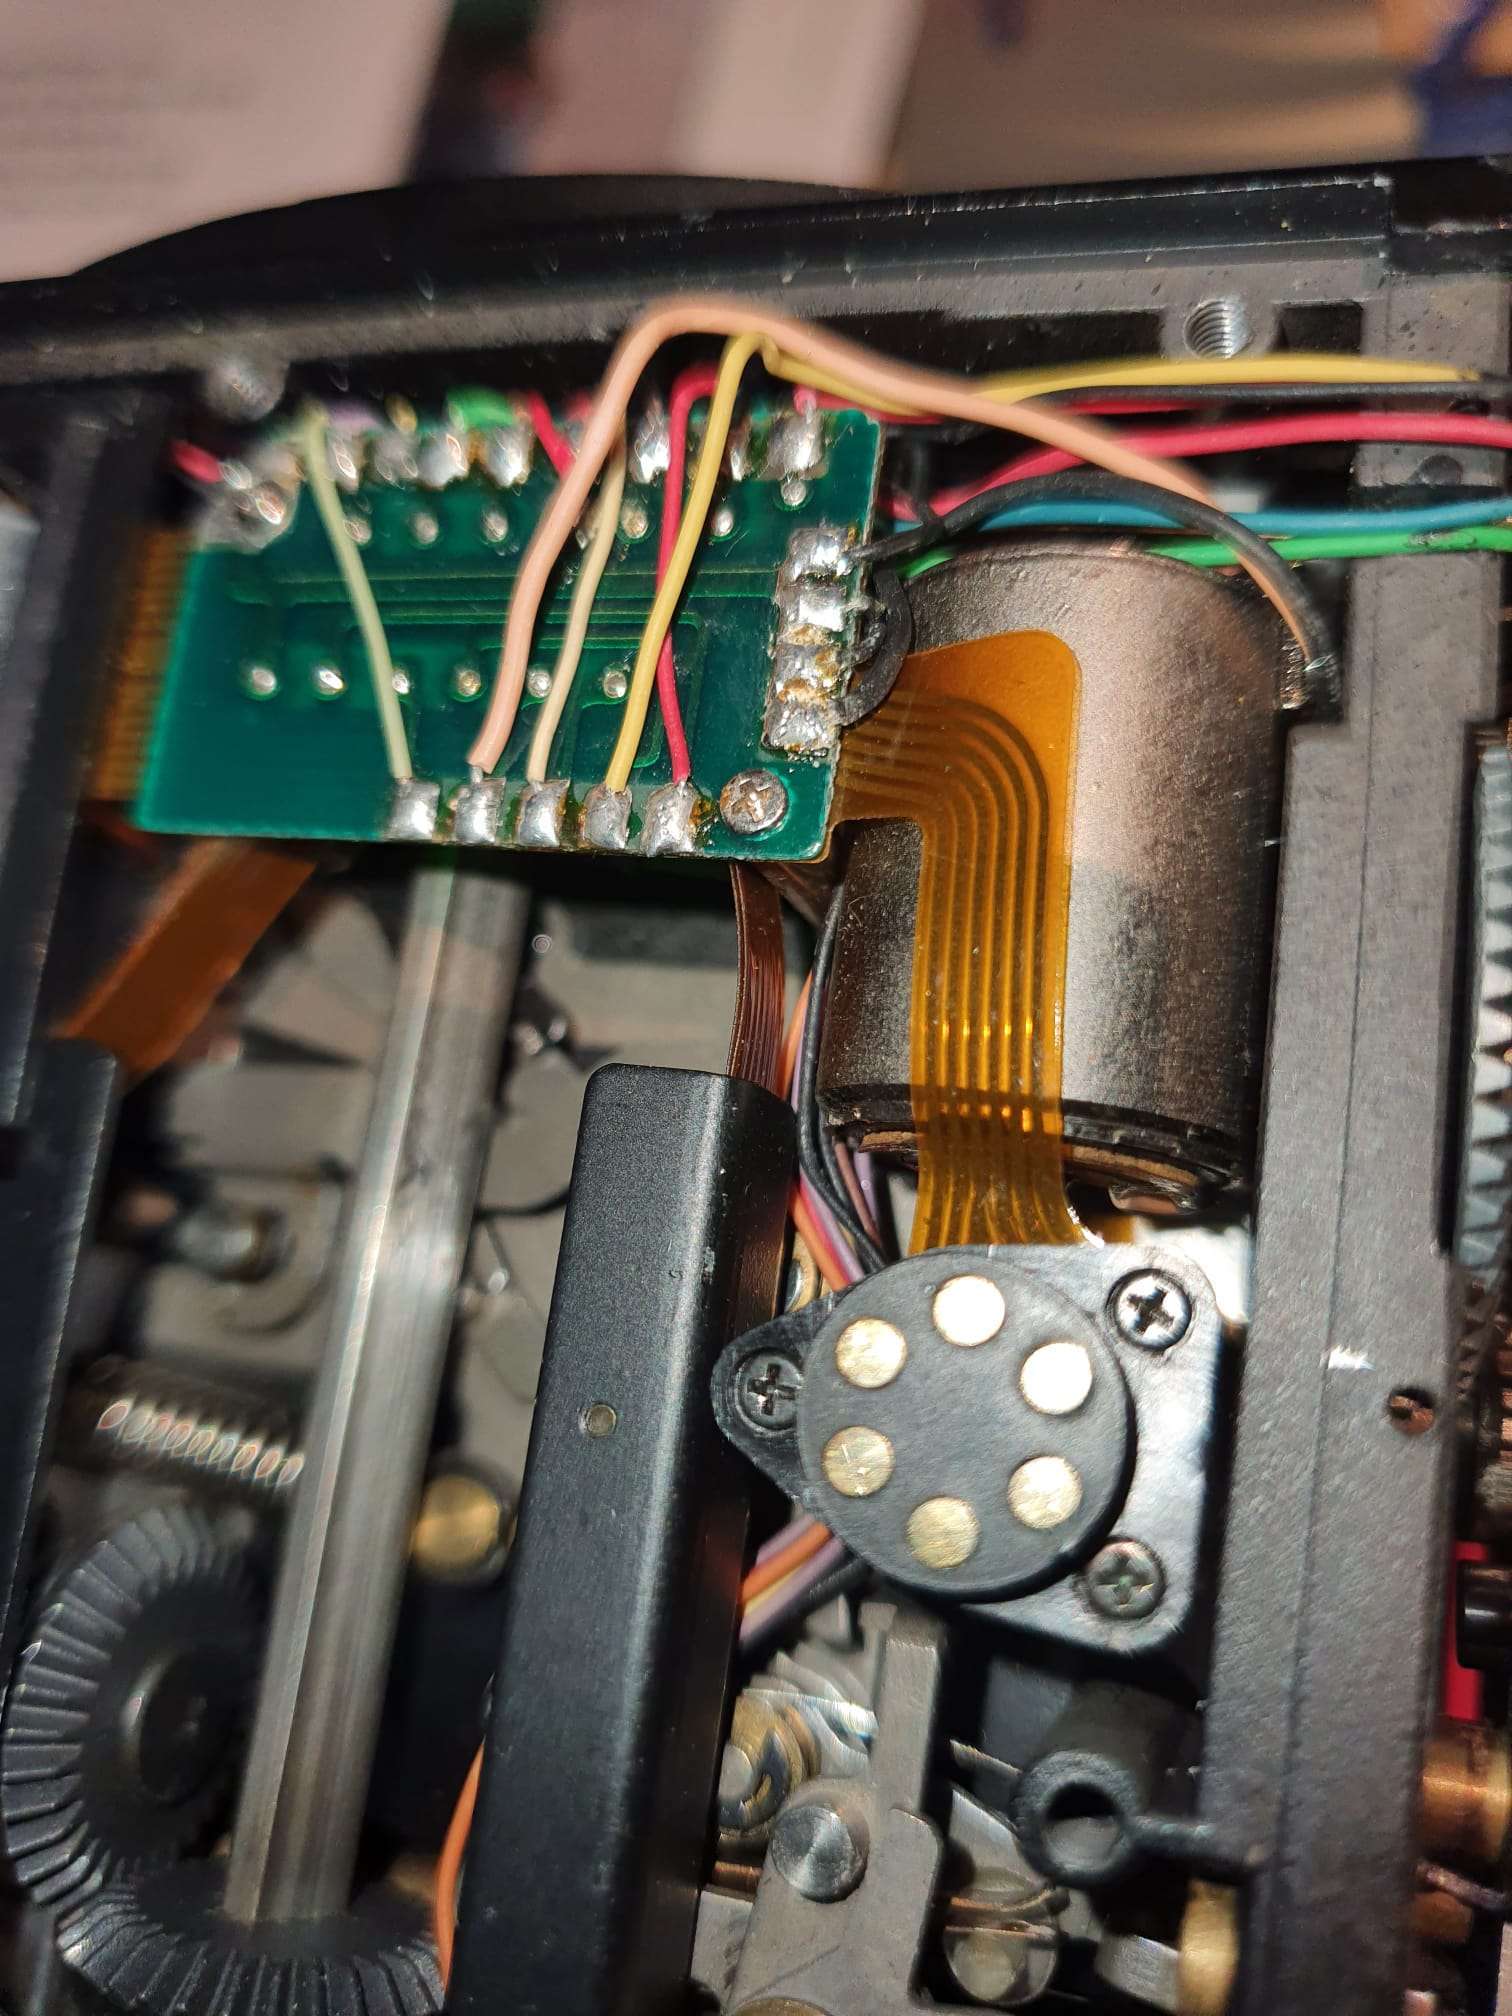
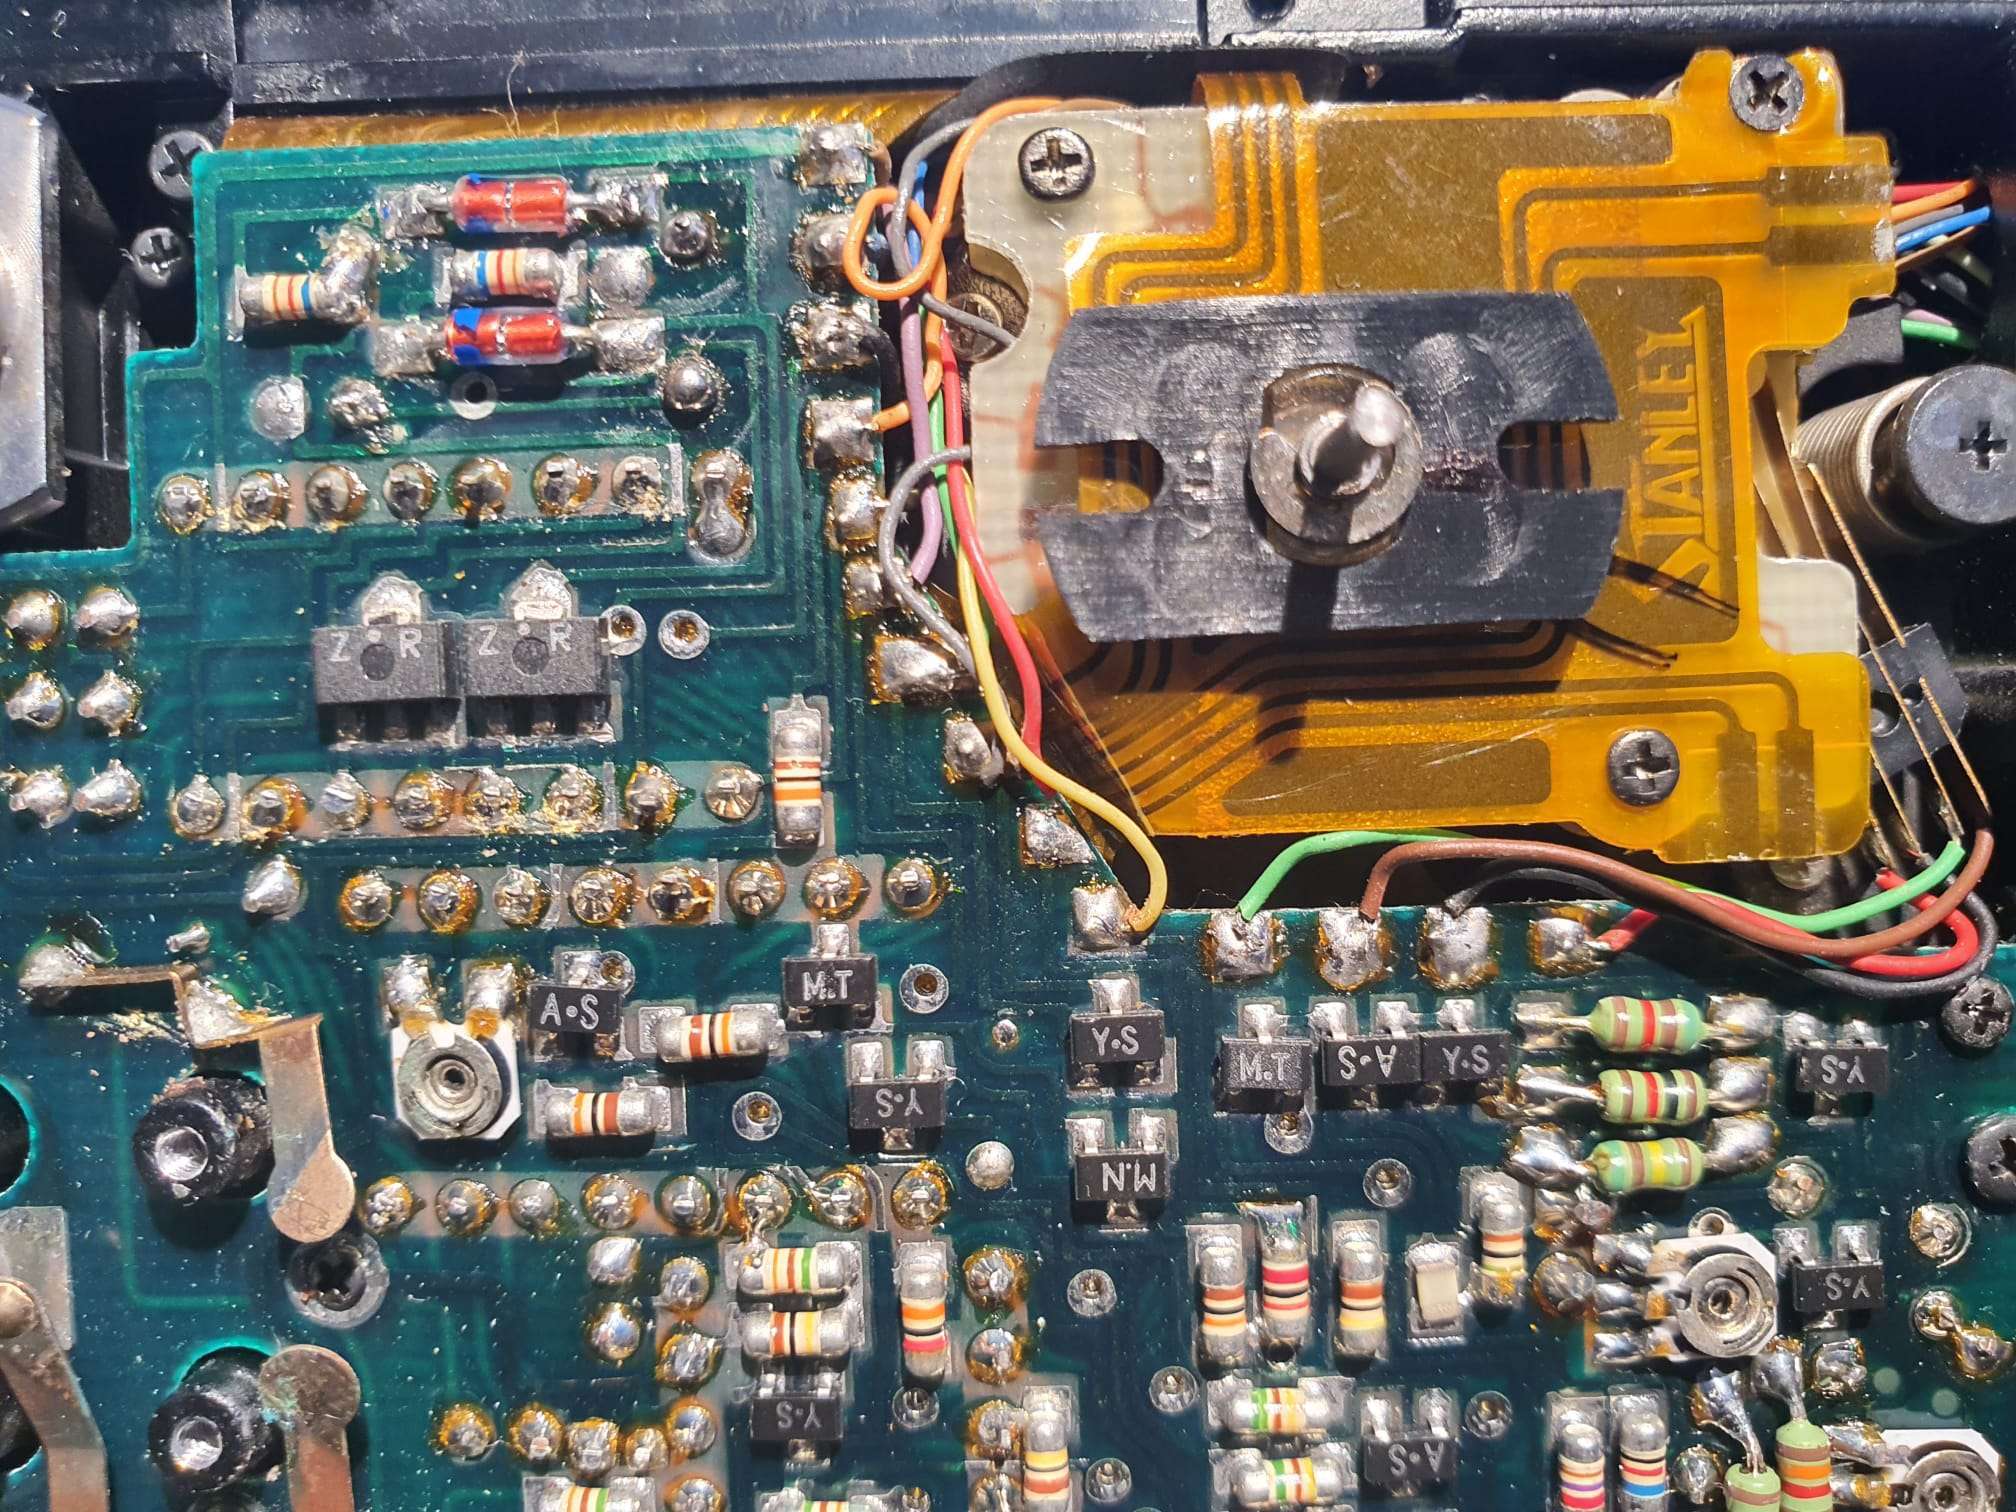
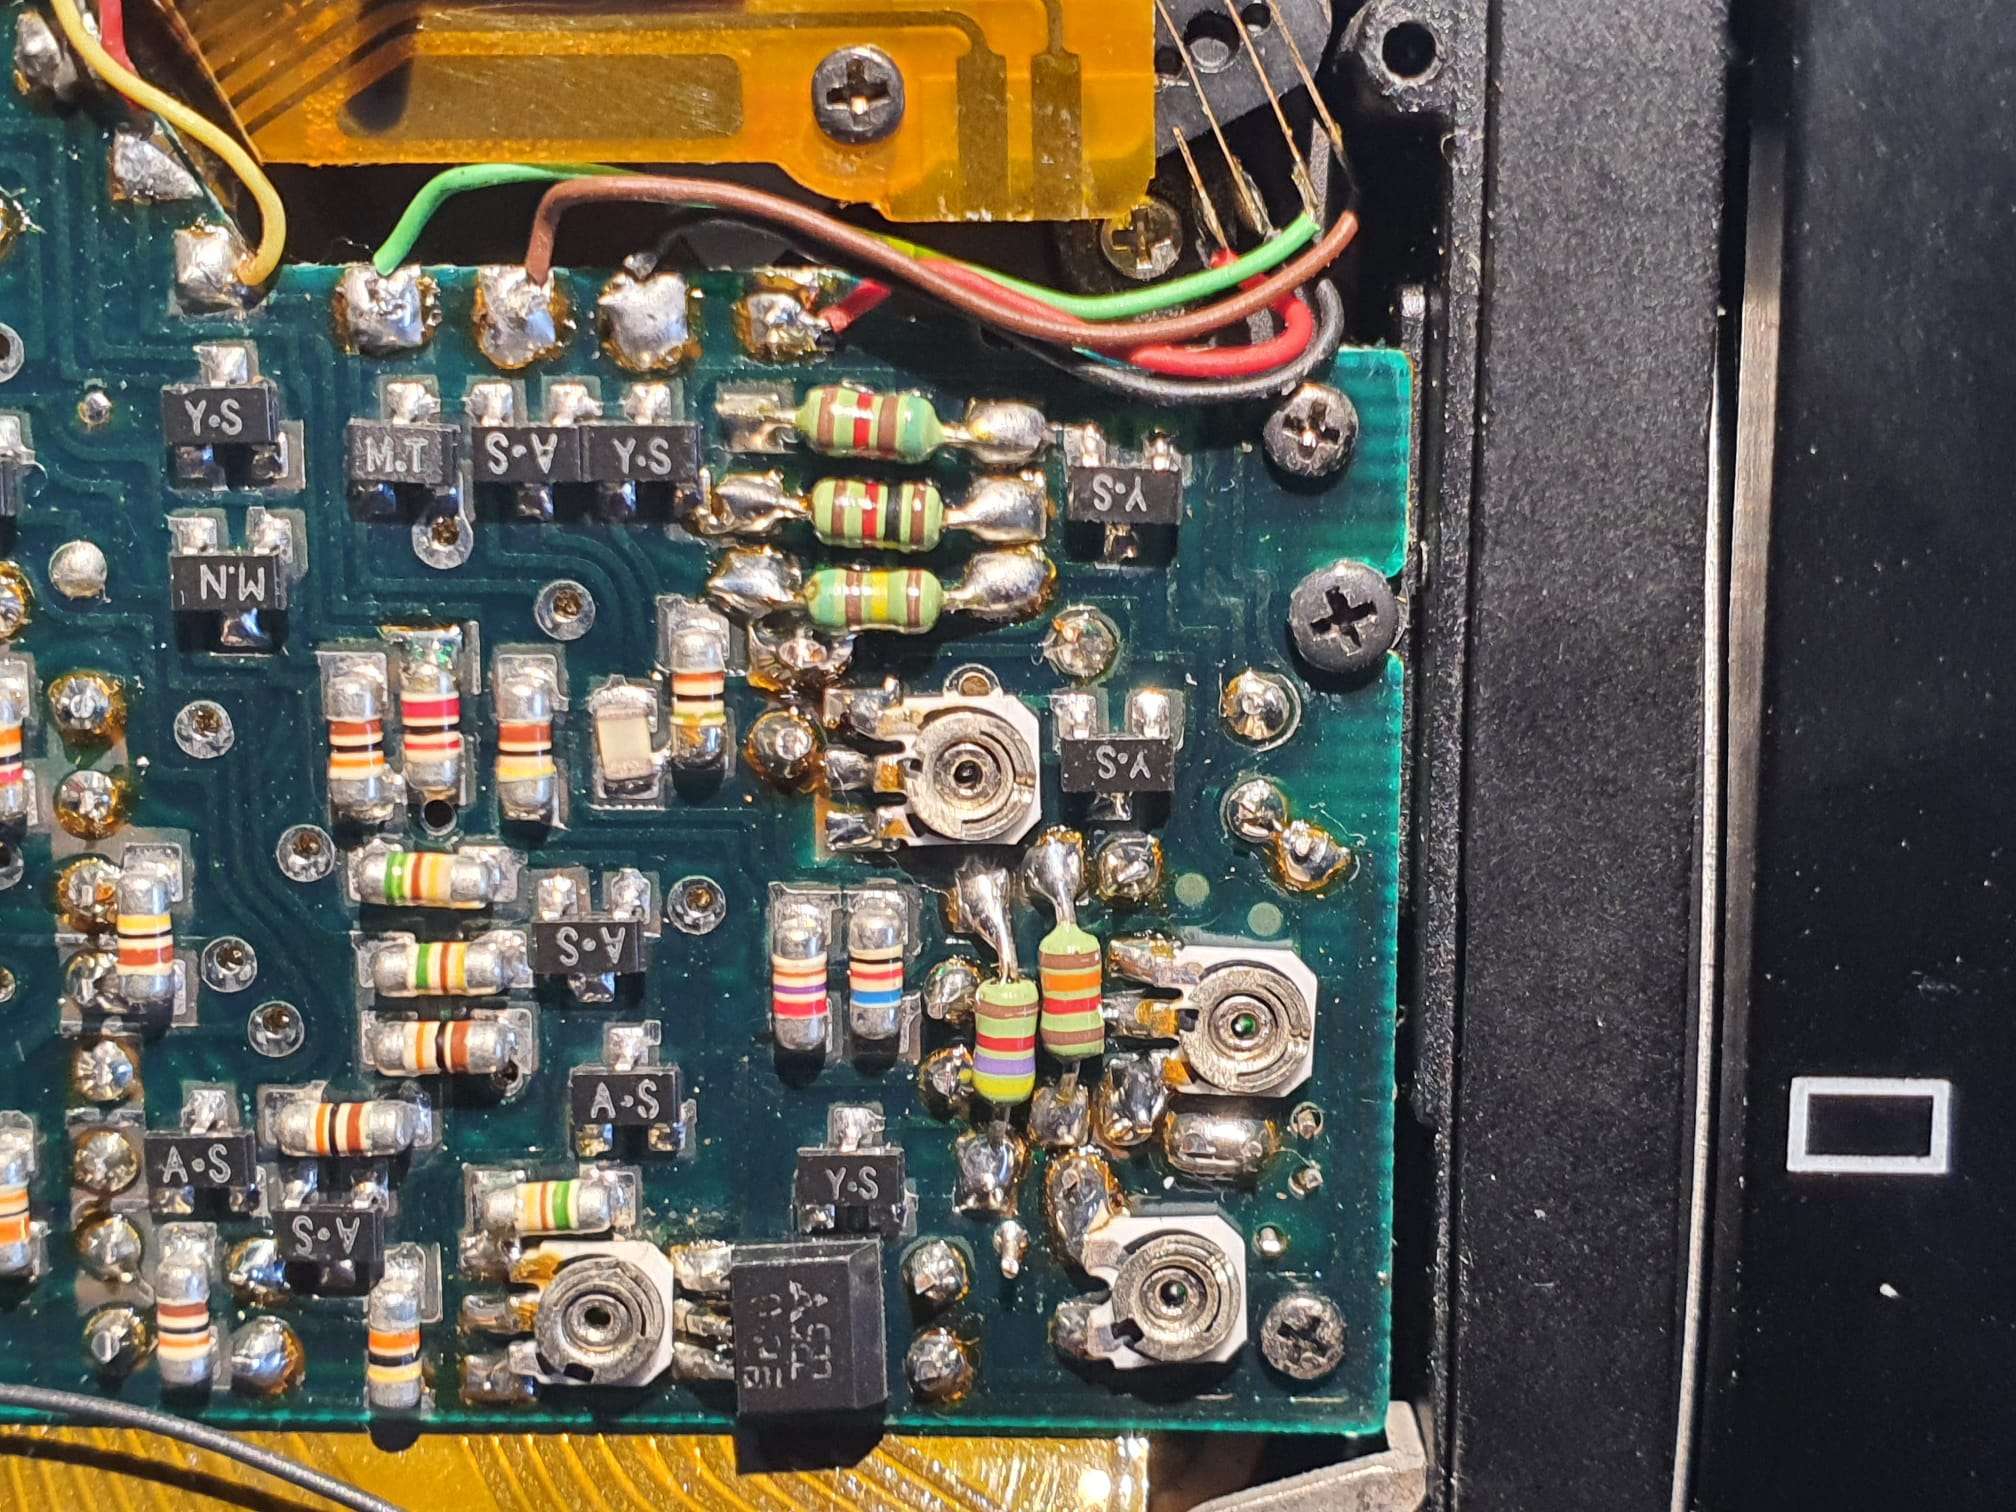
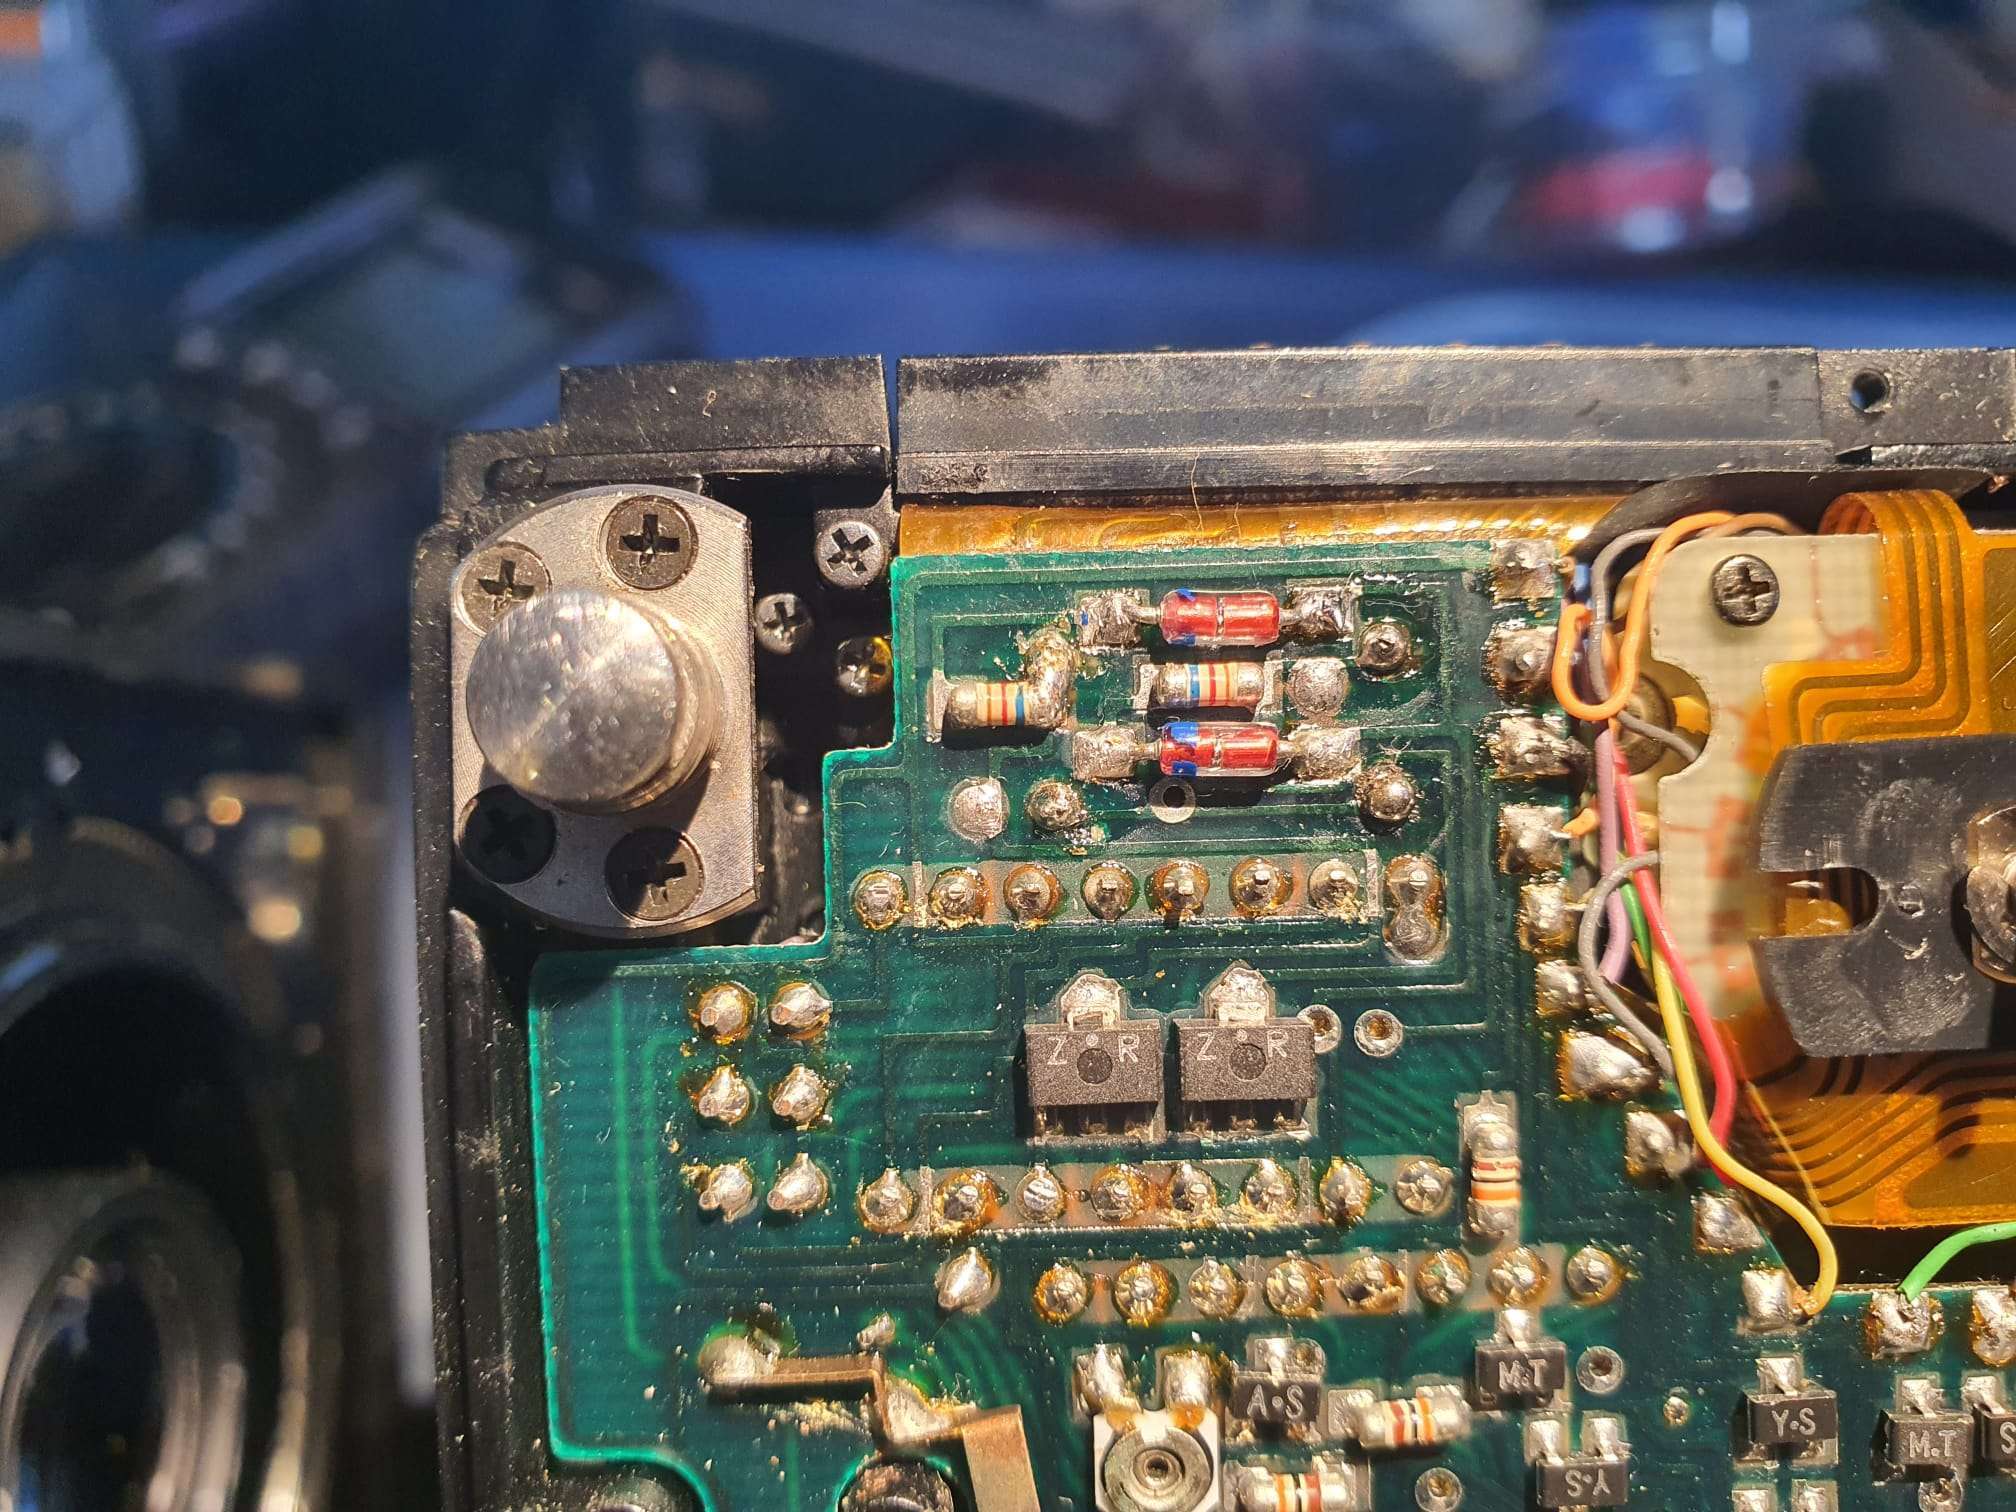
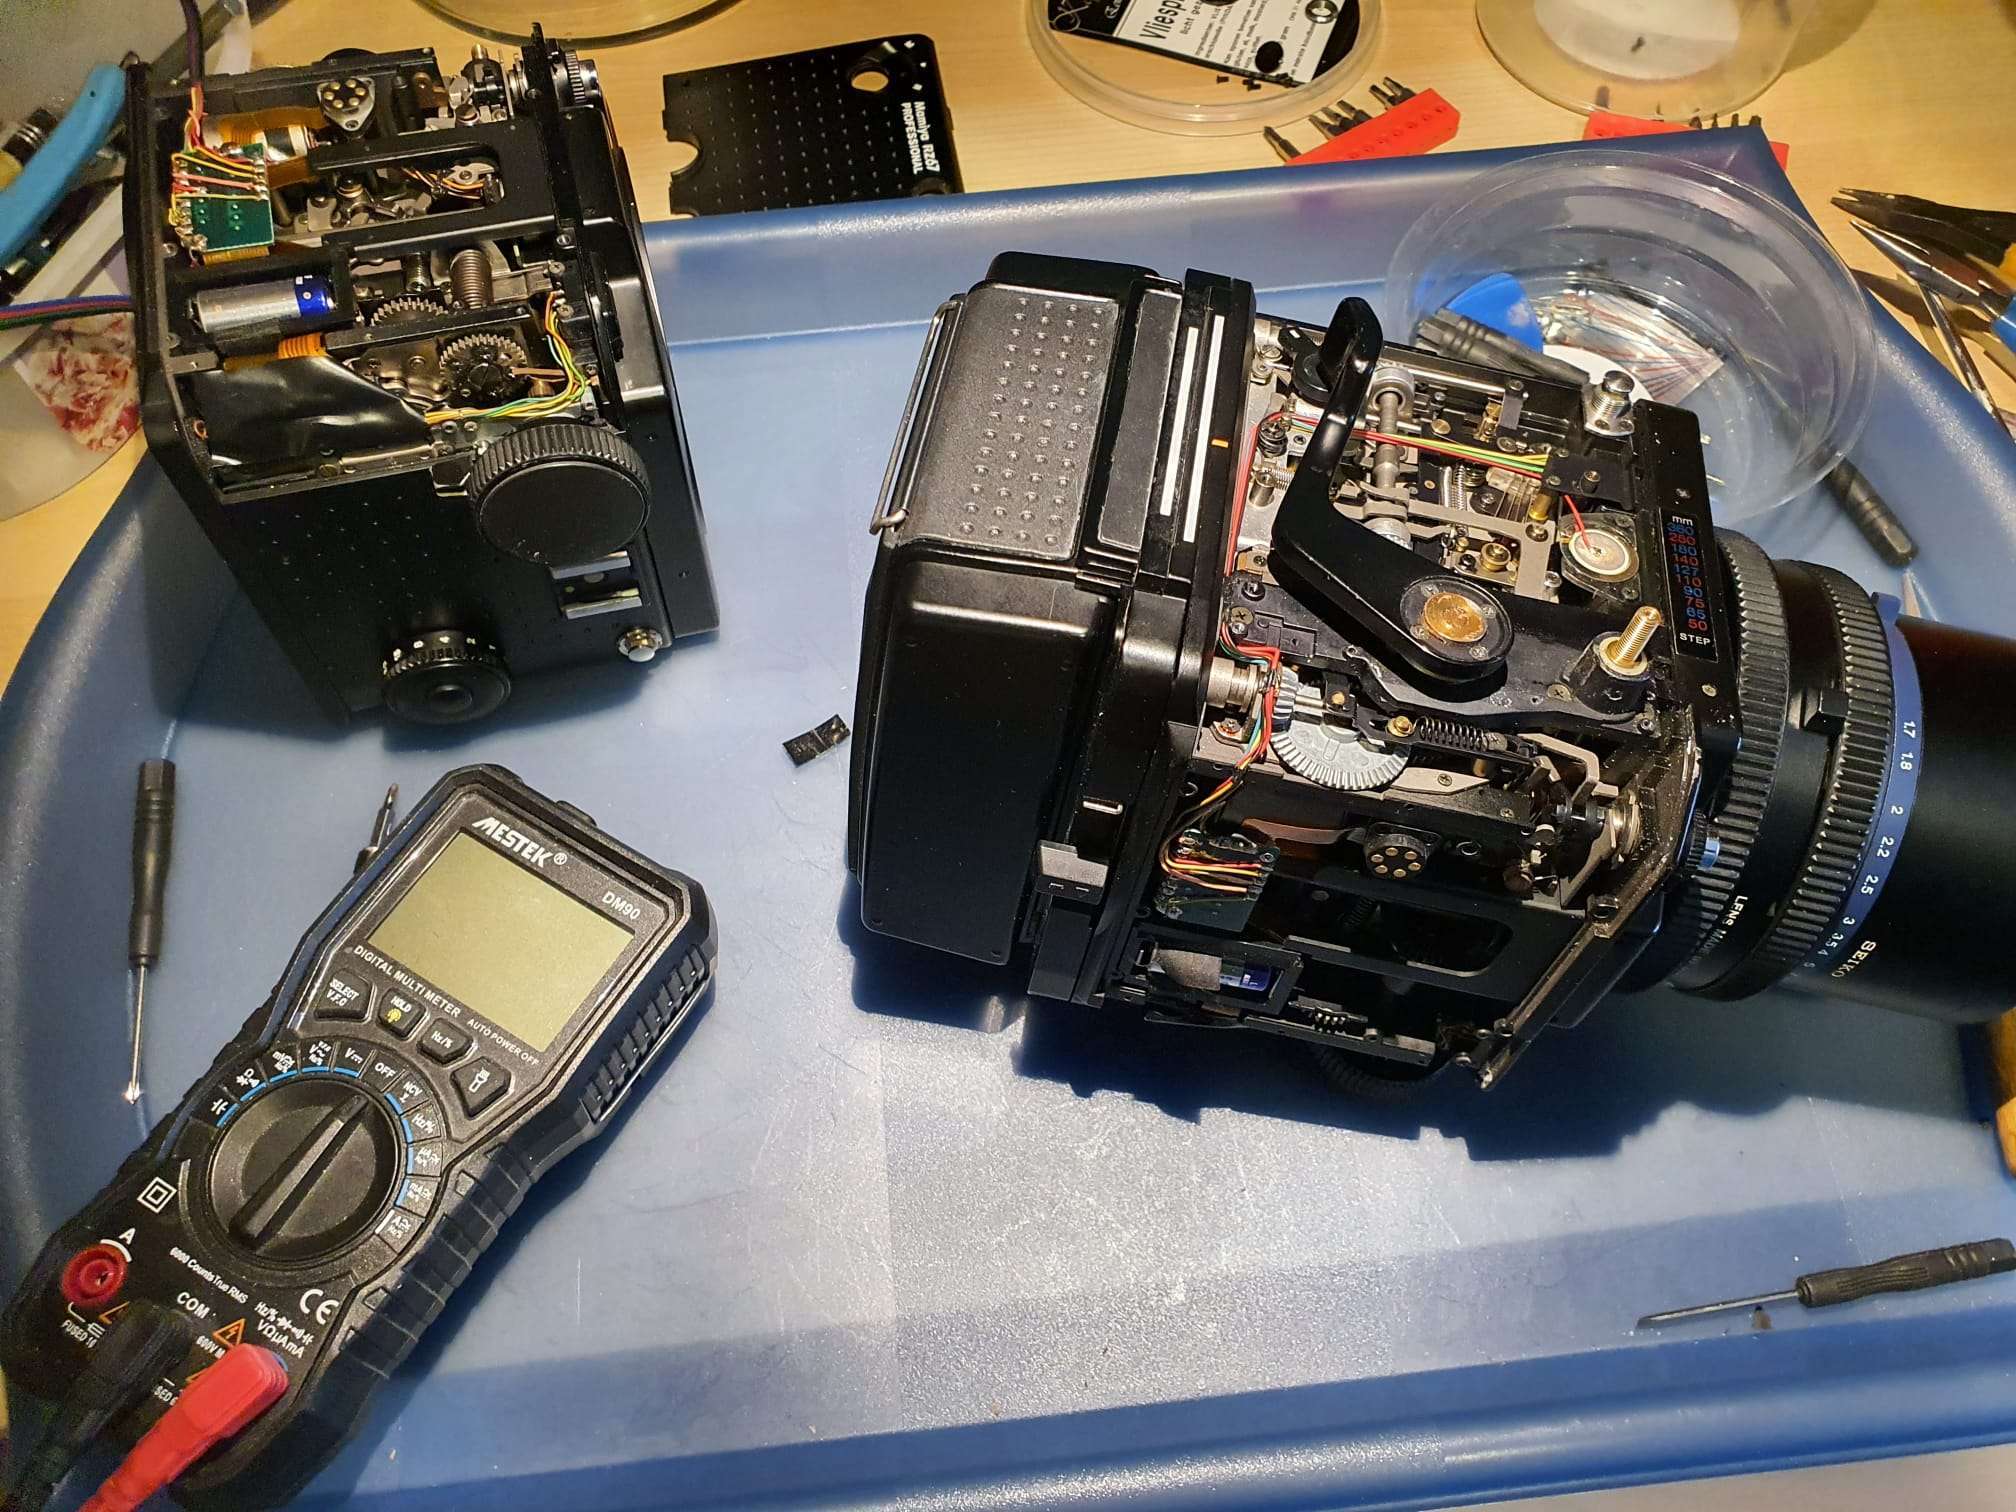
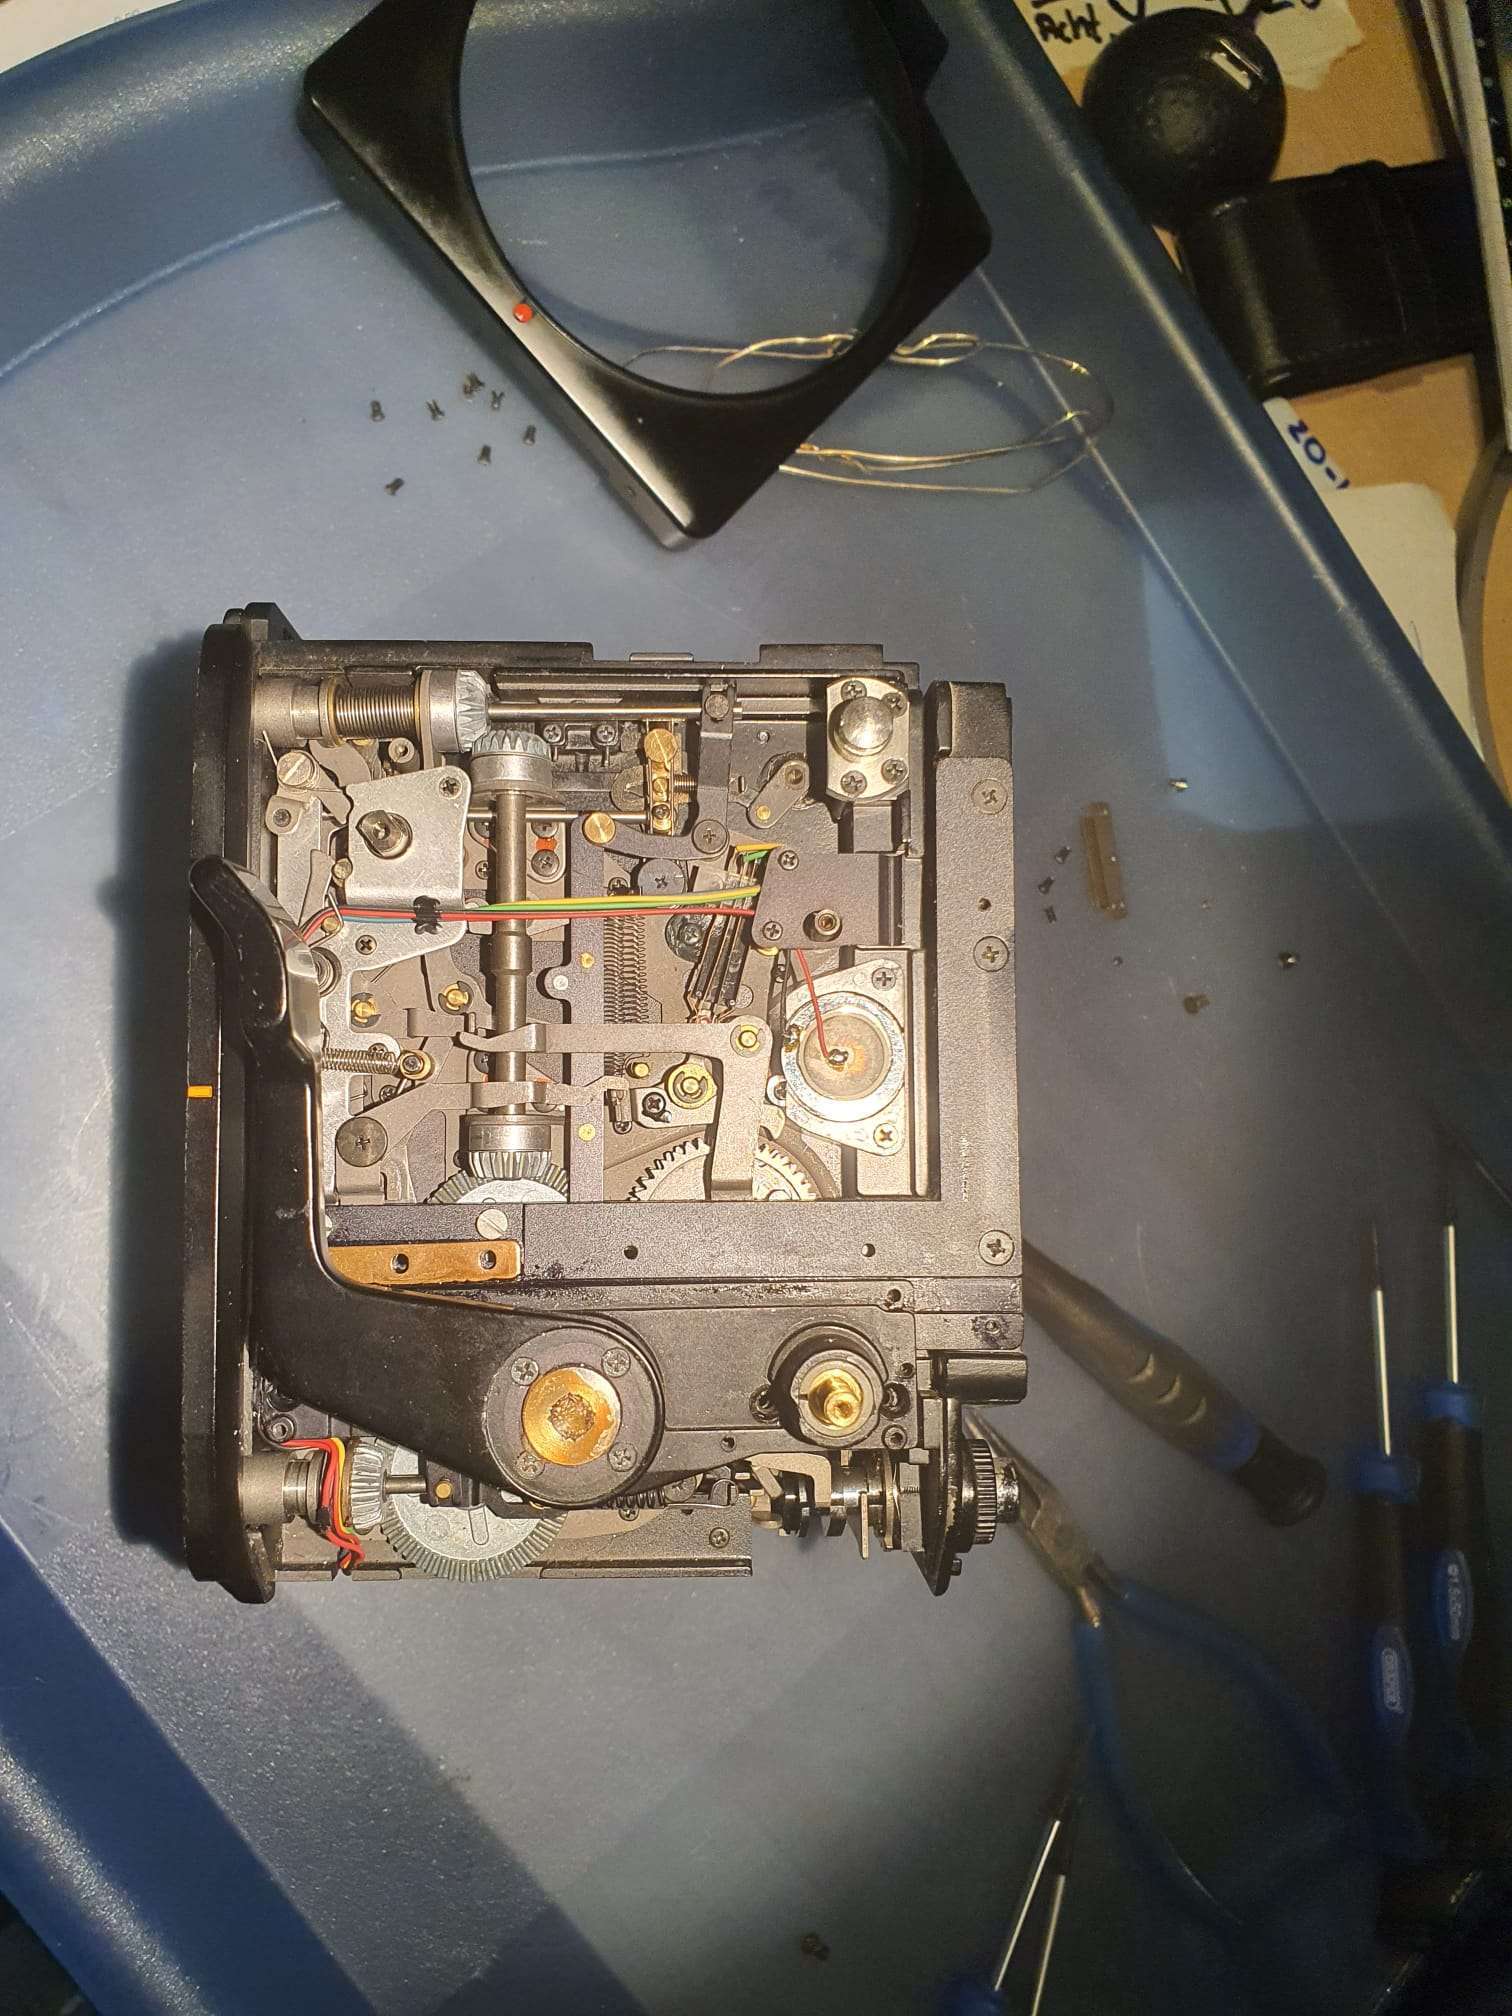
When repairing electronics, I always make a lot of picture up front. This helps especially with identifying the small components, both for the function as well for their specific value/type.
What makes this repair more difficult is the fact that, although I do have the repair manual, no schematics of the working of the electronics is available.
This means that I will have to work with the block schematics and the wiring scheme, only.
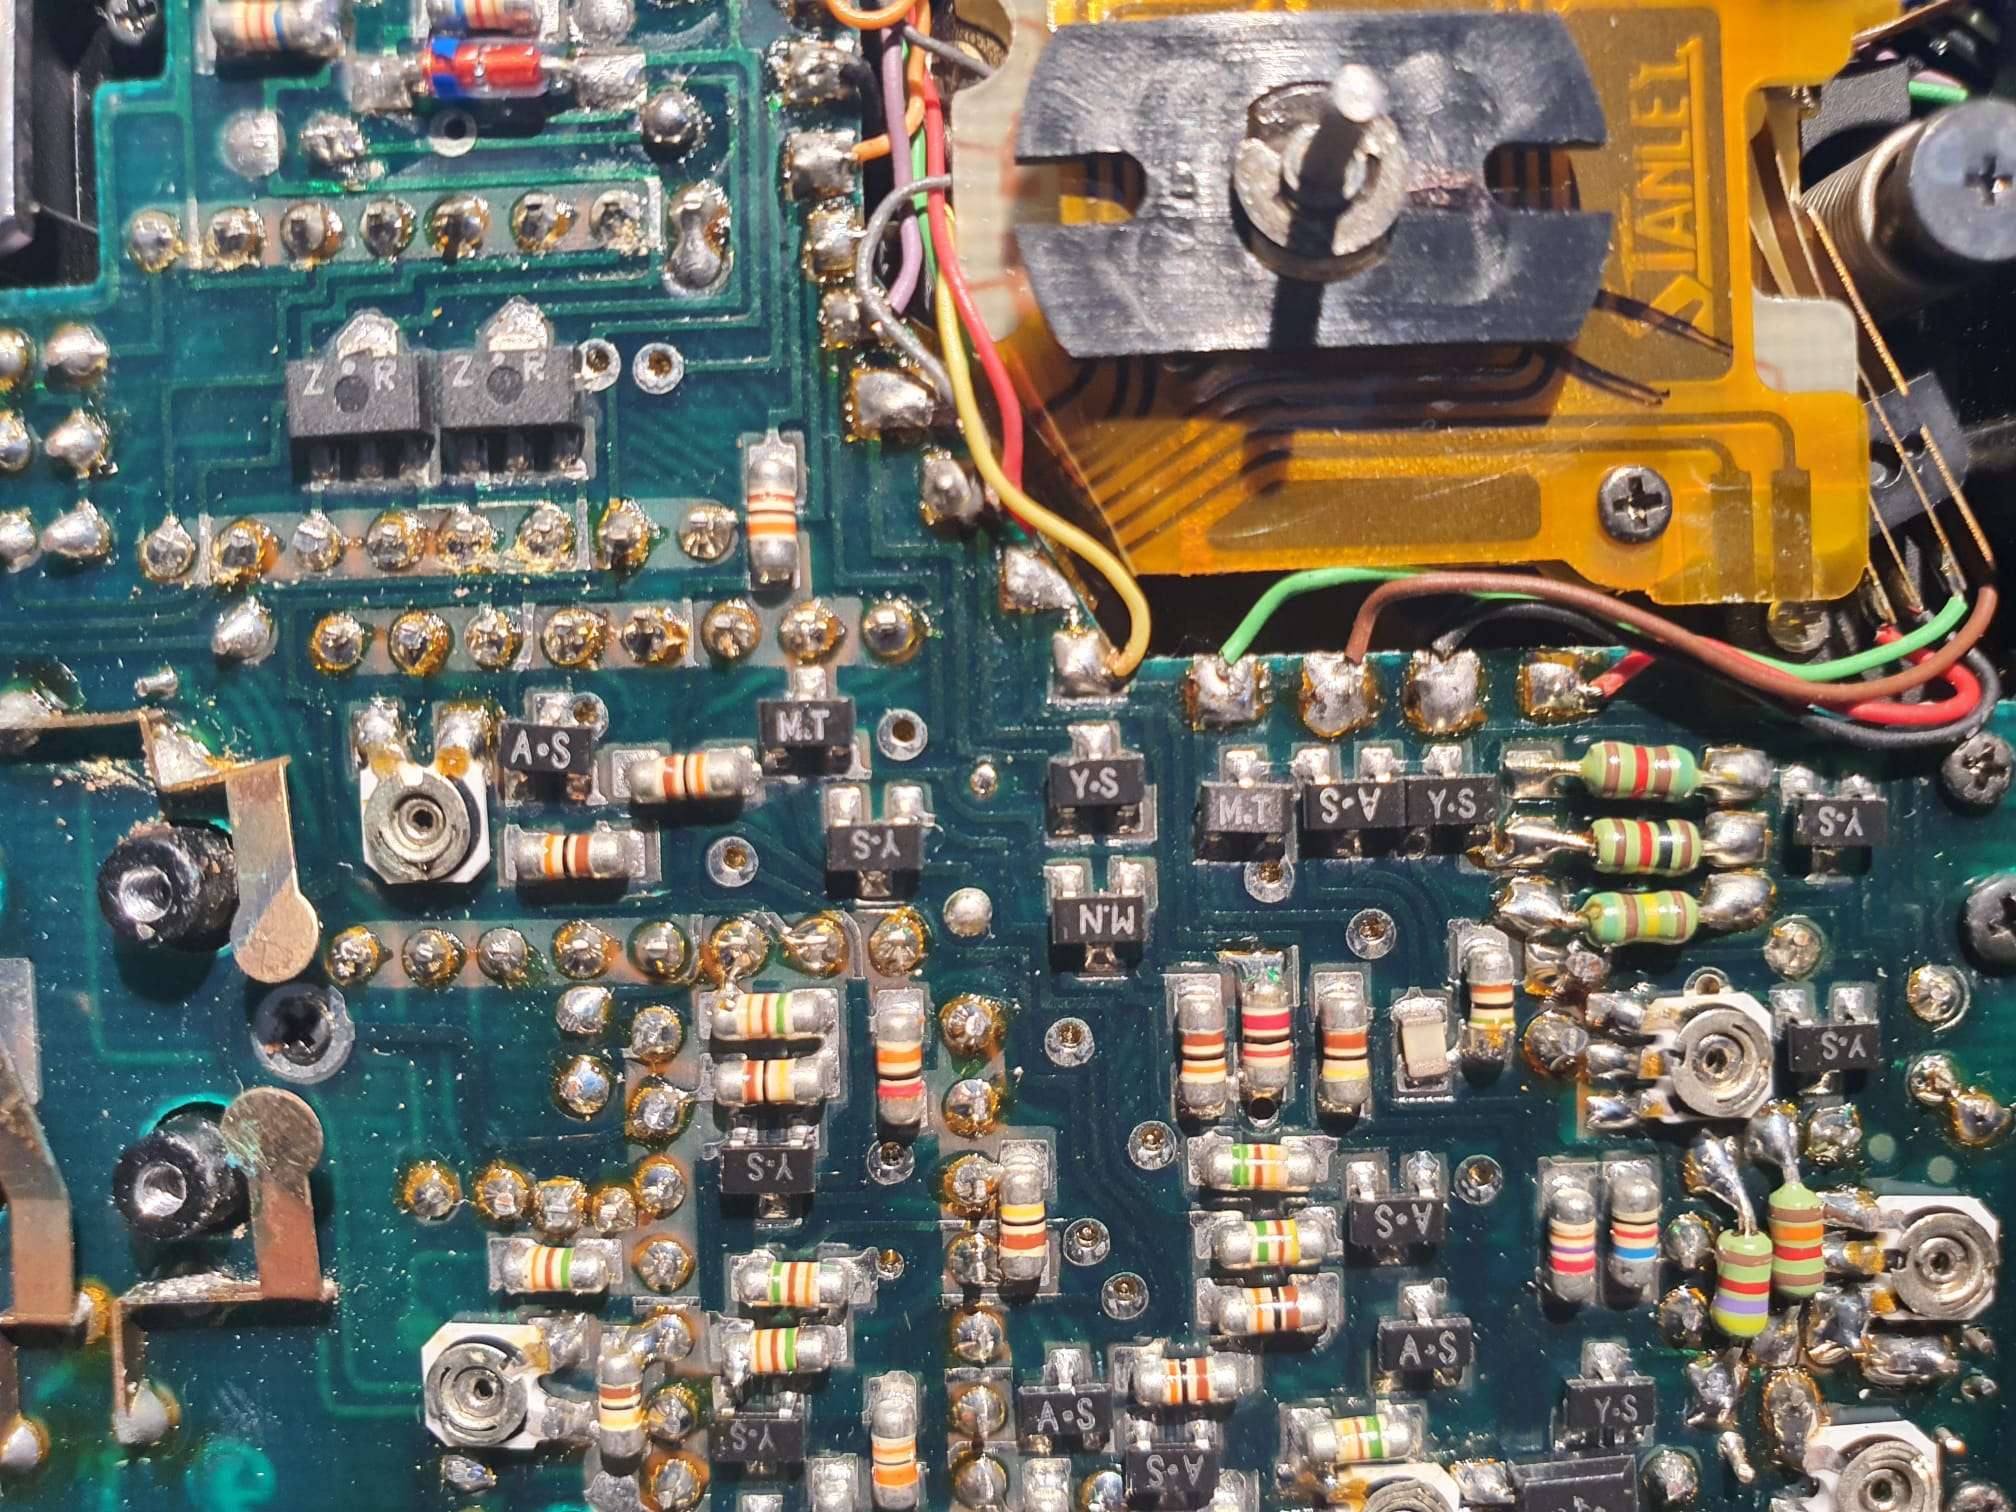
But- a reference is available for all of the voltages versus the pressed buttons at cetera. That will help, of course. And I identified all SMD components, including the transistors. Fortunately, all can still be bought online.
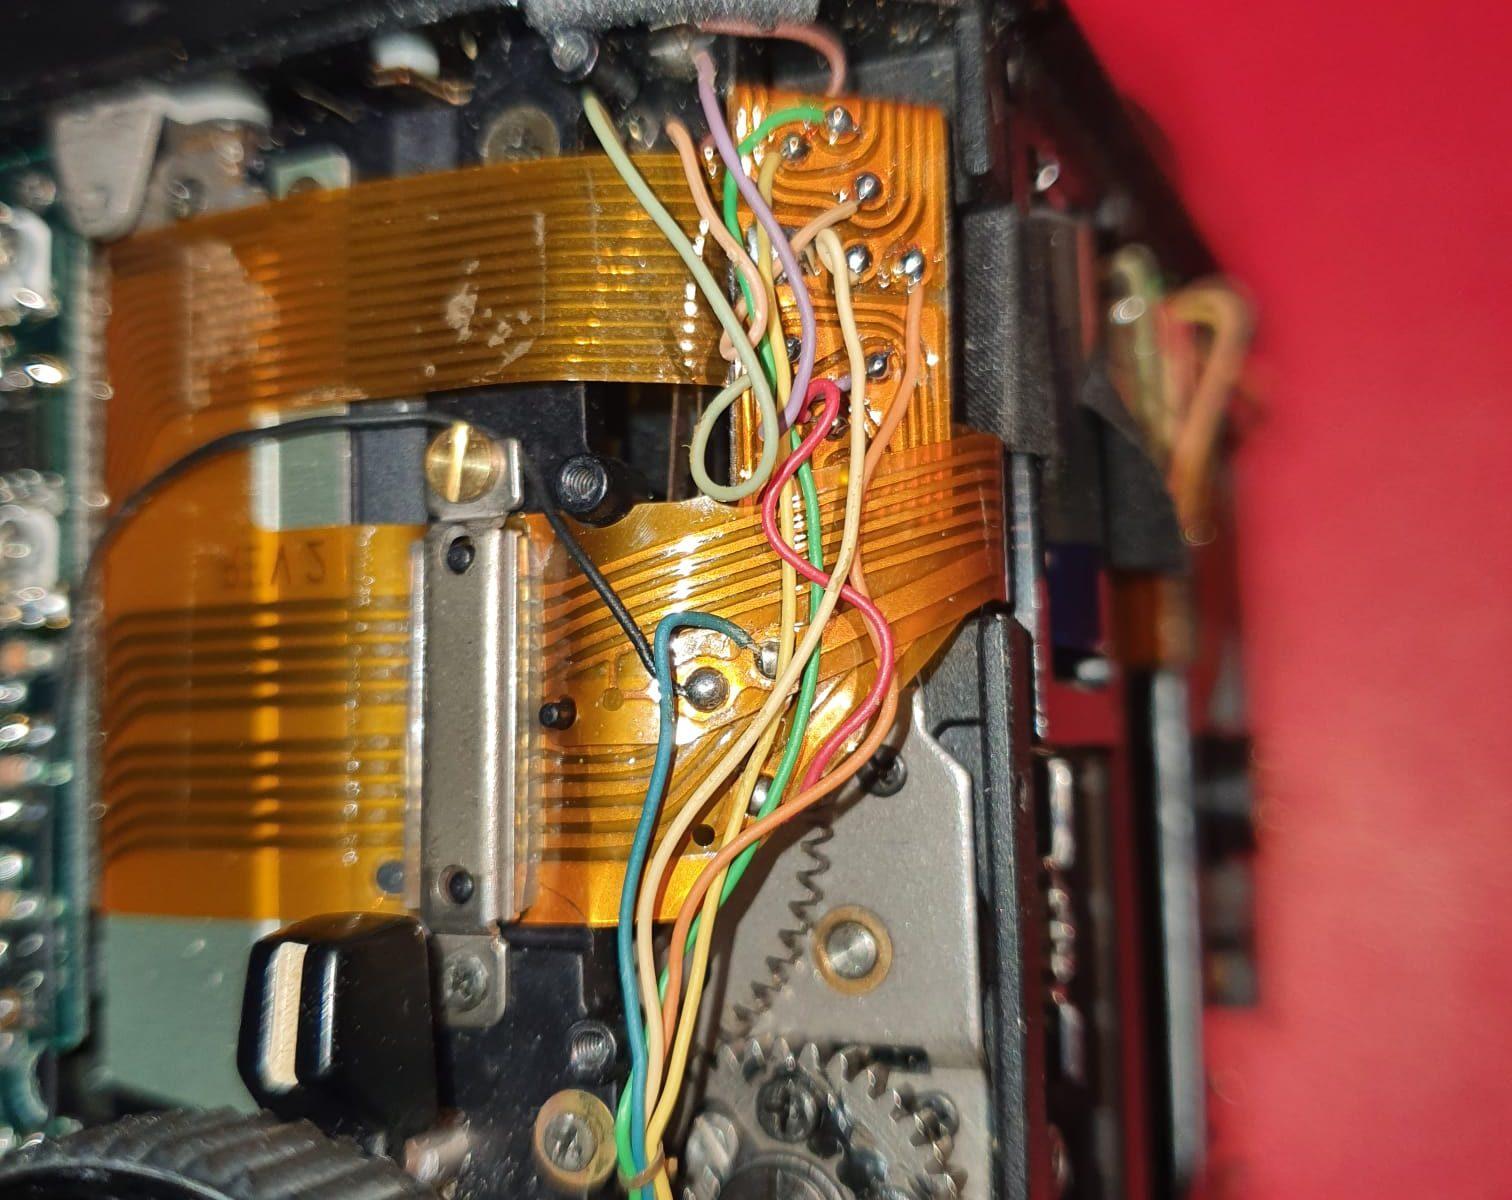
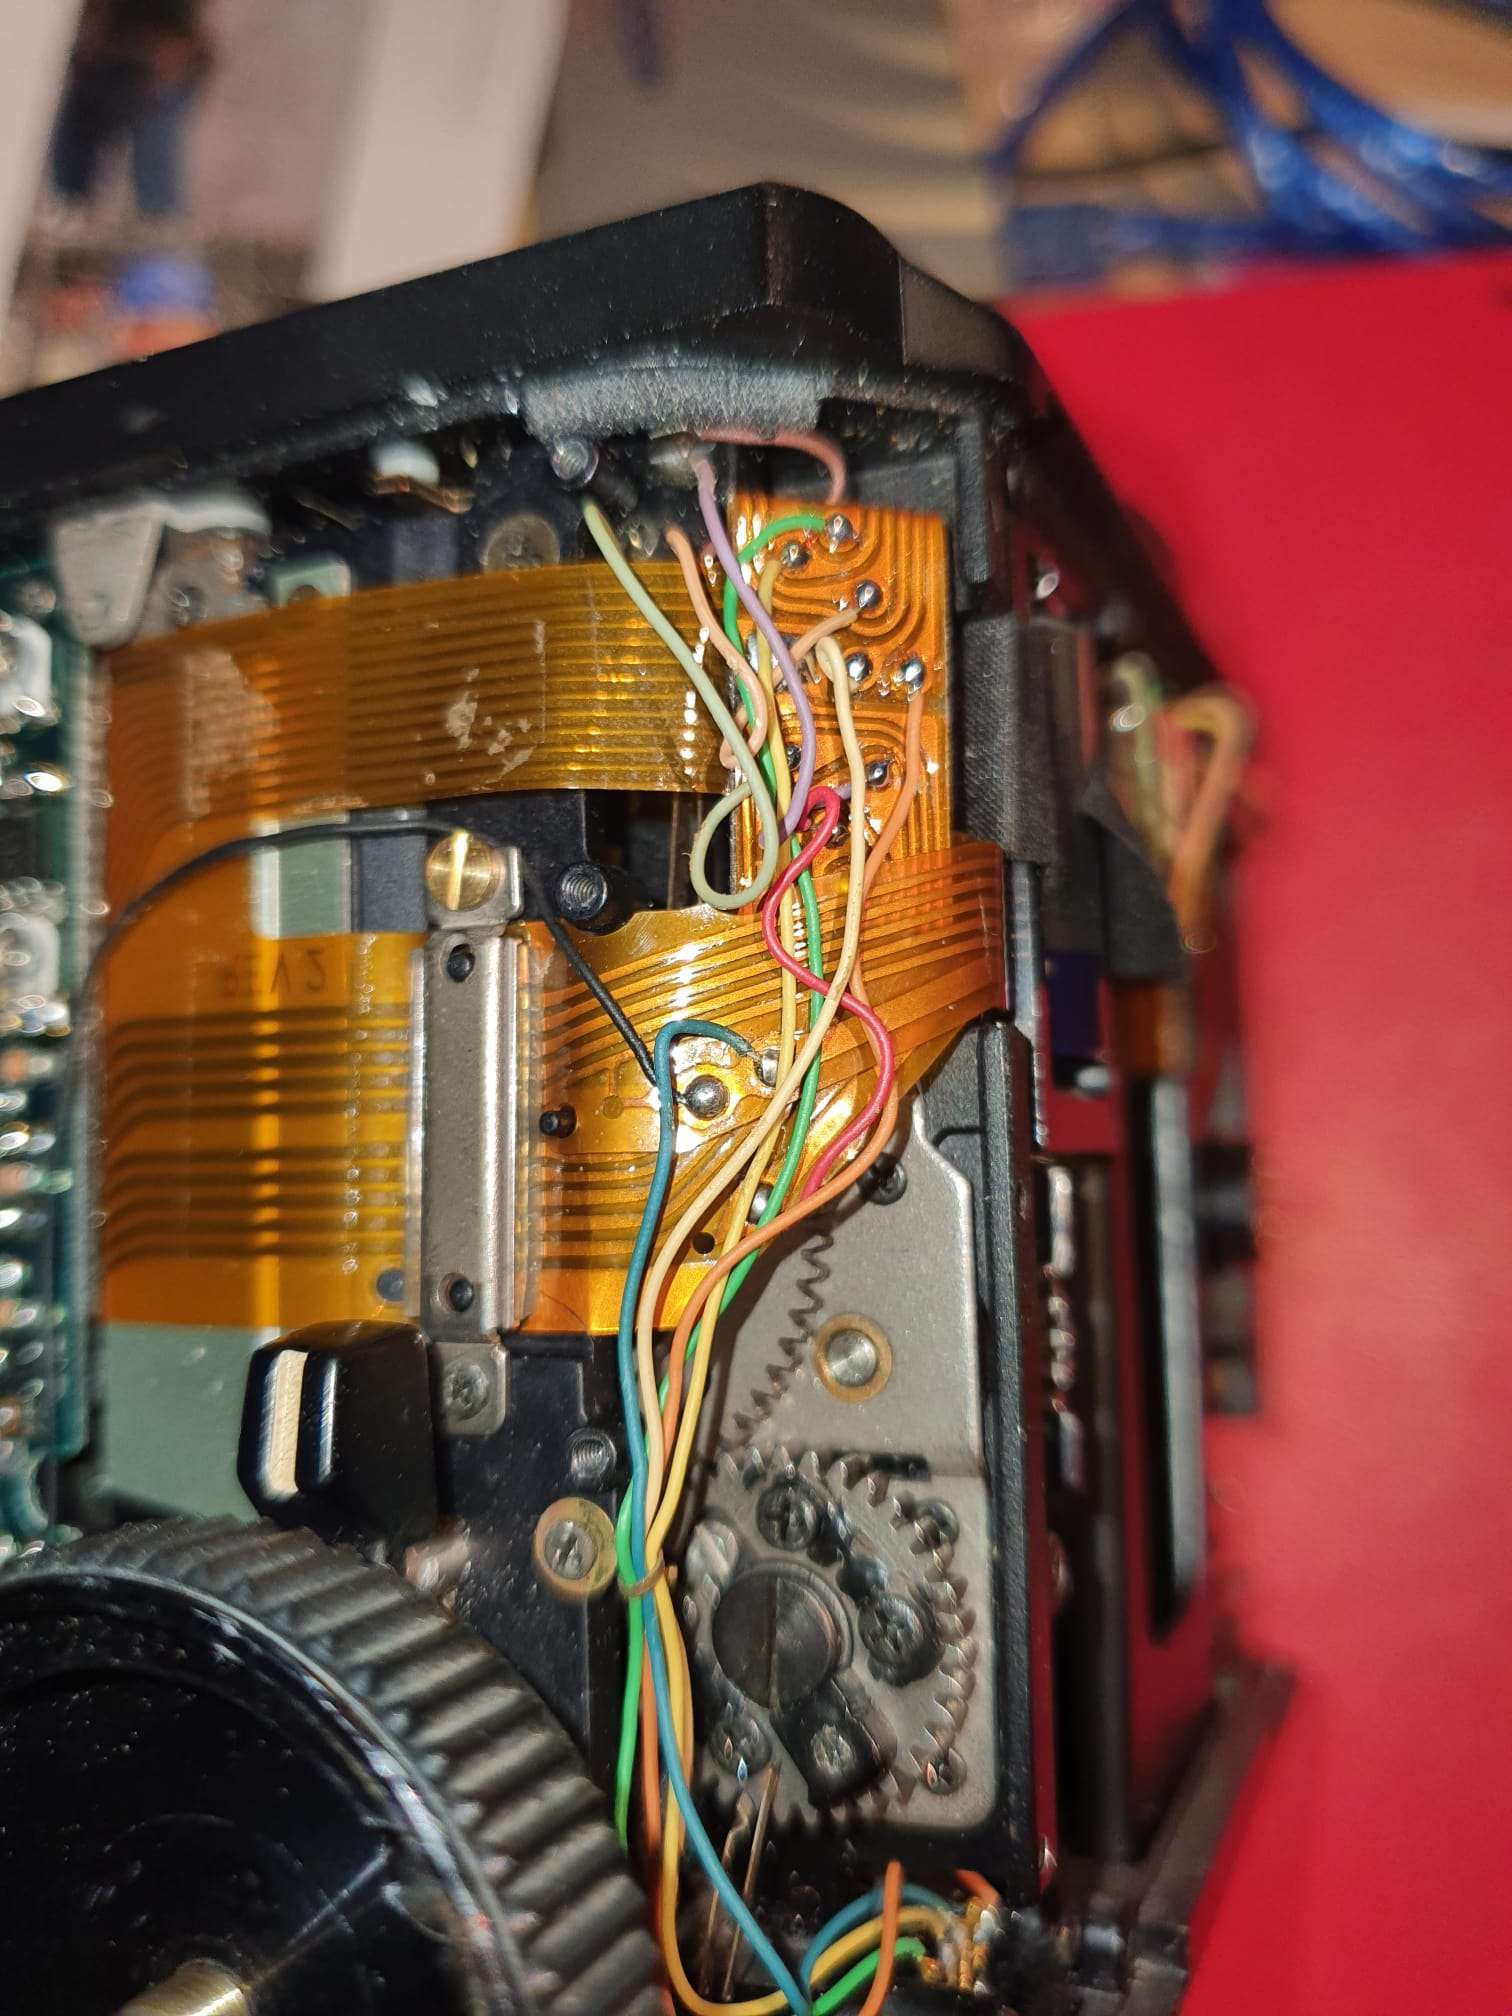
If you look at the added pictures, it appears that this REV2 print and its connected electronics have been upgraded- or repaired- at an earlier stage.
That could mean that this identifies an earlier problem.
First, I checked all reference voltages related to the camera’s settings and then I identified anything out of the ordinary.
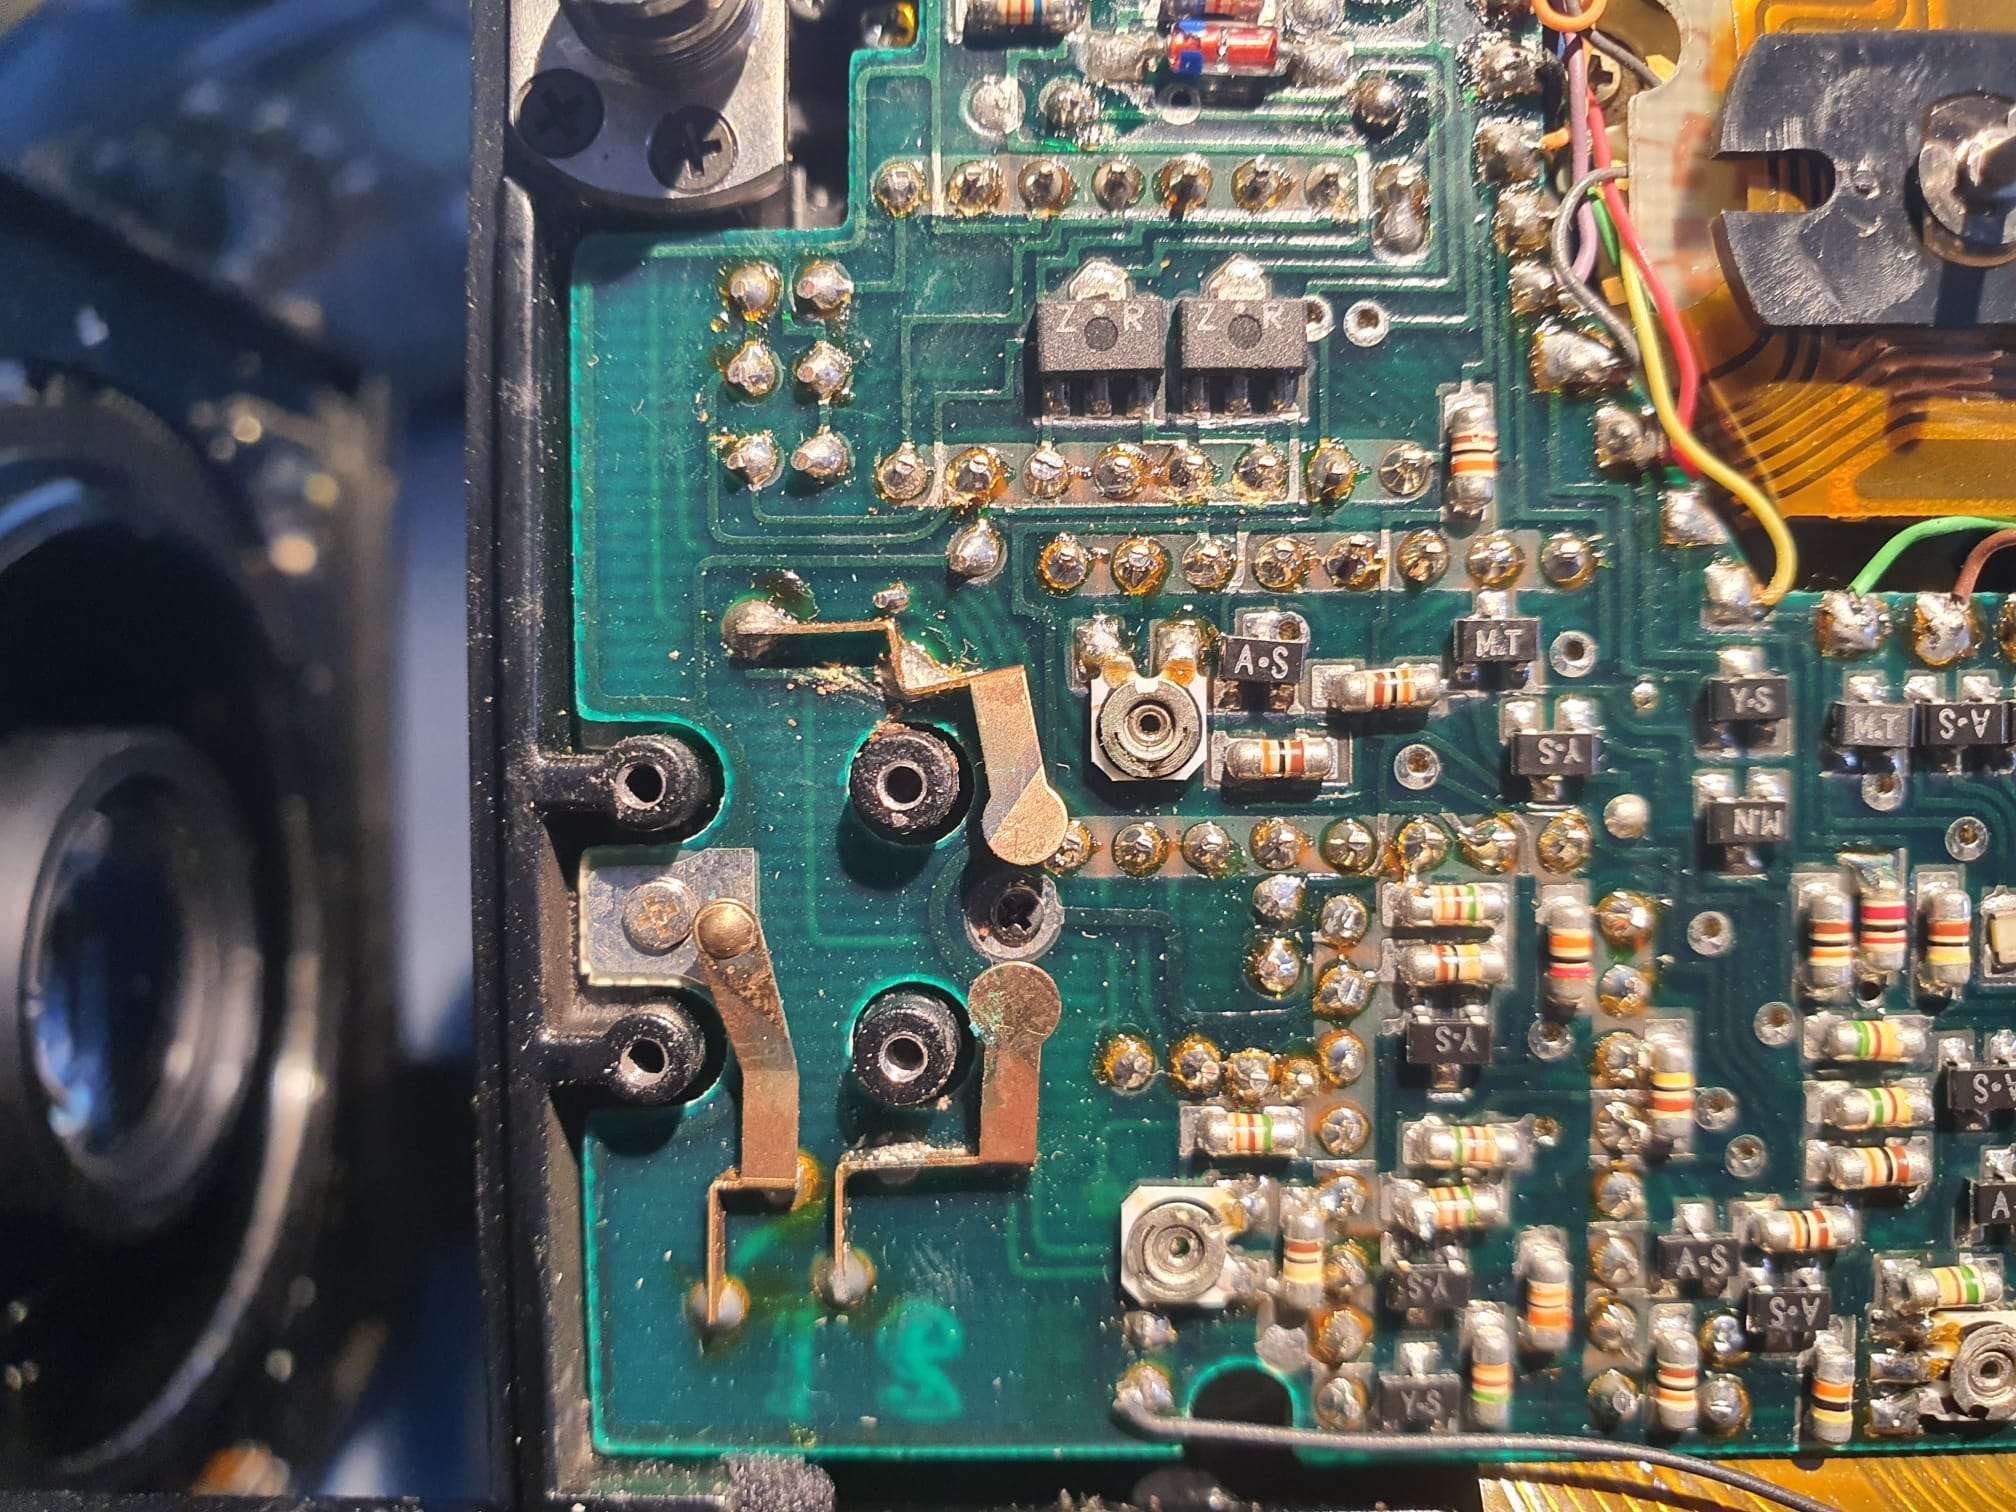

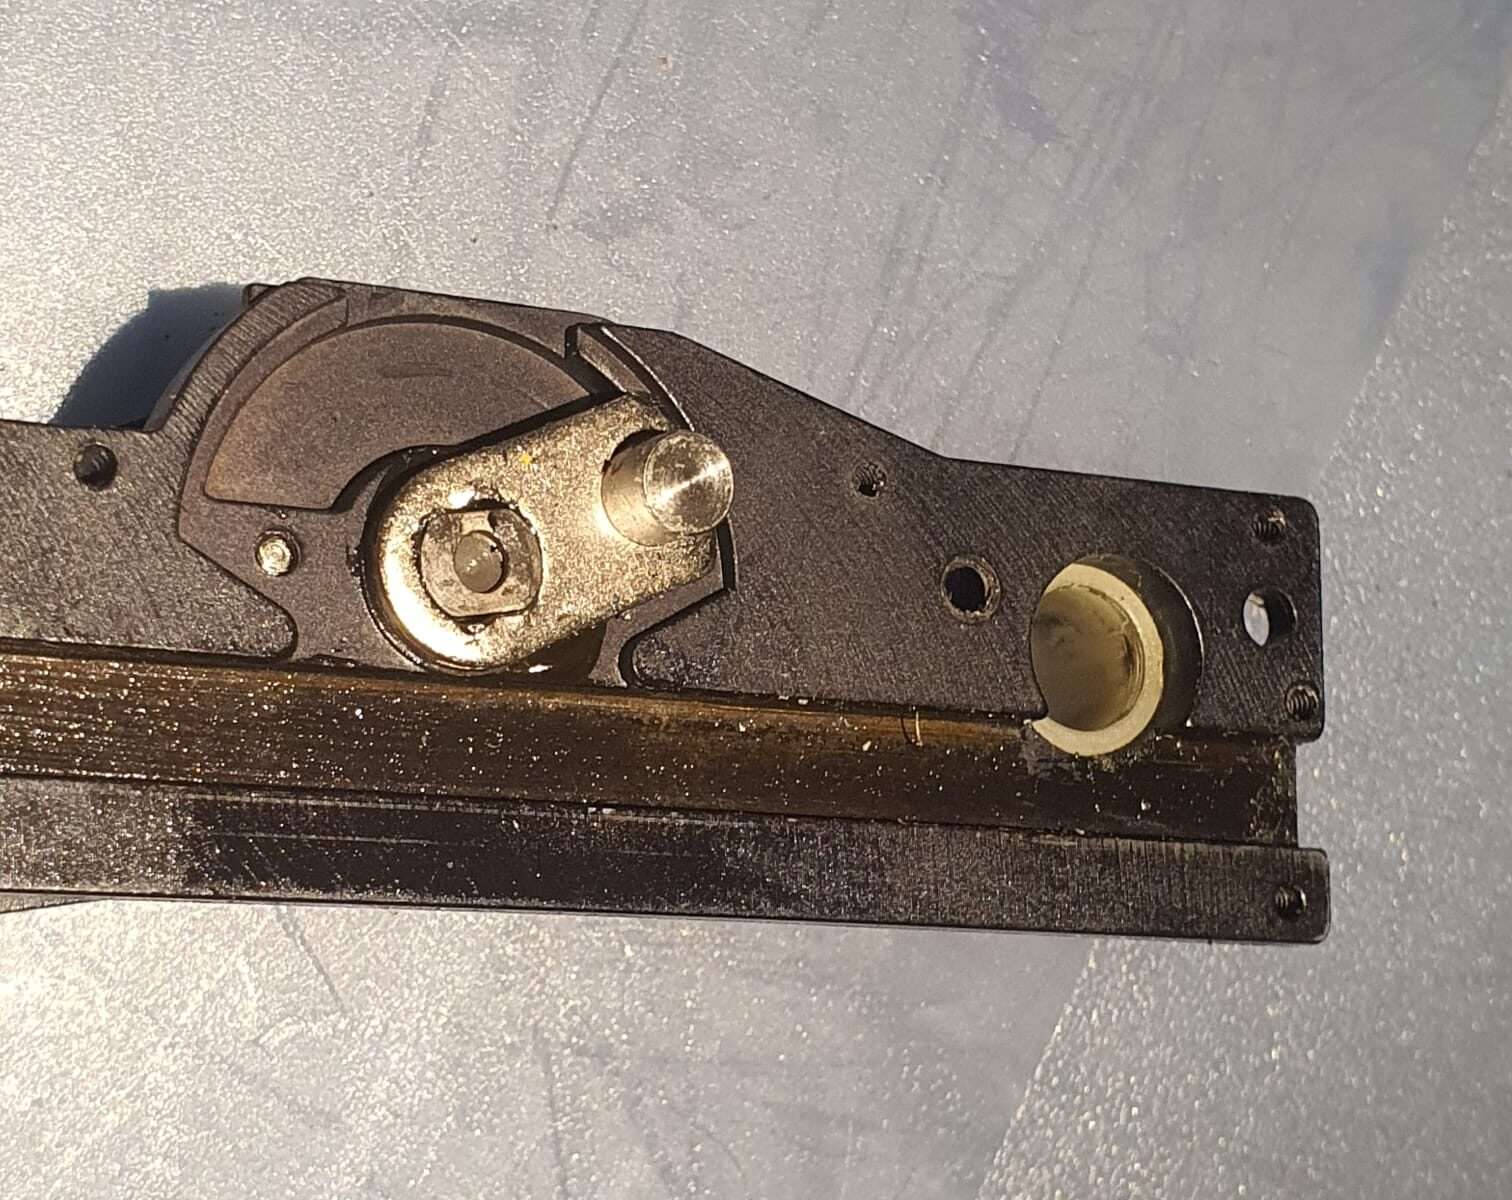
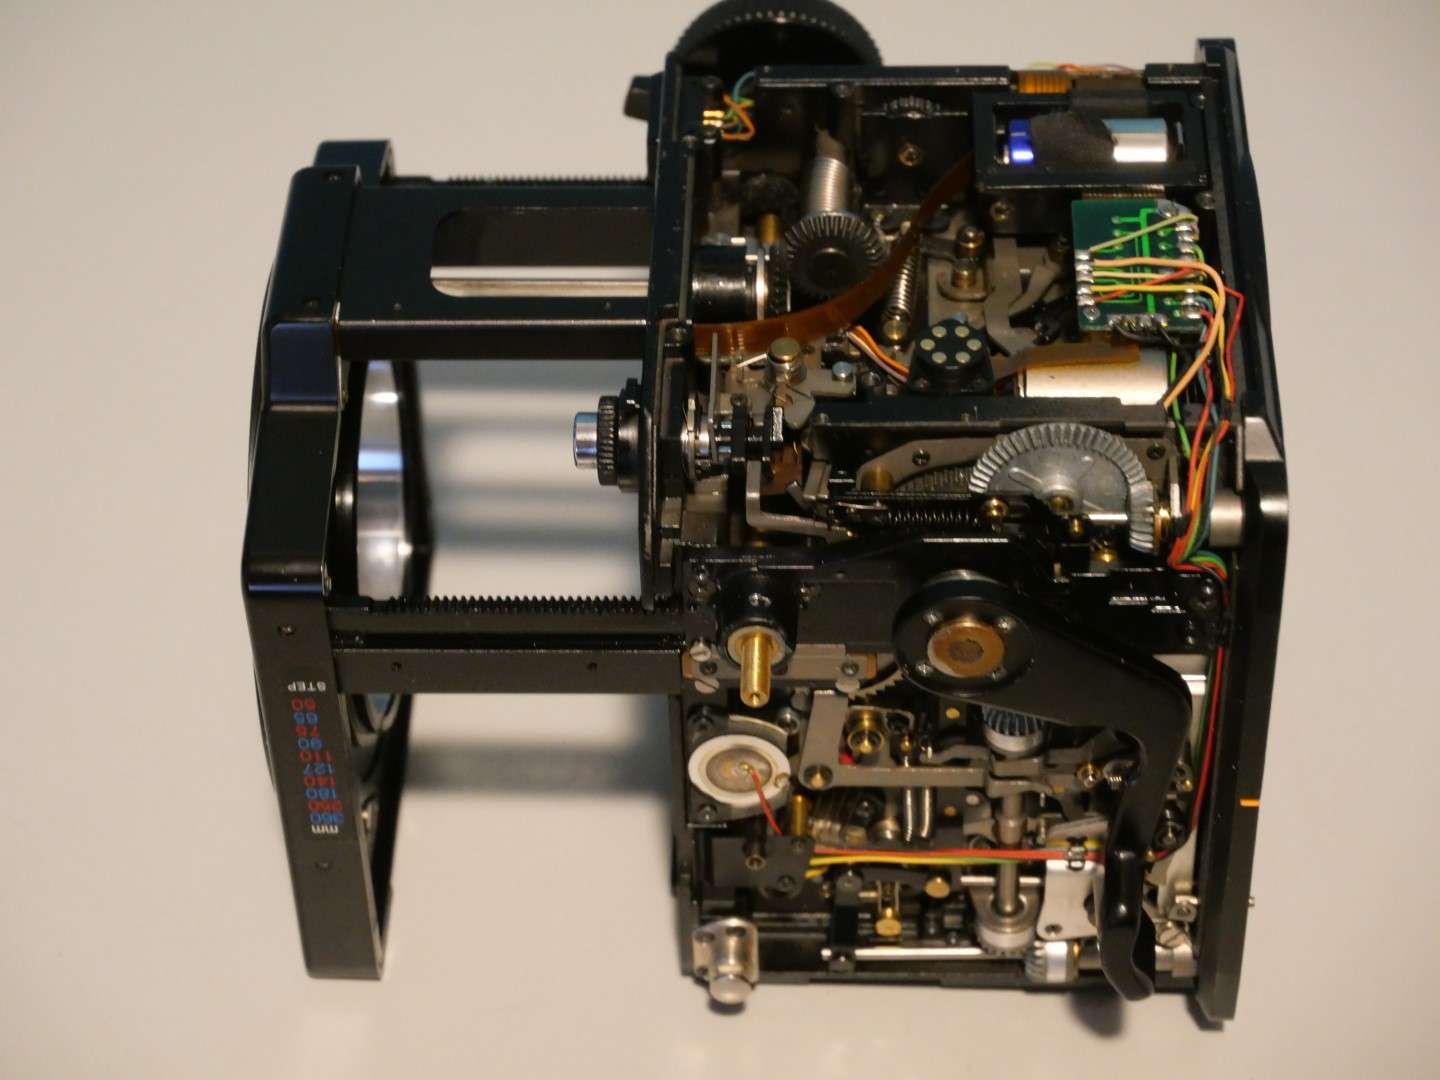
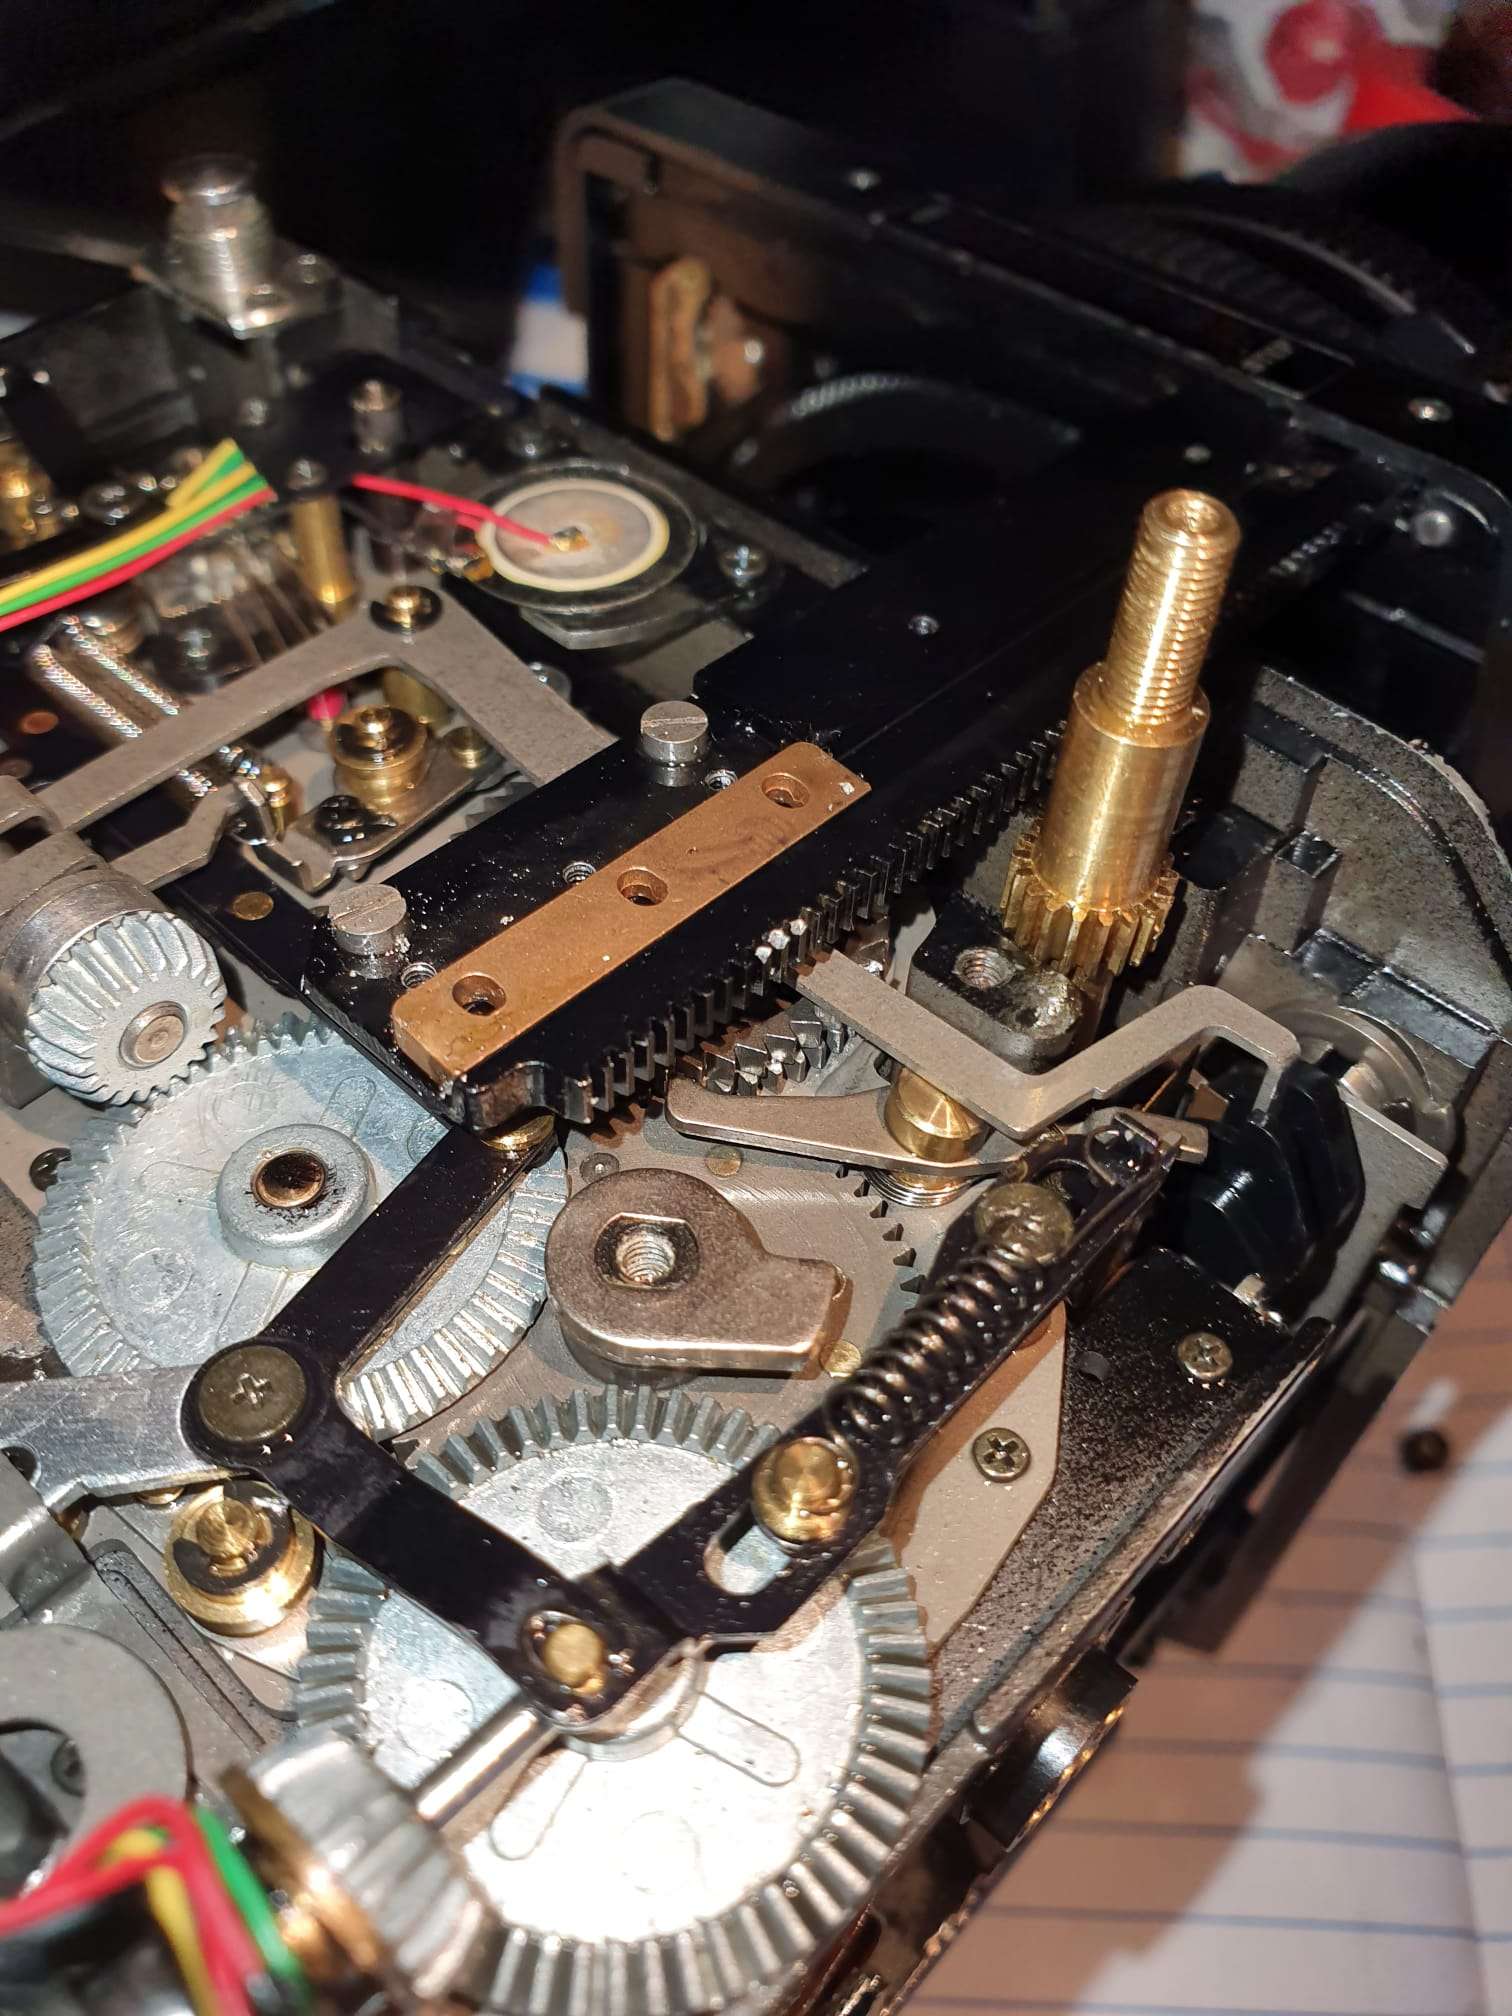
As you can see in the above MP4, the shutter cocking mechanism could not fully complete the cycle to the end of the cocking prcedure, due to play in the connection between the small flange and the rod on which it is placed.
I ended up by just using strong thread sealer, screwing it tight again an waited for 24 hours before using it again.
Together with the beneath shown repair of the external lever play, this indeed fixed the problem of not reaching the end of the cocking procedure.
And thus my donor RZ67 camera housing was working again, albeit only in emergency mode.
But I will explain the repair of this specific electrical problem(s) in yet another post.
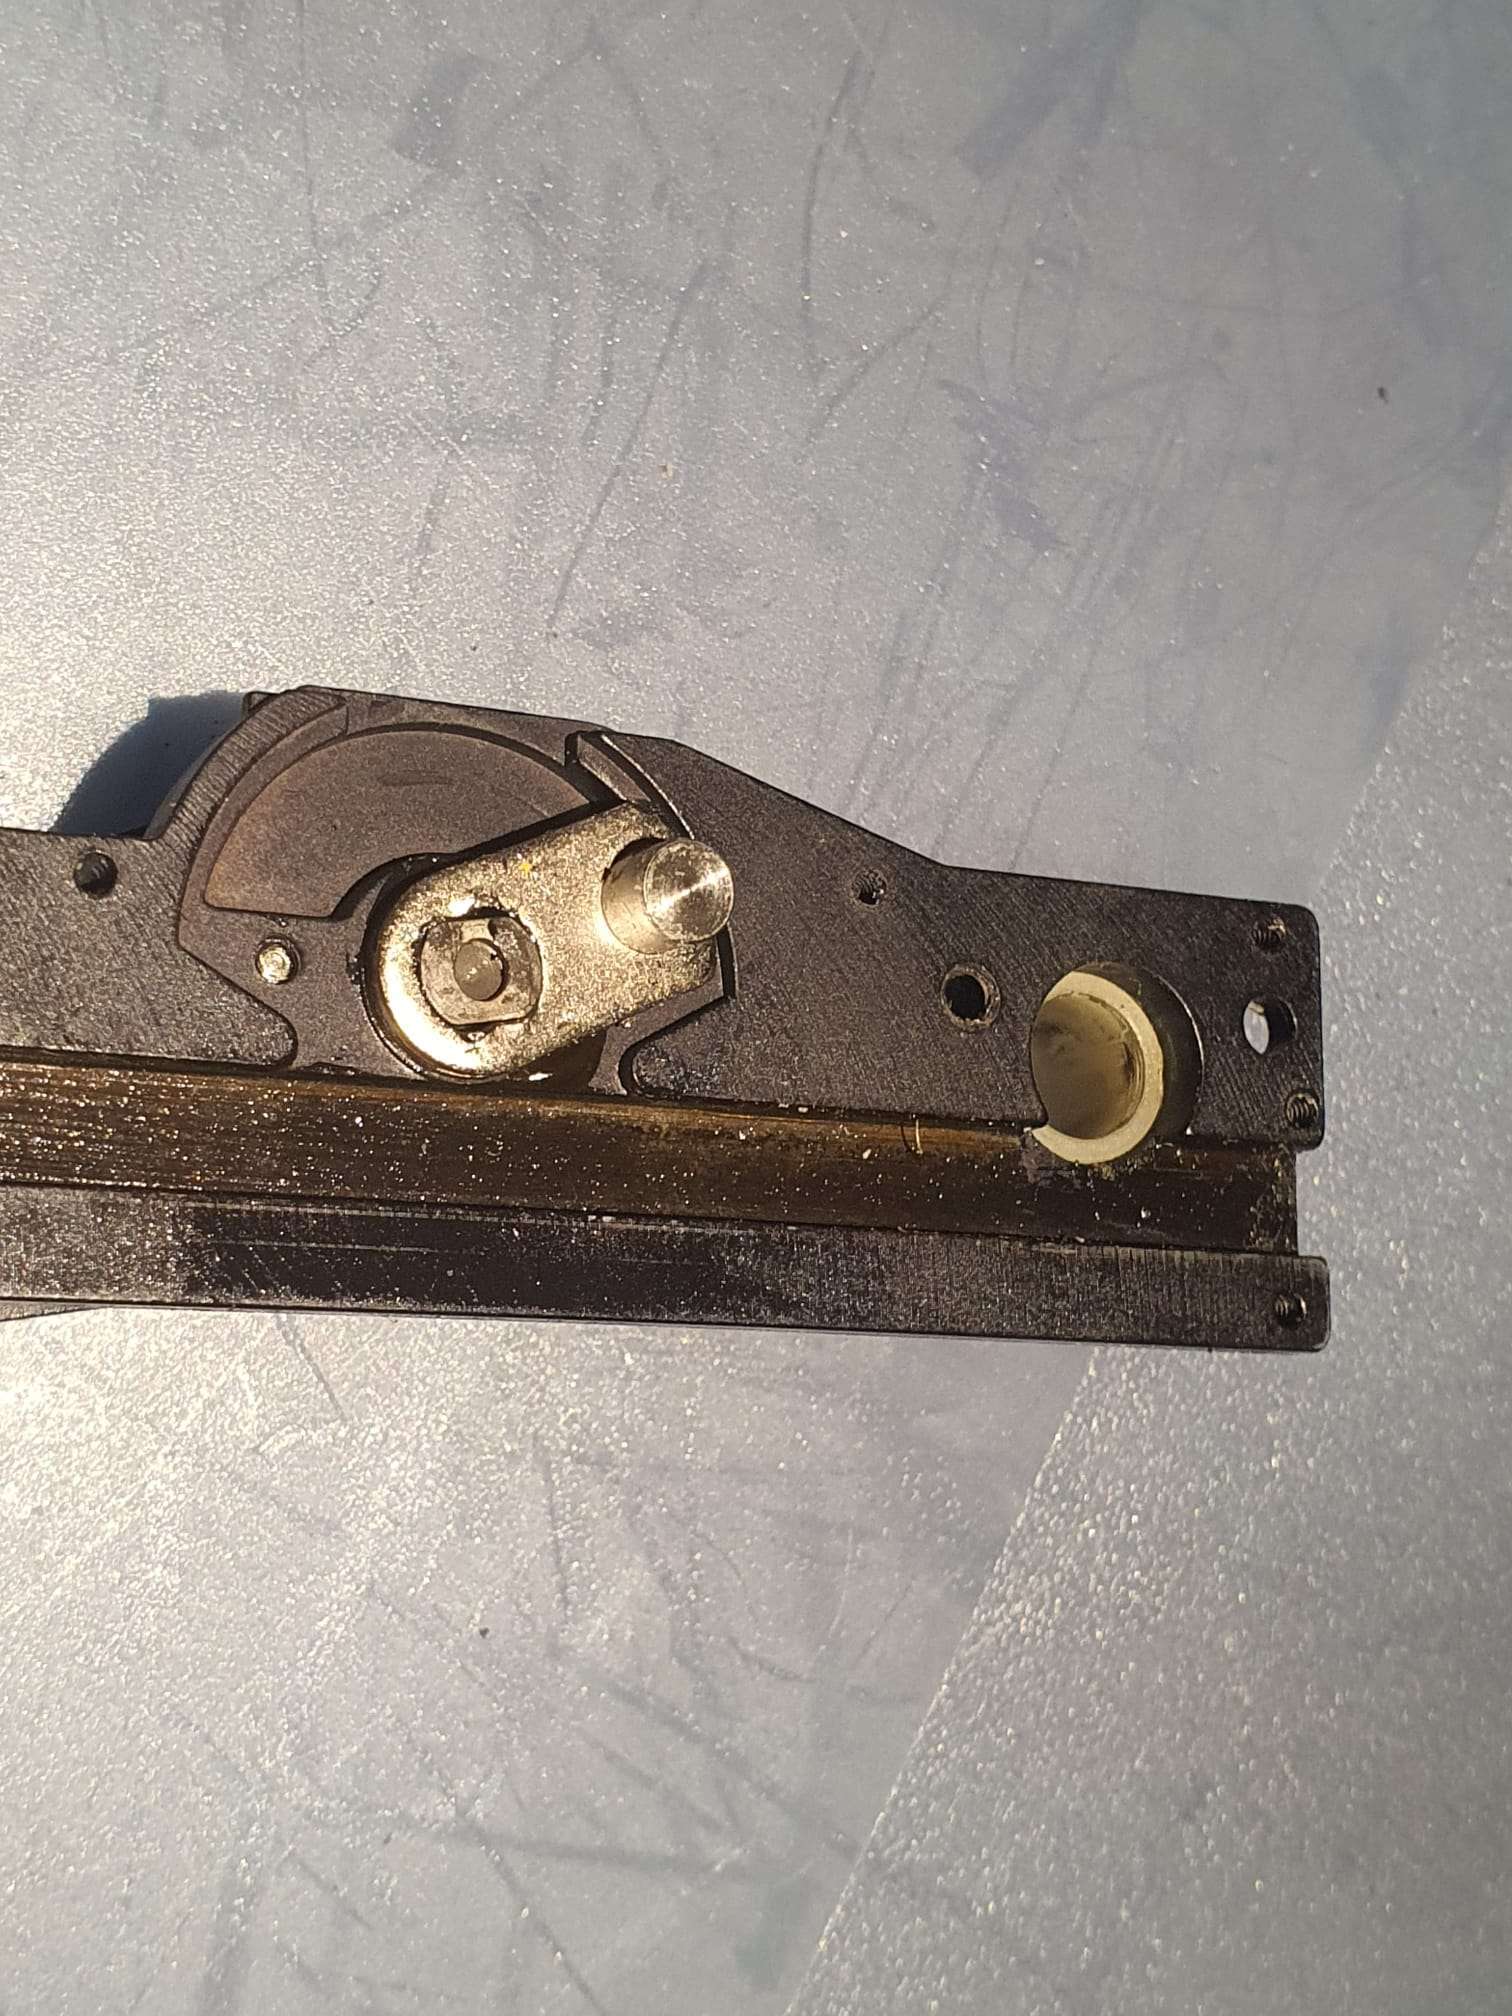
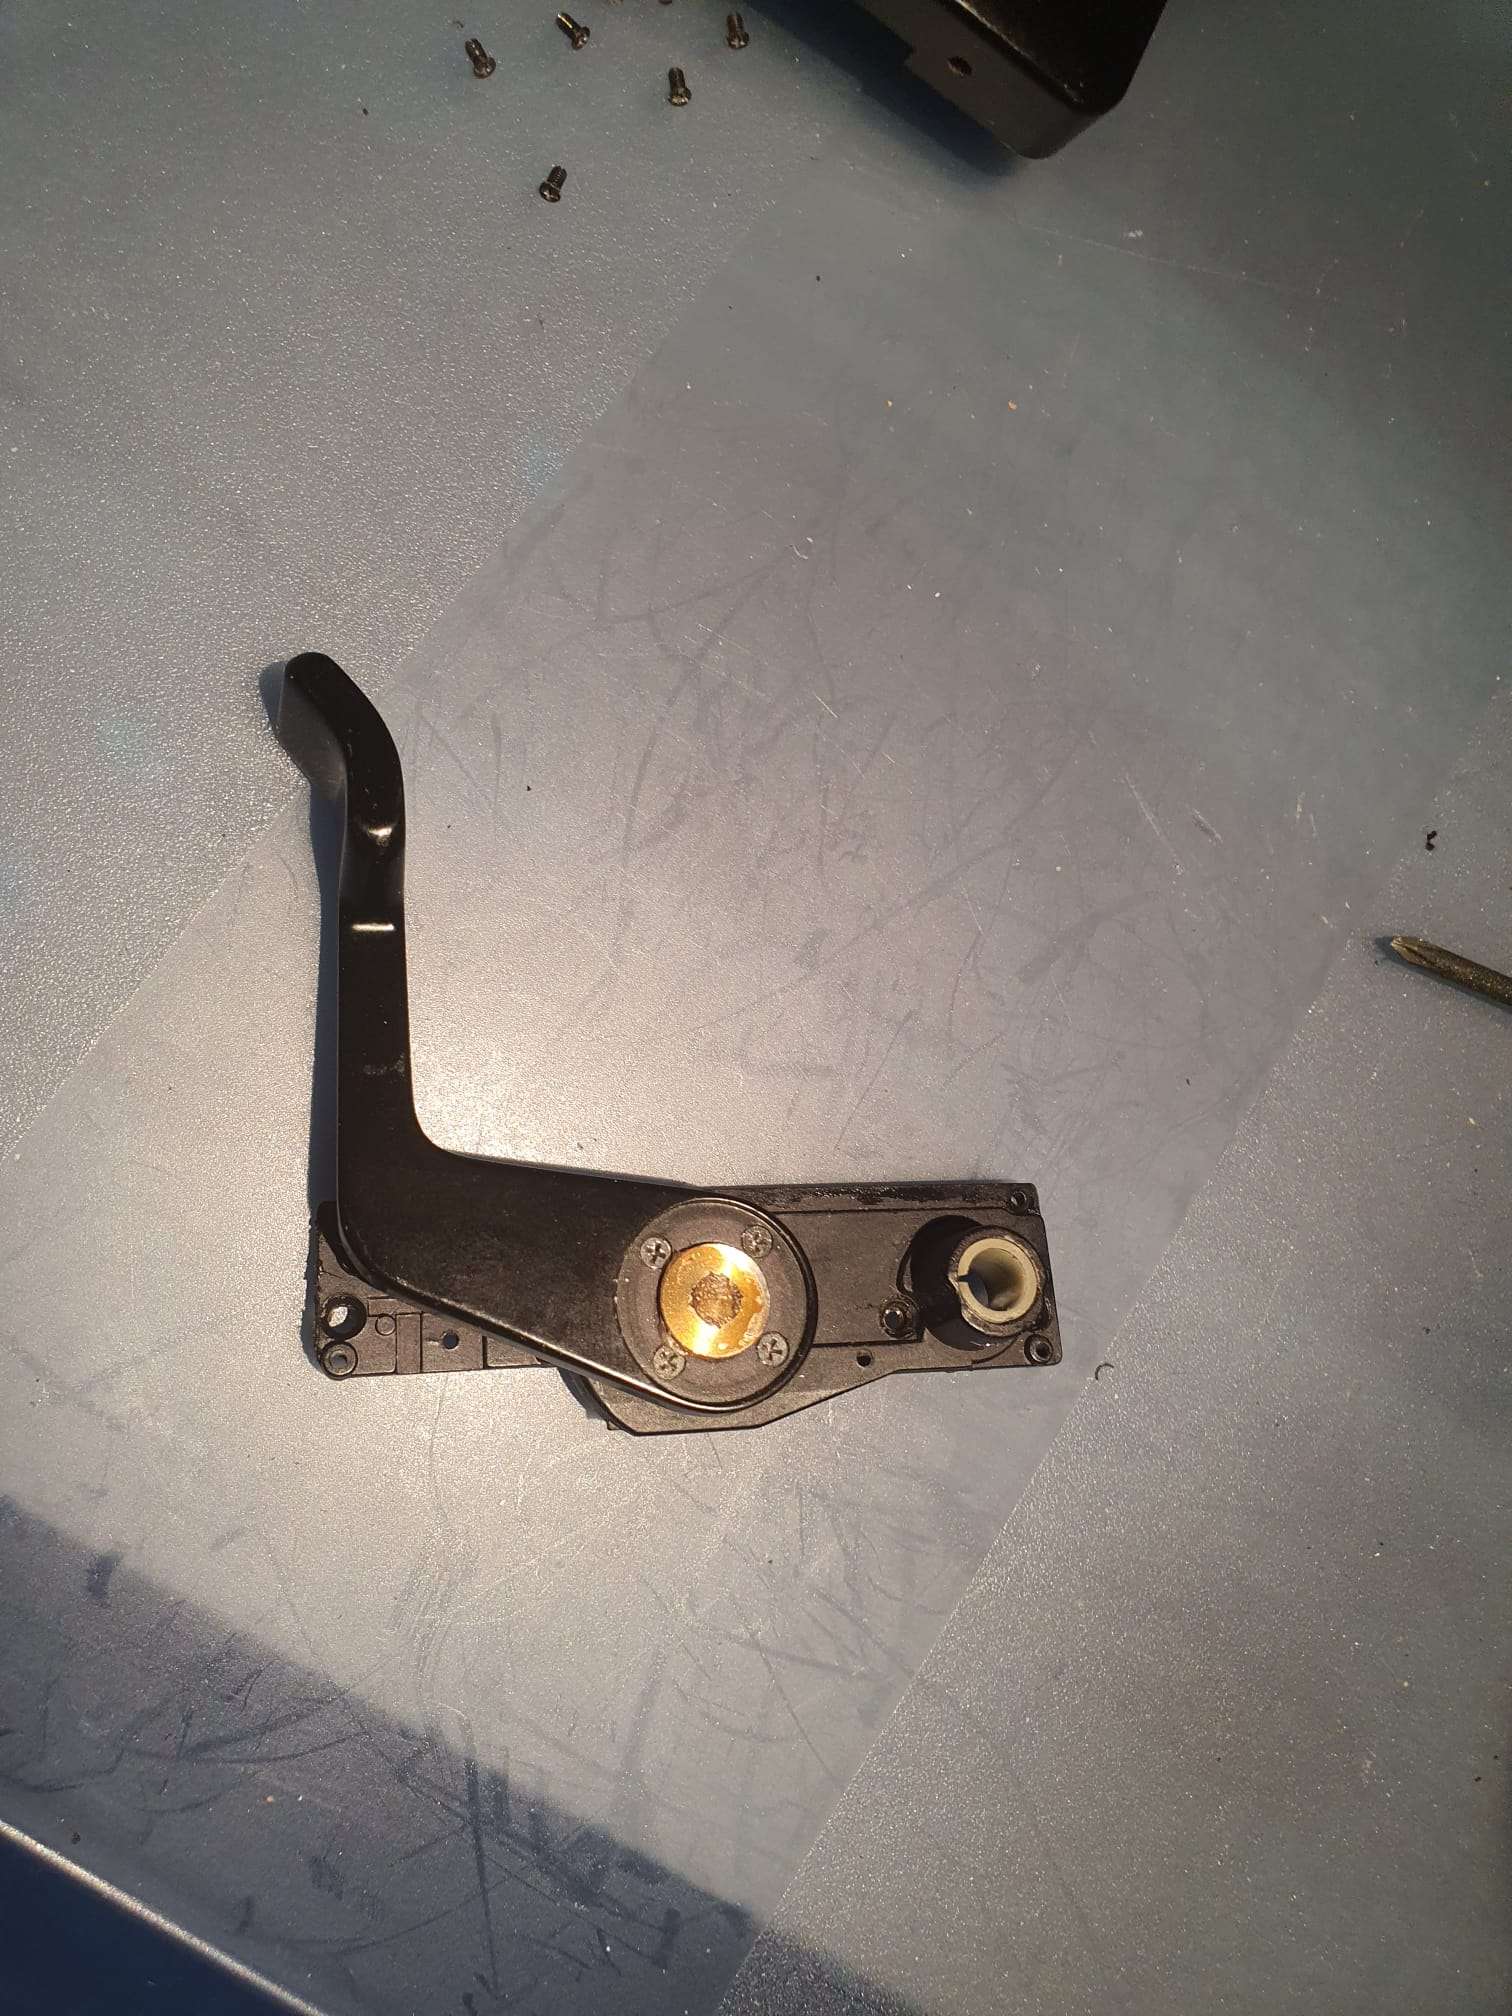
And- also the same problem with the outside lever. The lever was easy to repair. I put it on my working table , on the flat part of my vice and used a blunt pointed driver and a dead blow hammer in the center of the small axle to punch it and this fixed the outside (big black) lever again firmly to the internal small lever.
2022-02-10: FIRST ENCOUNTERS – RZ67 system & APTUS leaf 65
Recently I received some extra money to persue an old dream:
Get a medium format camera with a digital back and make some awesome architectural pictures!
I know that the Hasselblad/ Zenza Bronica/ Mamiya/ Phase One and some other’s medium format camera’s can produce awesome results, and that they are mainly used for non-moving os slow moving objects.
But- I am more of a digital type than analogue.
So-I really wanted a Hasselblad sort of camera with the awesome 39Mpix digital back.
But my budget is limited, so I had to get my wishes adapted to my budget.
In the end, I ended up with a set of Mamiya RZ67’s, both with a known problem so I could make 1 working camera out of 2 non-fully functional ones.
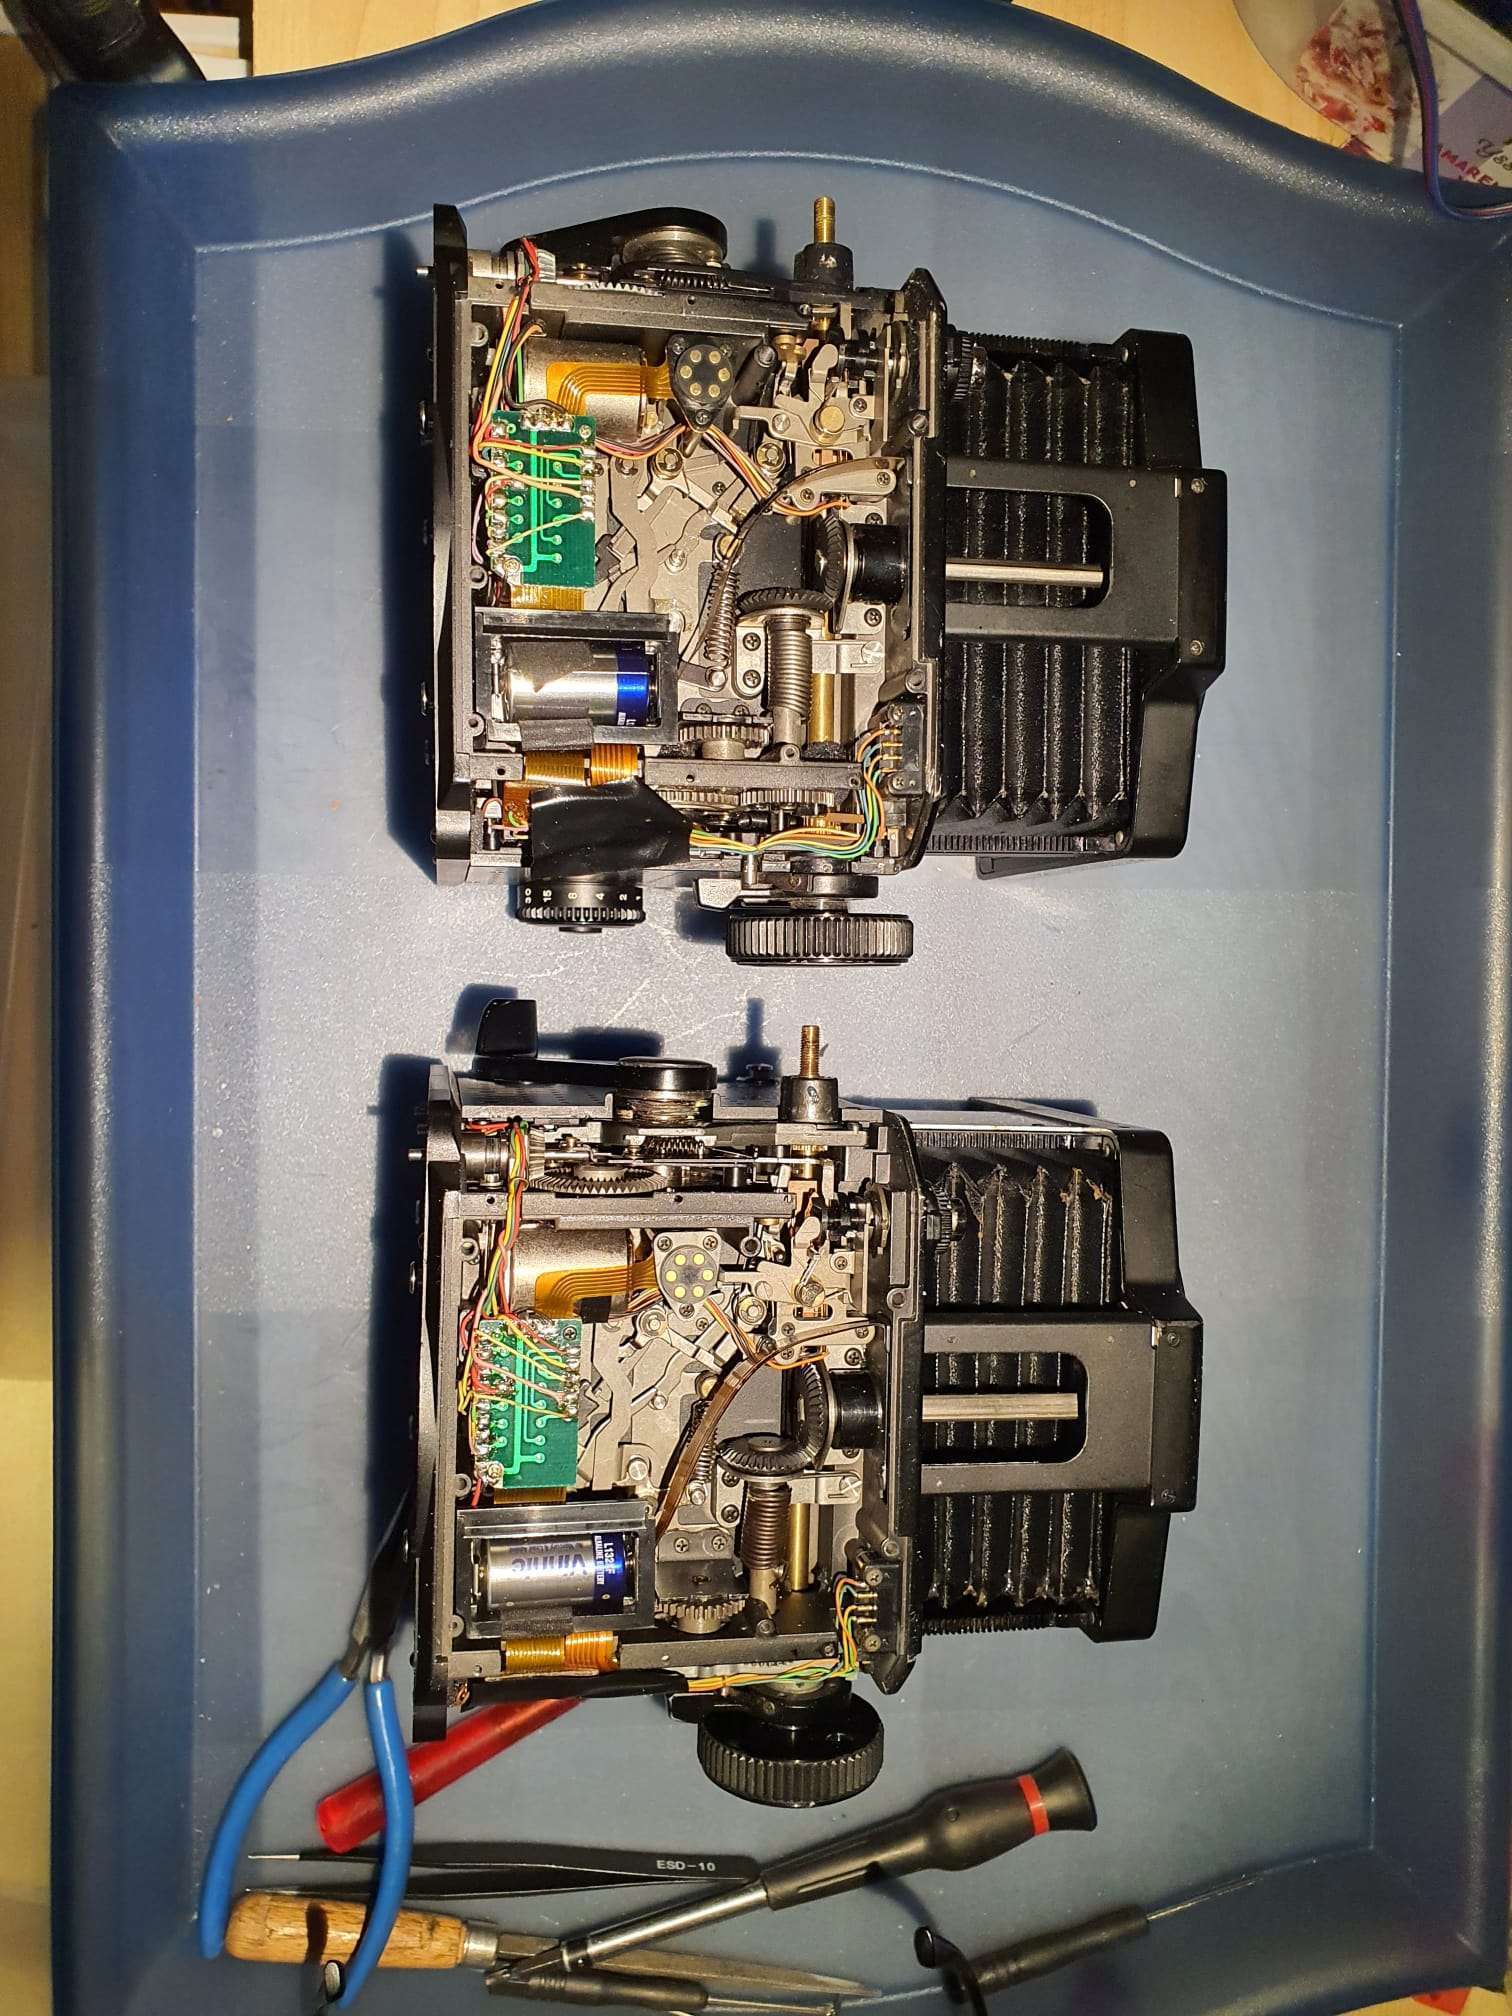
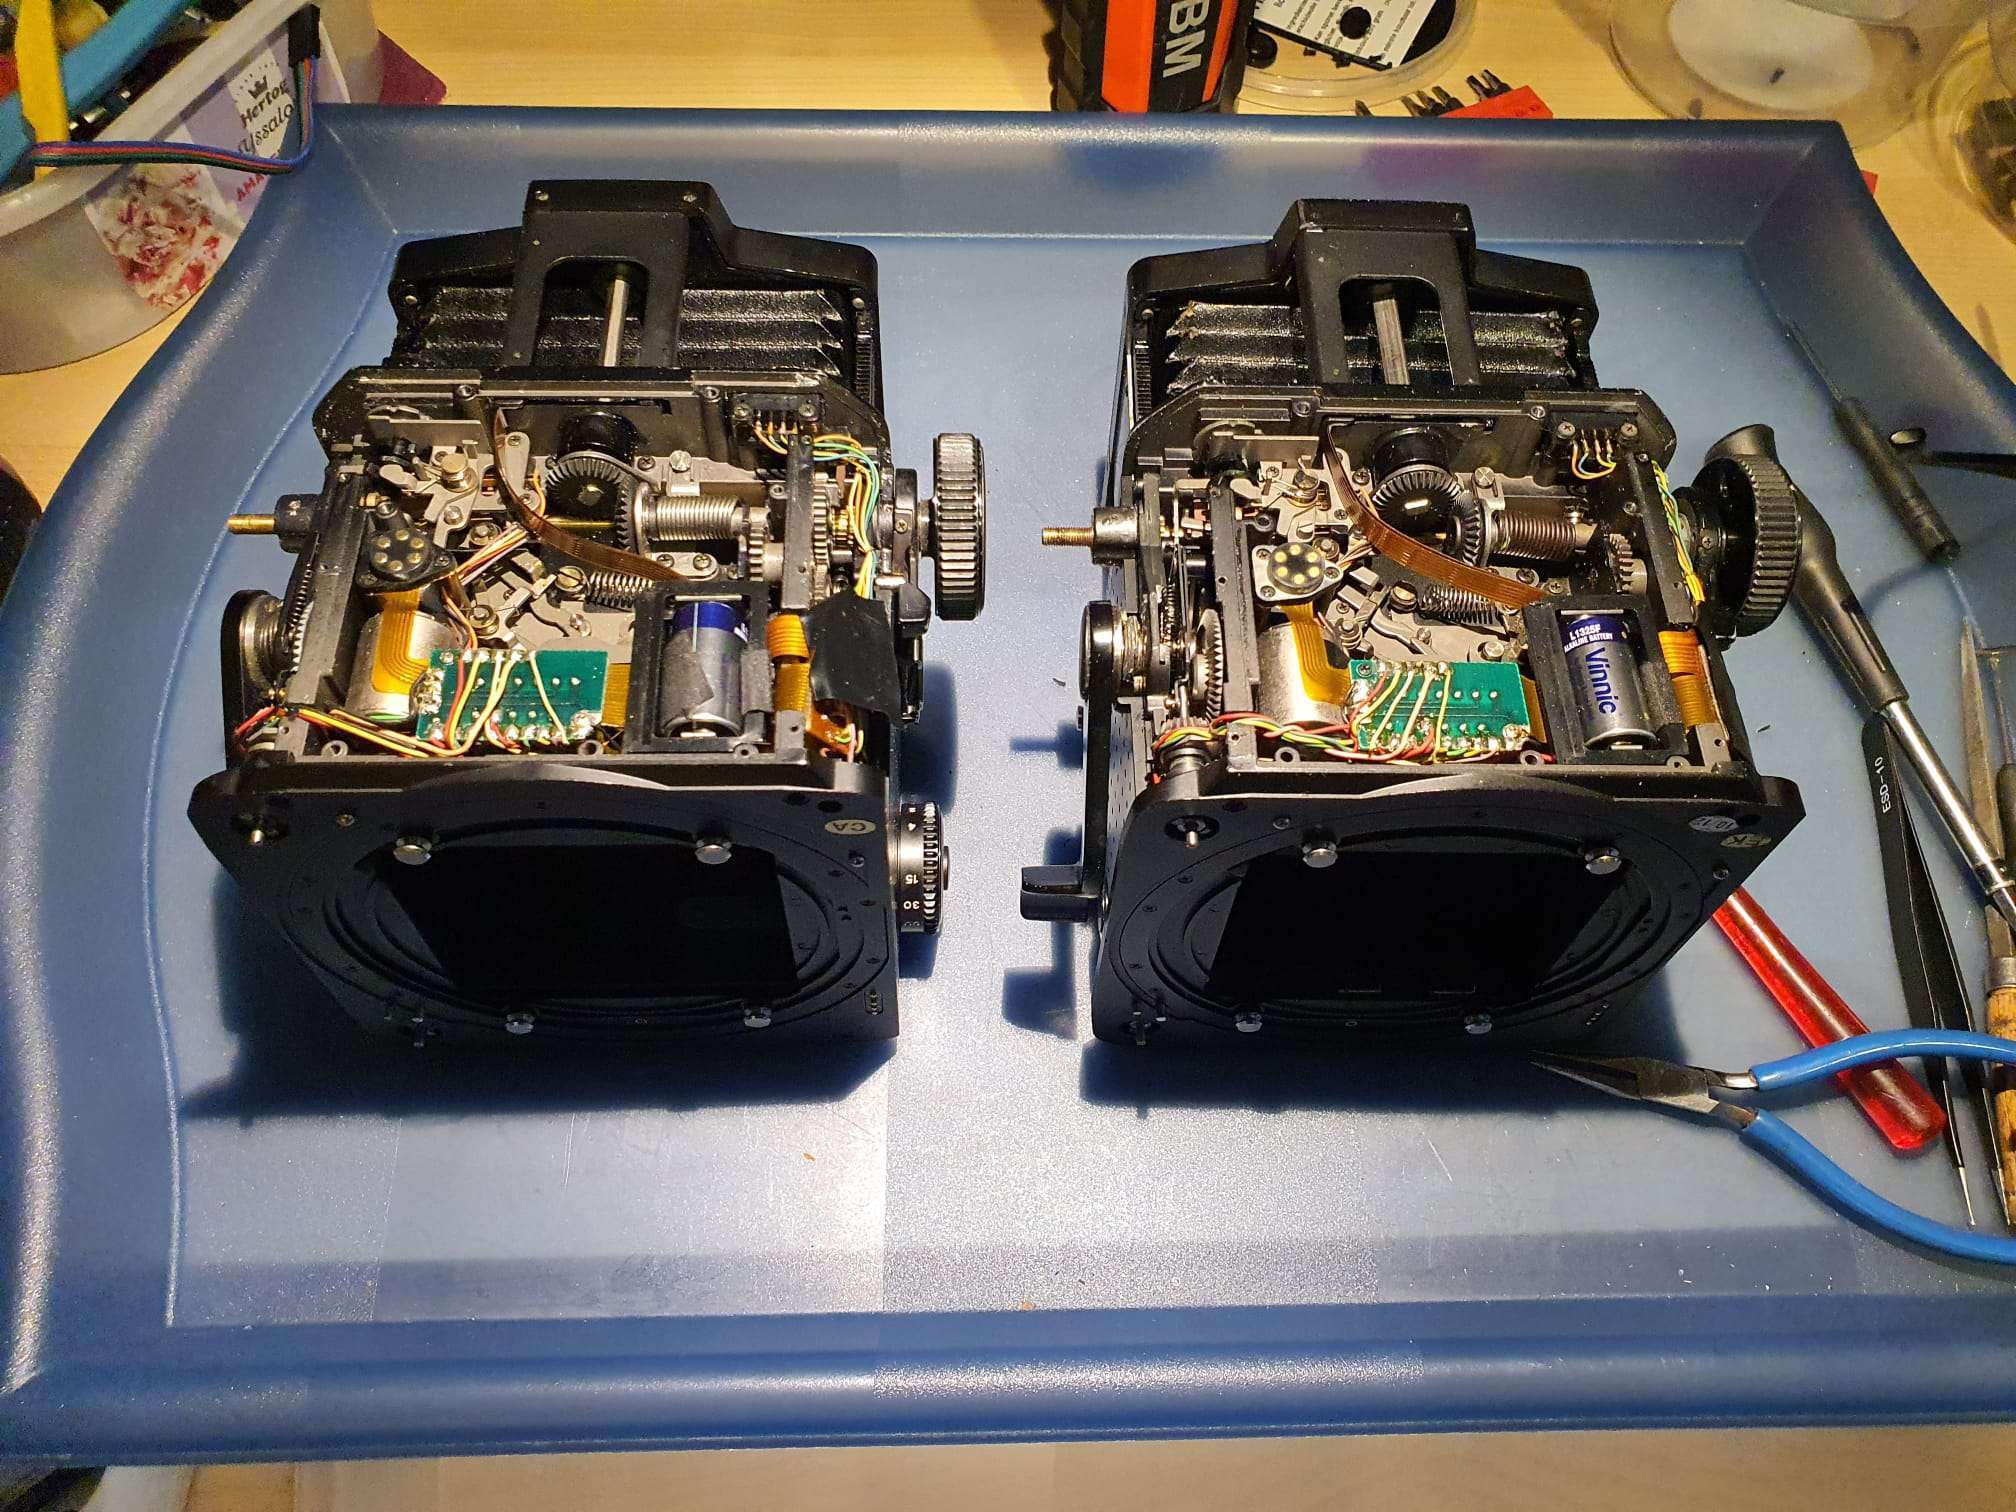
The repair went very well and within a period of 4 hours I had 1 completely working operational RZ67 camera and 1 donor camera with a lot of loose parts, that I will repair upon receival of the new bellow I ordered from AliExpress for 70 Euros.
The camera’s were acquired from Japan, like most of the other parts except the digital back that comes from Sacndinavia:
I got the lenses from ebay, and two of them really need some internal cleaning.
The one that works best is the 250mm lens.
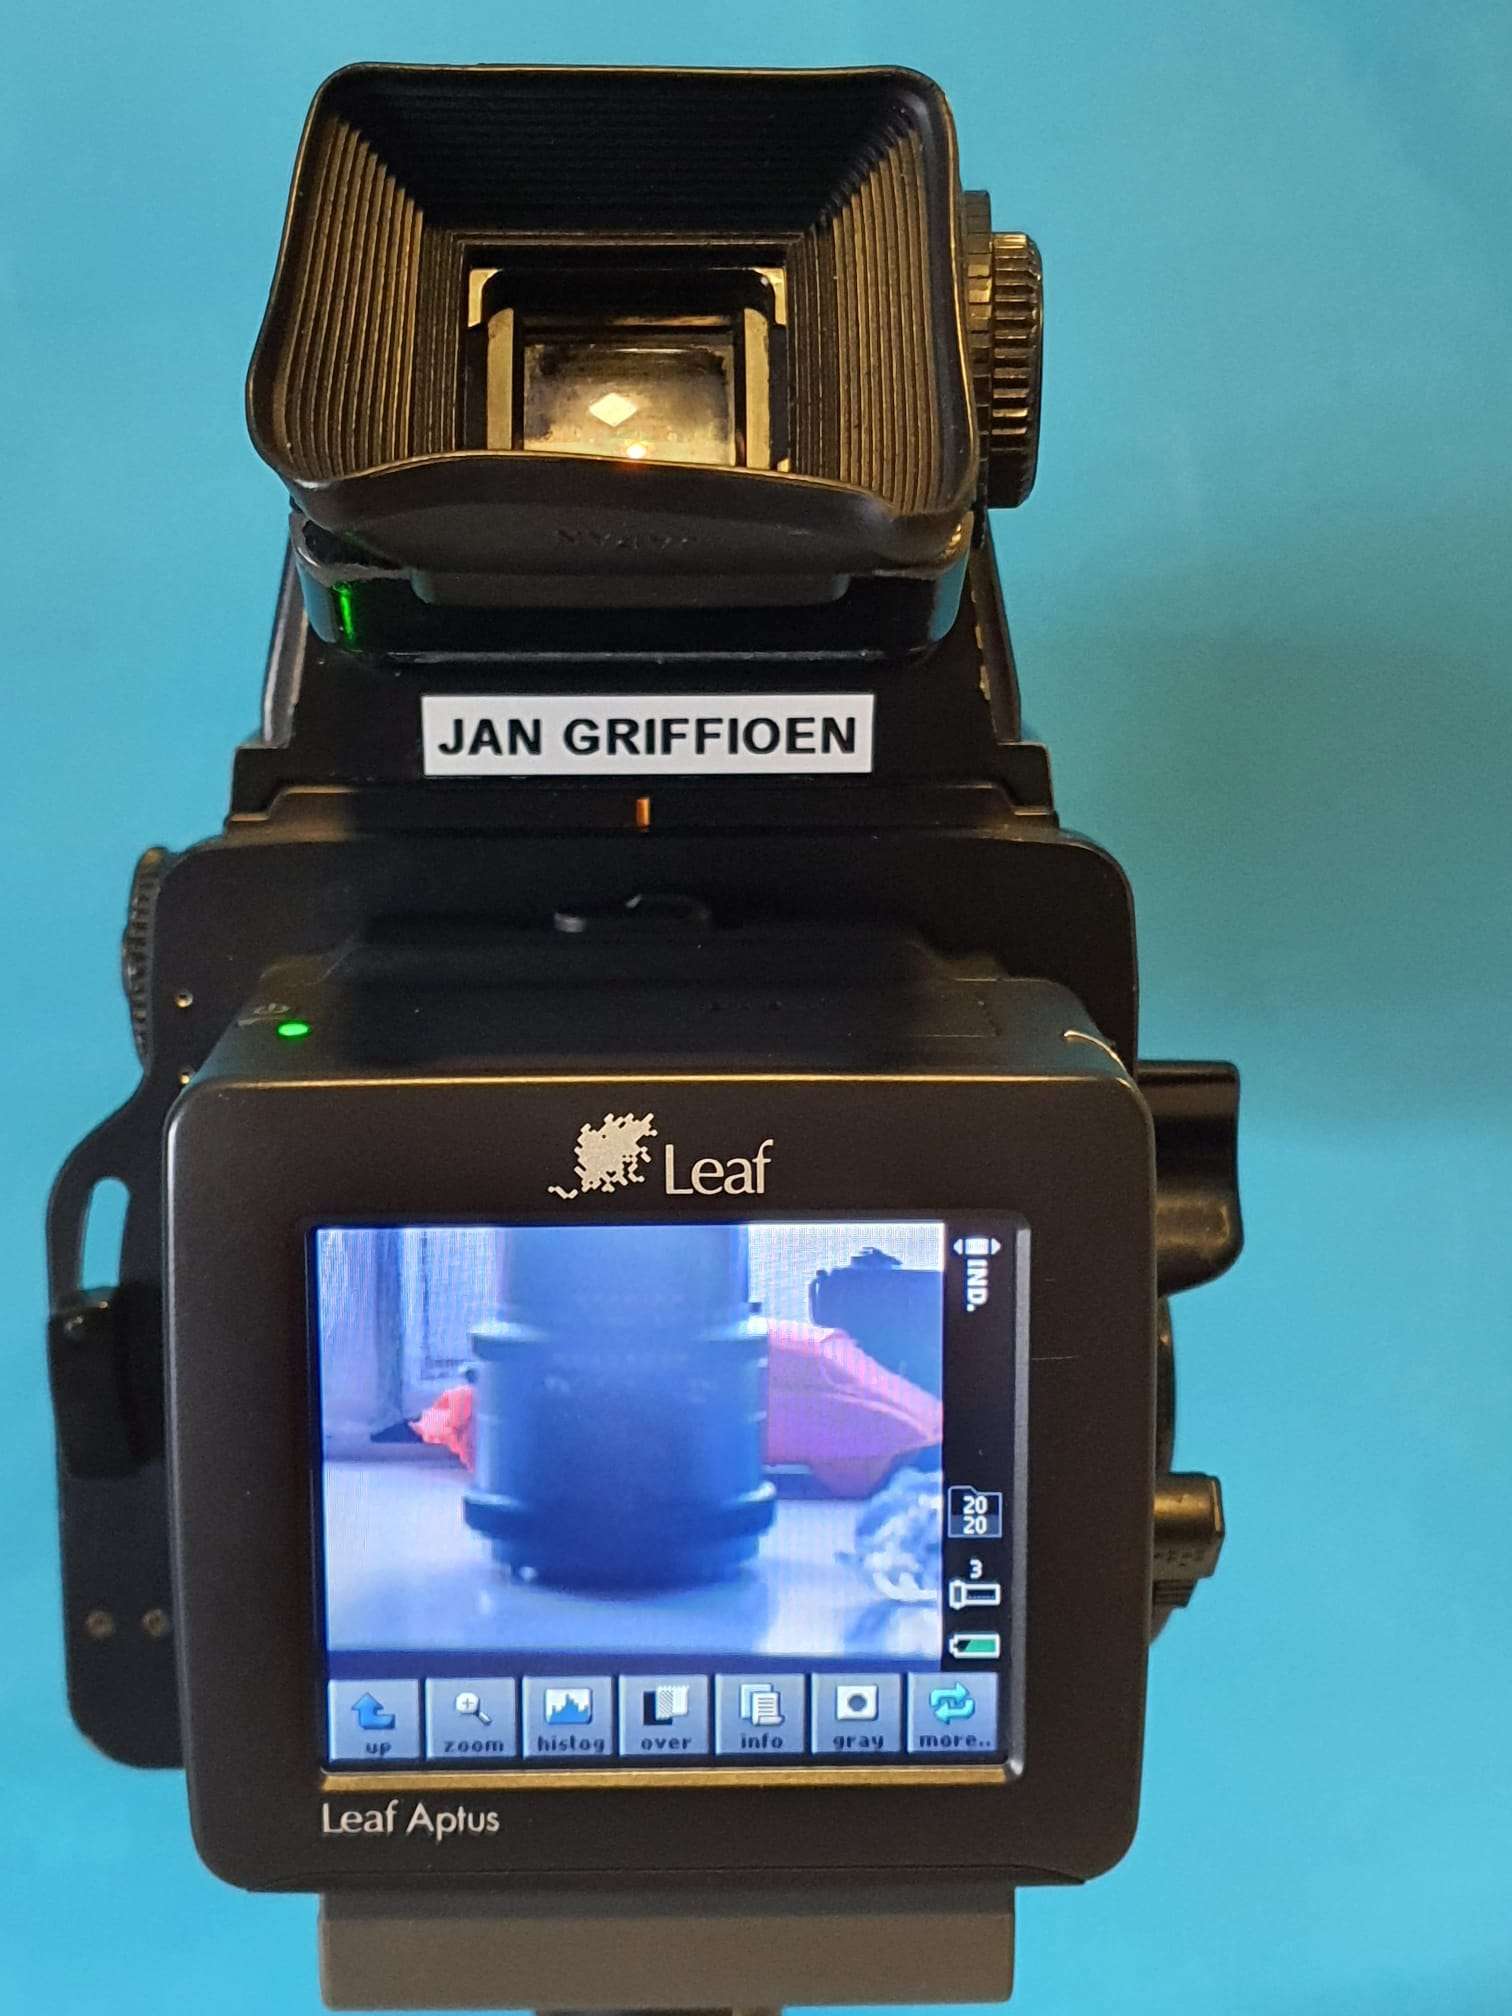
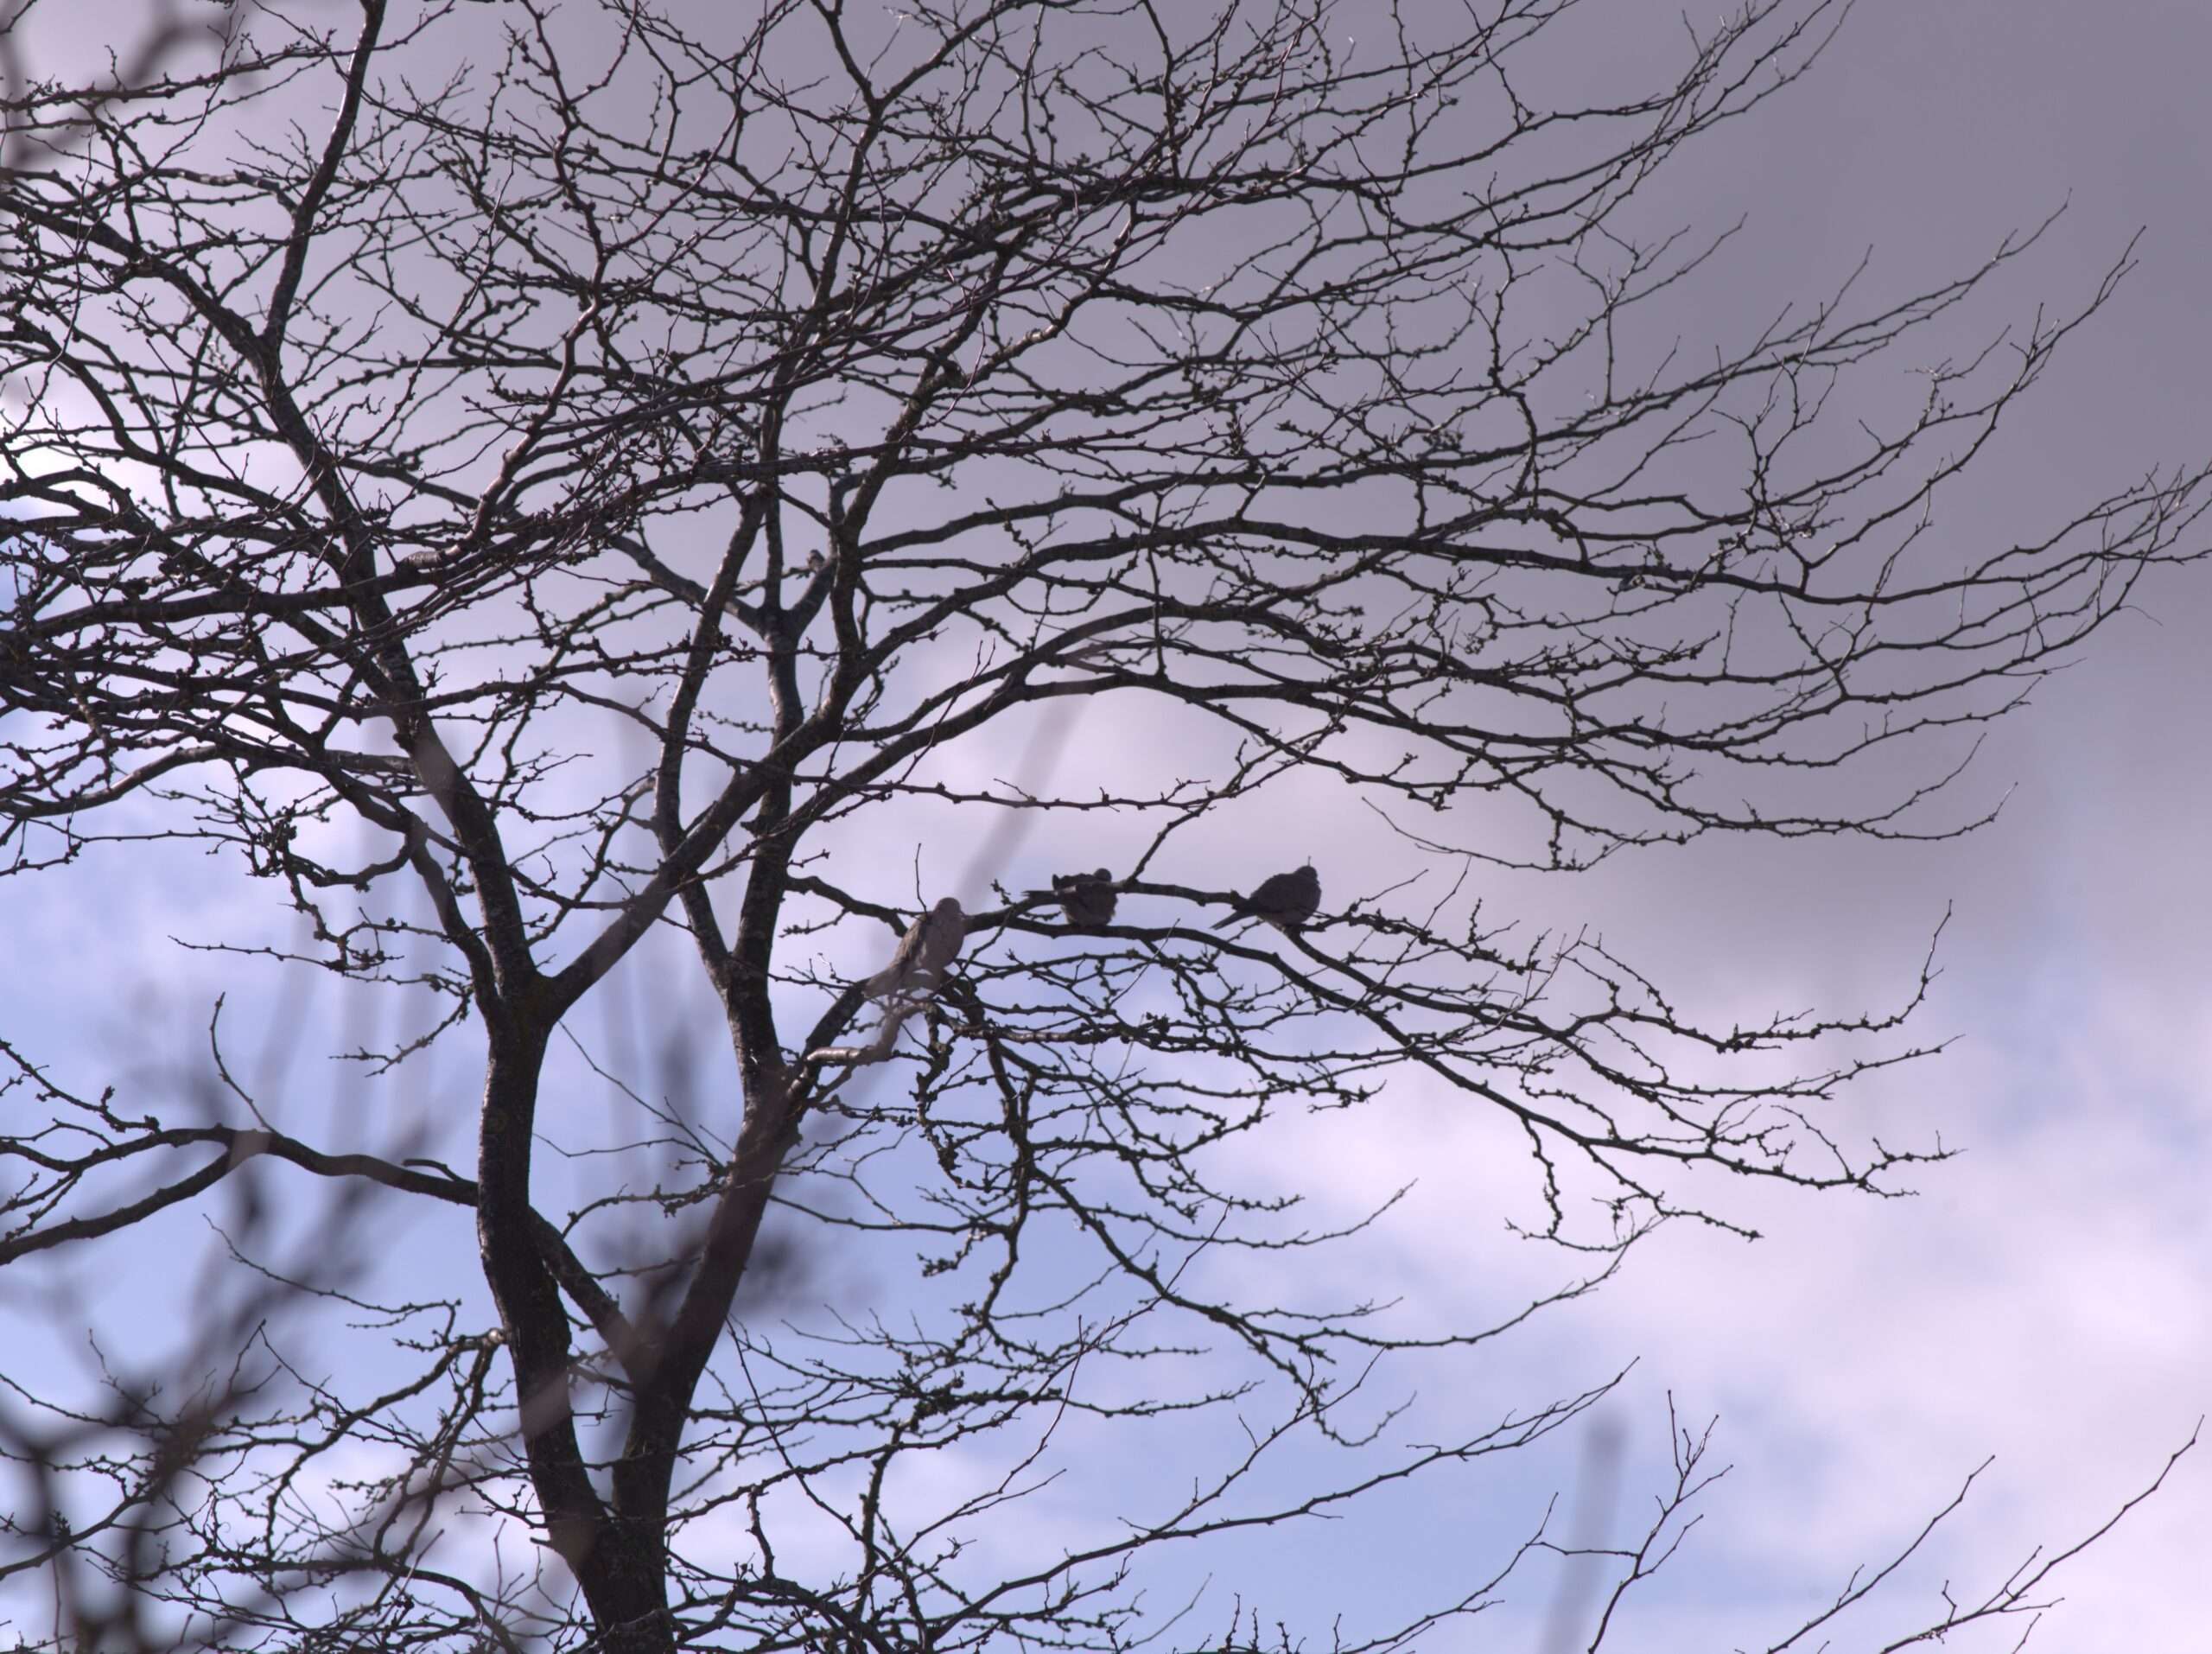
I got some pictures taken right after everything got mounted on the rig, through the window at home.
I used the AE finder on Automatic, and set the lens’s aperture at 32 to get the sharpest details.
The automatically generated (and set) shutter speed when the position switch of the AE prism viewer is set at ‘A’ in broad daylight against the clouded sky turned out to be around 1/15 second which seems quite long.
And the picture of the tree branches with some birds sitting on them turned out beautifully!
This tree is about 100 feet from my house (30 meters), and the couple of branches fill all of the screen, so the telephoto power of this combination is working very well.
This first digital photo that I made with my RZ67 digital kit and the 250mm Z- Mamiya lens is shown below:
Another thing to get investigated is that the 50mm lens does not get well into focus at all.
Like the front of the camera does not get close enough inside the camera.
The 250 mm works awesome and the 100-200 is fine as well, since this lens has its own focusing ring at the front of the barrell.
What I could not get to work -yet- is the ISO setting. If I set ISO on the Aptus to 400, the AE system of the RZ67 does not recognise this, since I get overlighted images.
I adapted this by setting the lighting correction to +3 on the AE viewfinder which made me produce OK pictures but this does not solve my original issue, since I want it to work automatically.
I really want to use this setting, instead of compensate for it so the Aptus gets less light. Still working on this.
I will measure the adapter’s electrical output on the right pin for the signal to change, like the analogue filmbacks do when you change the ISO settings.
If needed, I can hook up a small switch to the adaptor for ISO settings.
But I am sure it has something to do with settings in the Aptus 65, since you can configure almost anything and I am still finding out what I need to set for this to work properly with the Phase One converter plate.
The complete setup looks like this, with the 100-200 mm zoomlens attached:

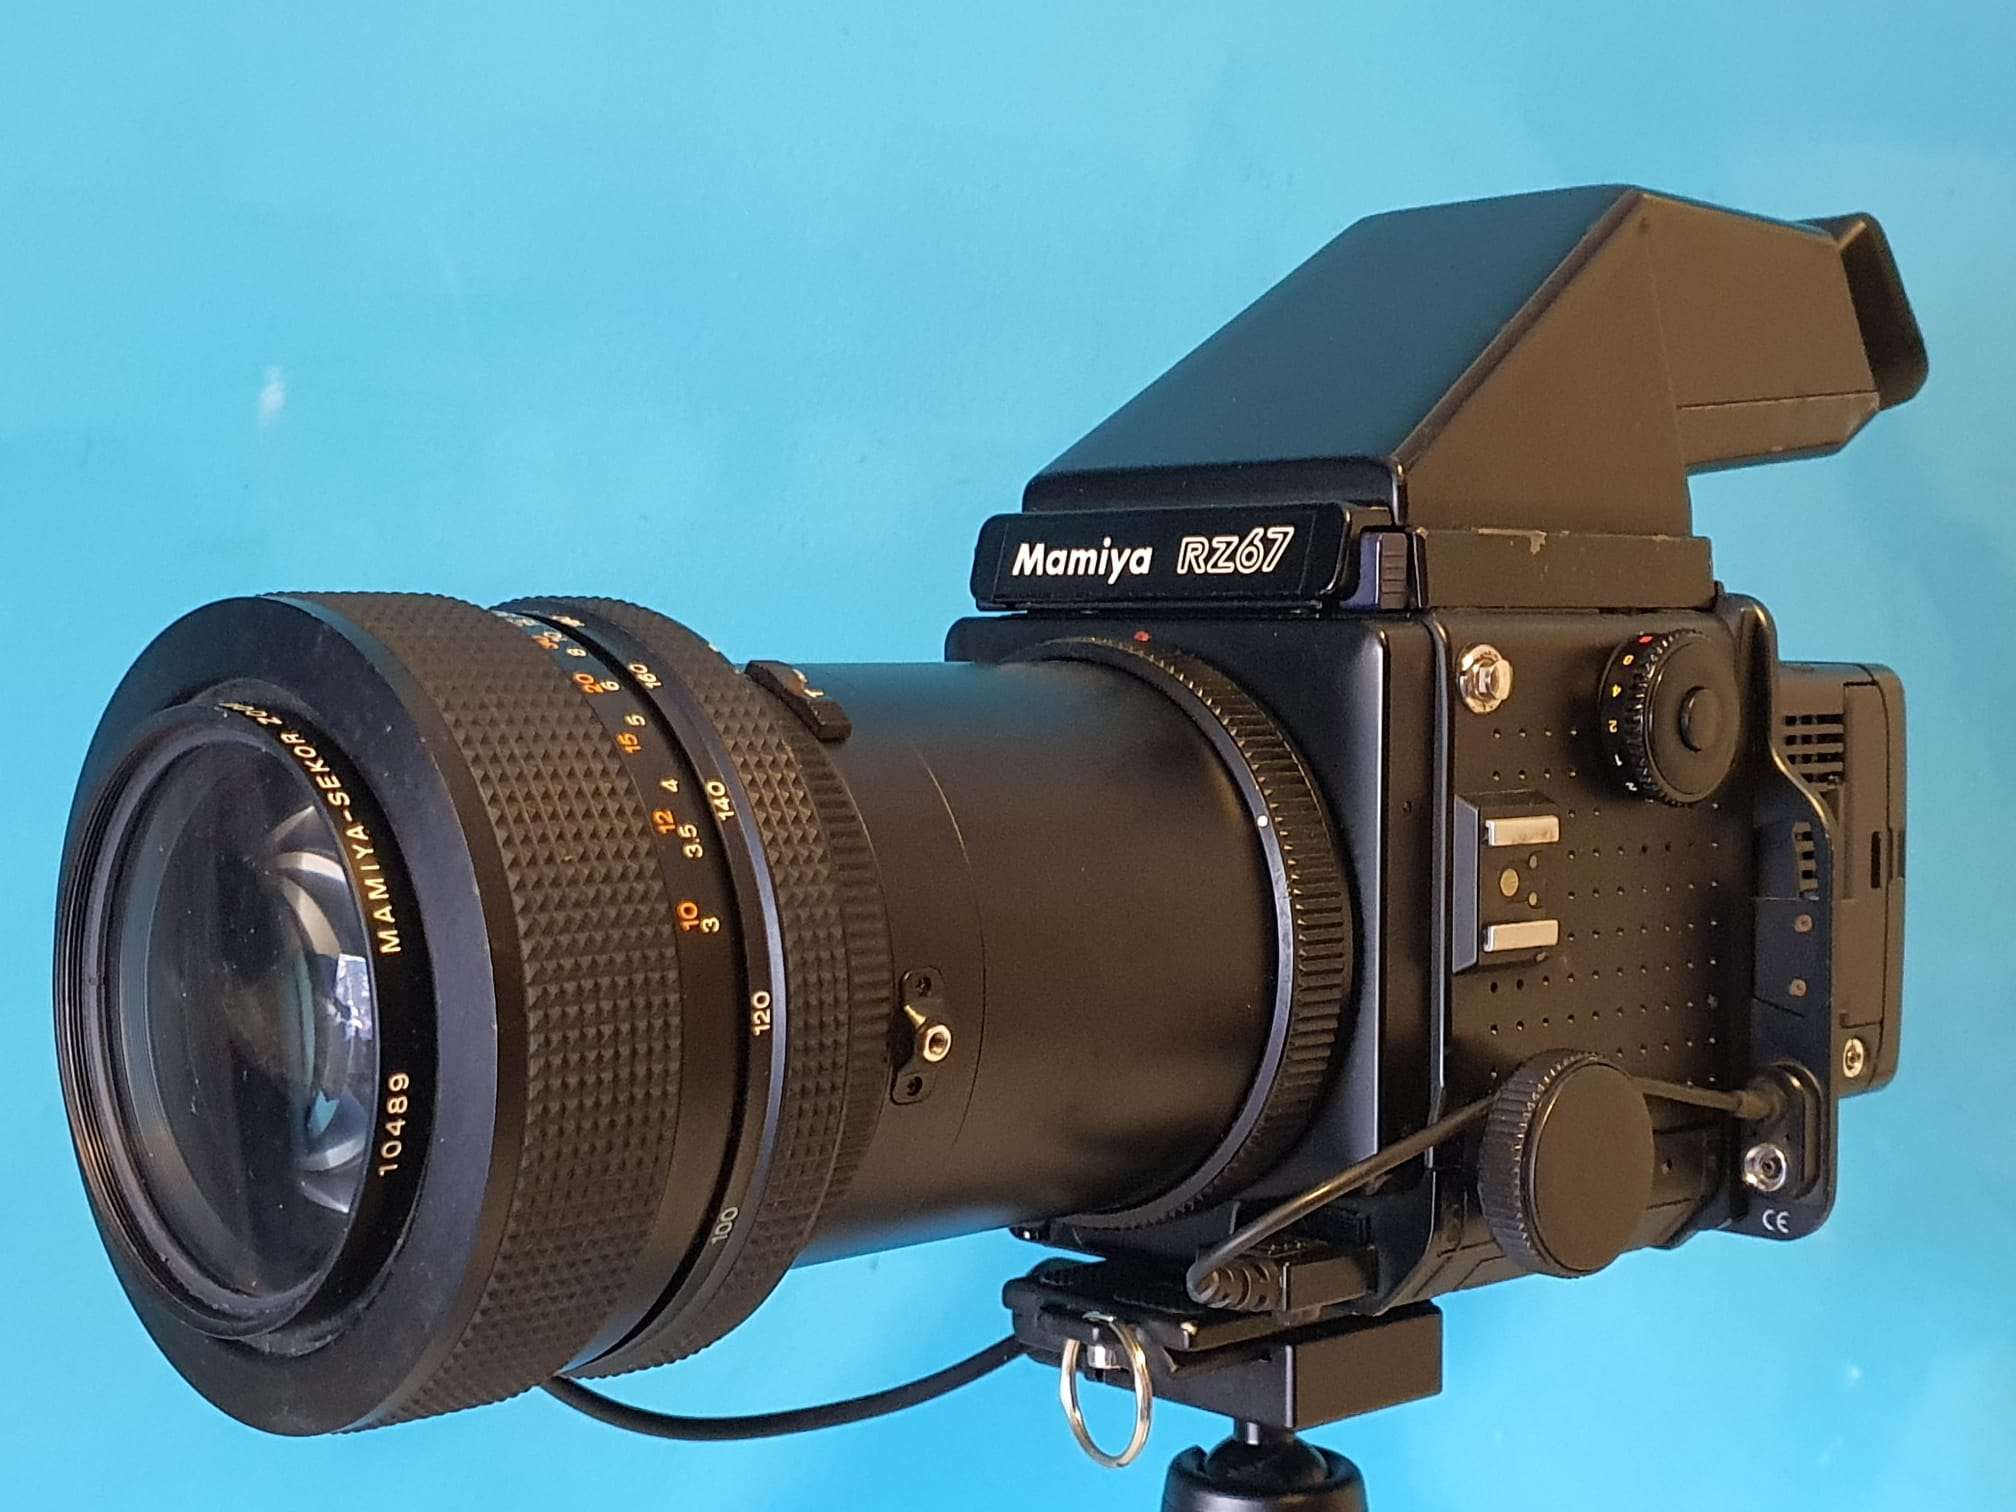
I will not be running around with this outside, since the combined weight is over 4 kilograms. Just too much if you want to seriously shoot anything that is any good.
This will be my studio-, & macro-, and architecture camera since the shallow depth of field will produce amazing pictures, both in B&W and in color.
Maybe a commercial photograph session now and then, I believe that getting a technical factory shot with this cam/combination could turn out to work very nice!
Compact Flash cards: I used an adapter from CF card to SD card that I also use on my Canon 5D MarkII, and it only accepts SD cards up to 32 GB. But that’s OK. I will try to install the wifi SD card as well, since I have that lying arouns somewhere, I will add this in a new post later. The Aptus’s firmware had a setting for this, so I will try this anyway.
The digital back adapter for the RZ67 camera is not really visible between camera and digital back, underneath is a picture of the one I use. It is commonly available but requires a V-mount digital back. V-backs from Leaf or Phase one are very rare to get by, since they are either Mamiya fit (proprietary mount for for the 645 cams) or H-Hasselblad fit. And Hasselblads V-mounts digital backs are very good and fairly easy to get at, yet they are (in my view) very expensive due to their high quality and high pixel rates.
CROP FACTOR
The Mamiya Leaf Aptus 65 has a 44×33 mm sensor of almost 29Mpix. The Aptus has been made for the 6045 line-up and therefore all specs relate to that, and not to the RZ67’s 6×7 cm format.
The maximum (theoretical) film format on the RZ67 is 70x60mm. But the picture size with a 6×7 cm back will be 56mm x 69.2mm.
Even though, most common used on the RZ camera are the 6070 film backs, although a 60×60 is also available but hard to get for a fair price. The 6070 backs are the ones without anything in size labeled on top. Any 6060 or 645 sized back will have this size labeled on the pack’s outside.
The Aptus 65’s crop of 1.3 is defined by Leaf in relation to the medium format definition and this is theoretically only 60x45mm but it is adjusted down, due to cutoffs and such. 60×45 camera size is measured in medium format picture size as 53.7×40.2mm.
The medium format is thus generally defined at 53.7×40.2 mm picture & sensor size, and its surface is 21.59cm2.
The Aptus 65’s sensor is 33x44mm and its surface is ‘only’ 14.52 cm2.
The crop factor of the Leaf Aptus 65 is 1.3 versus medium format.
The full-frame sensor against which all other image sensors are defined is 36×23.9 mm and its surface is 8,6 cm2.
So- even the fact that you won’t use the full width of the 6×7 cm range of the RZ67’s back panel’s covered projection space, the coverage of the Aptus 65’s sensor almost doubles that of a full frame sensor.
The used table is below:
I am, however, still out on the search for a Hasselblad CFV-39 V-mount digital back since it has the extremely good Sony sensor of 49×36.7 mm and it has great specs and image results. Still hesitating to buy this since the prices are above 3000 Euro’s, excluding import duties and VAT. So- adding this makes it cost over 4500 Euro’s. I am still searching for one within the EU, so I don’t need to pay additional costs before I get it.
Ever since my kids got an interest in lomography early 2021, it started itching in my head.
I have a lot of analogue photo equipment stowed away, just because I can never throw anything away that might possibly turn out to be useful someday.
So- I got a supplier for my juices and film and I tried reviving my cams. That turned out to be more difficult than I expected.
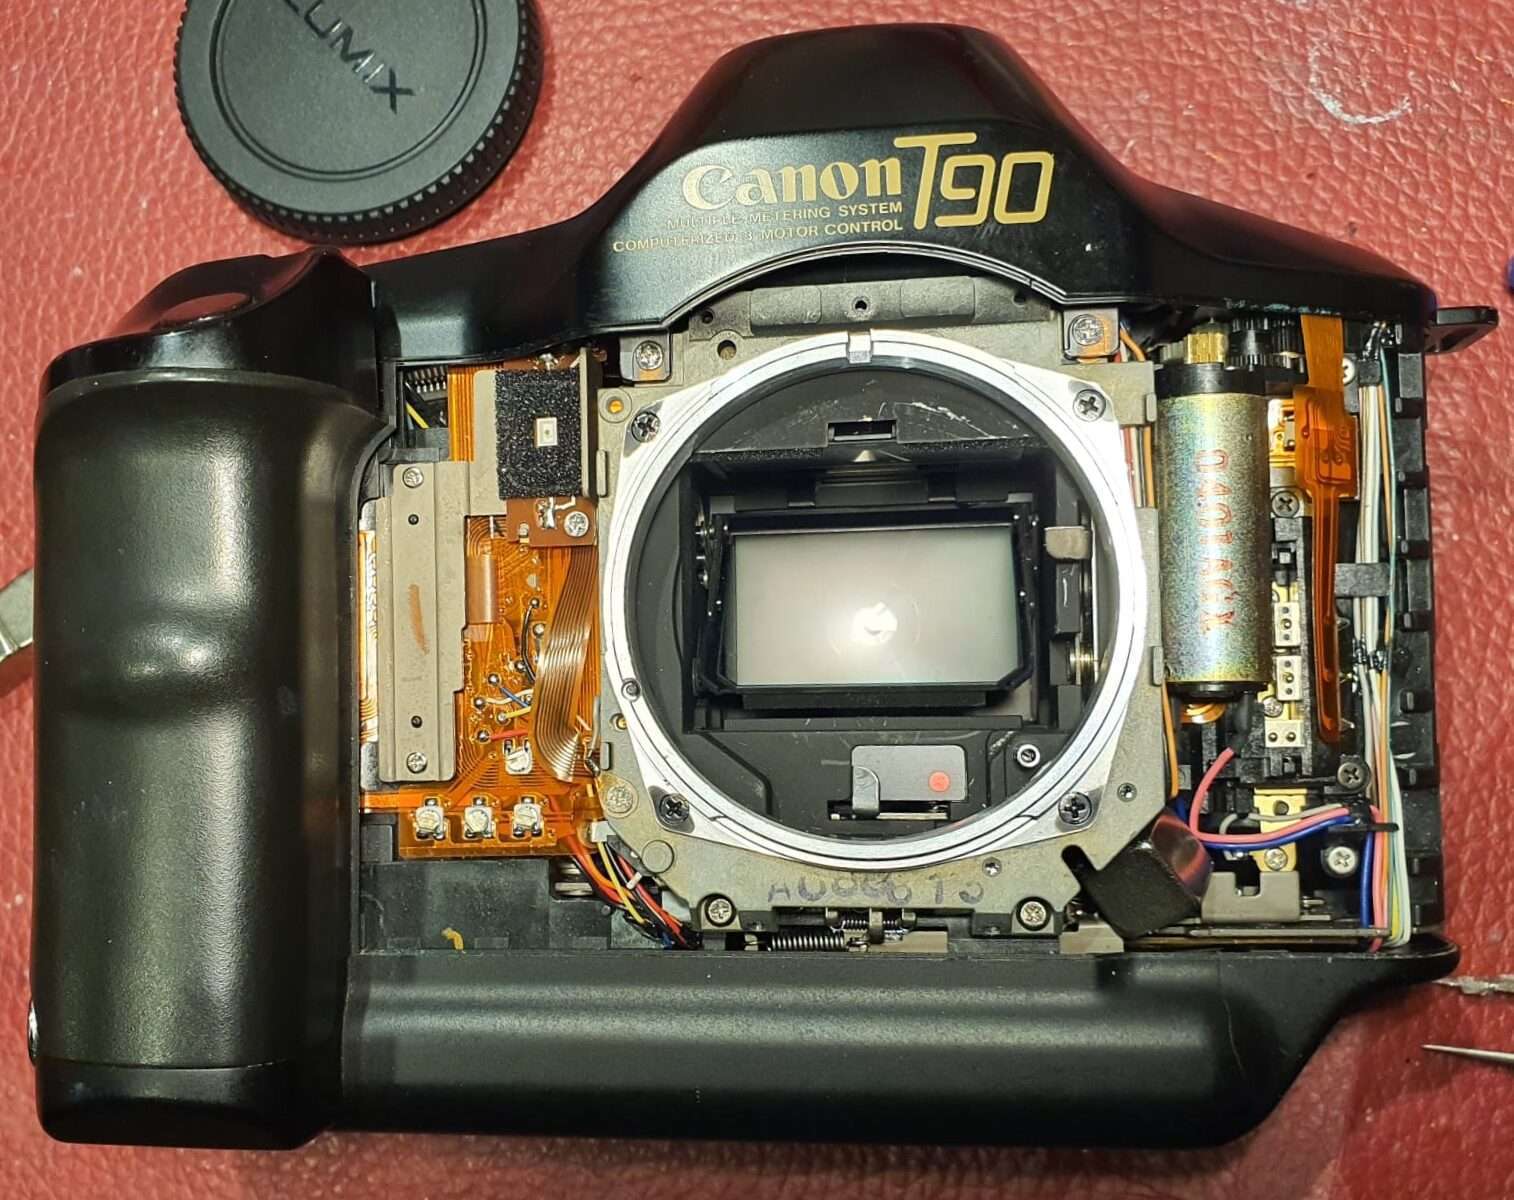
The T70: no problem, just put 2x AA batteries in it and it’s OK.
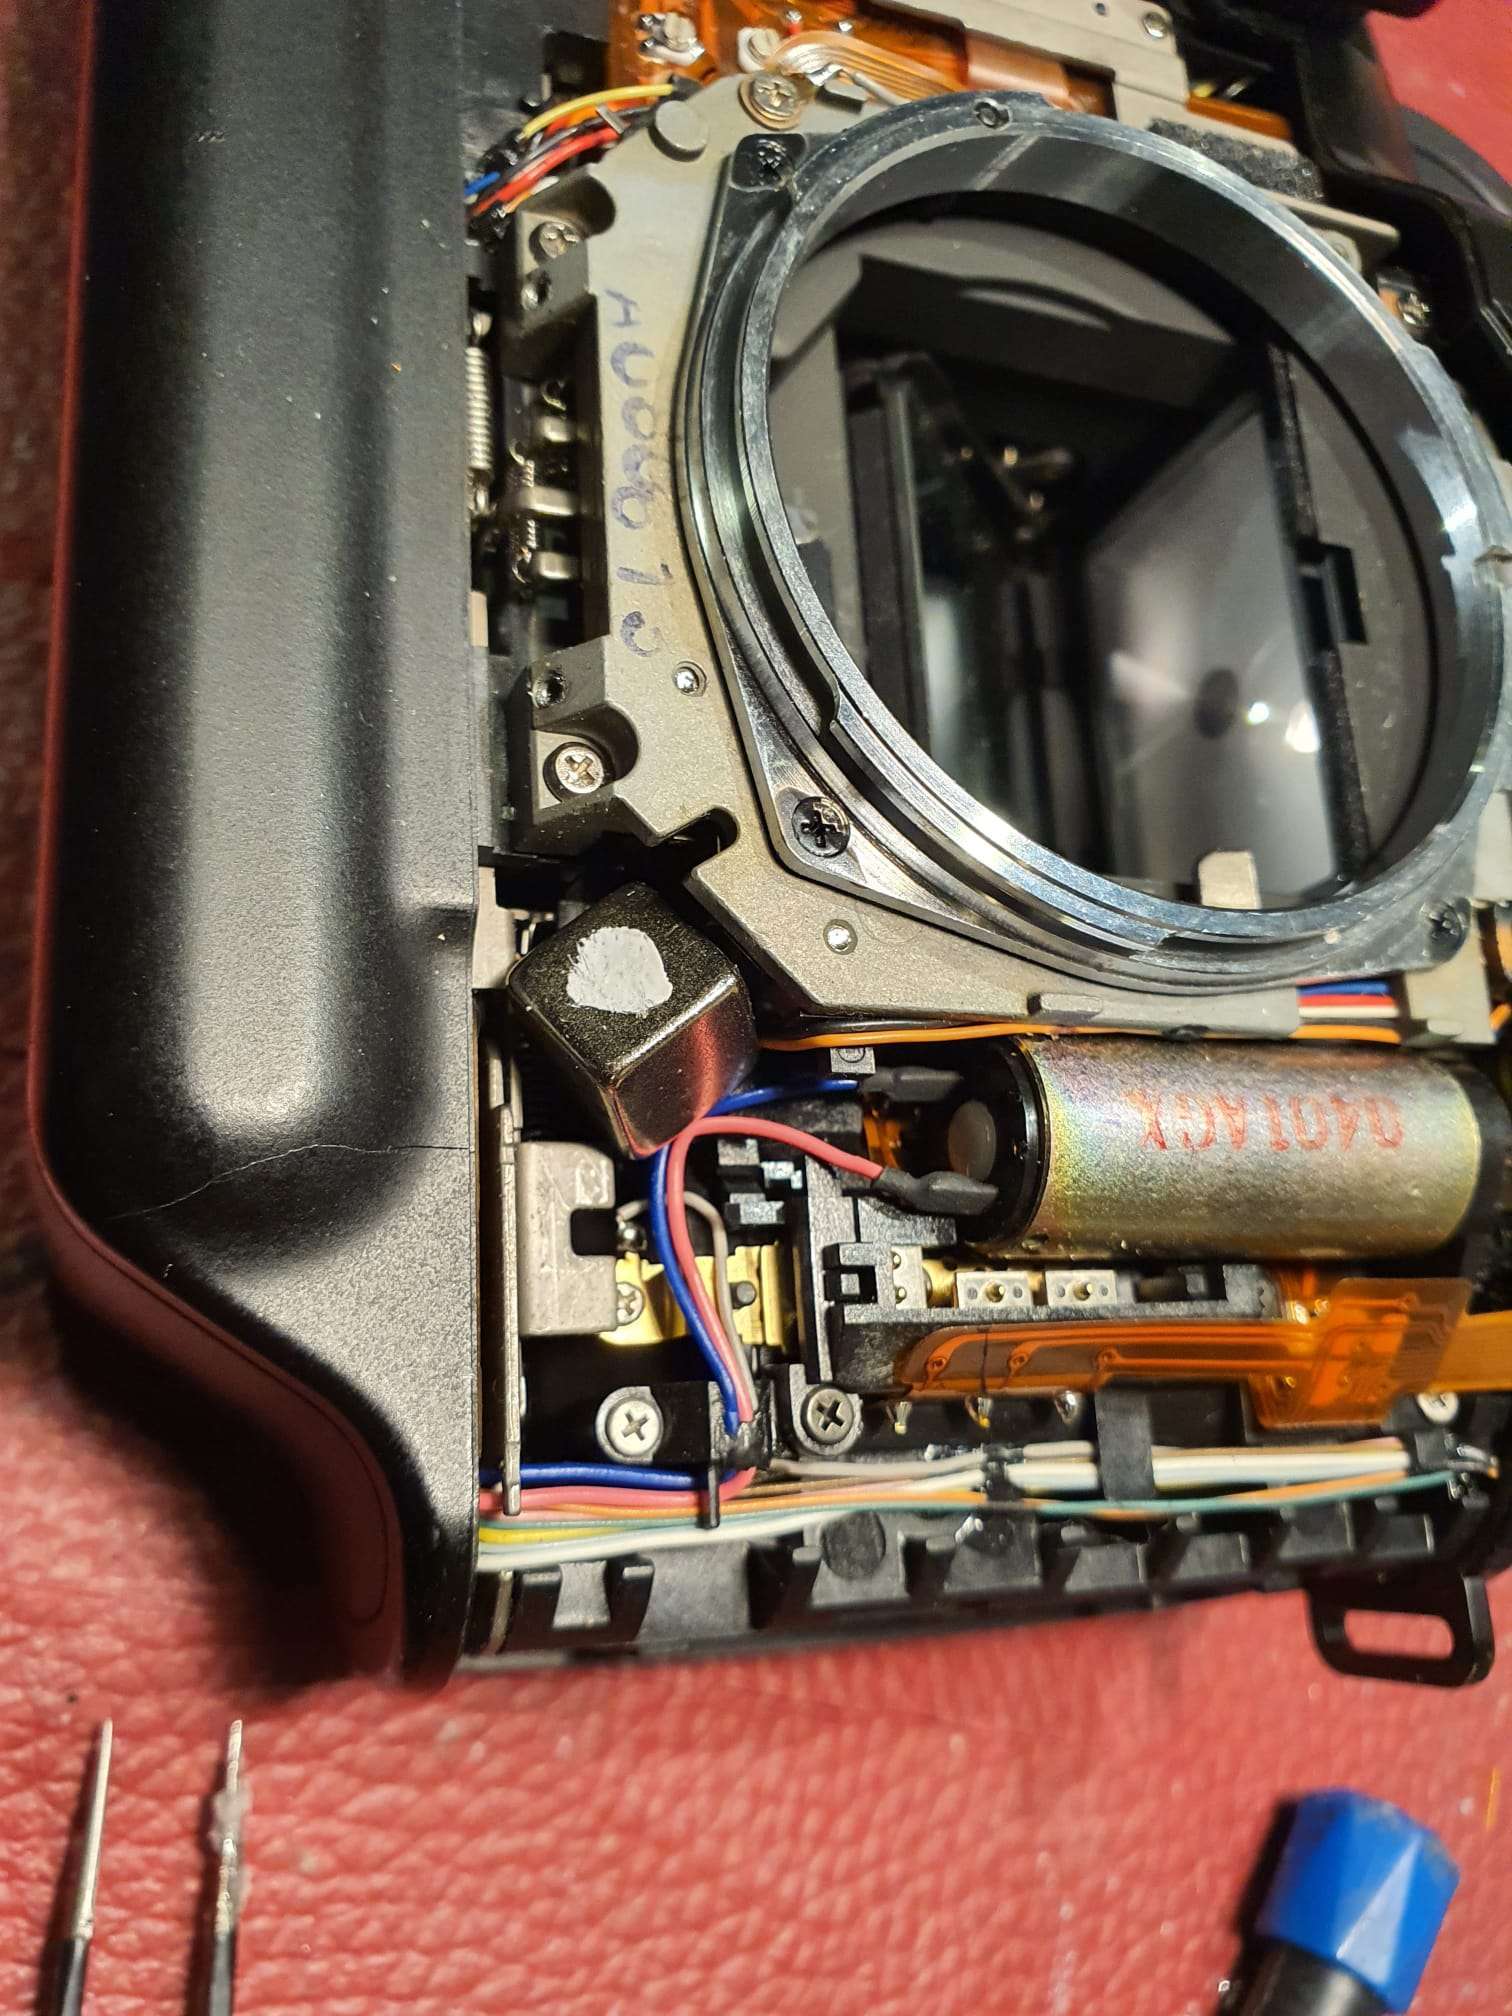
But-my favourite T90’s just would’nt fire any shots. After a lot of reading on the net, I finally found the problem: One of the coils appeared to require some magnetism from a nedymium magnet and all works well again!
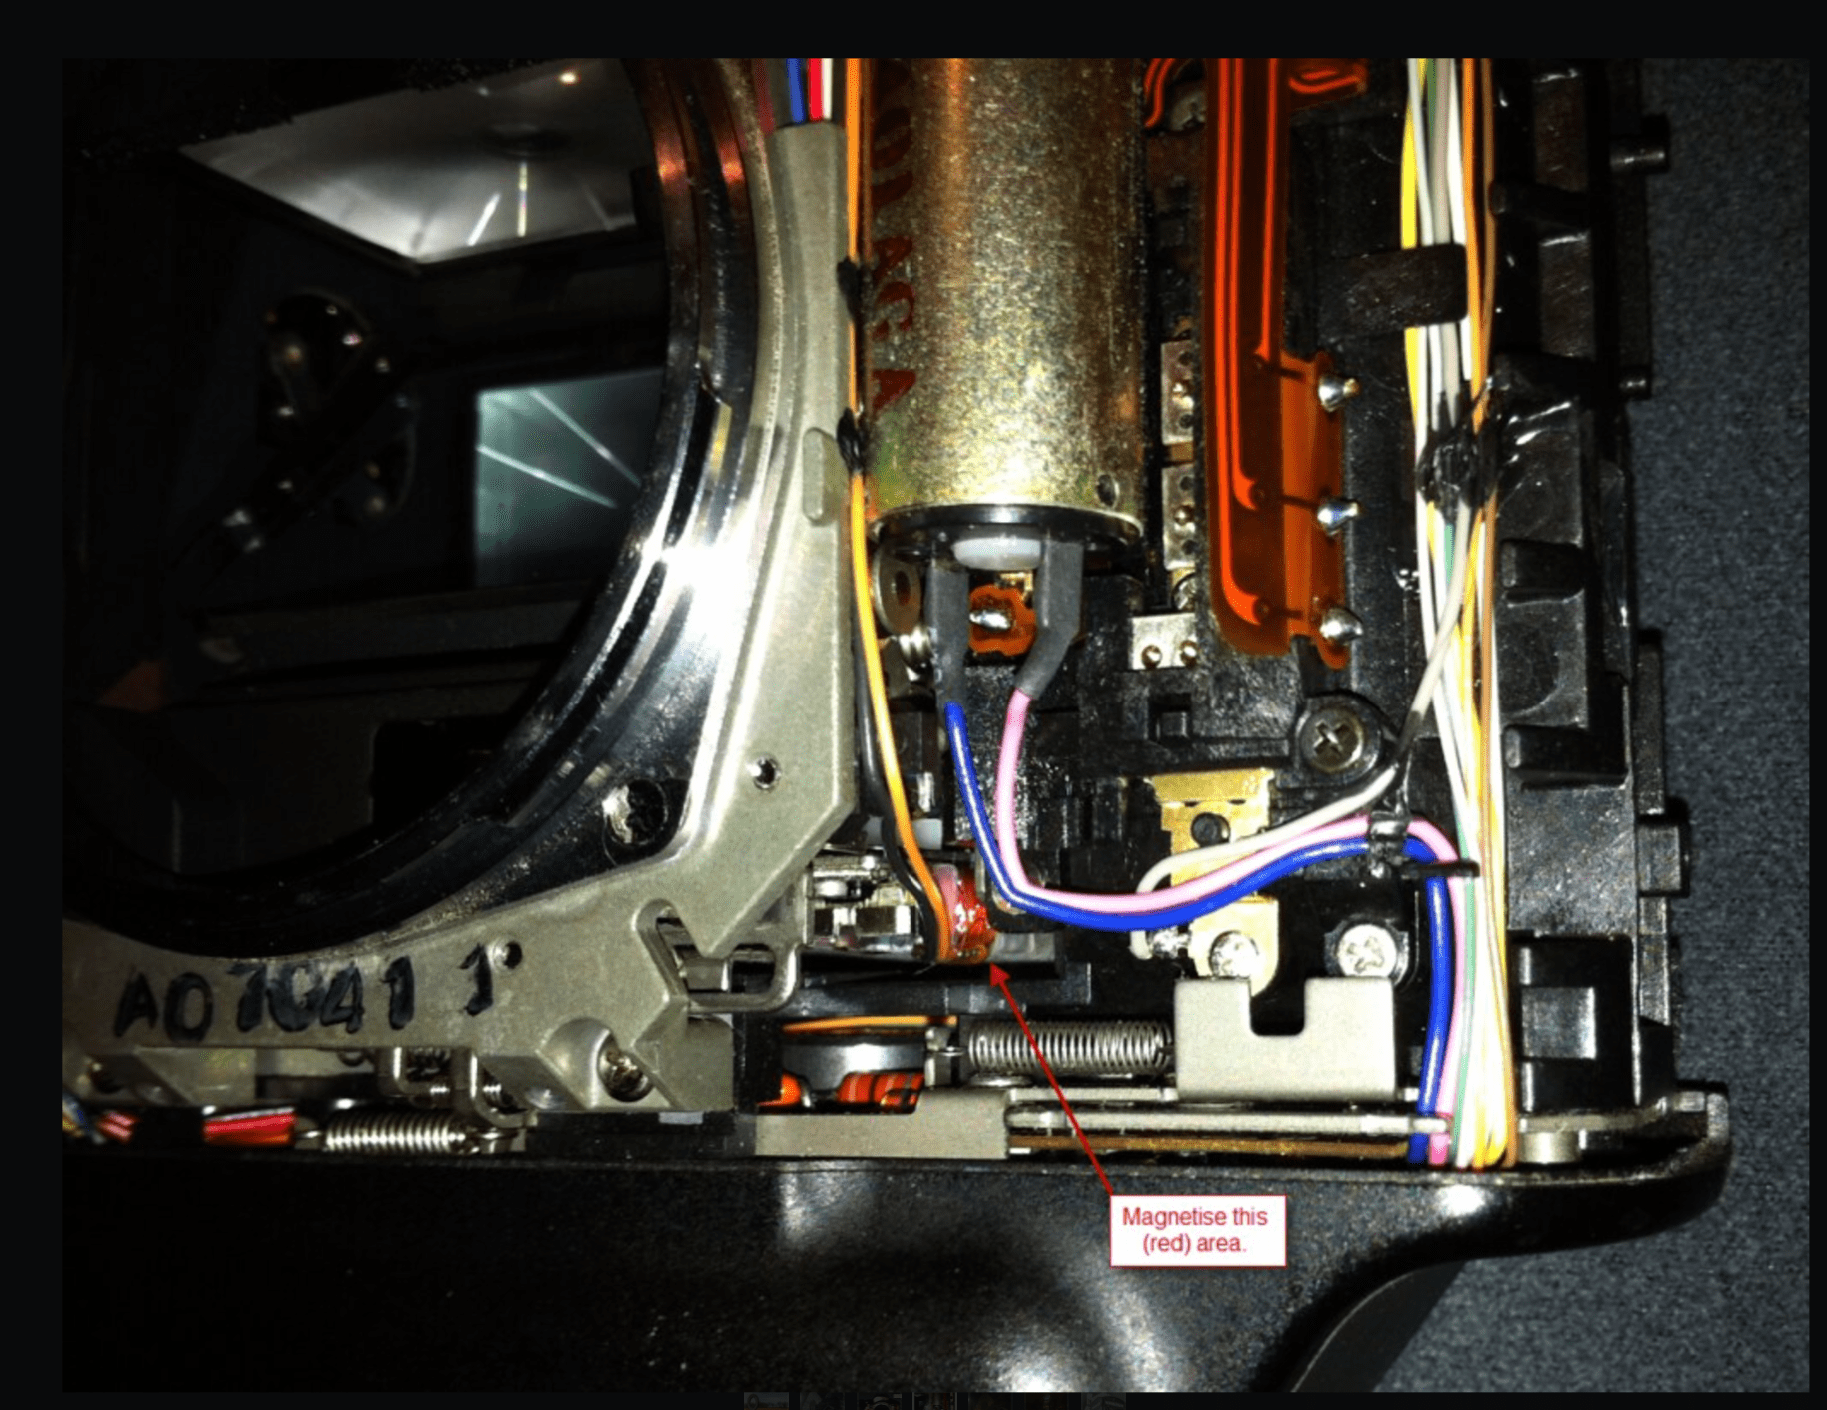
So I did this and it worked. Actually, I removed the magnet and the camera kept working for some time.
But next day I had to do the same ritual again. and again.
So- the T90’s are in the storage again.
And- My newer Eos 500 worked perfectly! Everything automatically, AF and all! This is just a modern camera that has all you may need. The EF lenses all fit so I can start shooting with this 35mm cam, again!
I will only do B&W, since my enlarger and all of my dark room equipment is for B&W. I received the needed liquids last week, and I’m ready to go!
I will add new posts and add the links above when I start developing my first roll of 35 mm film, in black and white !