Protected: Disc brakes for my Citroën Traction Avant


3D modeling, scanning and printing
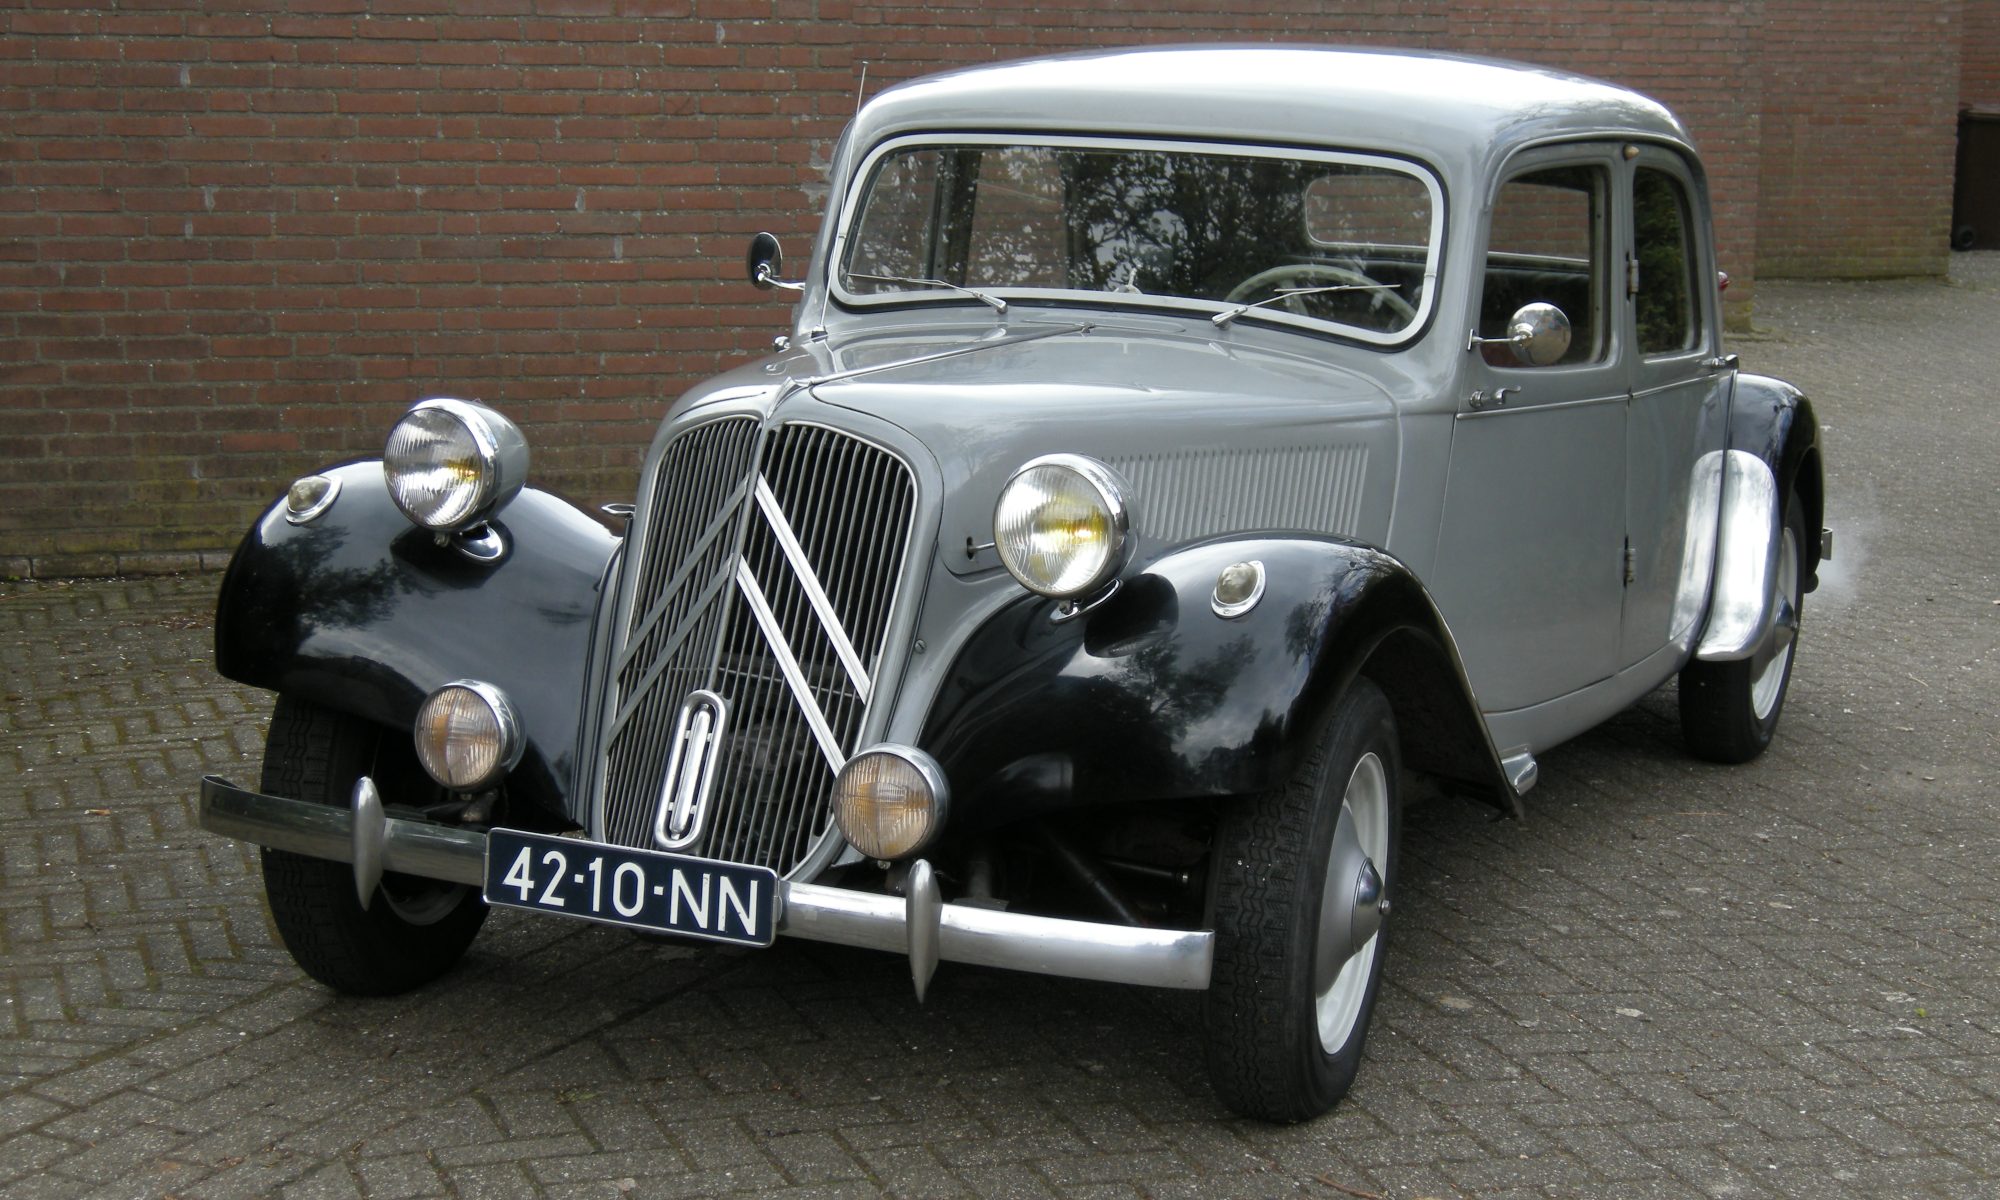
I bought my Traction Avant 11BN (1955 made) in june 2006, and I had to perform a lot of mechanical repairs before the car was roadworthy.

The engine block was cracked beyond repair, the gearbox 2nd gear was smashed, the brake system was really bad and so on. And the fenders were rotten in the common places. BUT- the body and the doors of the car were wonderfully intact.
AND- this car has had internal body care with either dinitrol or some other rust-preventing fluid. Everywhere the little plastic caps show where holes were drilled to gain acces to the car’s body for the rust prevention. One of the first things I have done is to do this process again, with solvent and rust preveting fluid, also on the bottom and underbody of the car.
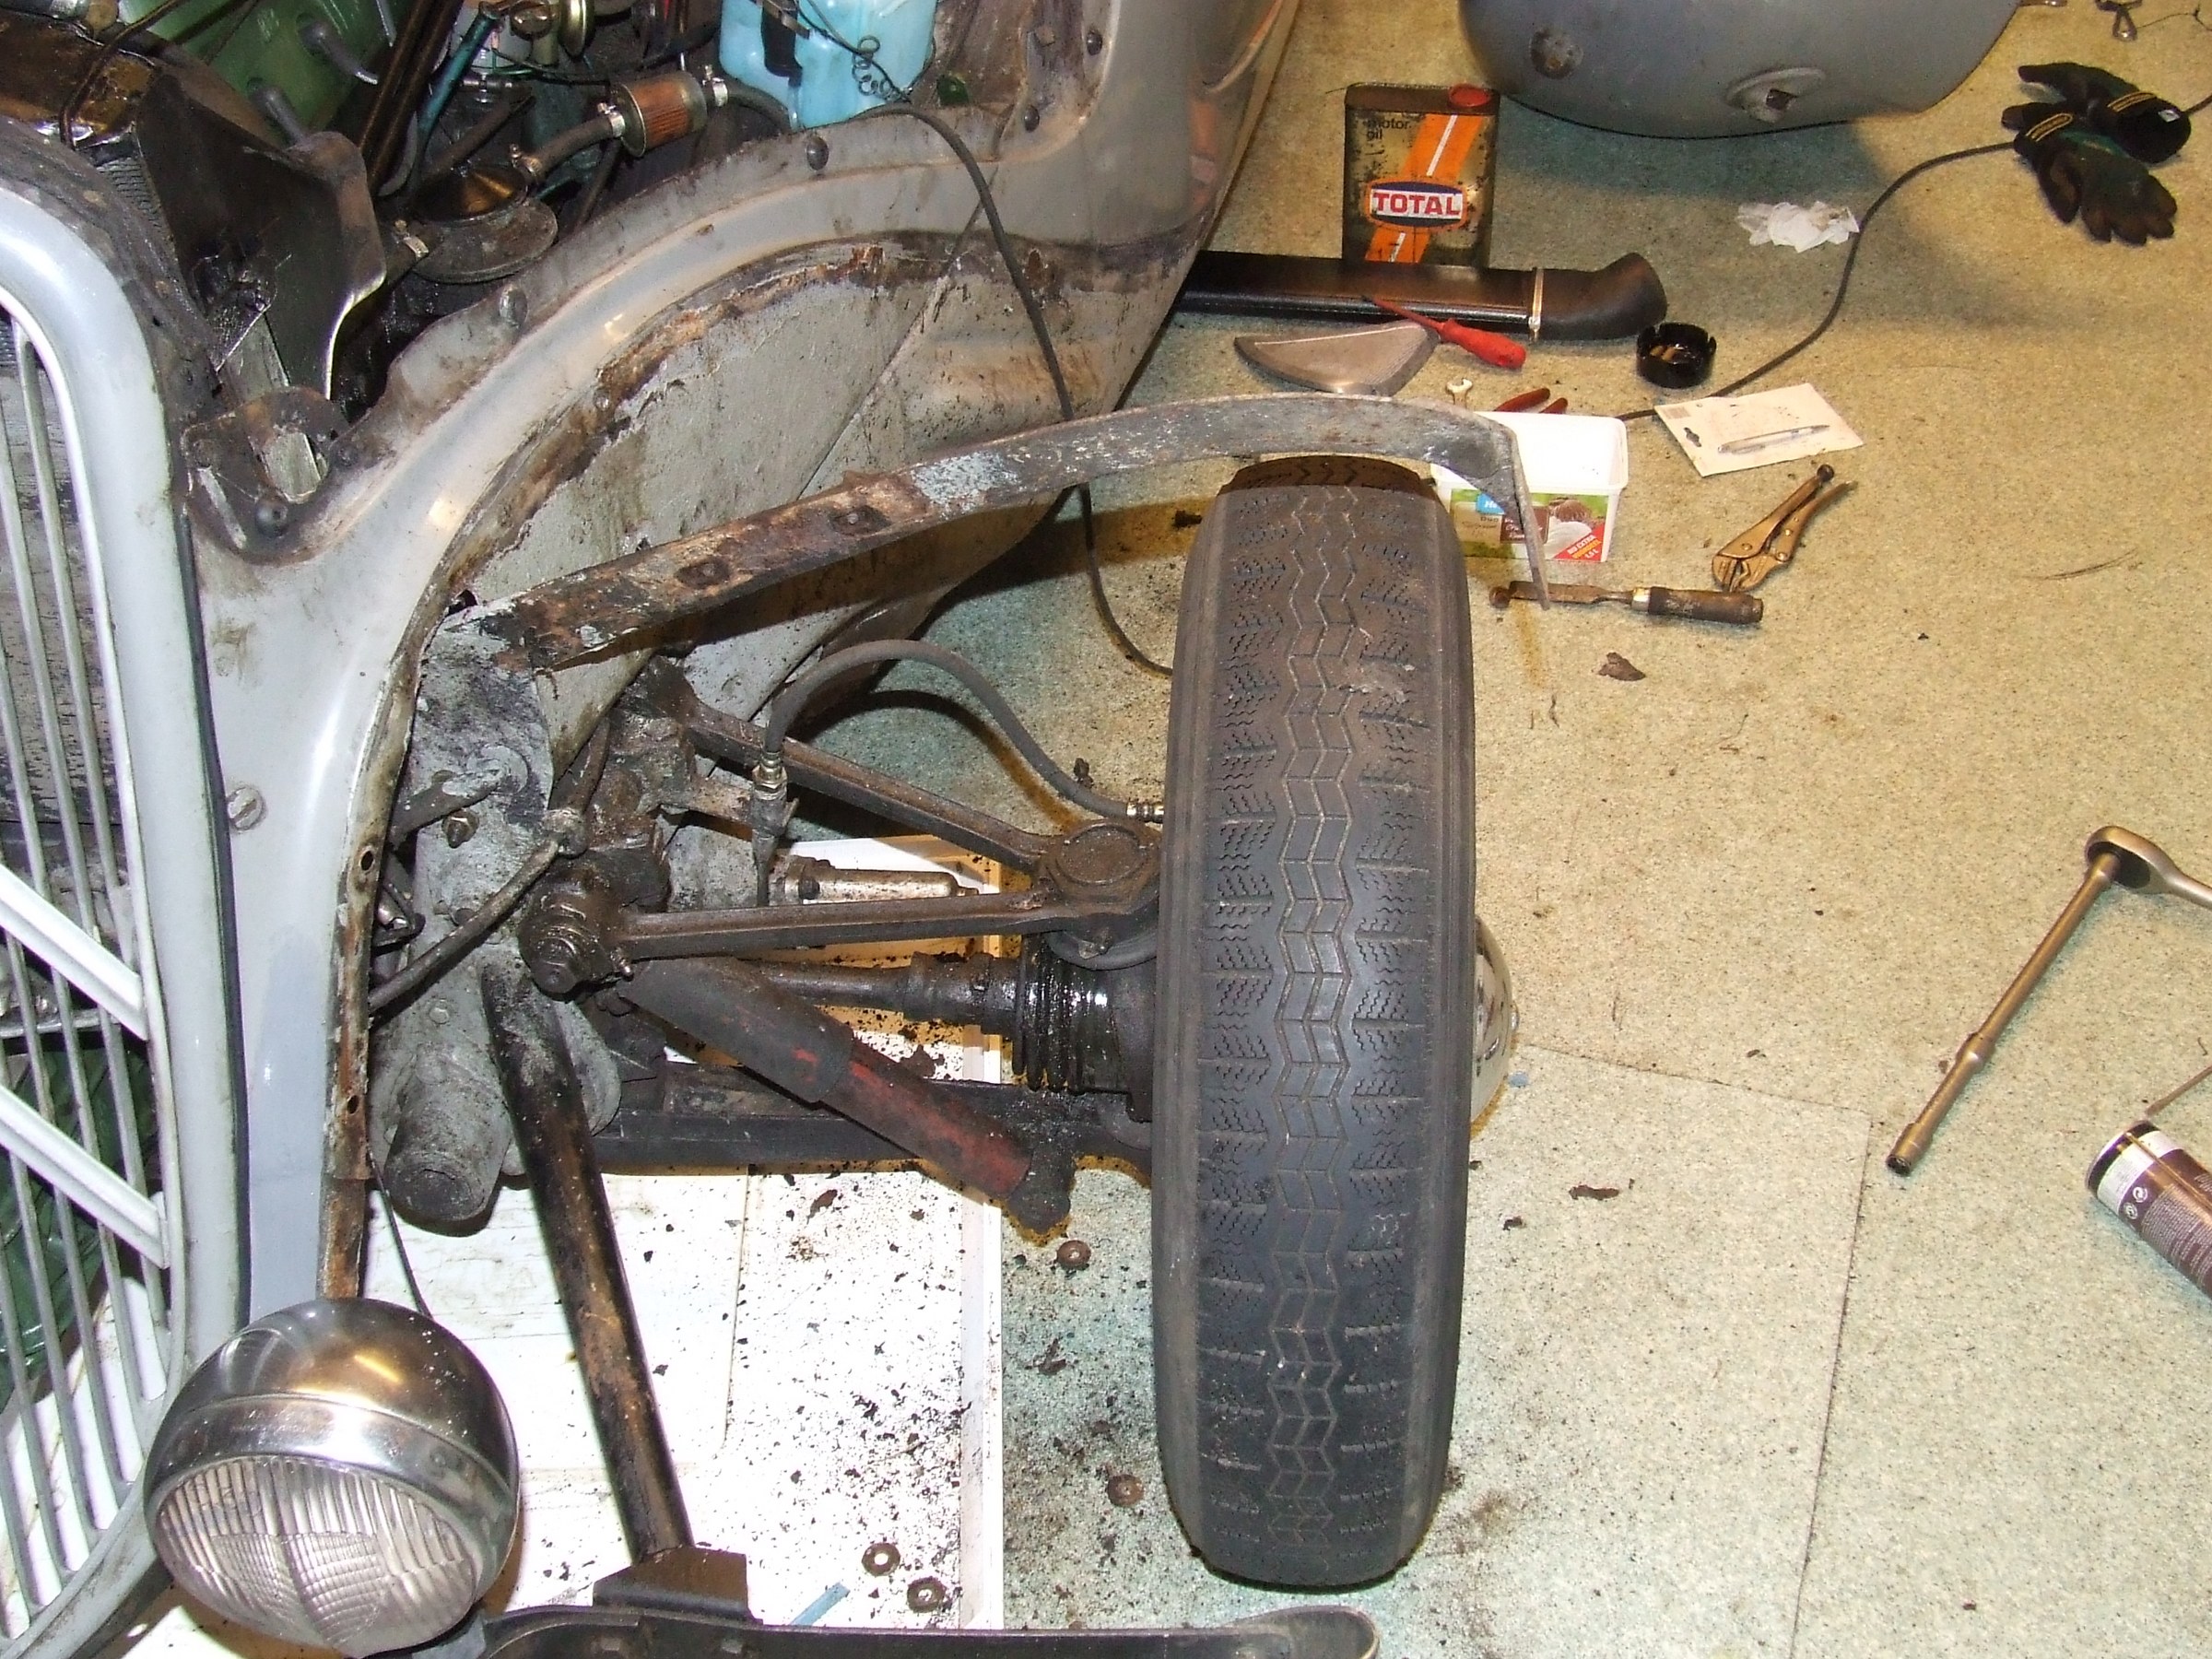
Other parts were also renewed: Drive axles, steering joints, all lights like blinkers, head lights, dash, interior. Also the exhaust, gas tank, suspension dampeners, horns, steering wheel (temporary until the original steering wheel was repaired)
So- to get the car through the MOT inspection I initially made the mechanics work. Later on, I also made the car’s exterior look good. I chose to keep the internals of the car as they were, to preserve the vintage appearance.
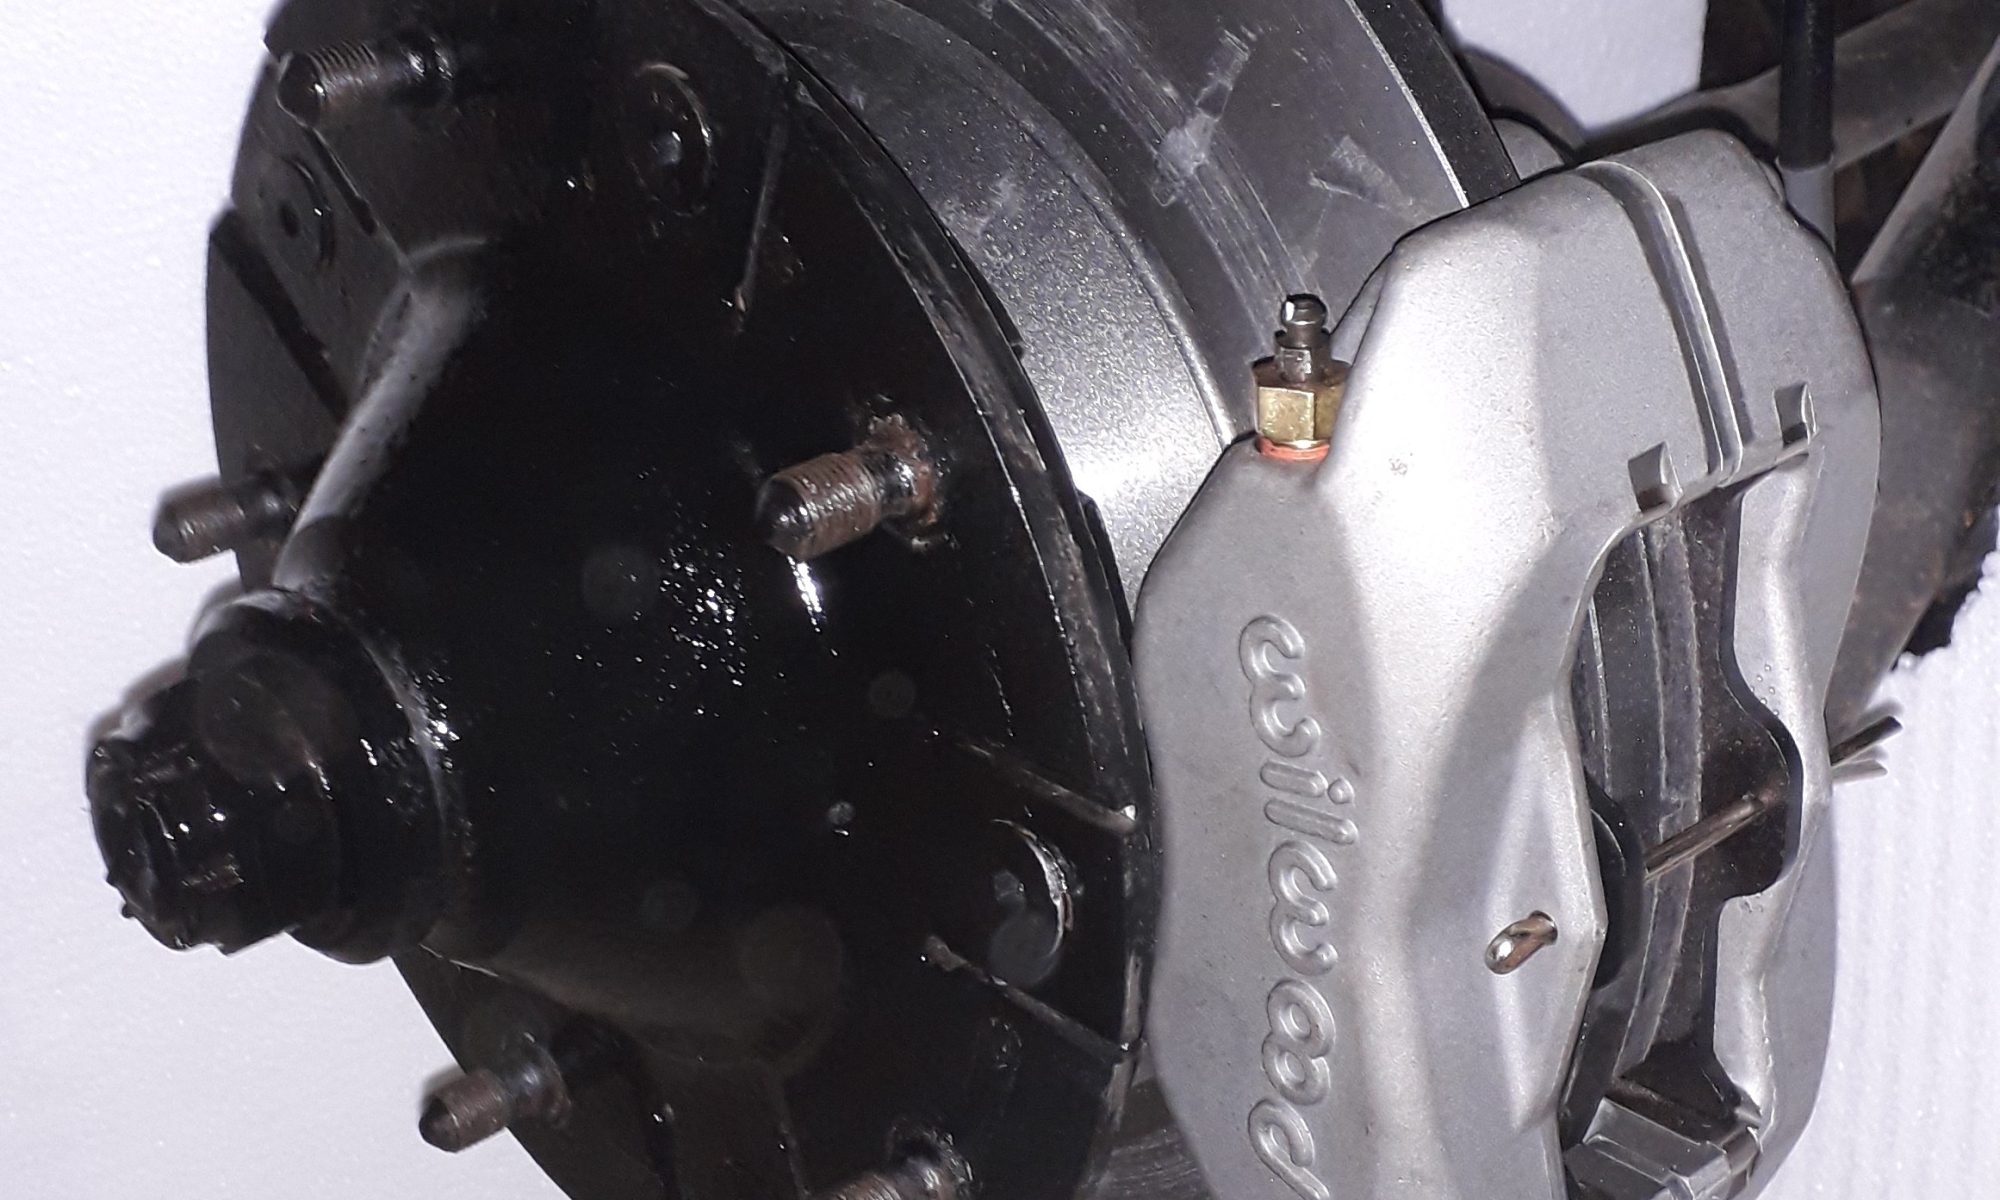
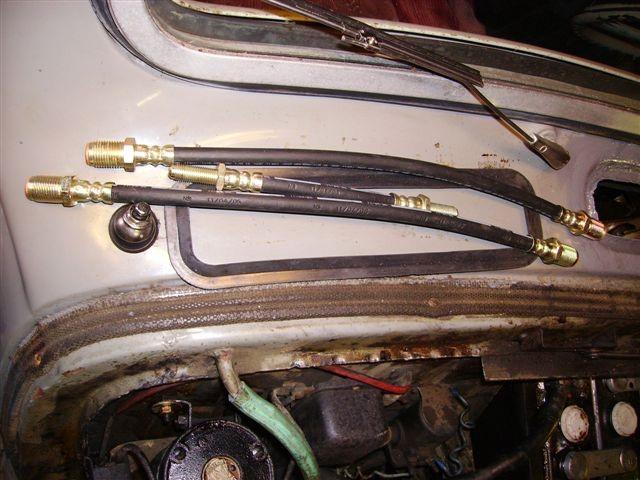
The brakes, engine and gearbox were really bad and all had to be completely overhauled.

New brake calipers, new flex brake lines, overhauled master brake cylinder, changed to DOT3 brake fluid, new brake springs, new brake shoes and – retainers, new dust covers for everything
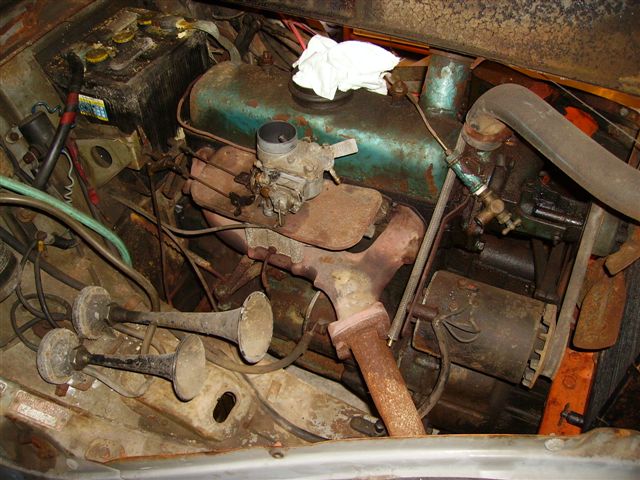
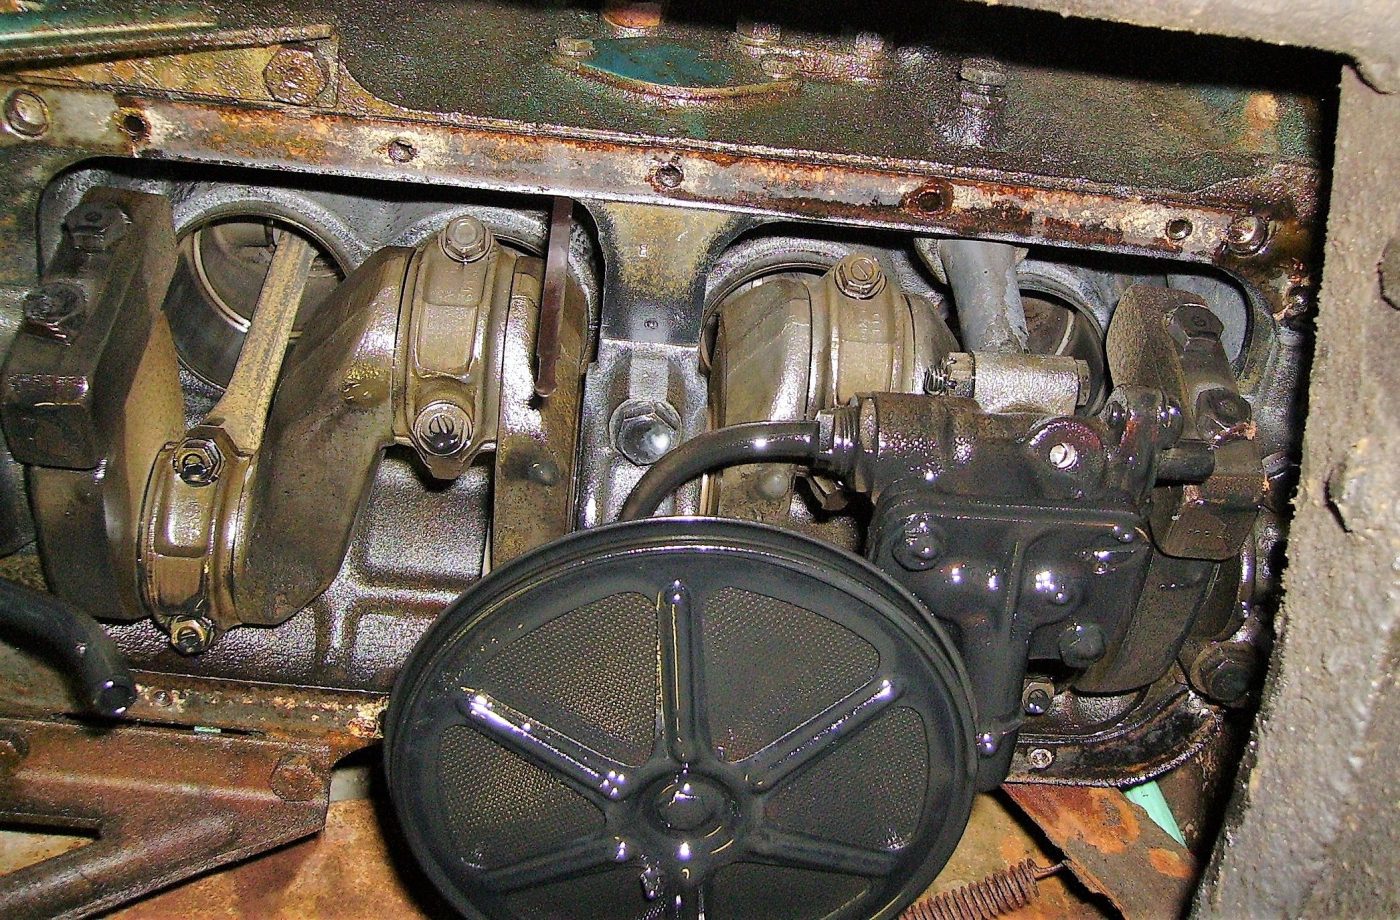
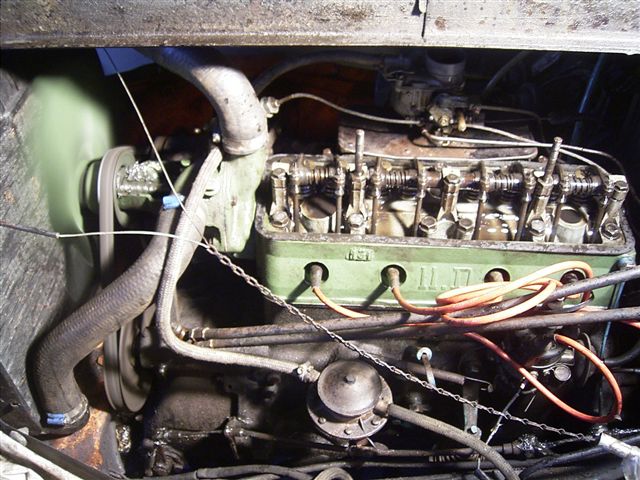
The engine was completely seized up. I had it soked in diesel for a week, took the carter pan off and freed the pistons. Bought a revised cylinder head and made the engine run again. Later, I found out that the cause of the seized up engine was a cracked underblock in the passenger’s side rear corner. But- the engine ran well again to get through the MOT.
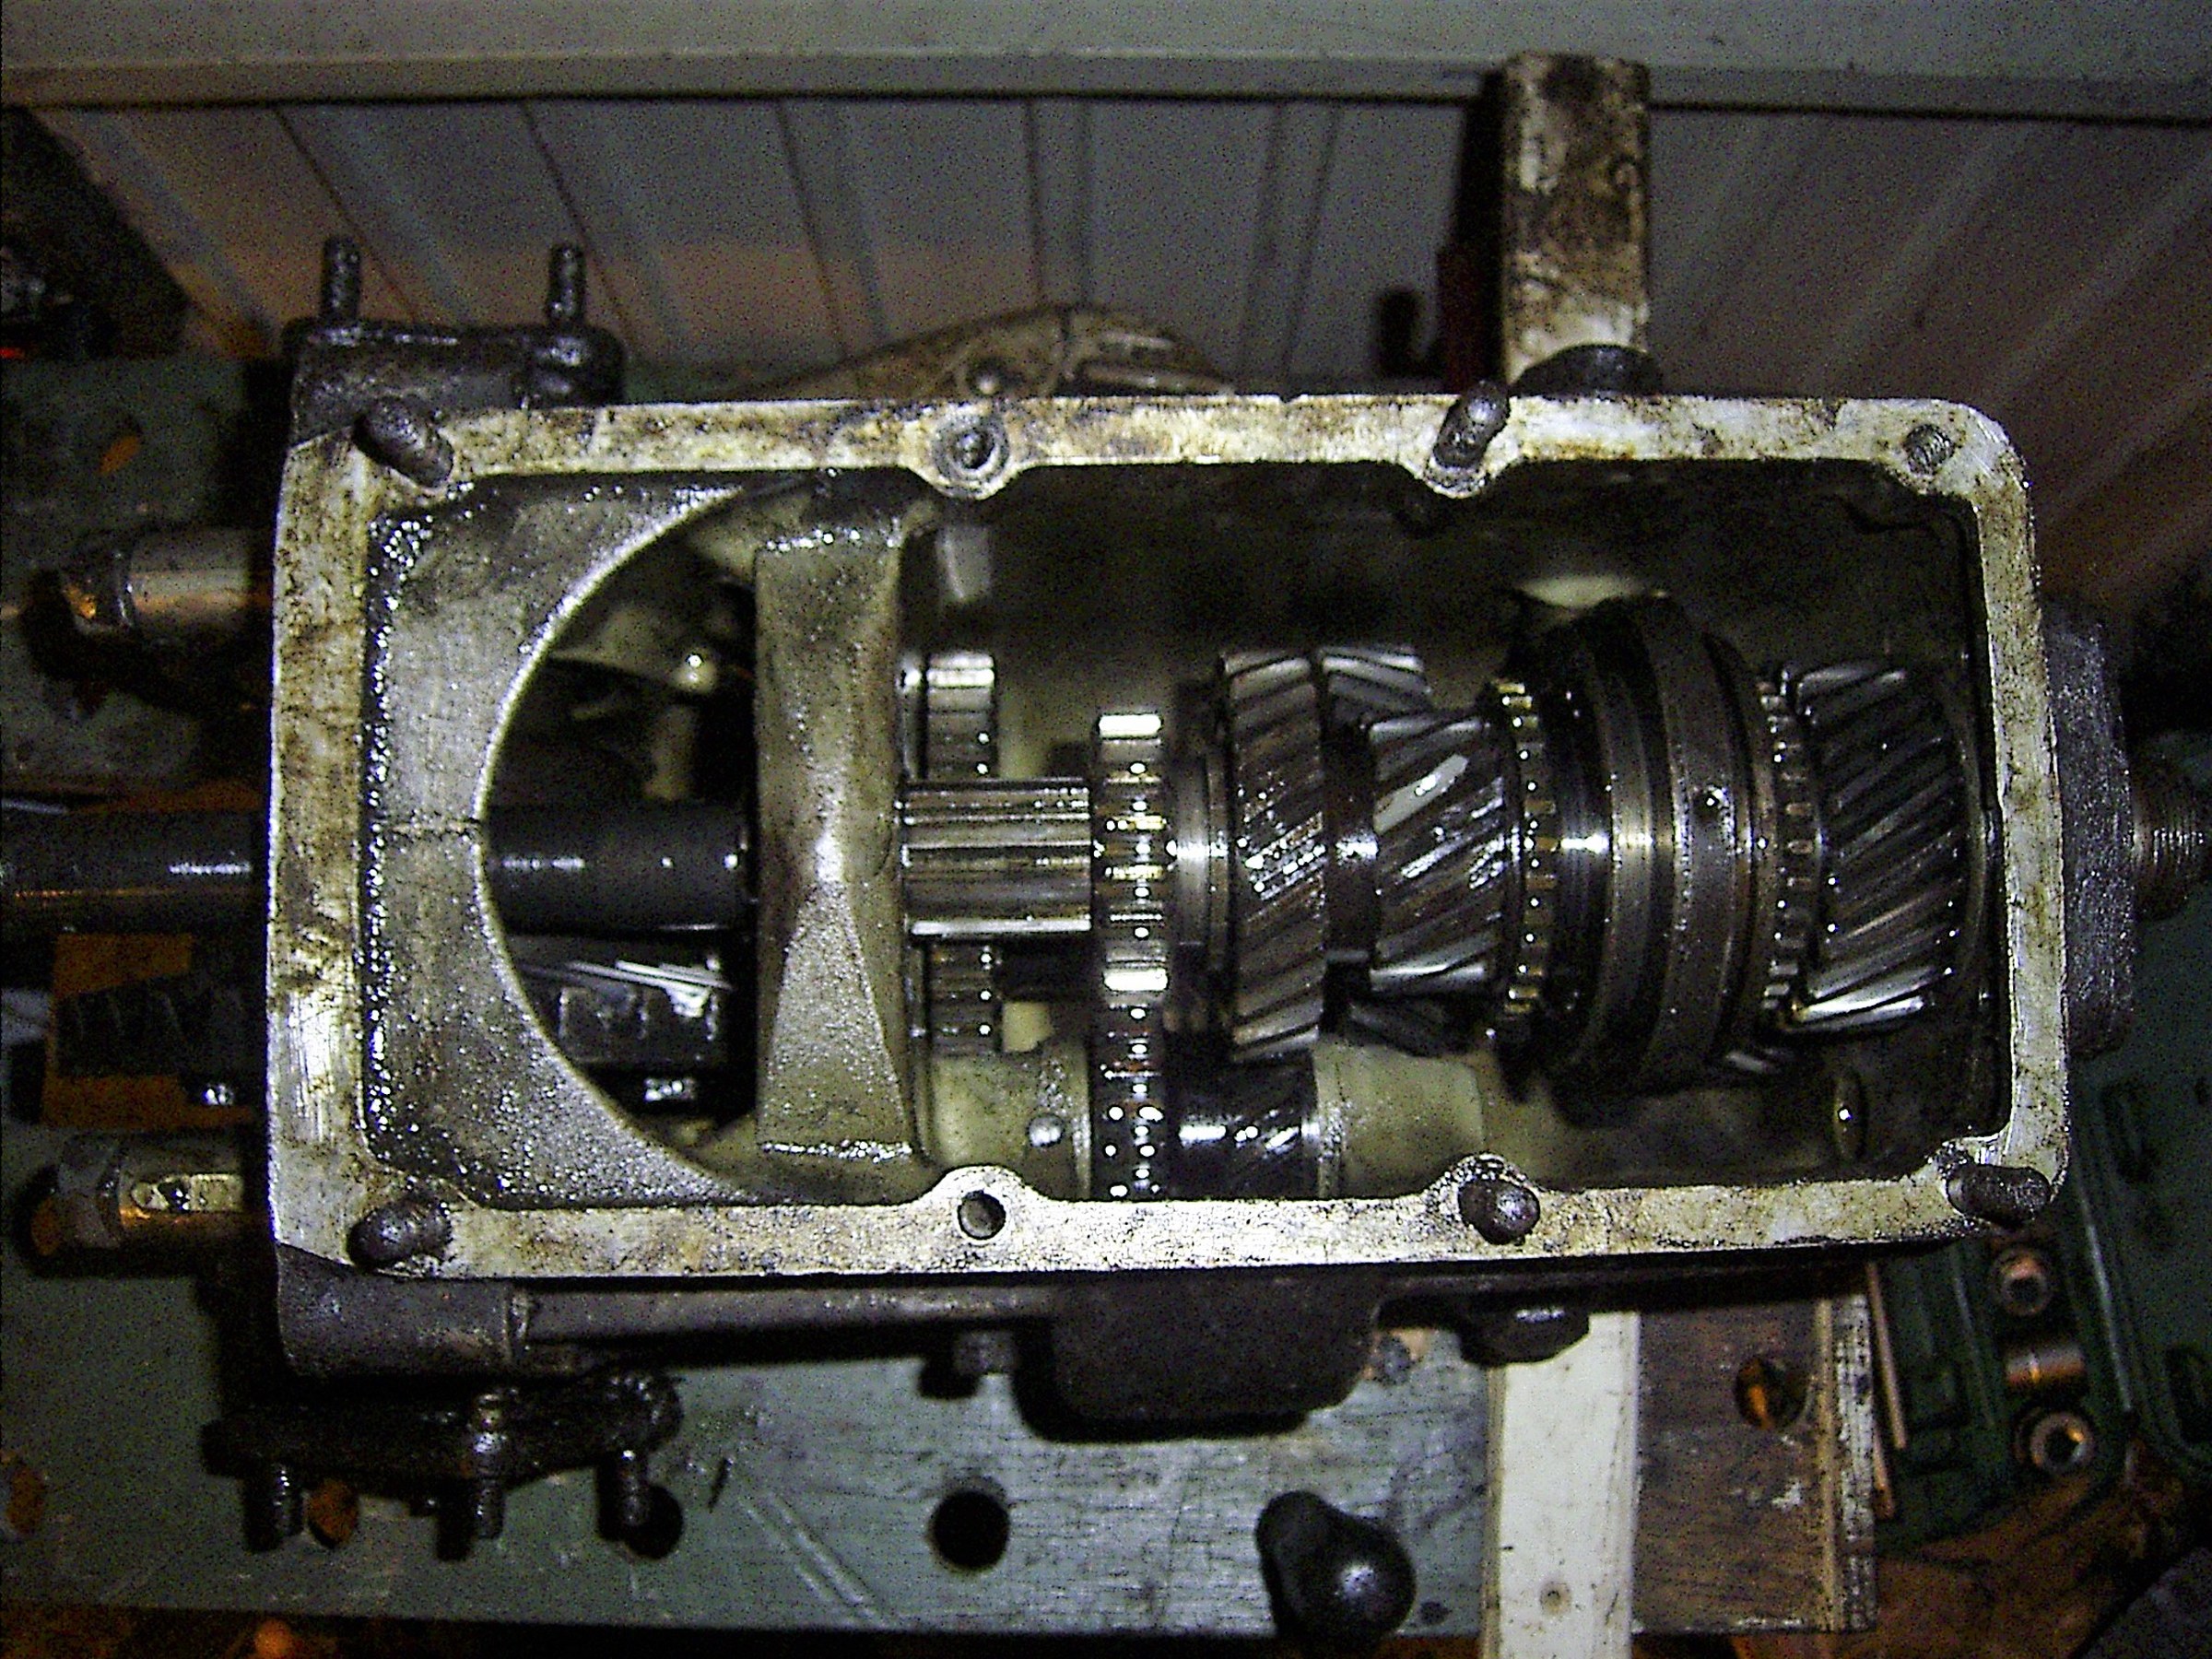
The gear box of this car is a 3-speed, no synchro on 1st gear. It is a gearbox that is not regarded to be very sturdy and thia was my problem. Obviously, the previous owner tried to get the seized engine free by towing it in 2d gear. 2 teeth were broken off the 2nd gear teethed wheel. Fortunately, the TAN club could provide me with a 2nd hand 2nd gear teethed wheel and I repaired the gearbox, replaced it and we were almost done.
The rest of the repairs was a lot simpler like replacing the gastank, repairing all lights, repairing the original drive axles (I replaced these with unijoint versions later on) , hand brake cables, mirrors, and a lot more. Also, I had to add a red fog light at the rear.
REPAIRS
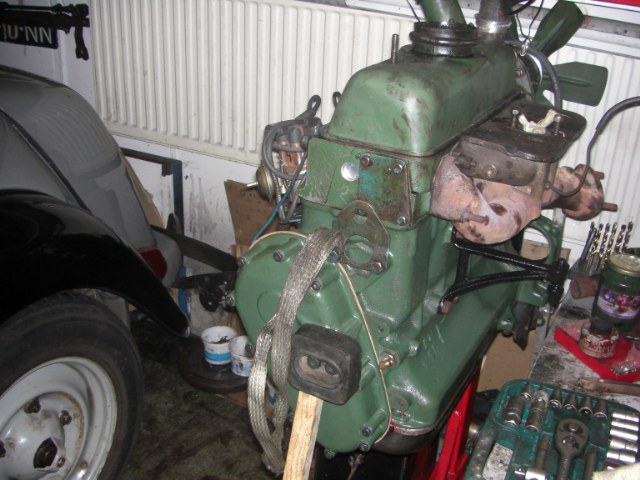
Directly after the MOT I had to do a lower motorblock exchange since the original lower motorblock could not be repaired.

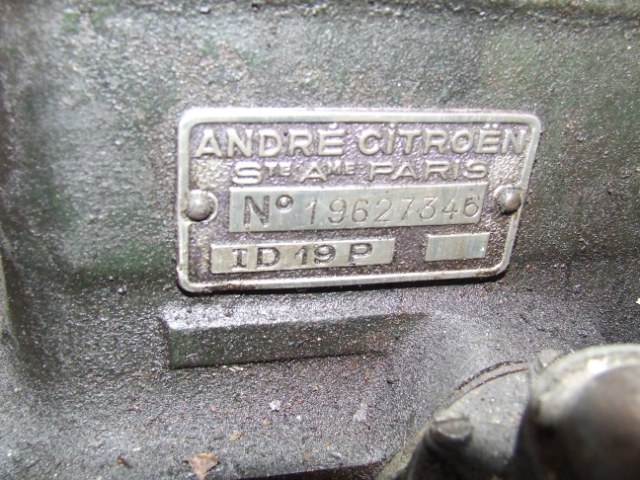
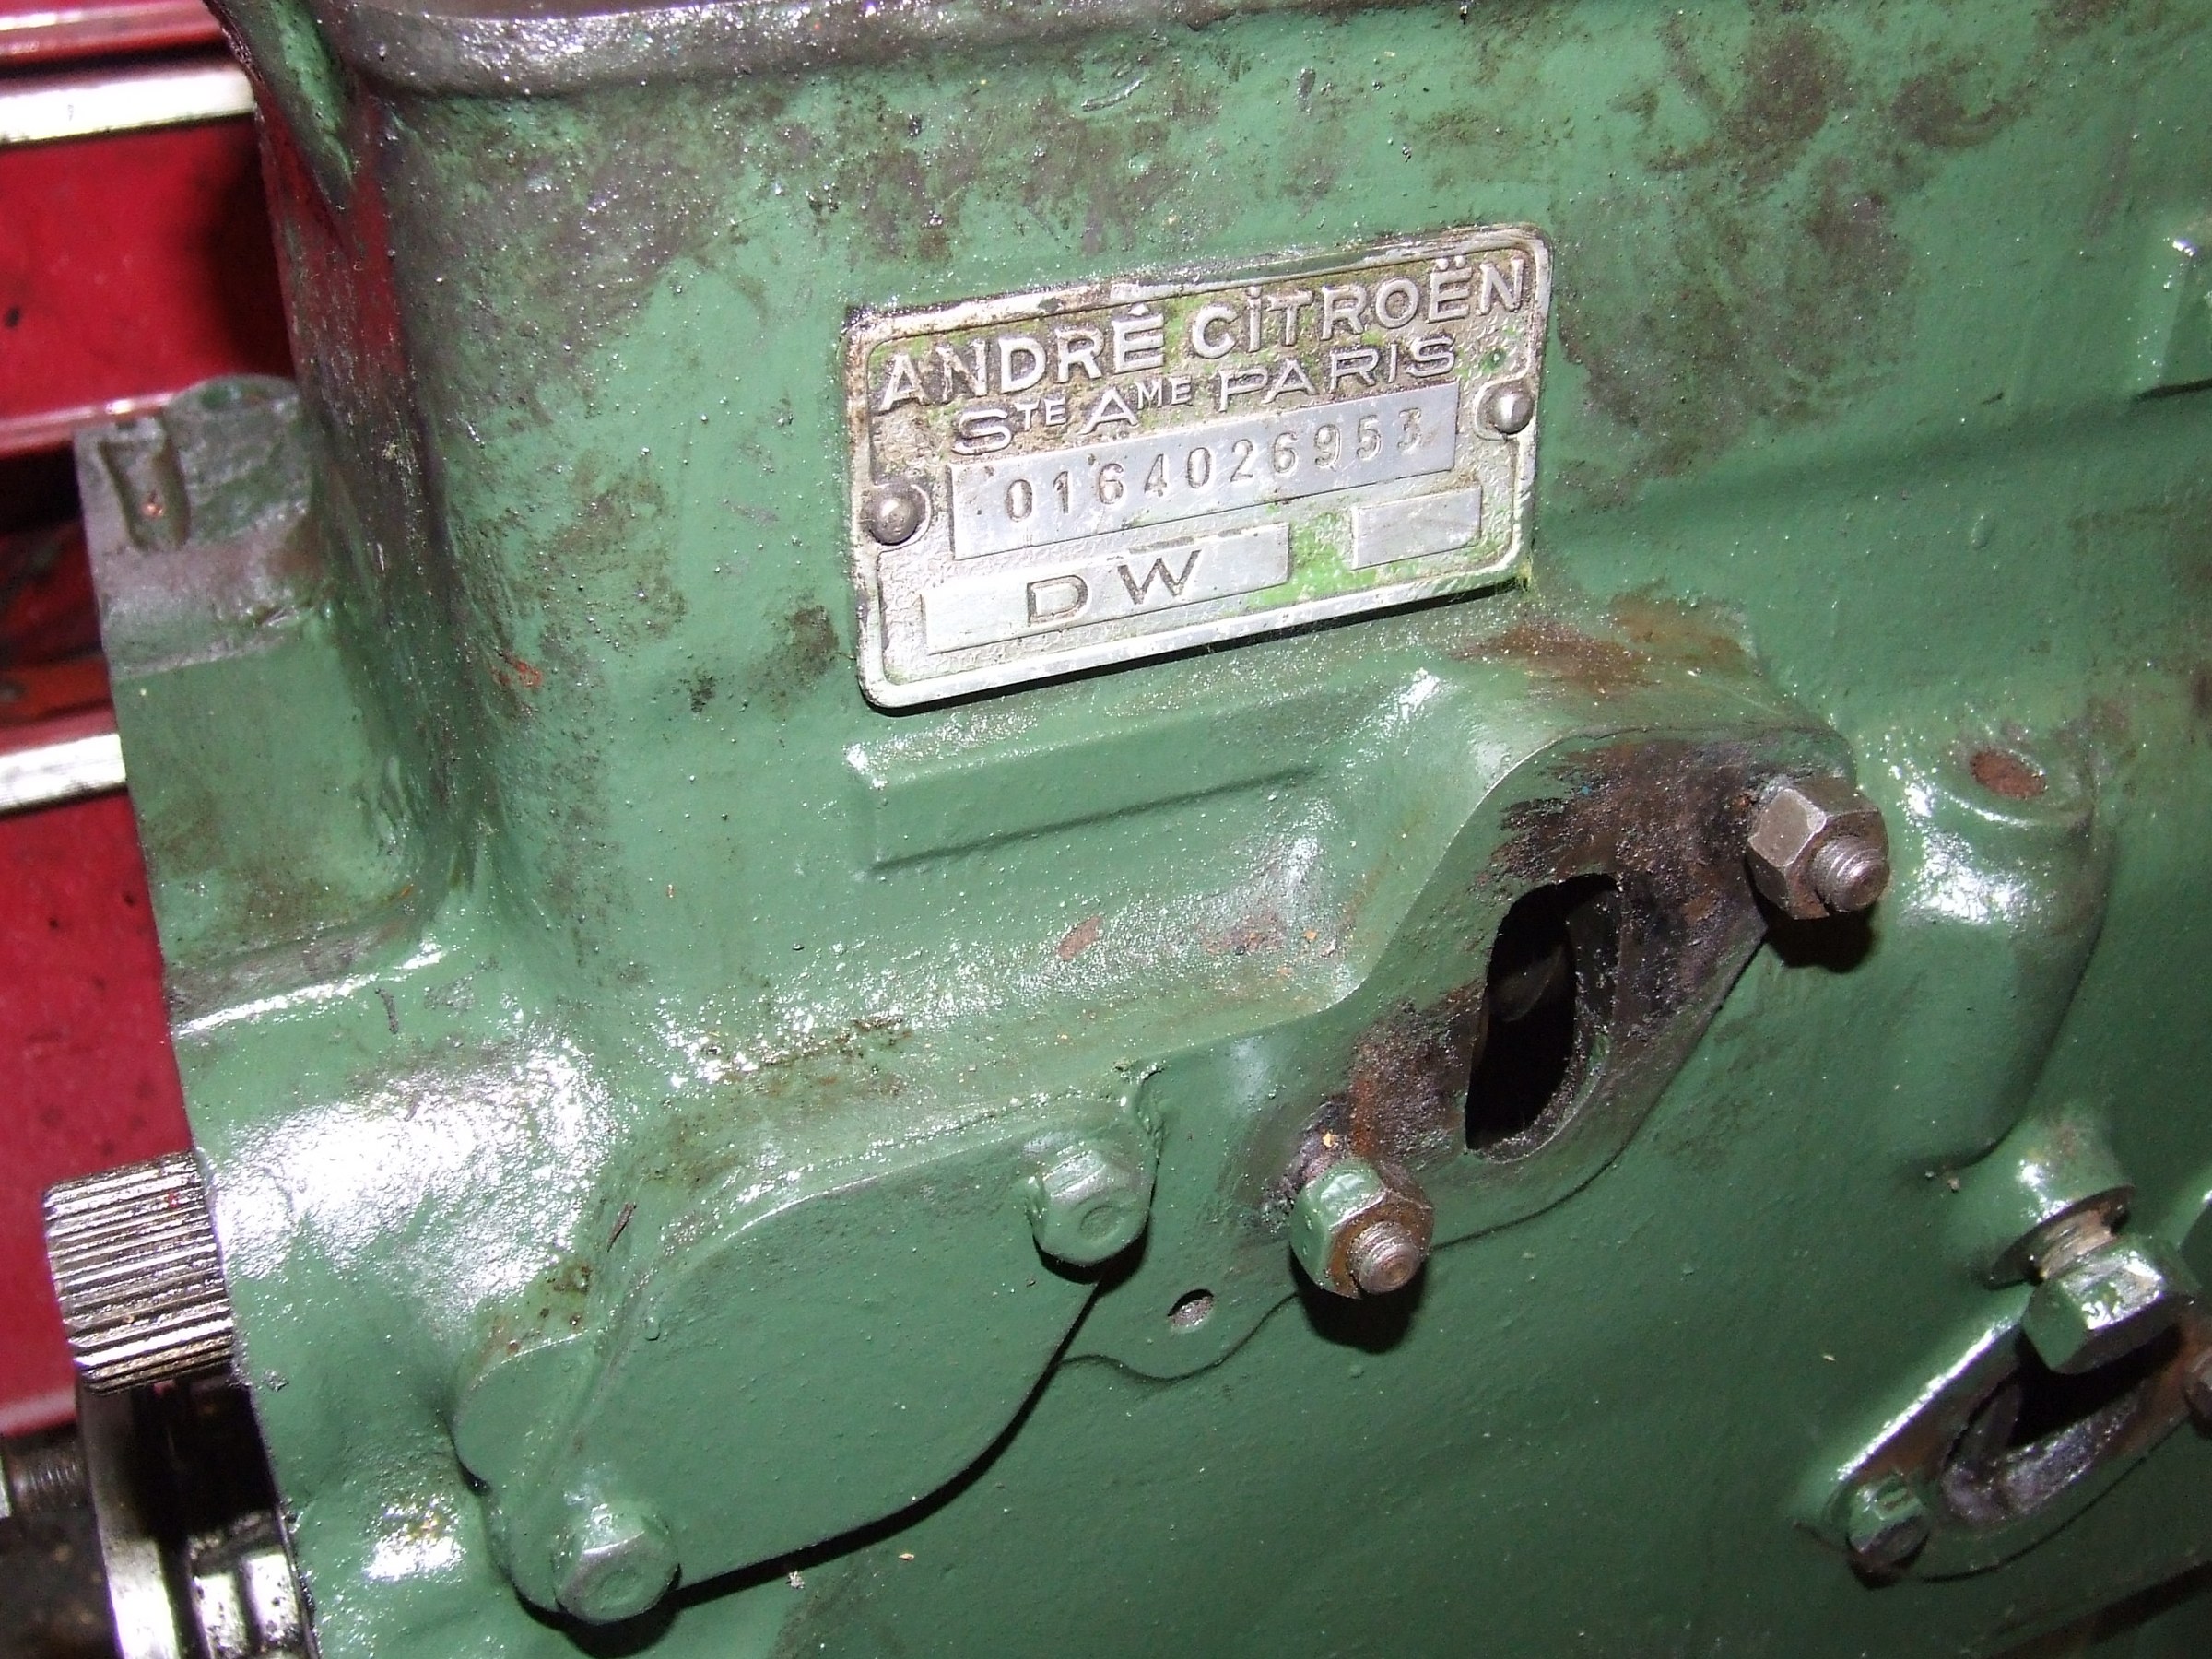
For this repair, I got me a long stroke Citroën ID19P engine underblock which is very similar to an original TA lower motorblock. This all worked very well with the original TA’s upper parts and during/after the first MOT I drove with this combination for a couple of years.
OUTER APPEARANCES
Although I fixed the outside of the car to make it through the initial MOT inspection, the car was far from beautiful. I just patched any holes and put some paint over it in a similar grey color paint.
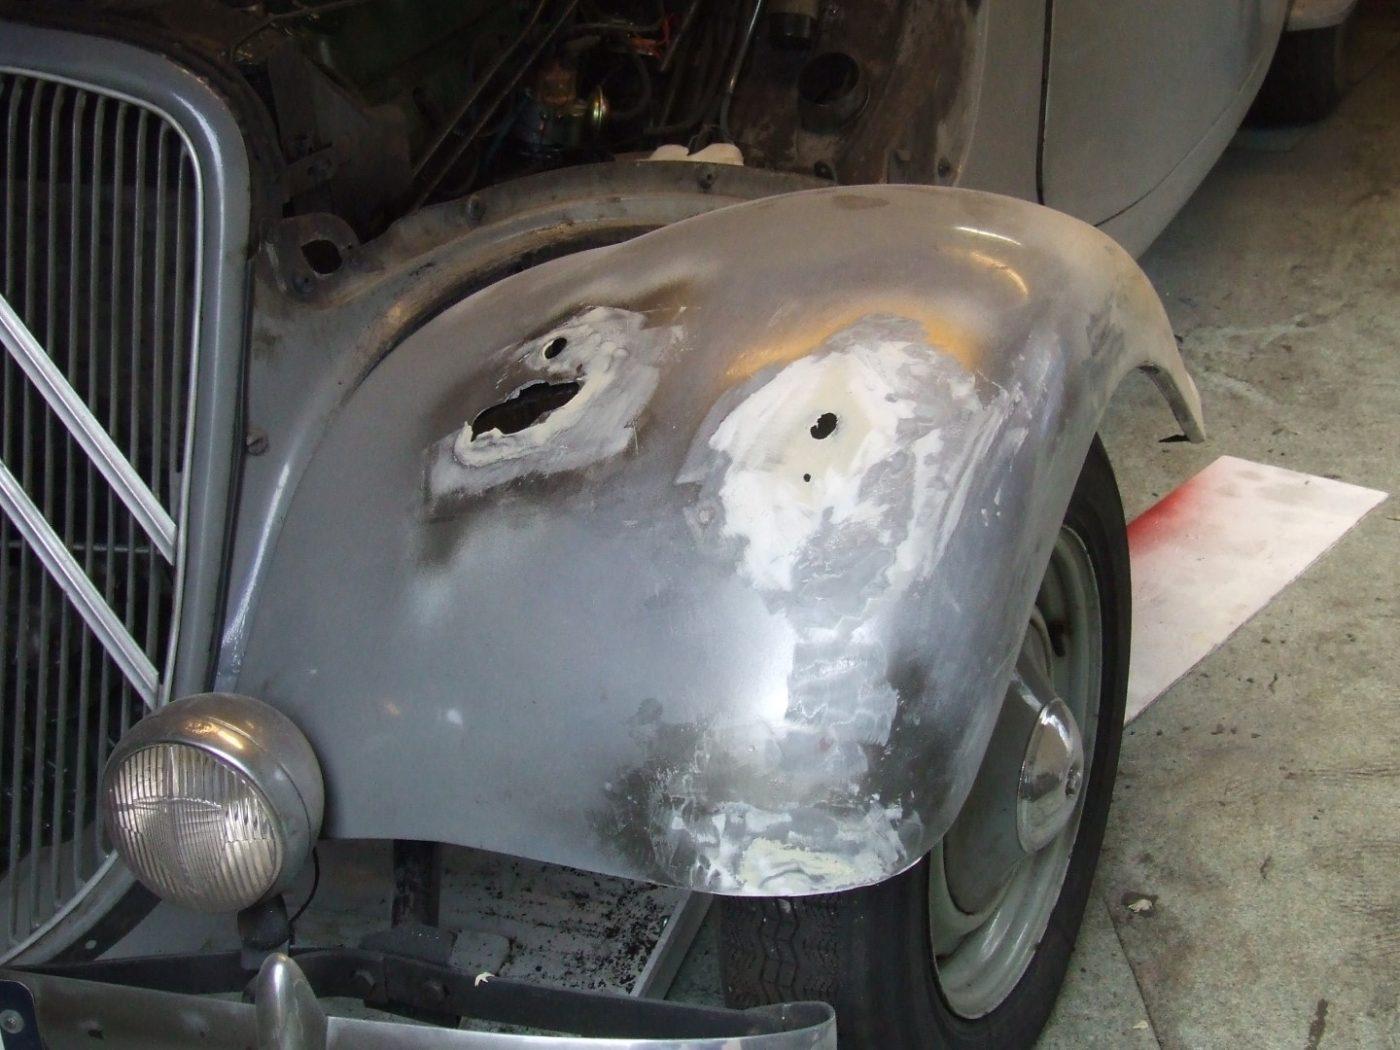
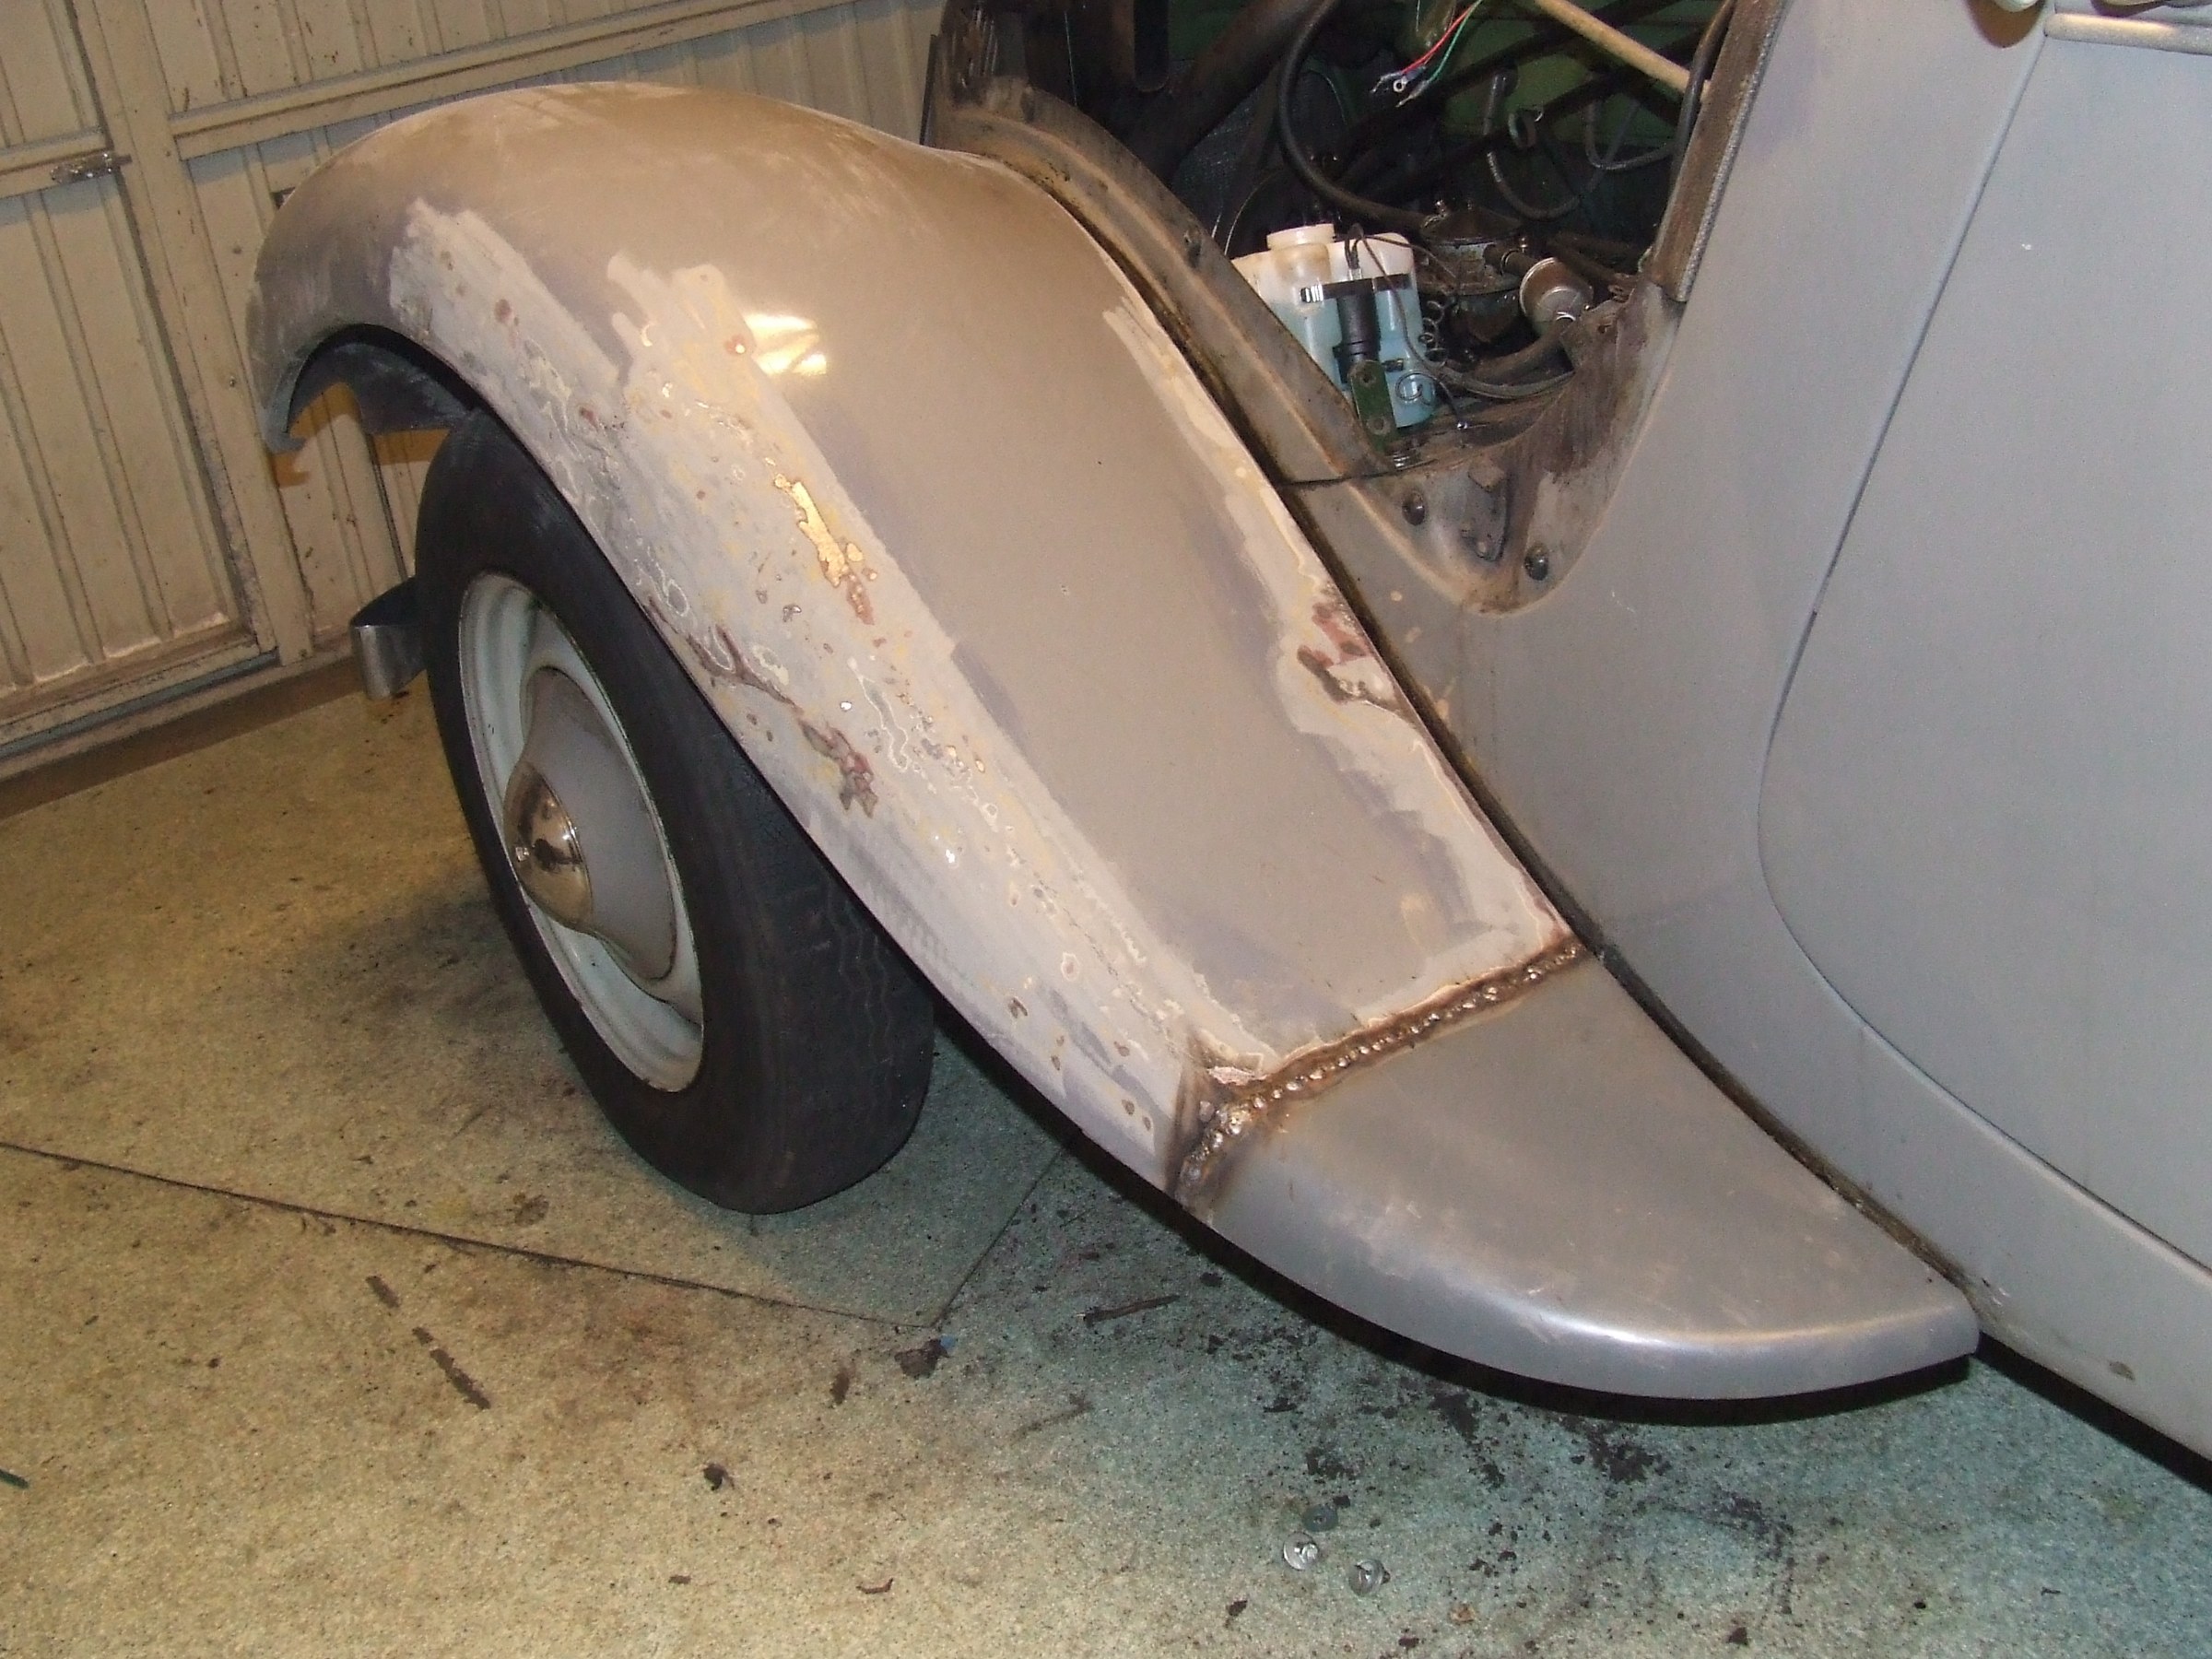
It took me over half a year to get the car in a nice external state, by repairing all bad parts, doing metal- and bodywork and spraypainting only the repaired parts. In this way, I preserved over 60% of the car with original paint.
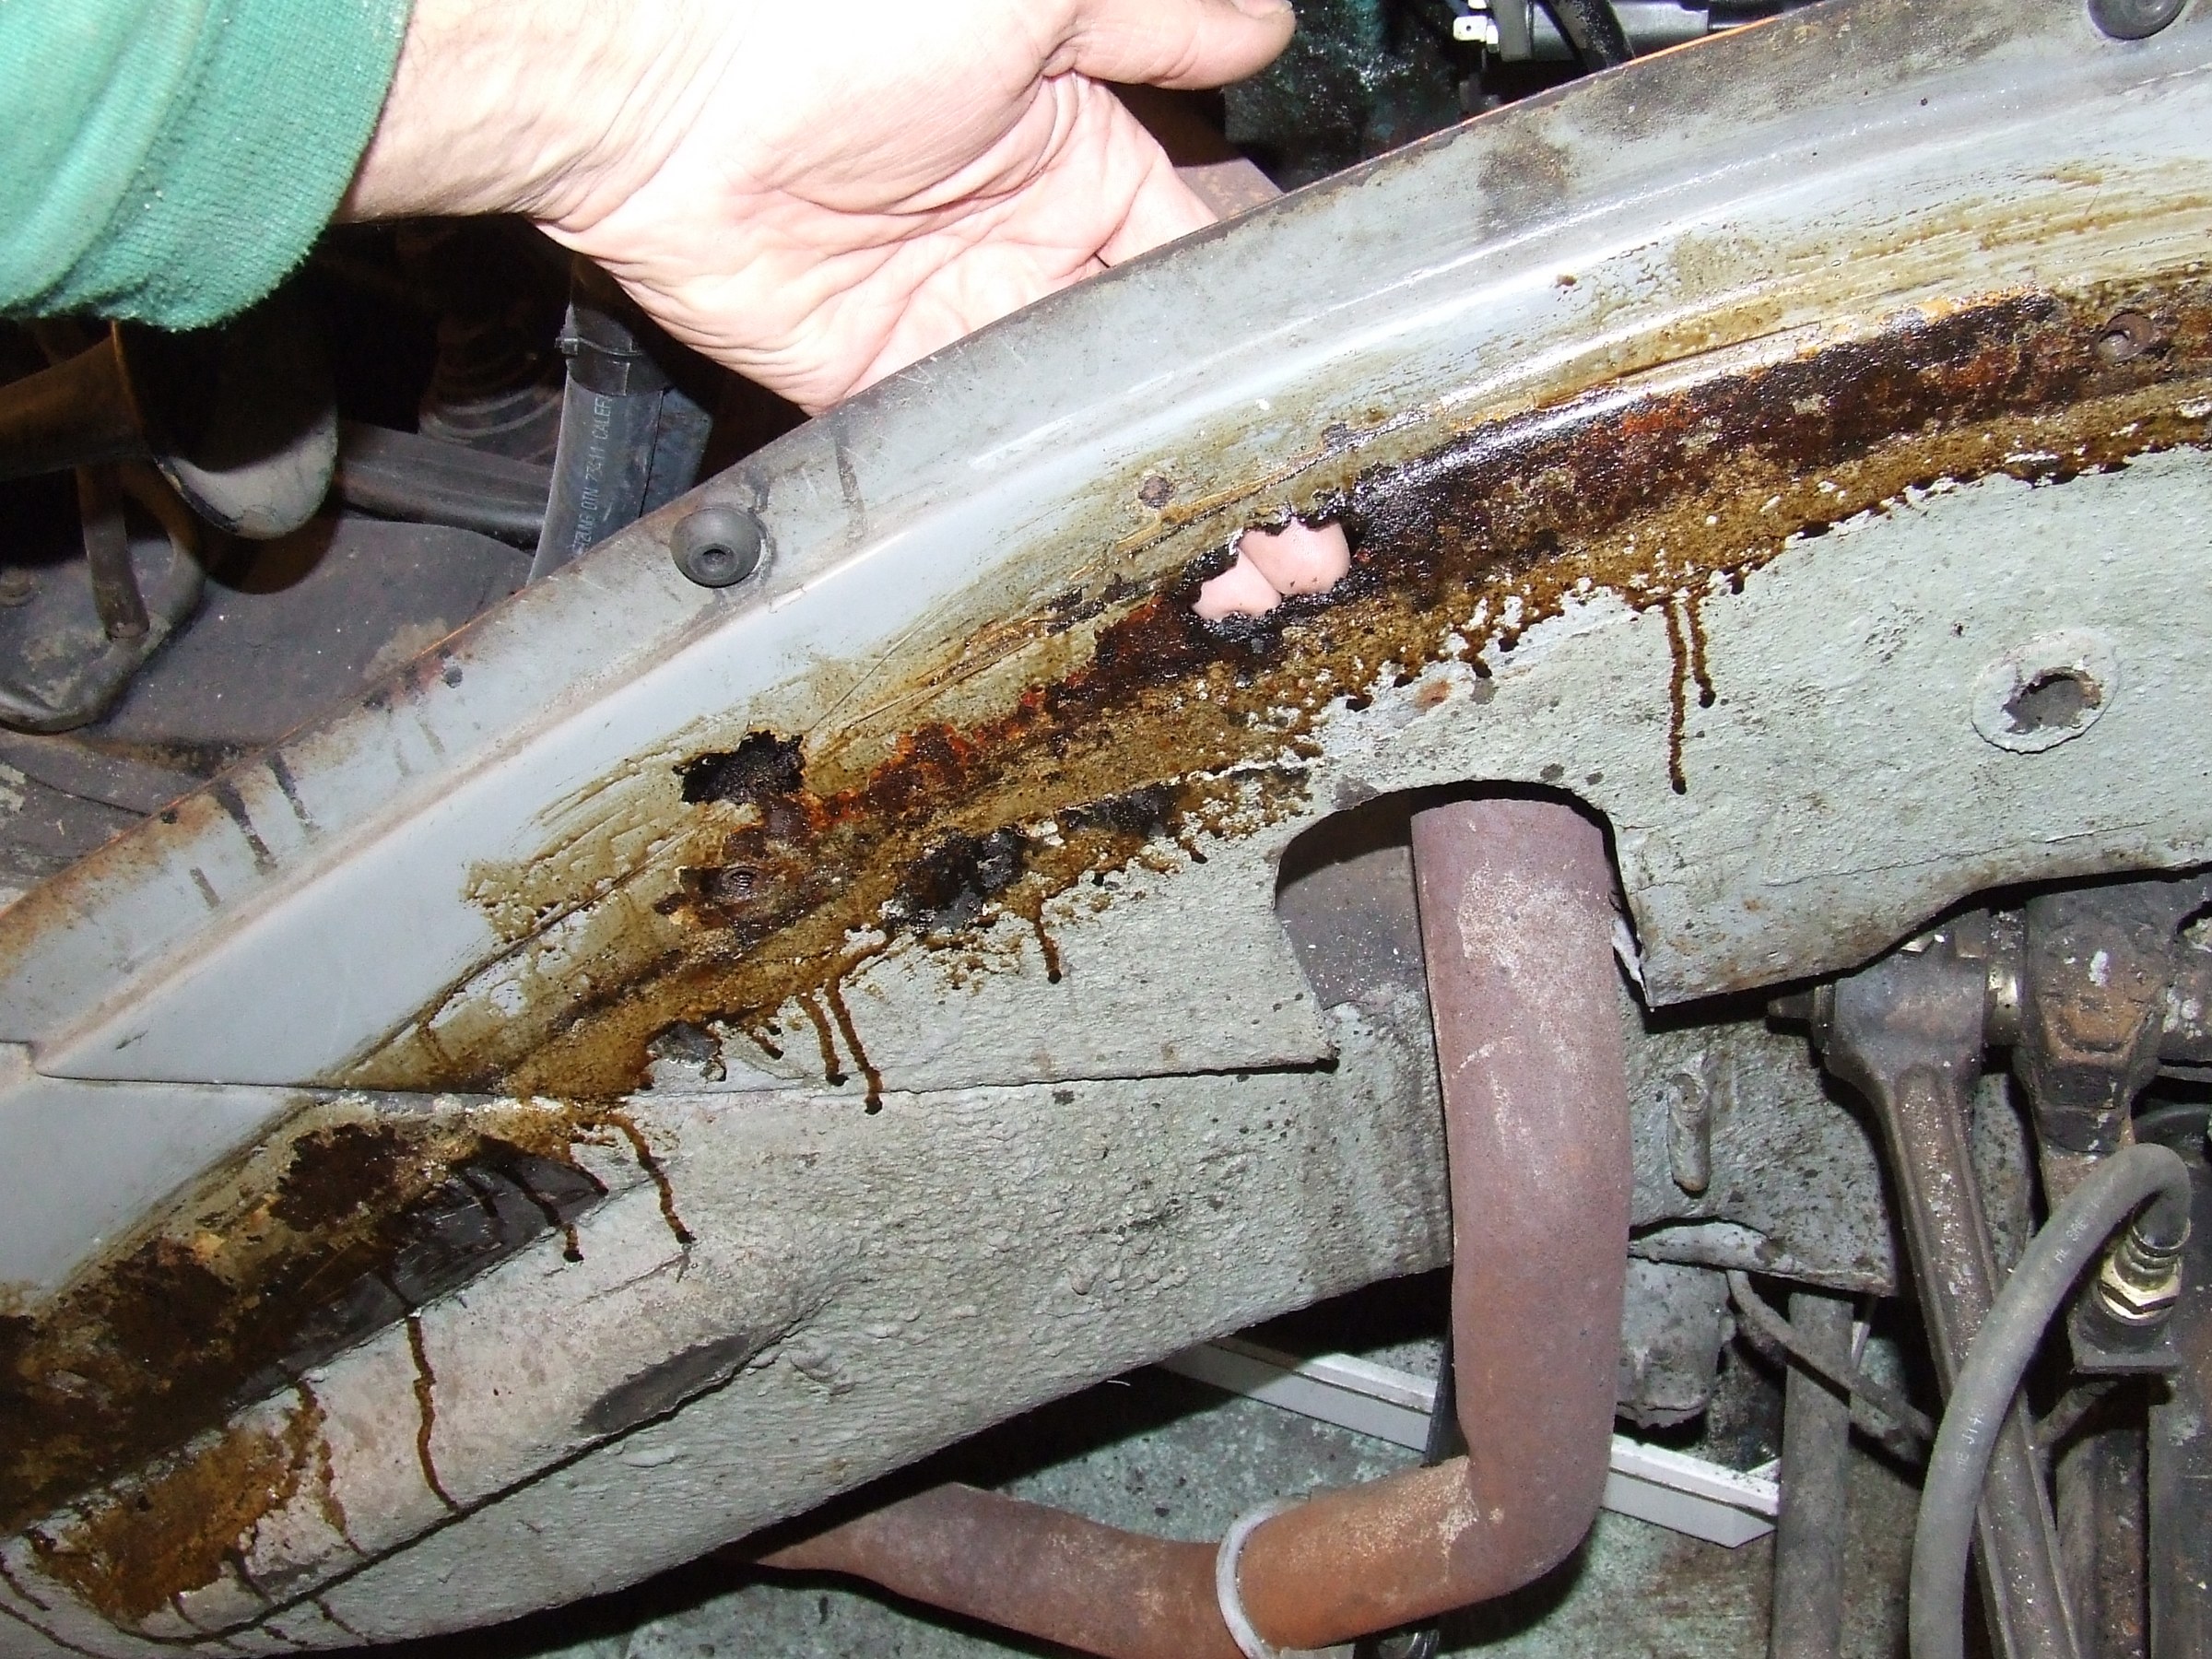
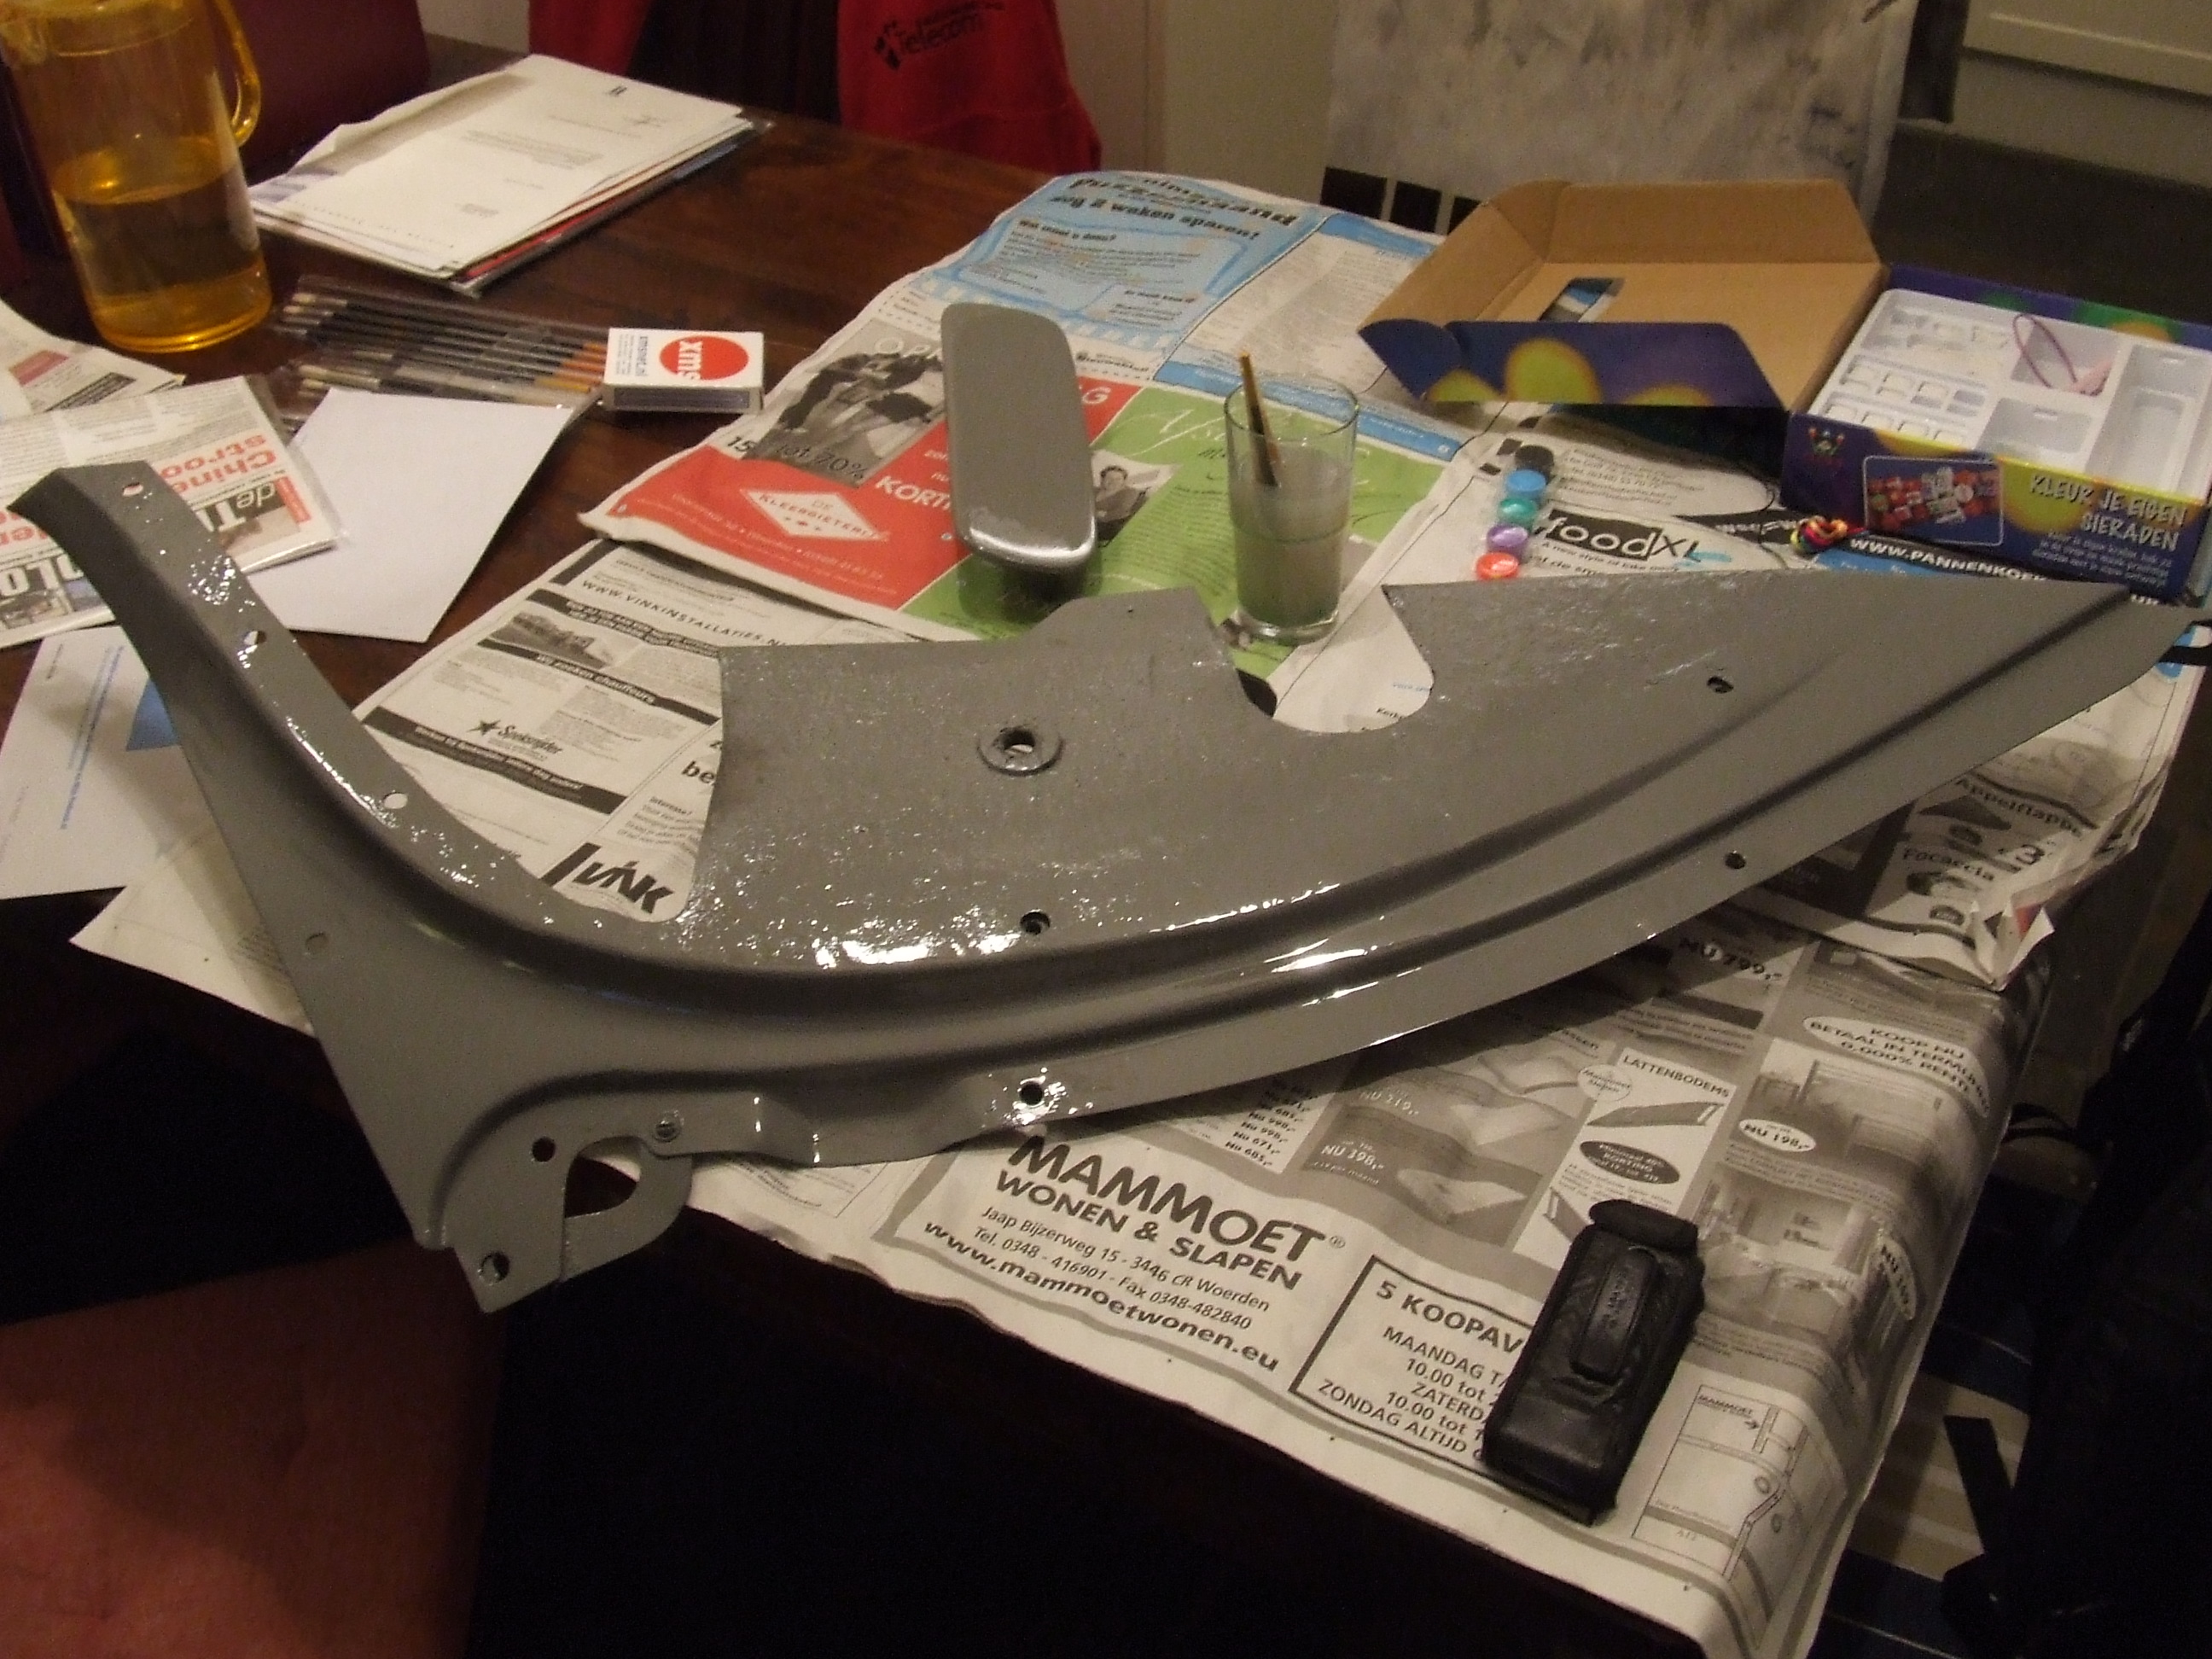
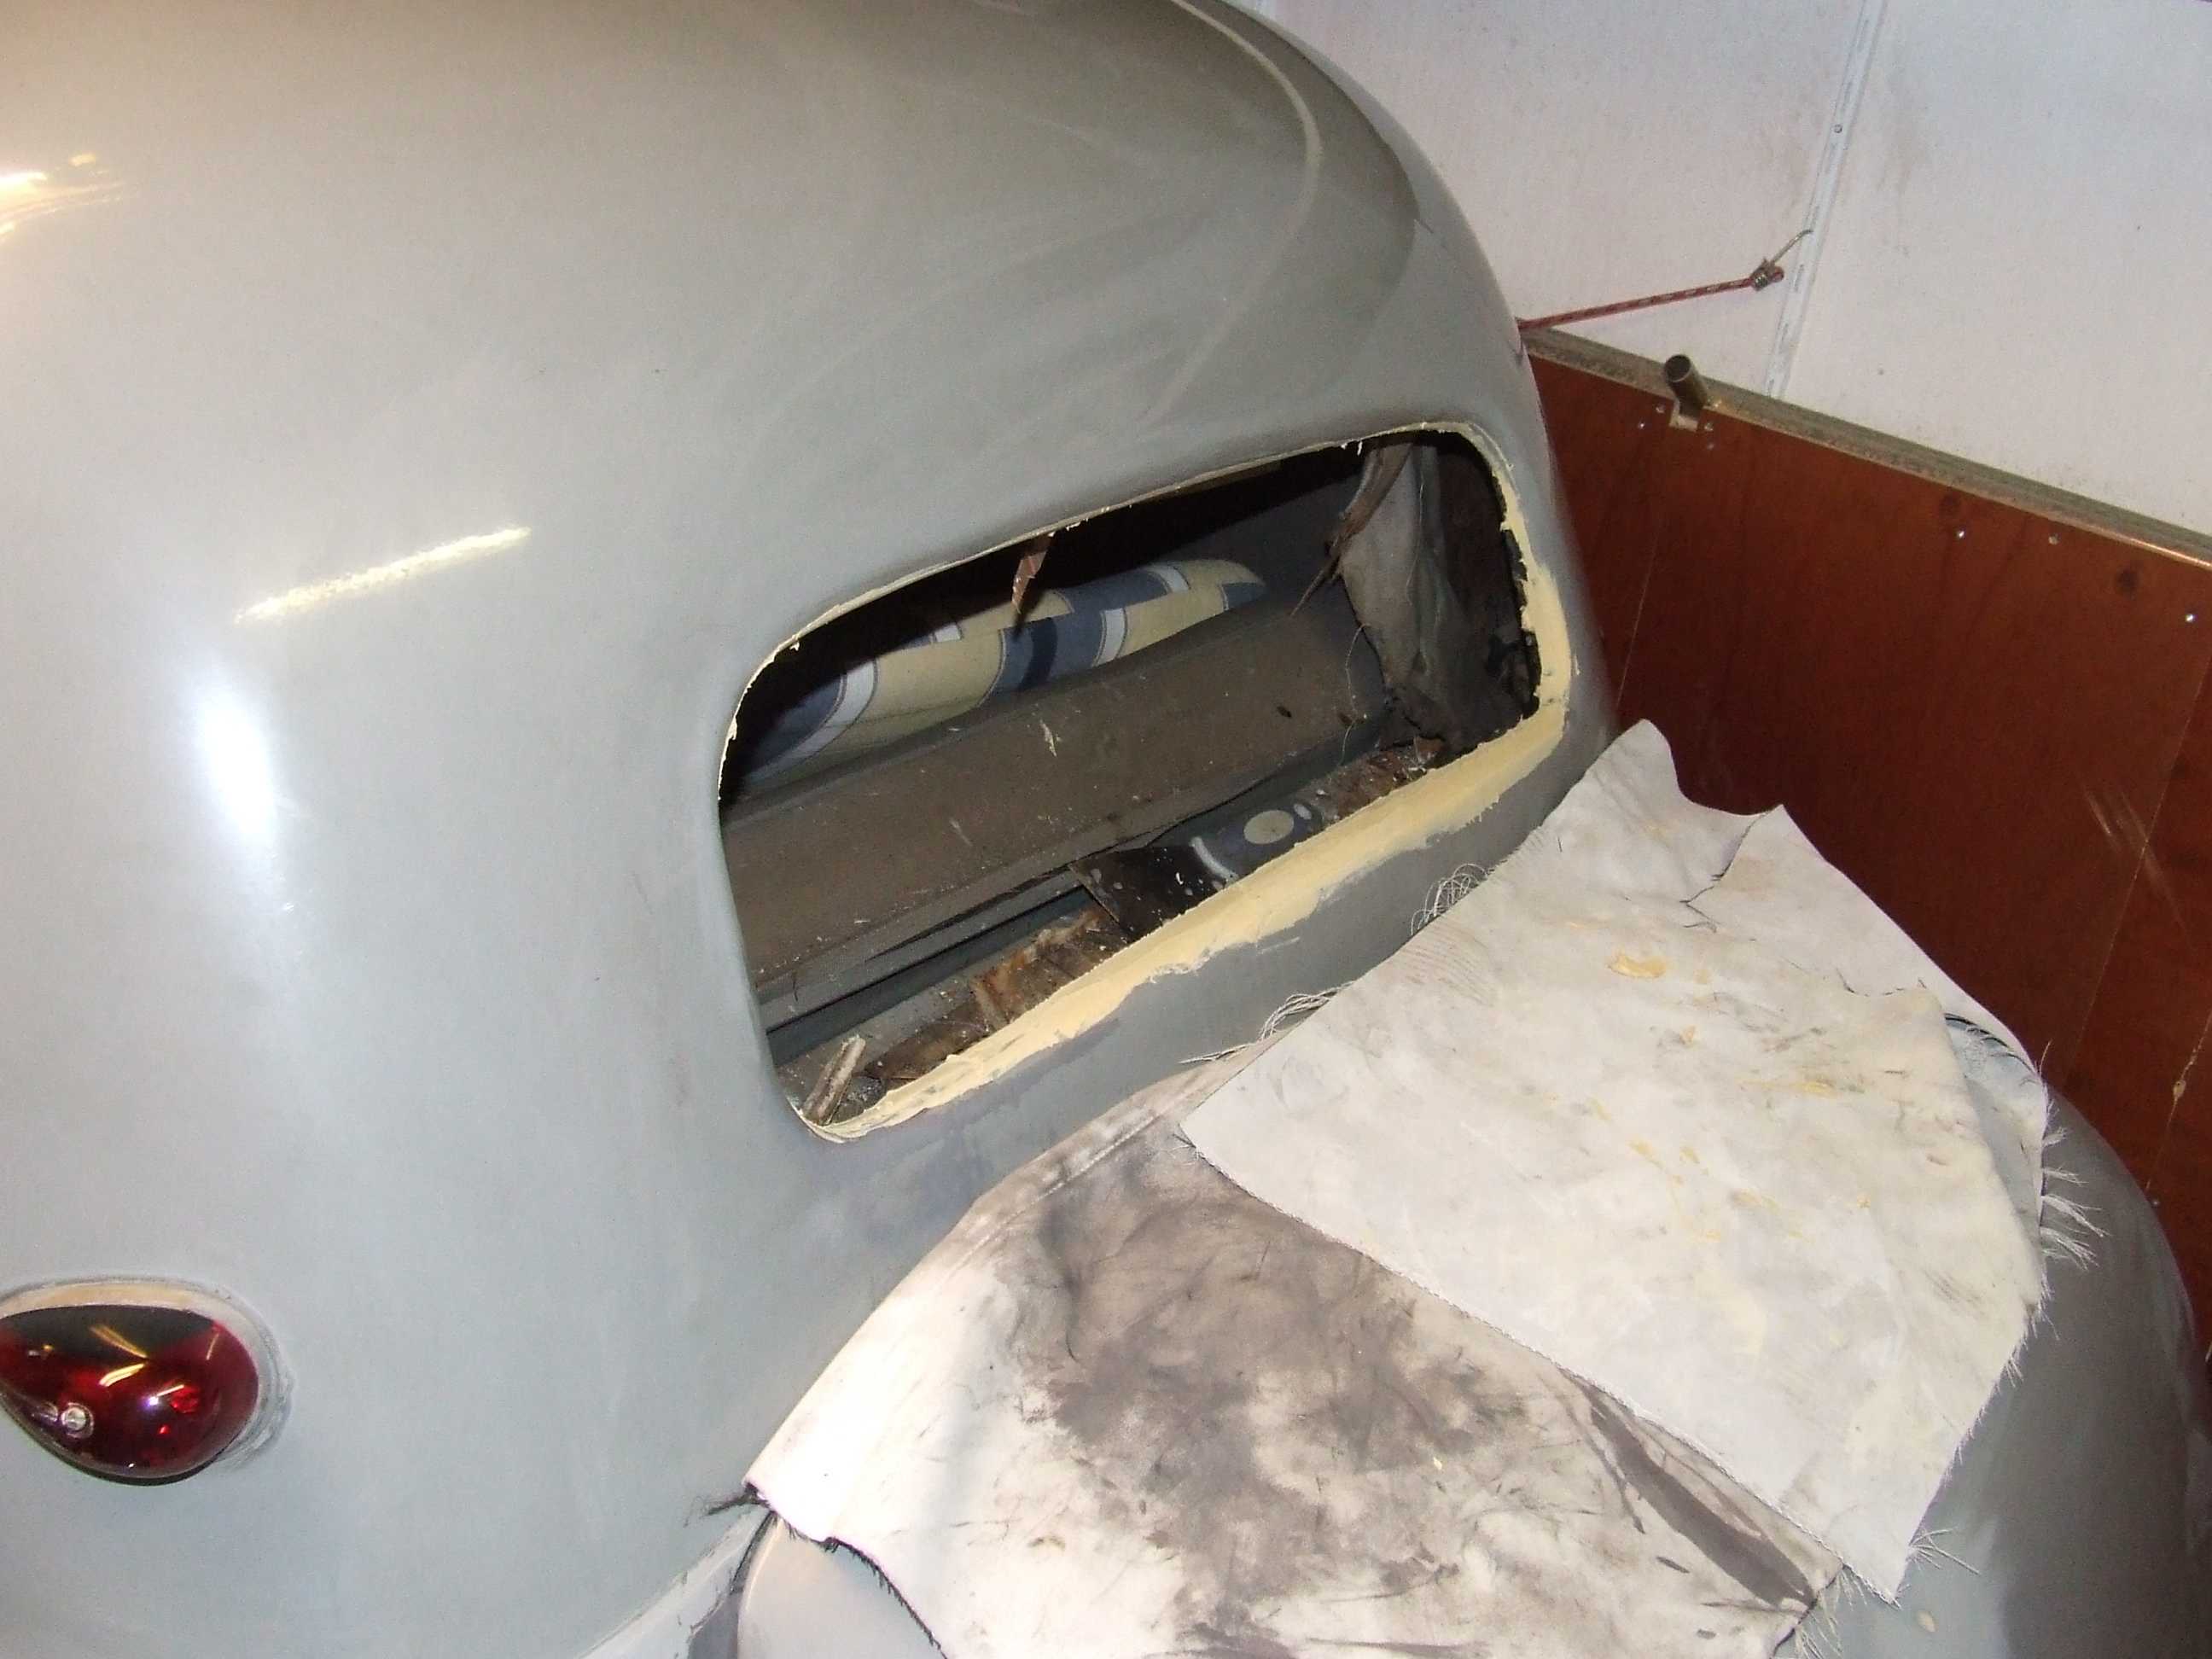
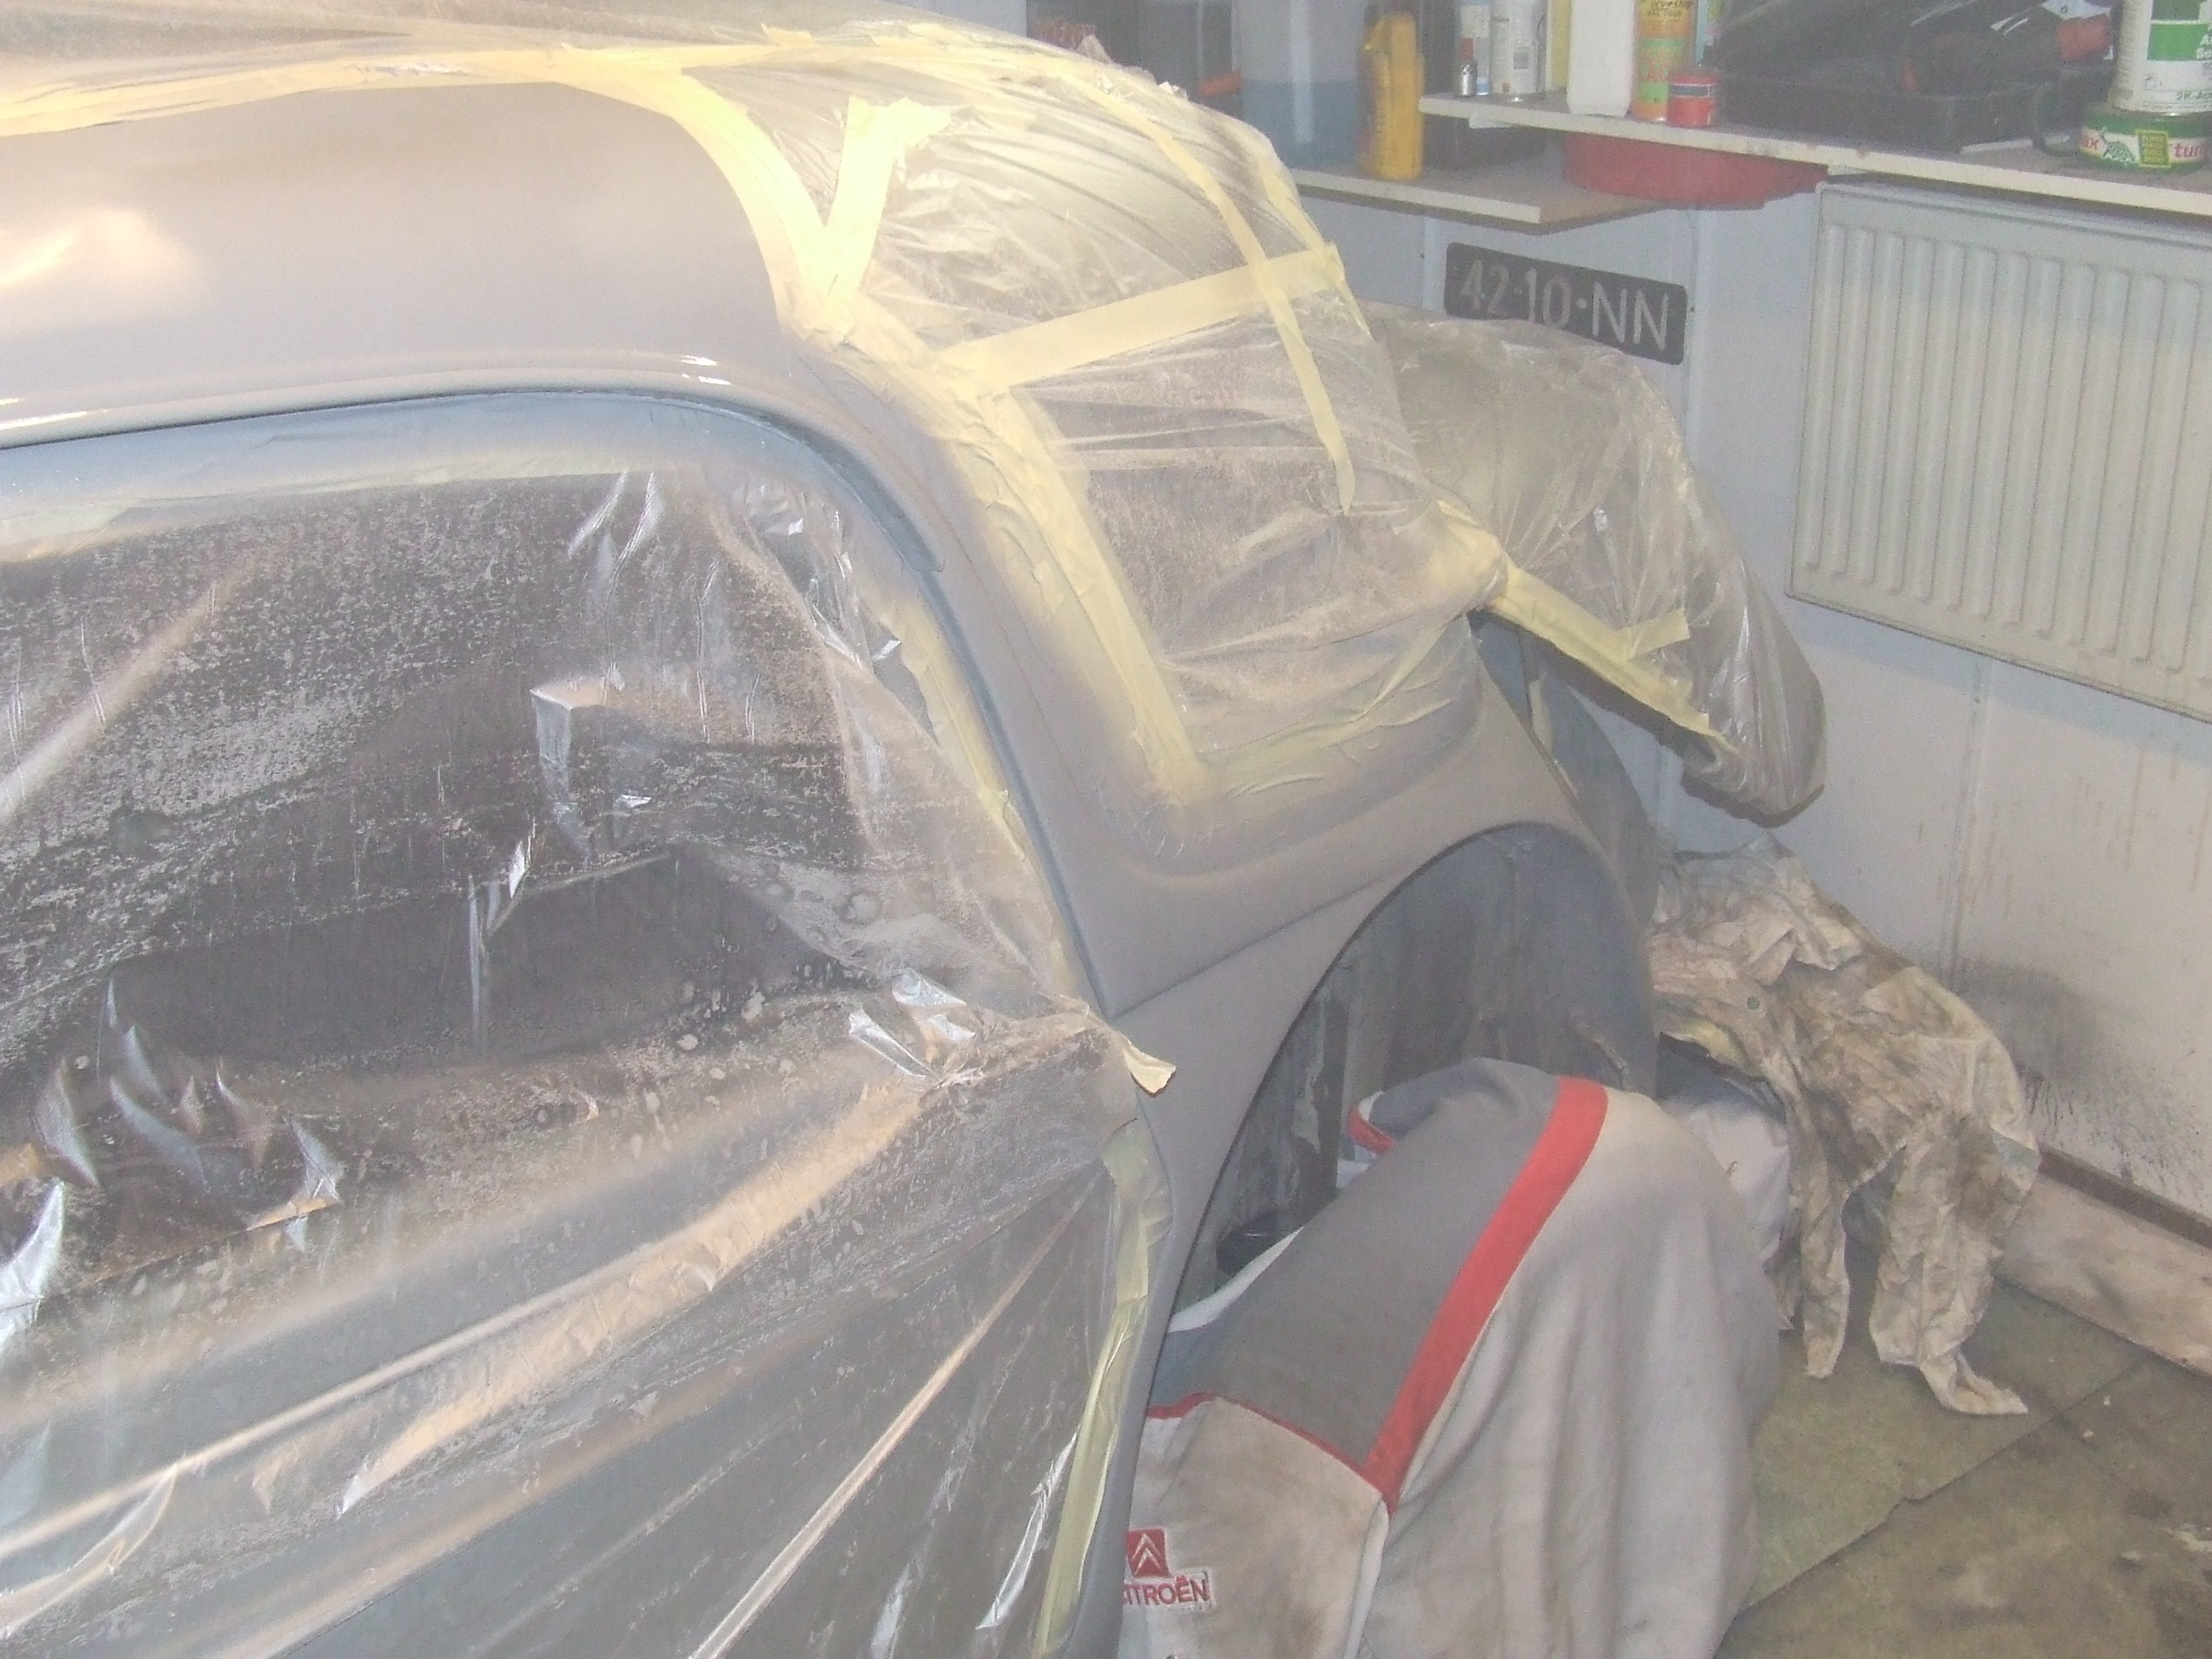
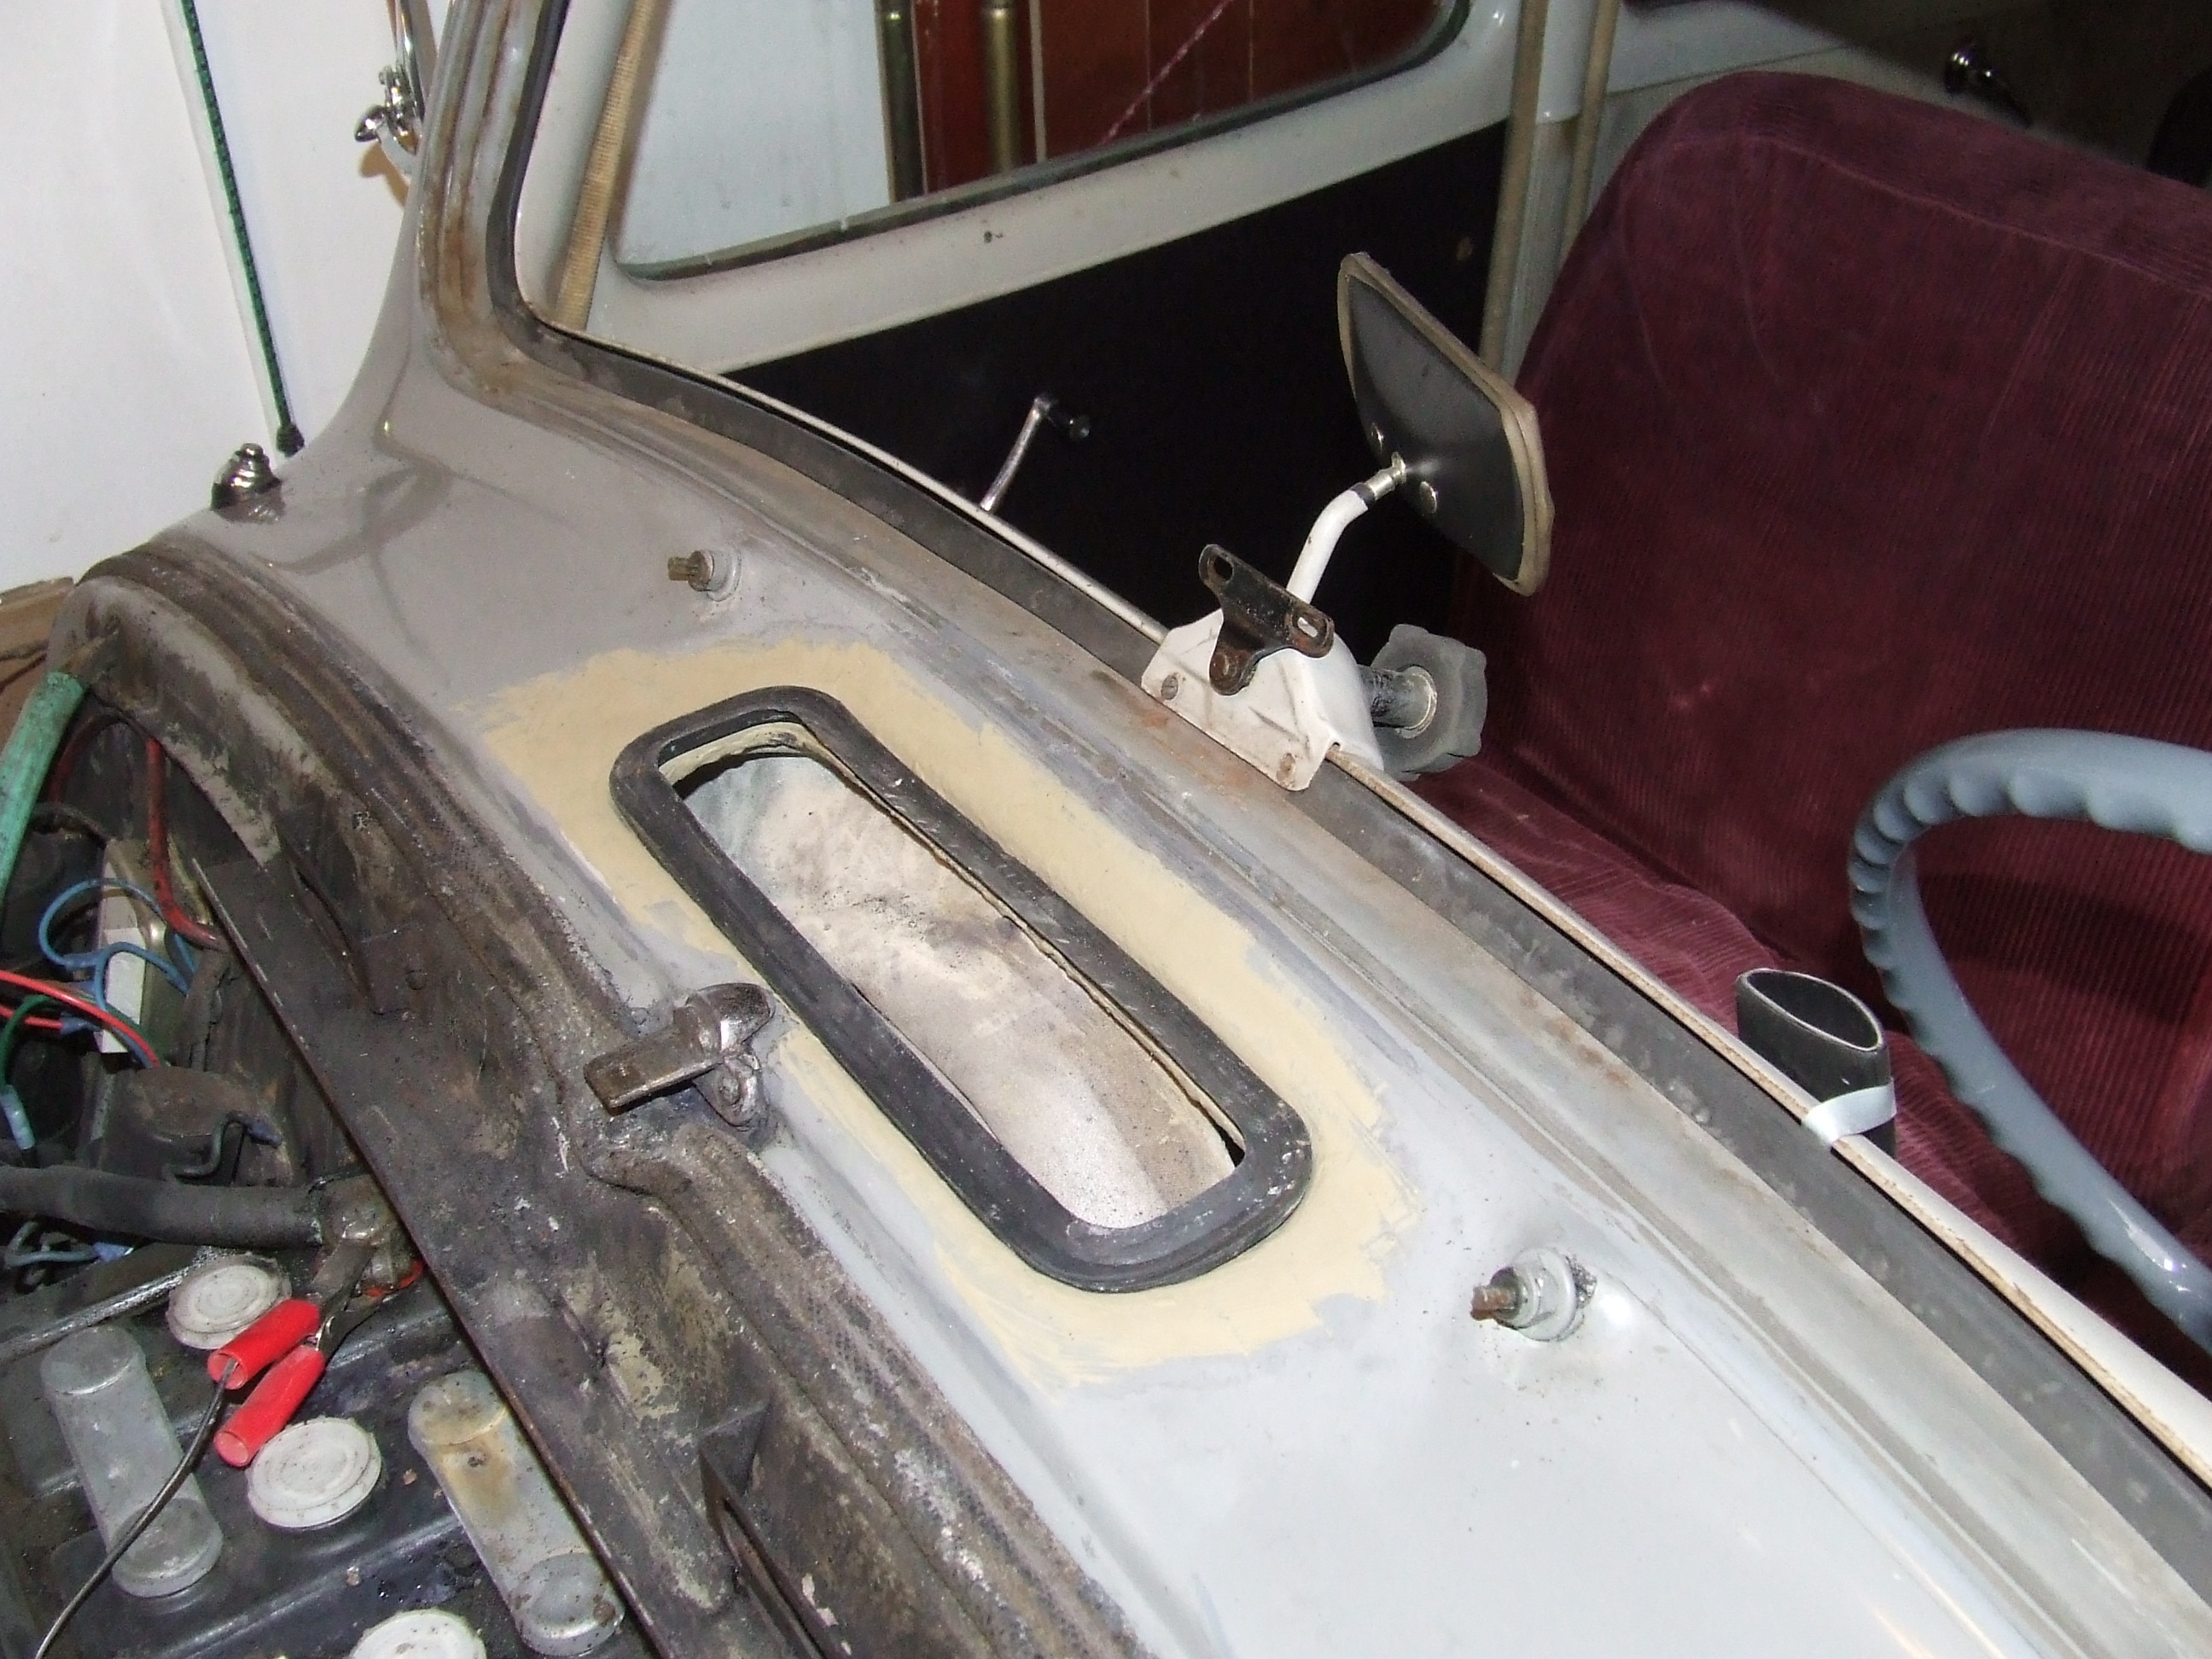
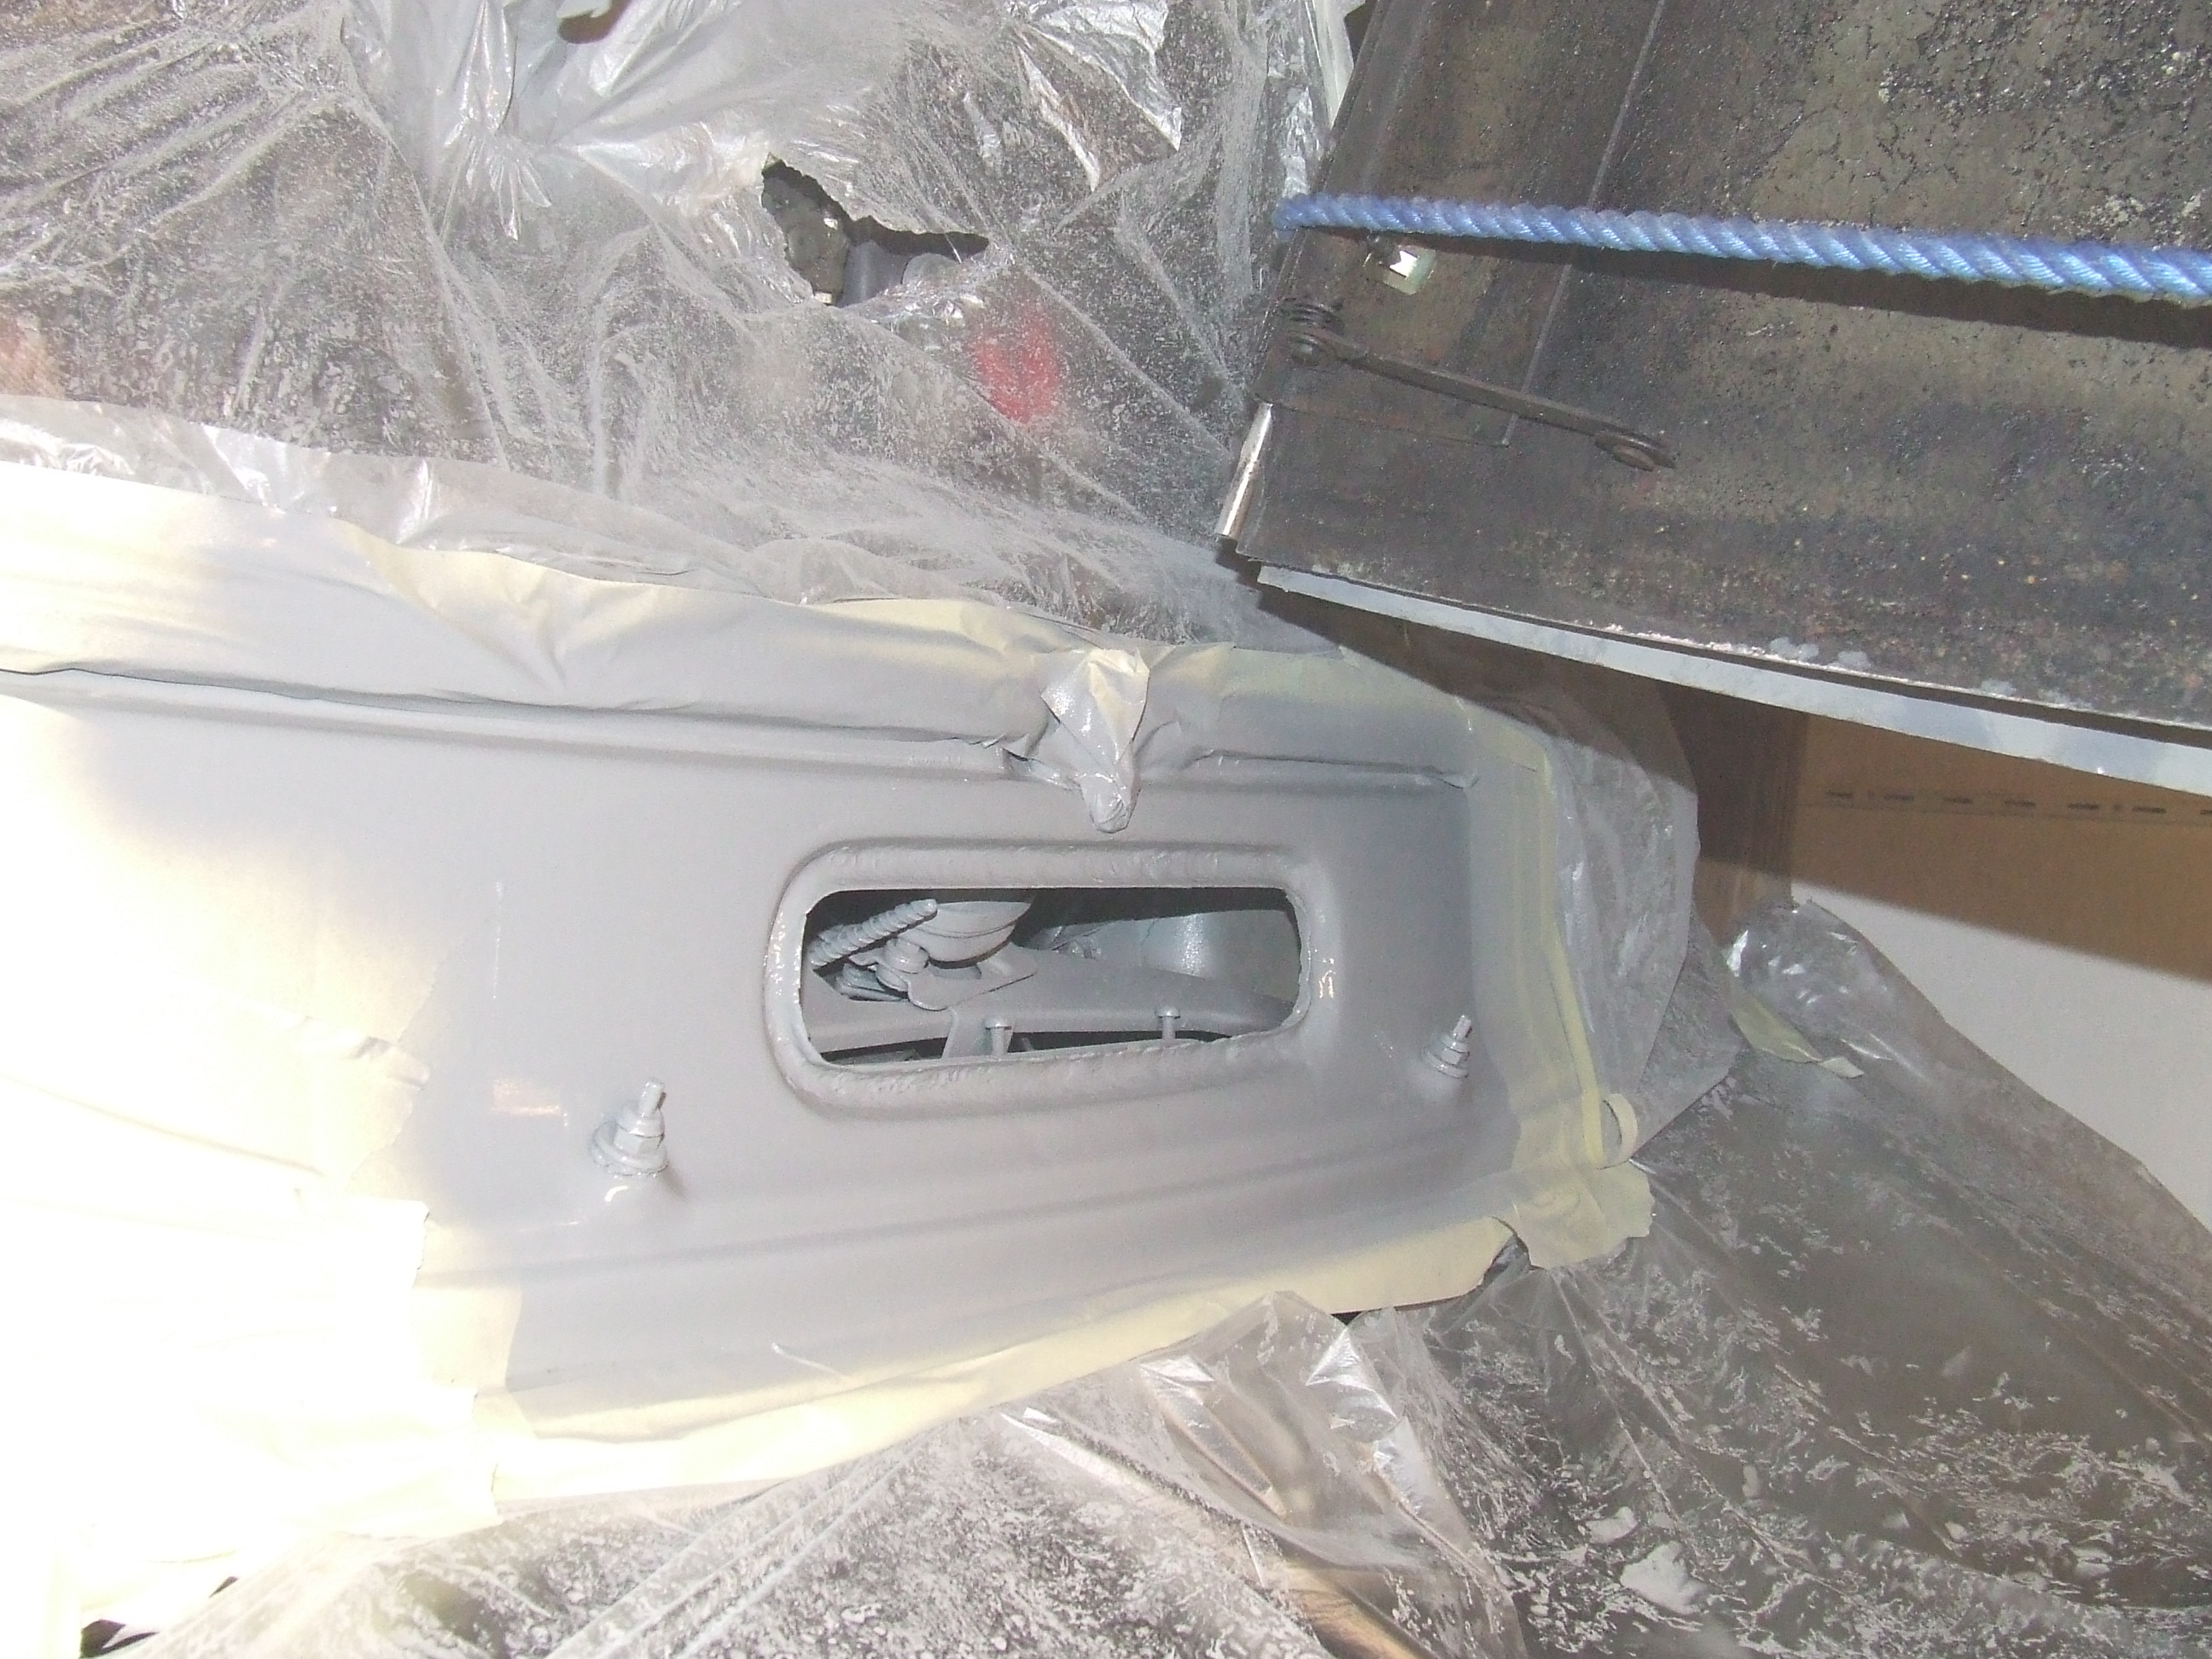
I had to do a lot of bodywork on the fenders, and some on the bottom of the doors, the raingutters of the roof, the outer parts of the bonnet, the edges of the rear window mount, the edges of the hood and the air inlet just under the front window.
UPGRADES
Later, I upgraded to the following parts (sequential order):


***: I mated the old 3-gear original gearbox to the old TA-motor that now has an ID19P underblock. This is now my spare motor/gearbox set in storage:
MAINTENANCE PHASE based on max 2000km/year
Every year:
PLUS Every 2 years:
PLUS Every 4 years:
Afterthought: I am glad that I am by now very experienced in doing all of my maintenance myself, and having a place to work with all the required special tools available helps a lot!
For things to come: Please see THIS
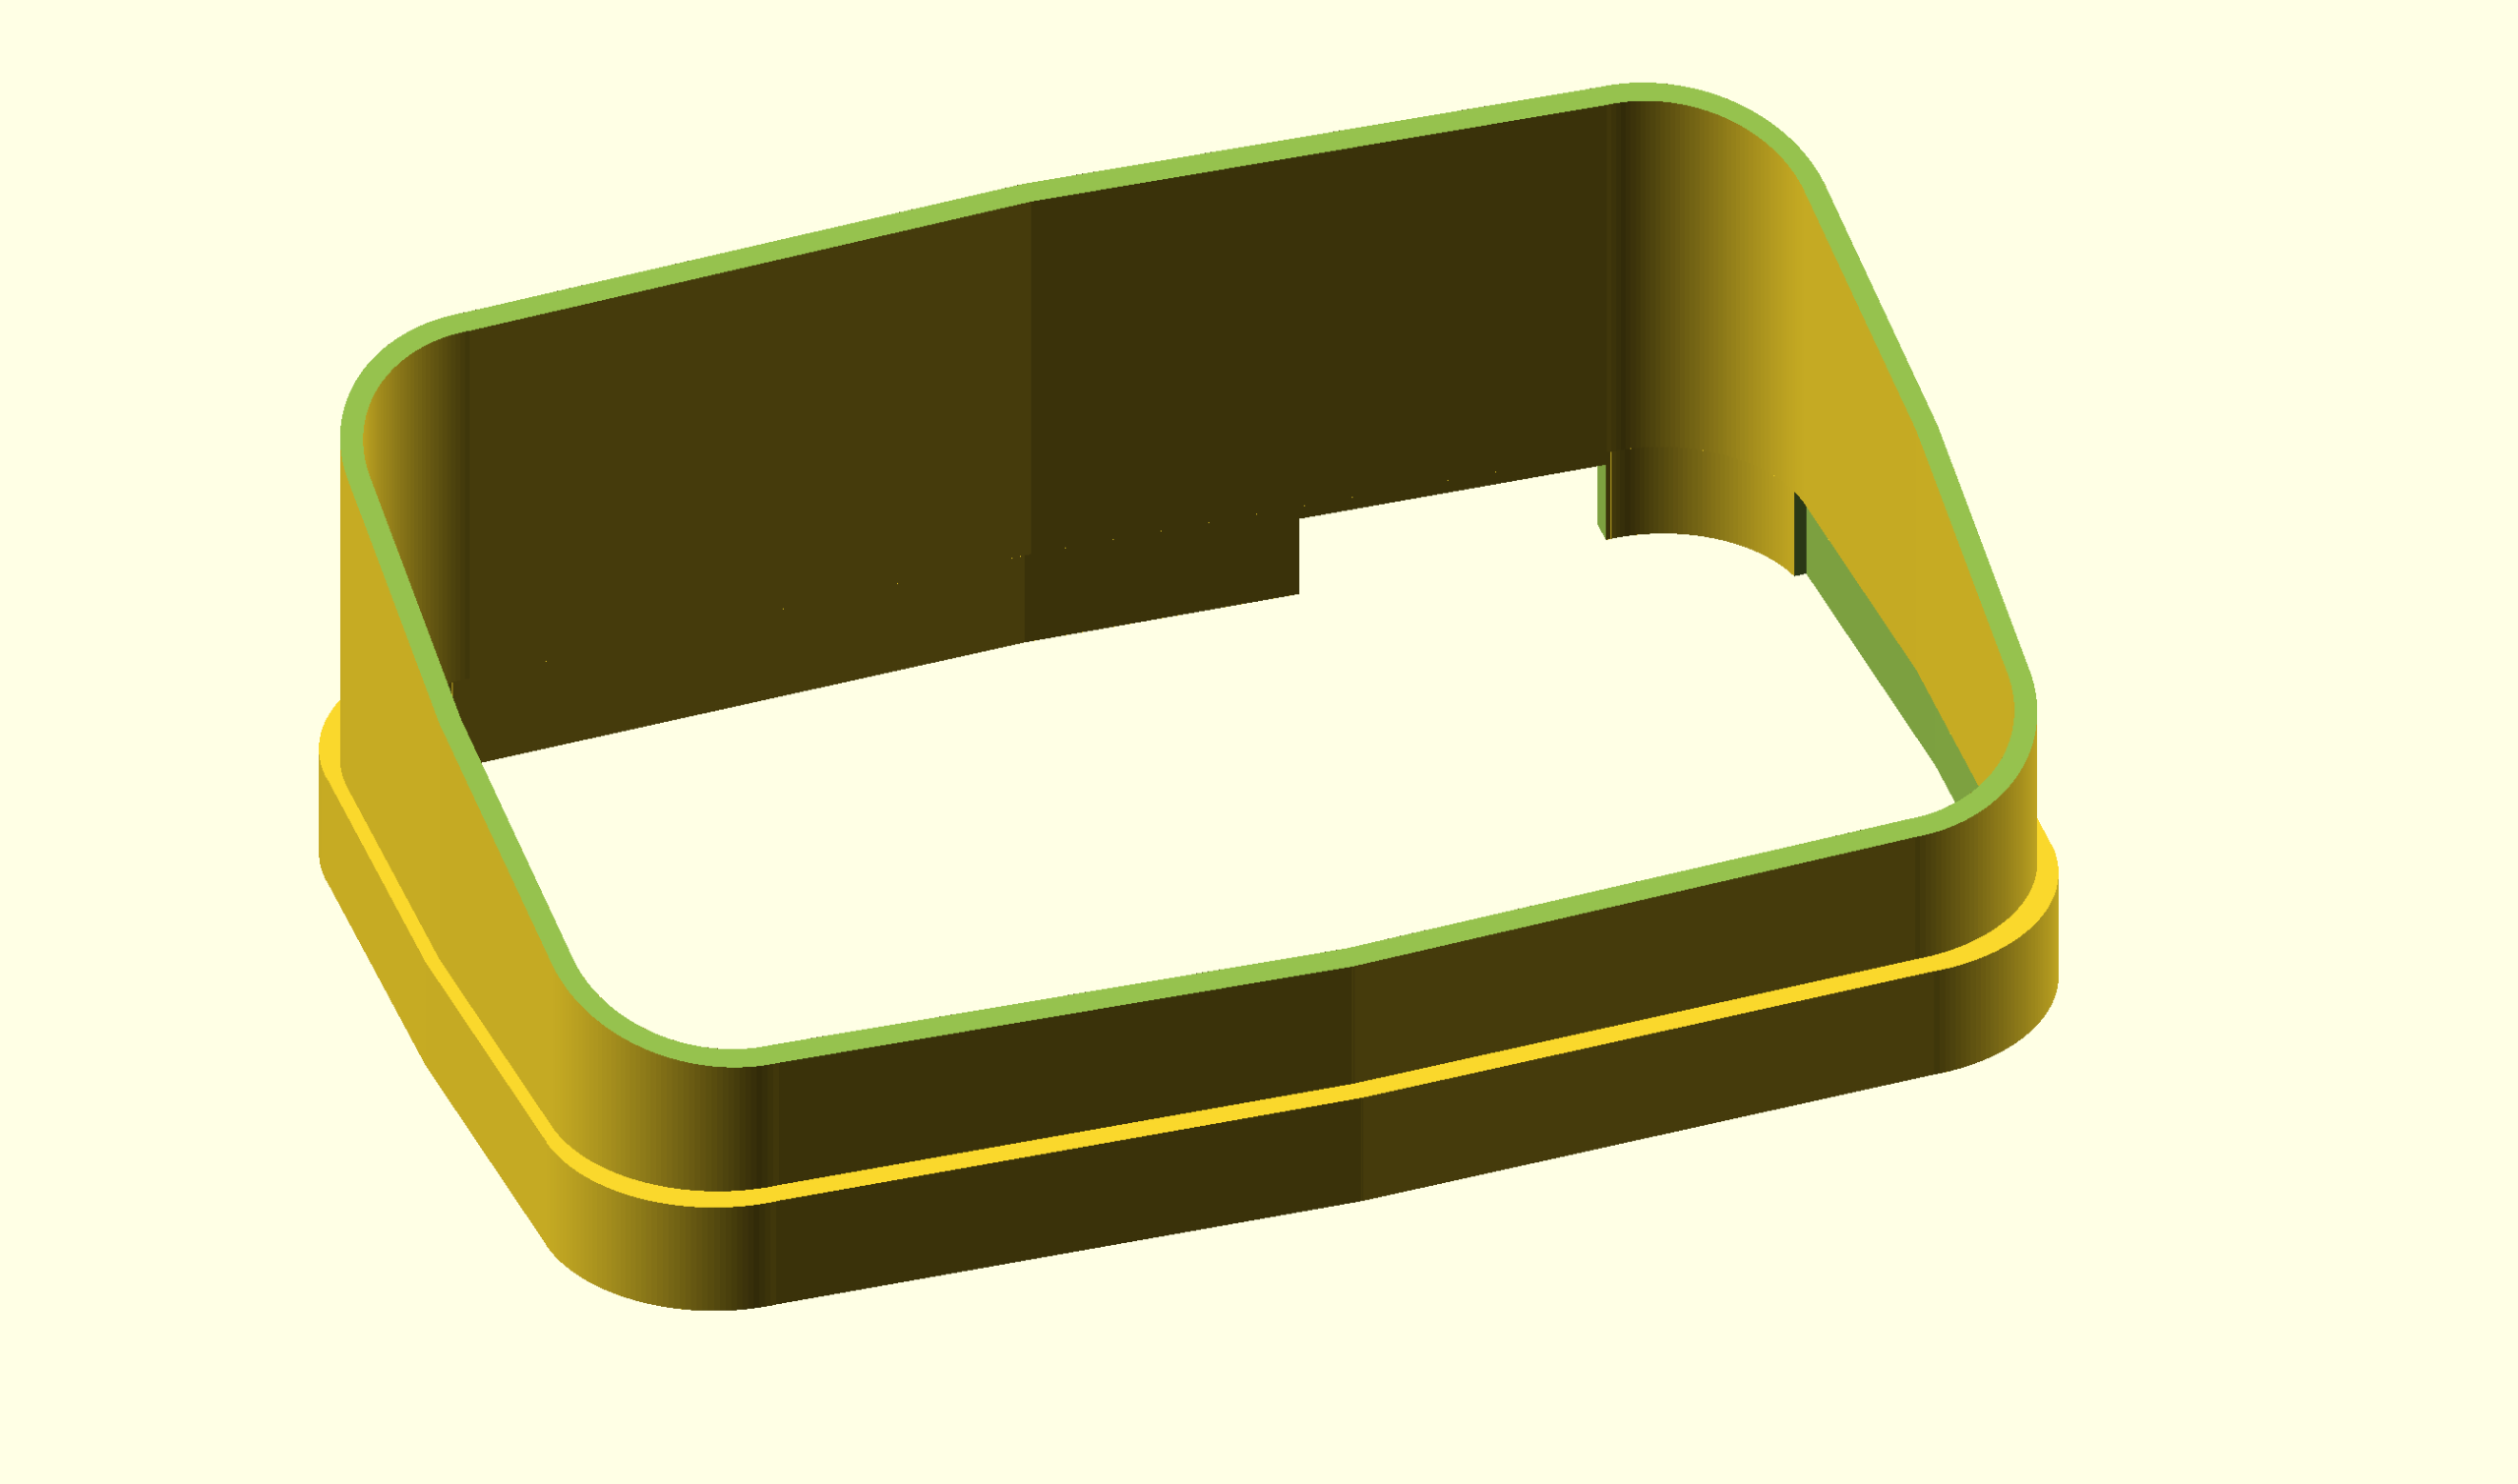
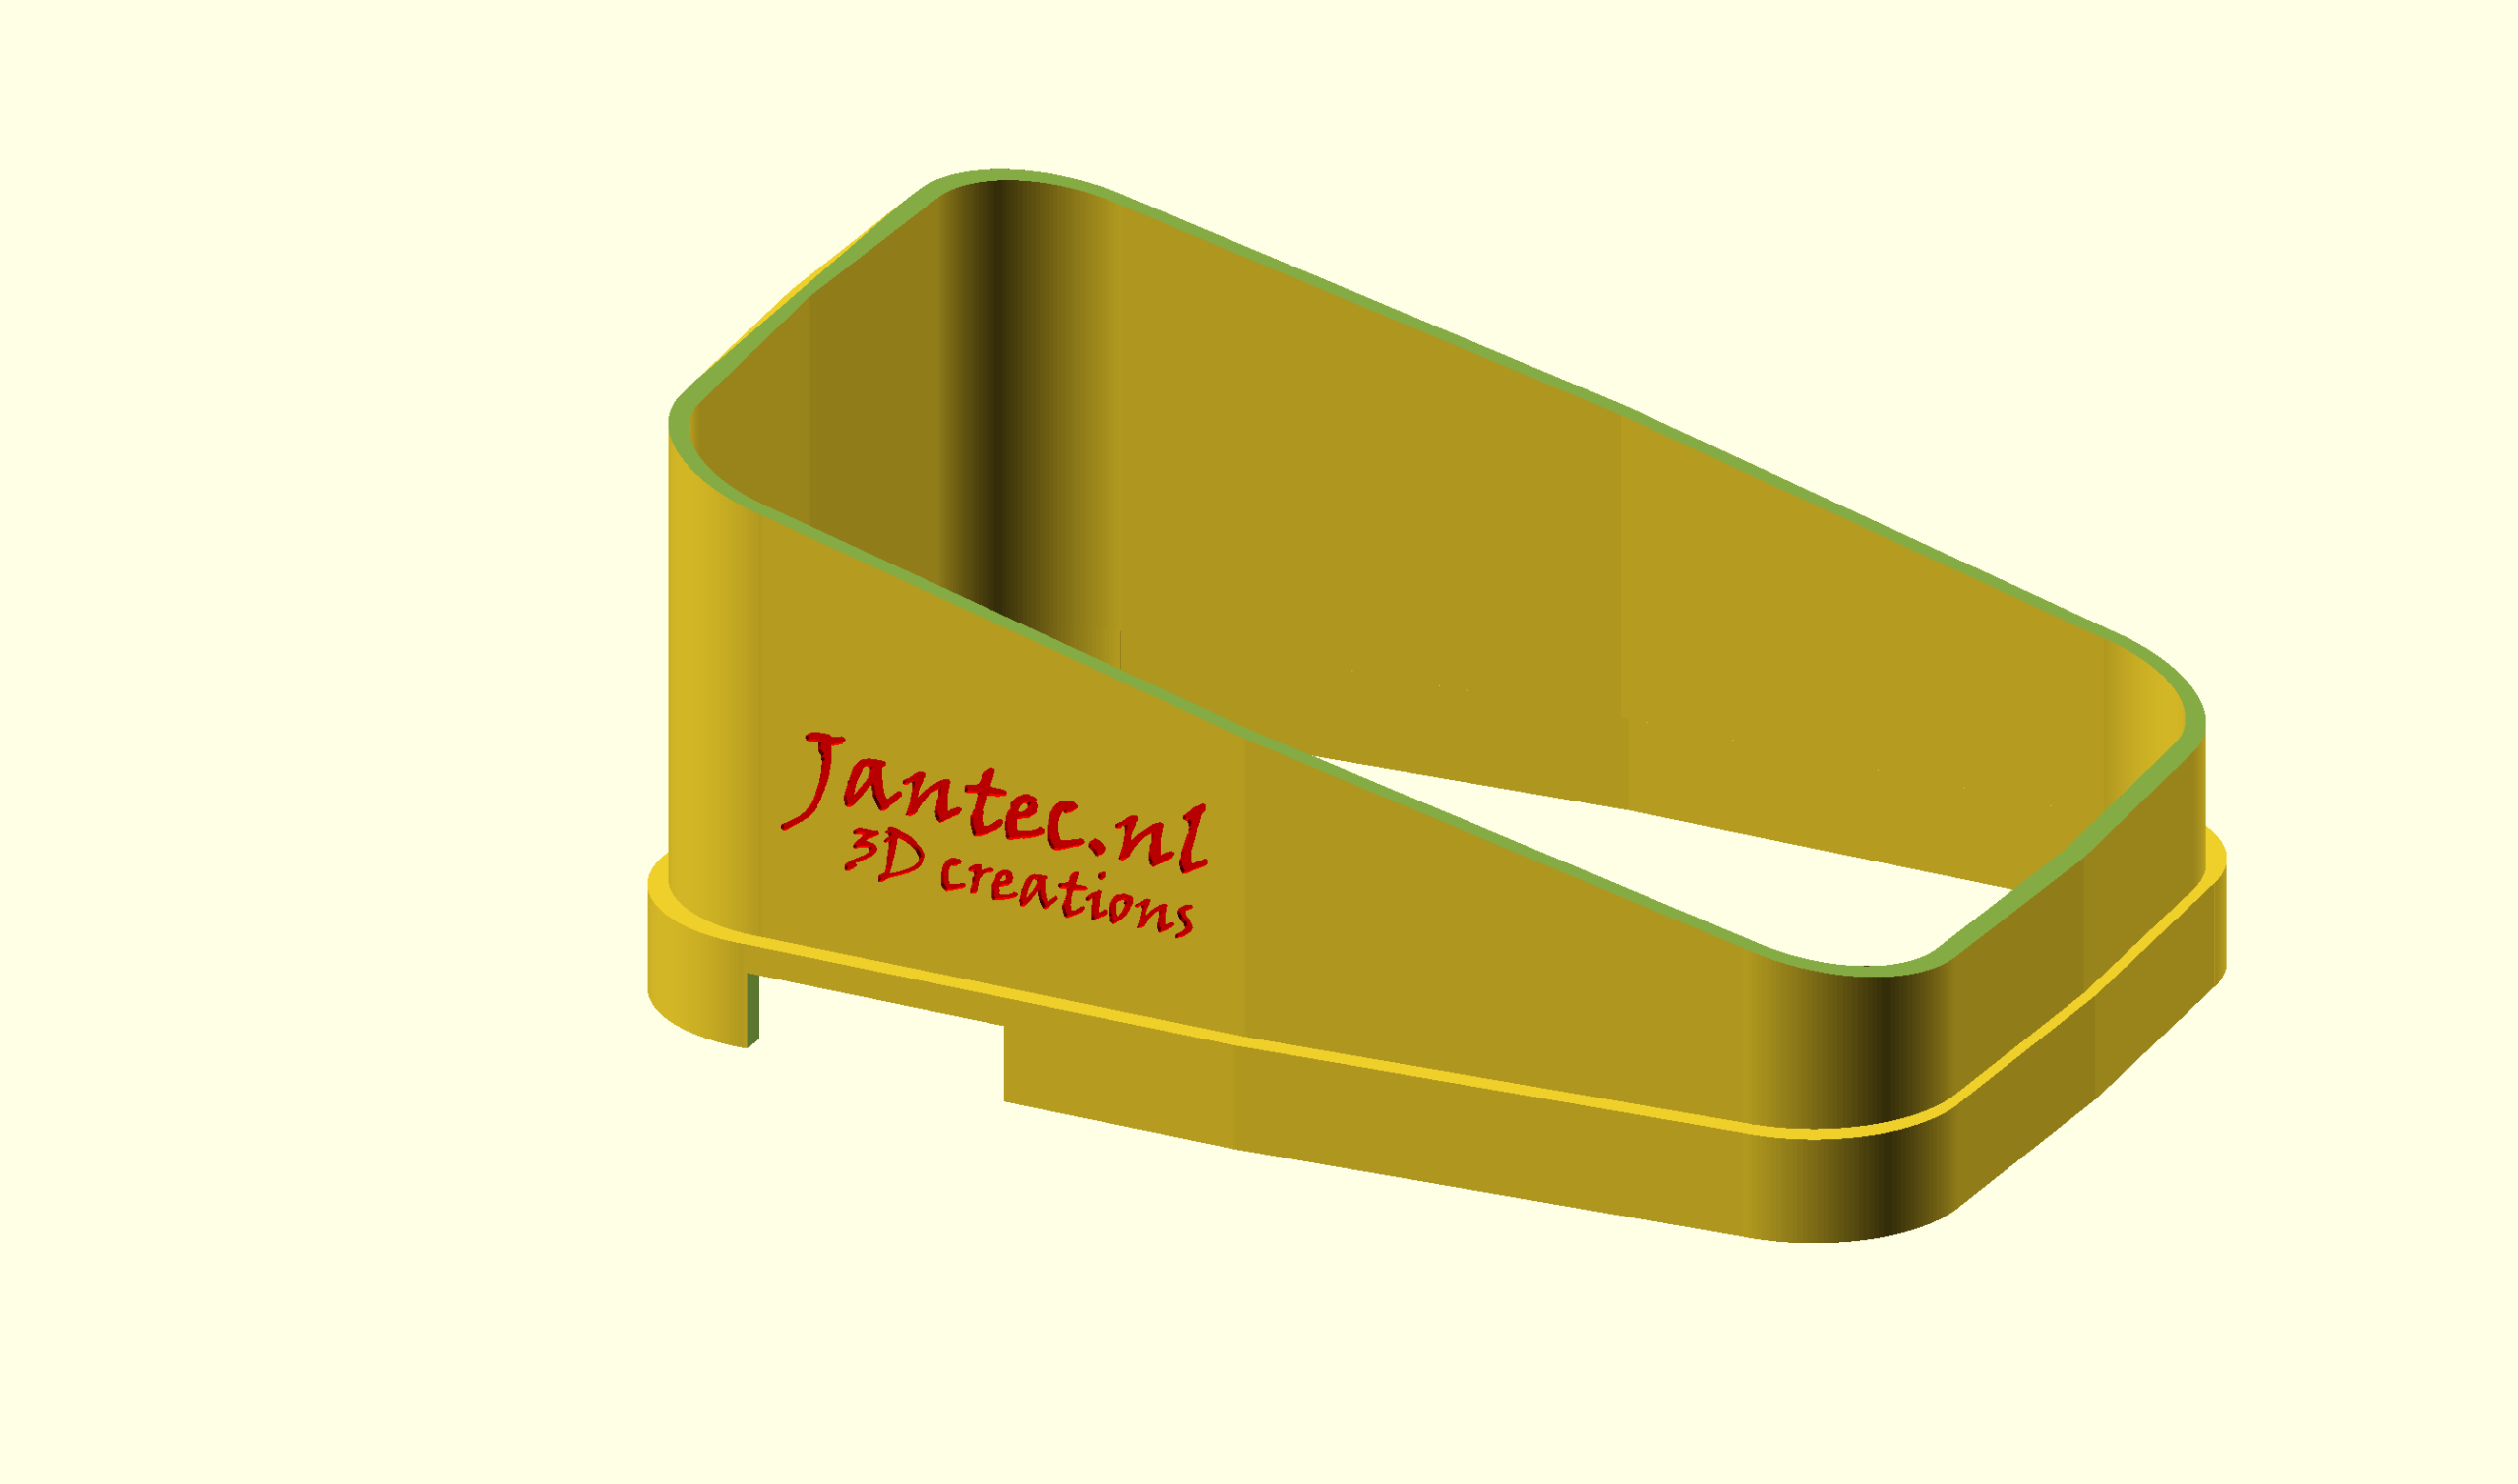
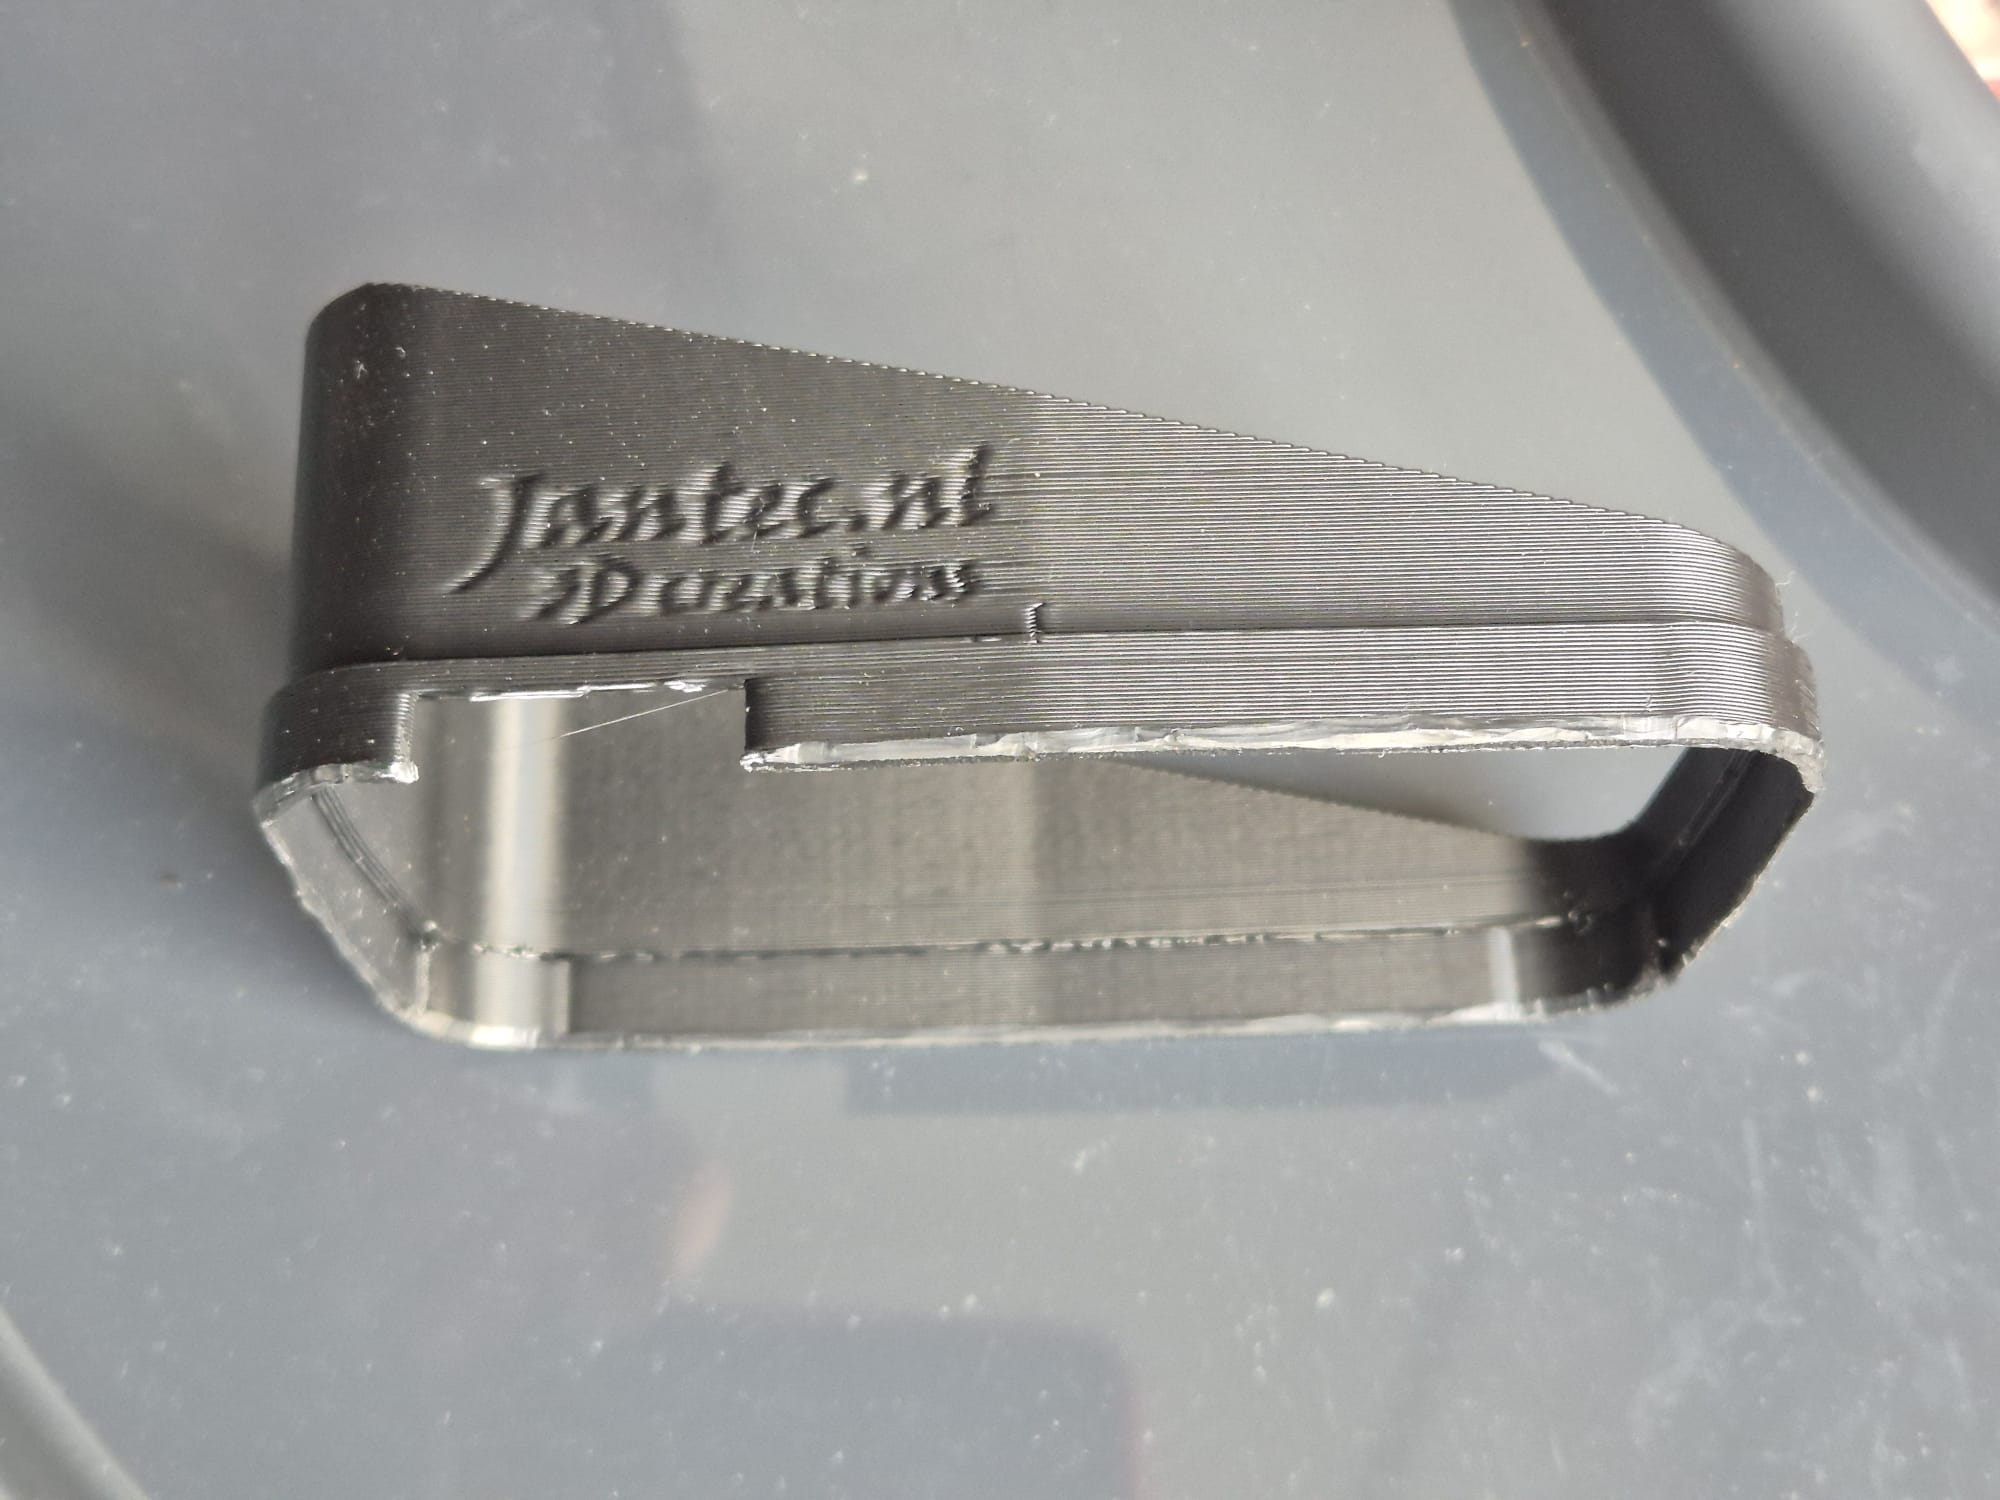
I designed this in Openscad and it took 2 days (off and on) to get it perfect. I started with a horizontal sun shade I designed earlier.
Please donate $1 to my paypal account if you use my original designs !
Tomtomrider550_sunshade_horizontal,_M_20251011V10
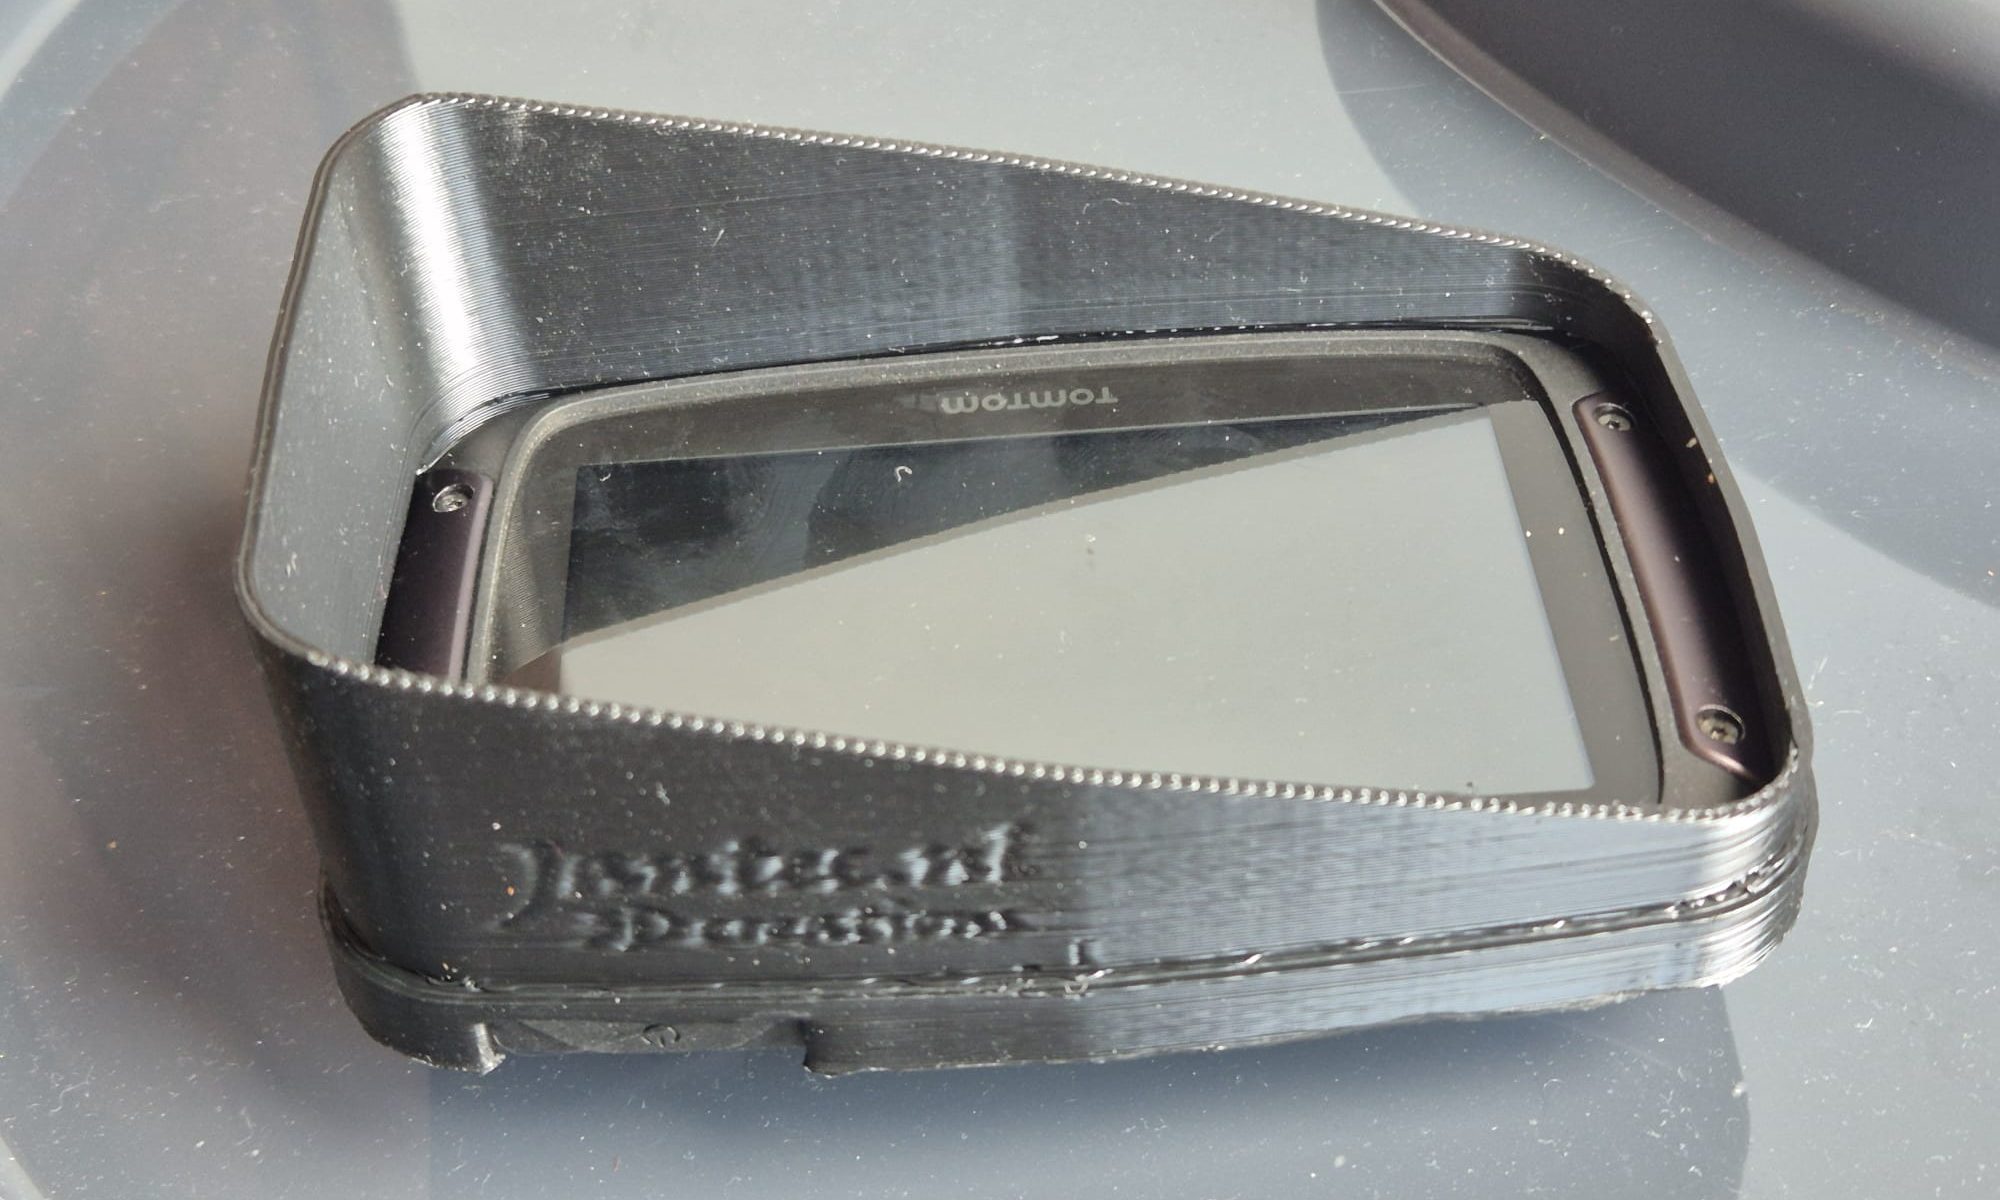
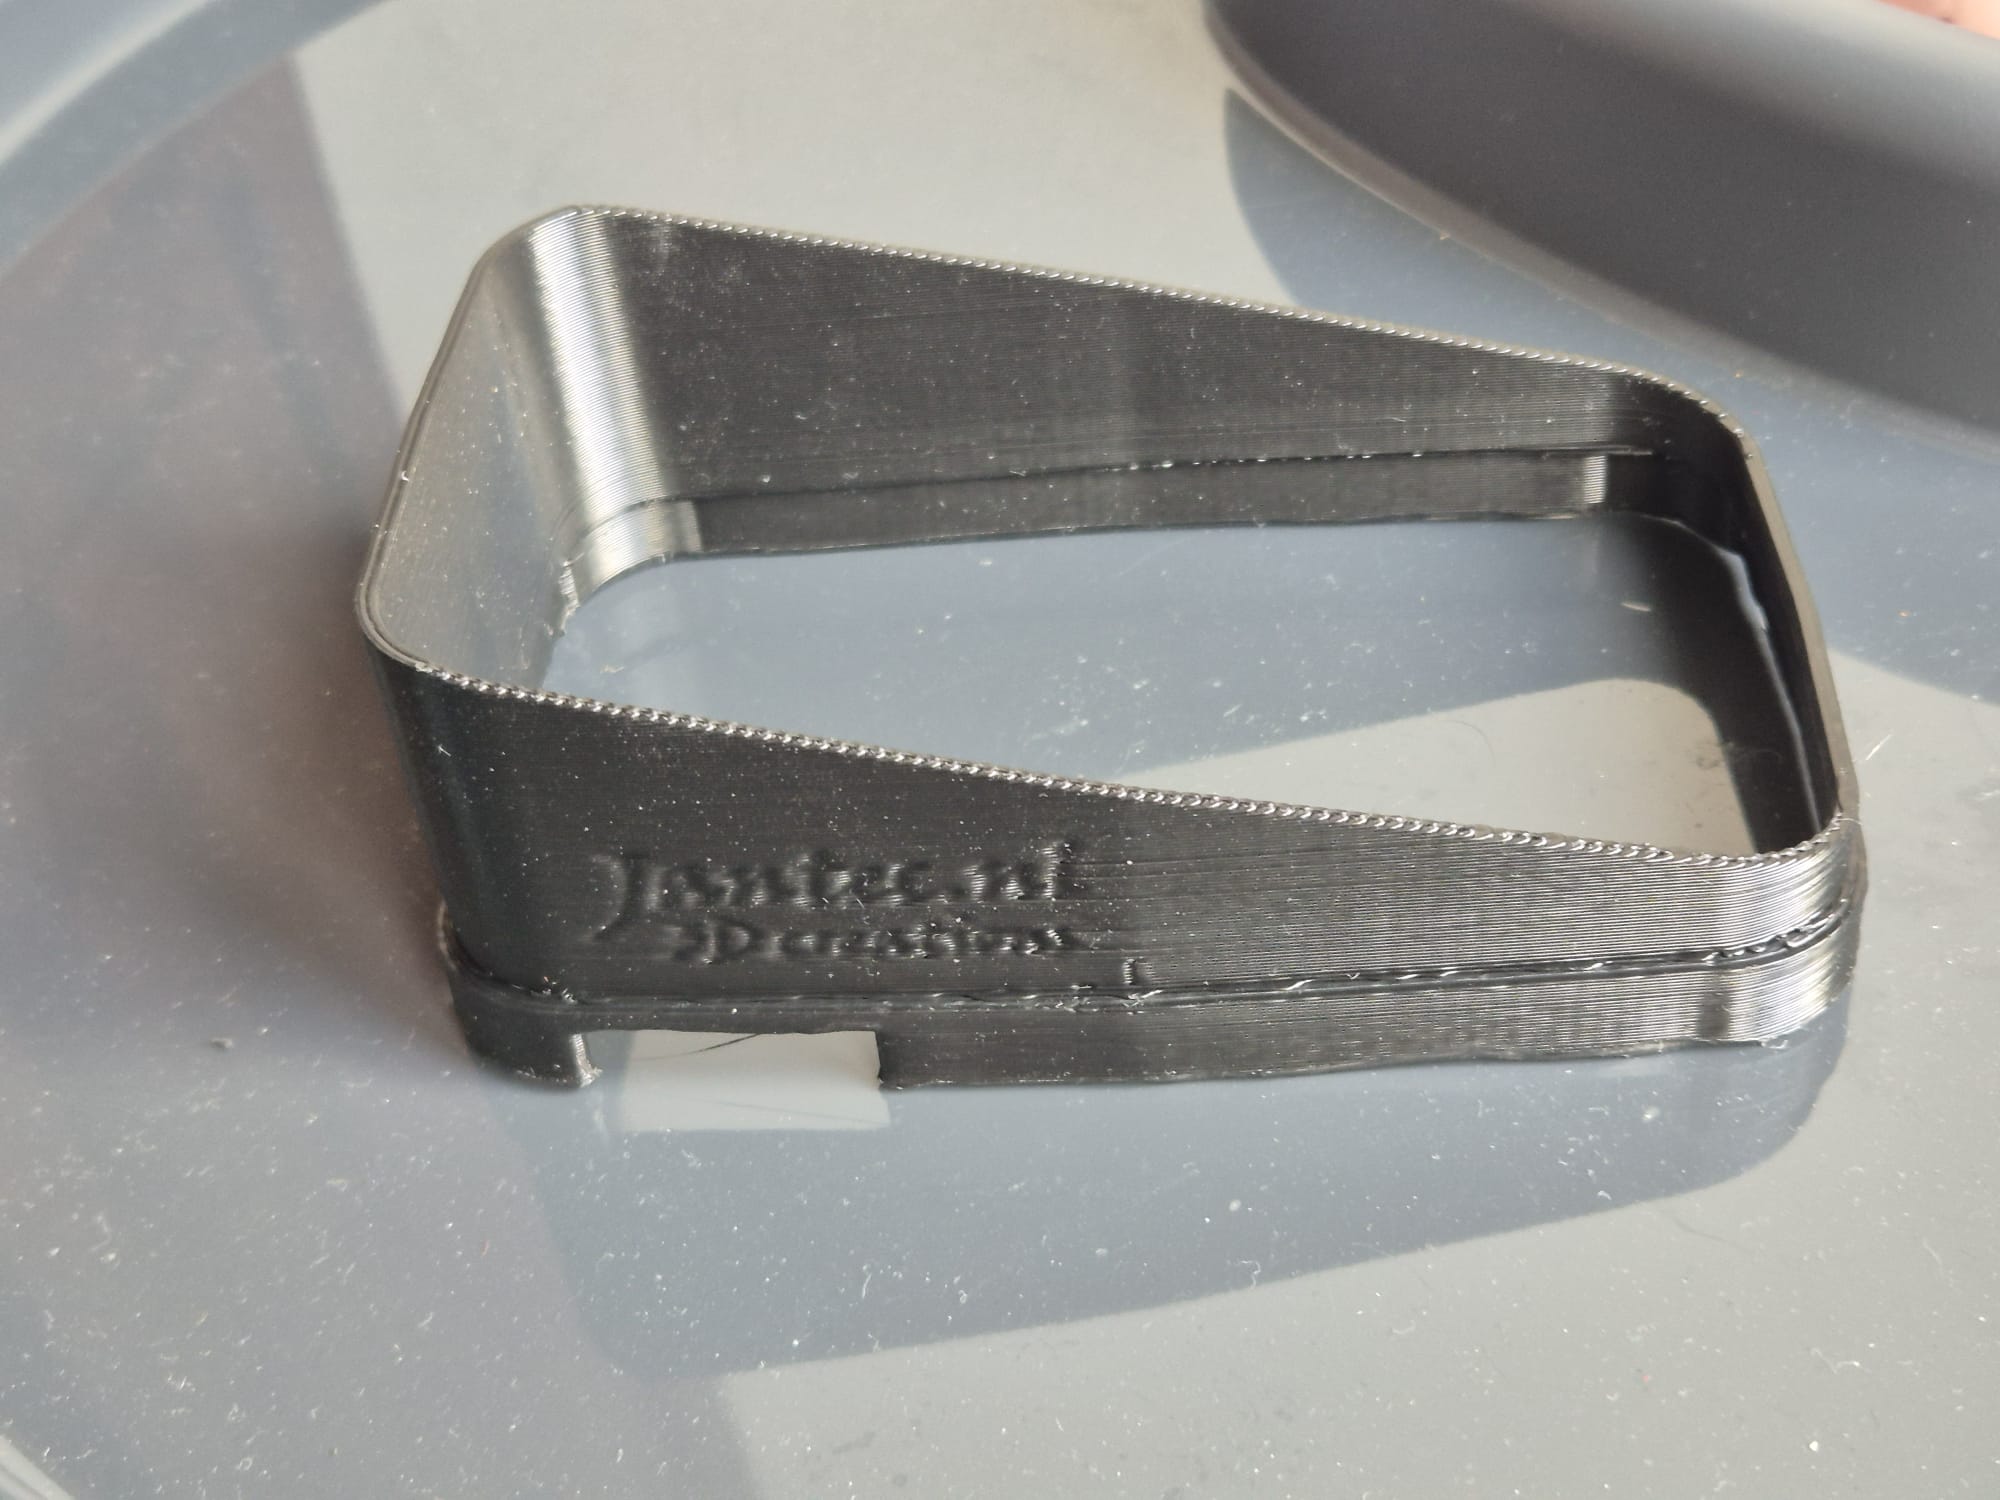
But I really needed a vertical one for usage on my motorbike.

So I changed the horizontal sun shade I had made earlier to a vertical one, which was very easy once I had the horizontal one really perfect. It took a couple of fitting trials before I had it good enough.
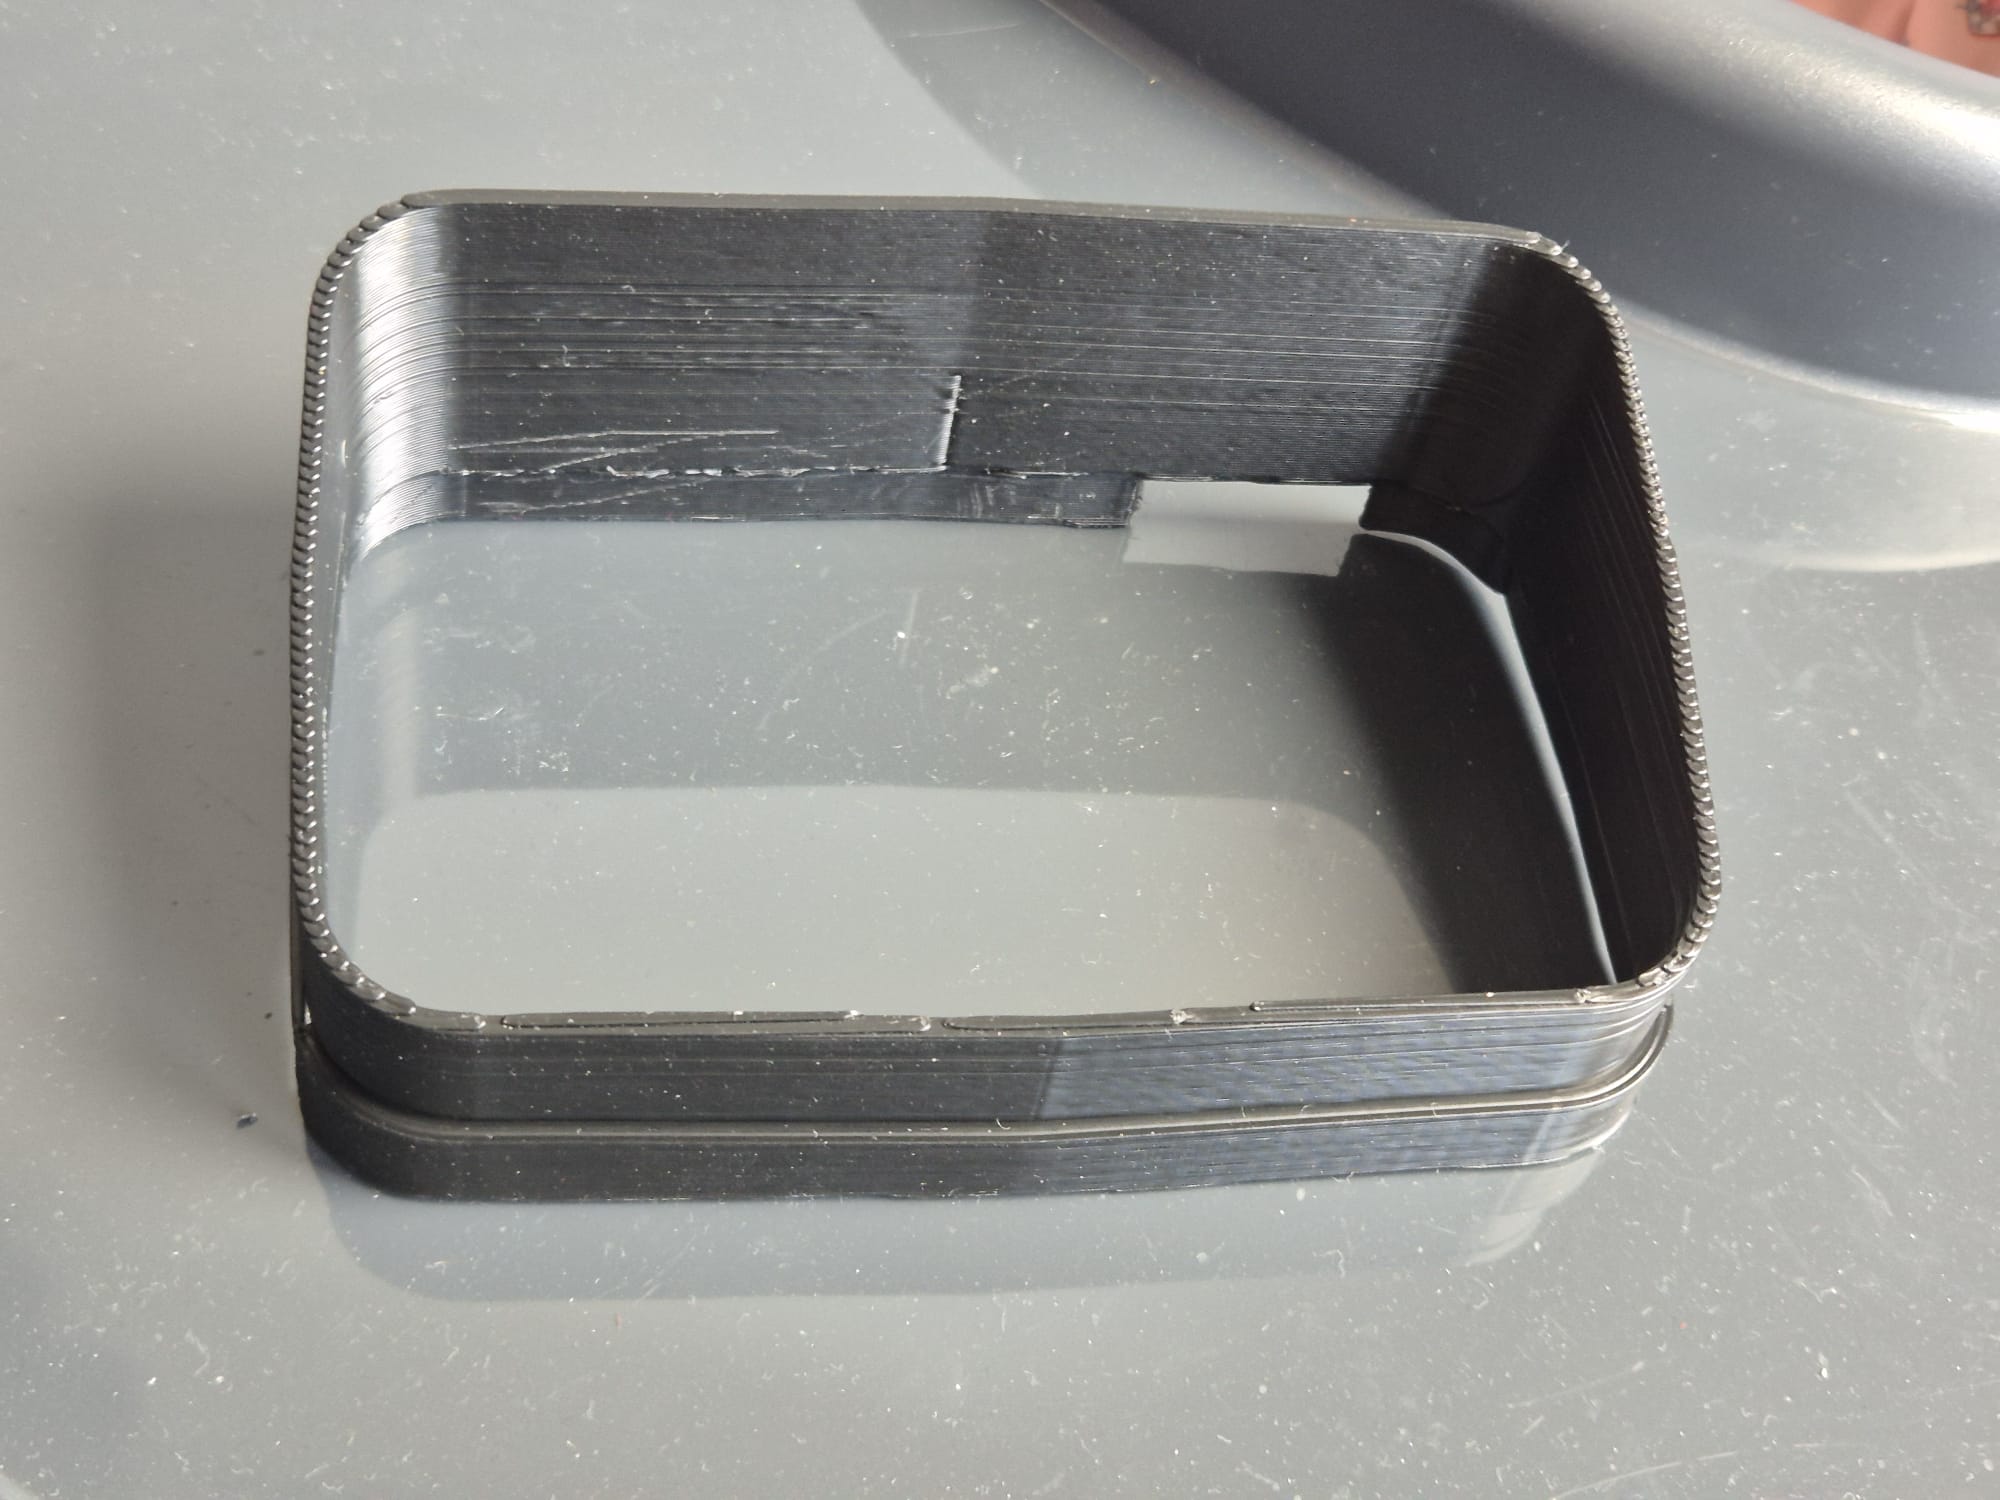
I printed this all on my hi-volume Voron600 with black ABS at 275 degrees, nozzle 0.8mm and layer height 0.4mm, 32 minutes to print the complete sun shade for my Tontom Rider 550. I always have the parts fan at 60% except 1st 3 layers and I print at 120mms, except 1st layer which is 20mms. Travel speed is 200 mms , rather low for this print at 0.4mmLH.
I use a rather high setting for Z-hop height at layer changes because this particulat ABS filament at this temp can give a small blob at the end of print lines and I don’t want the nozzle to jam into this at layer changes. Nor do I want to retract any more than 0.2mm since I don’t want any filament to get stuck in my so-called cold-end.
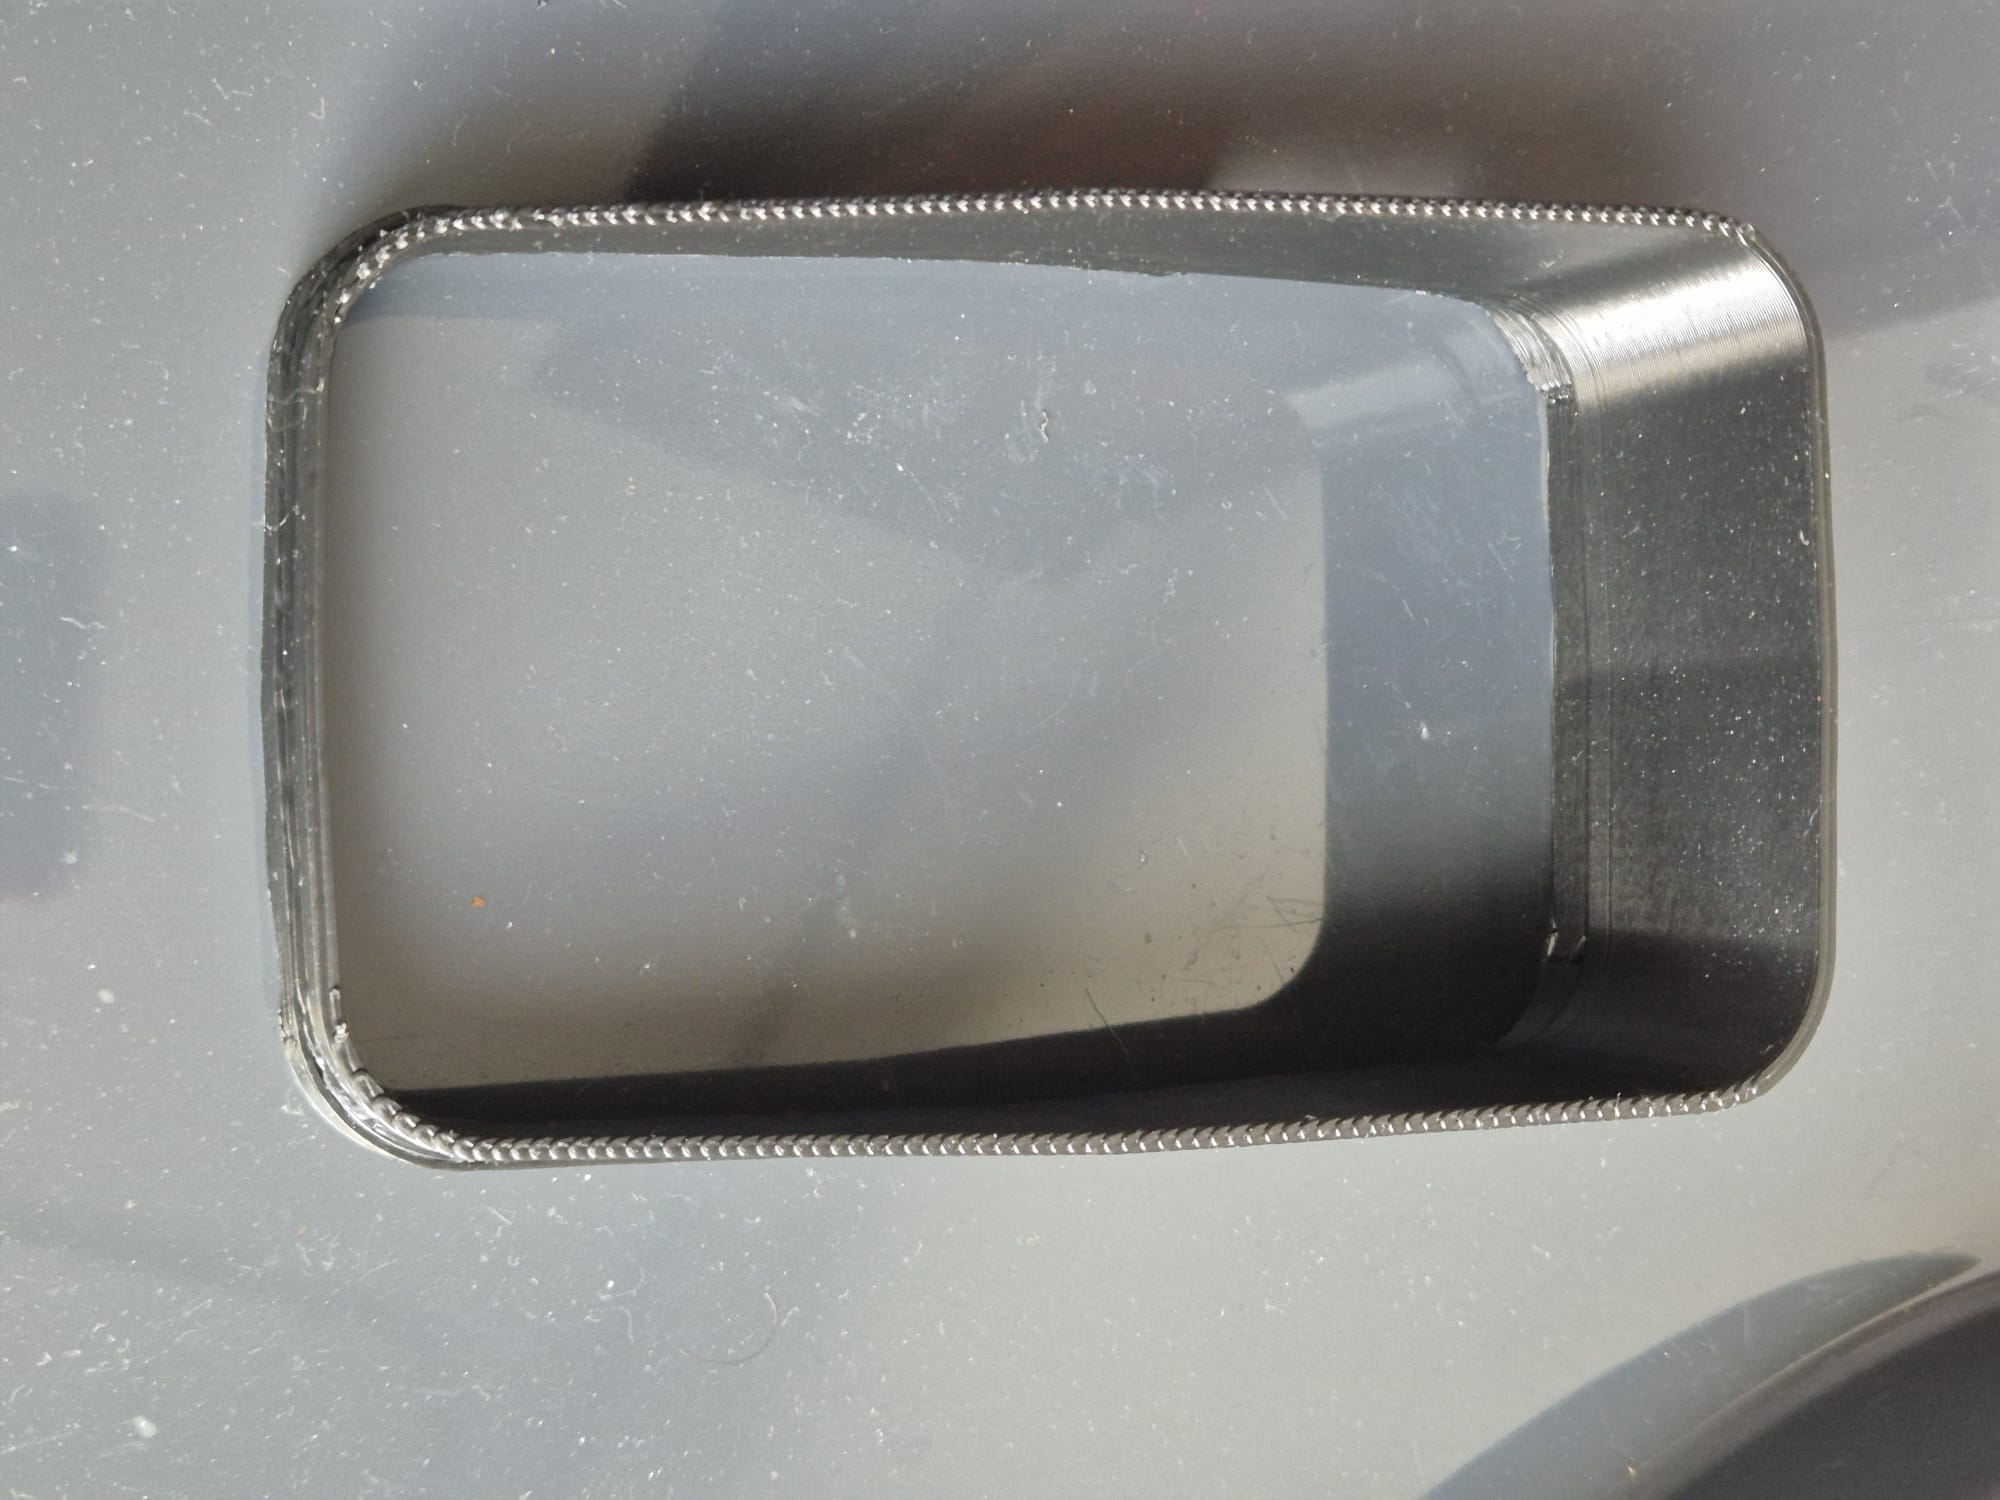
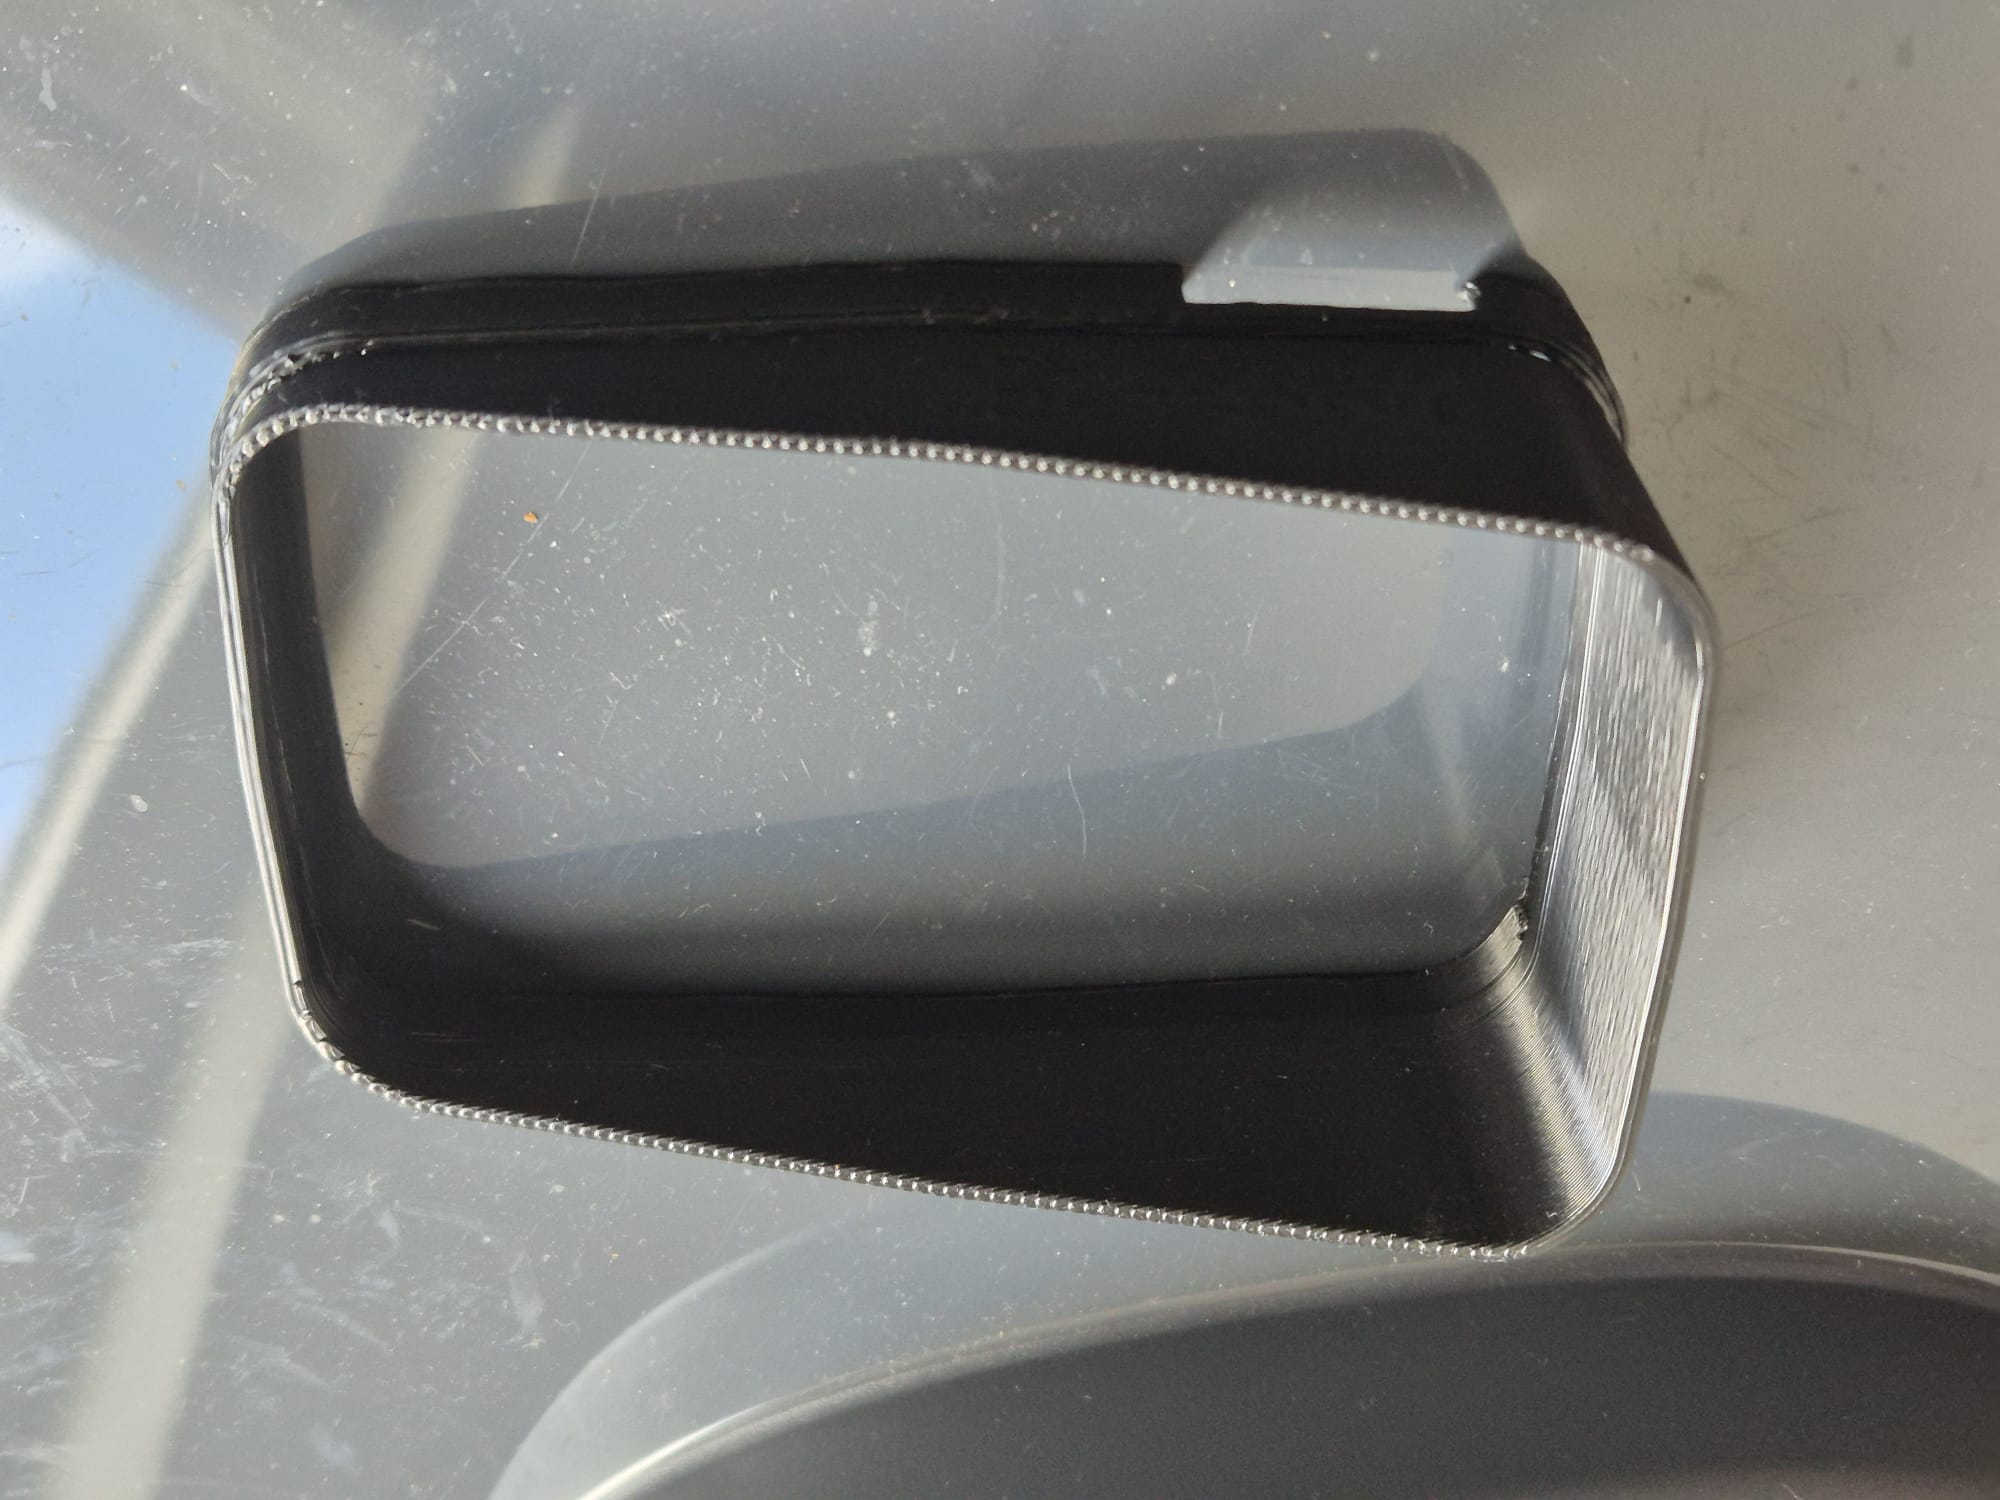
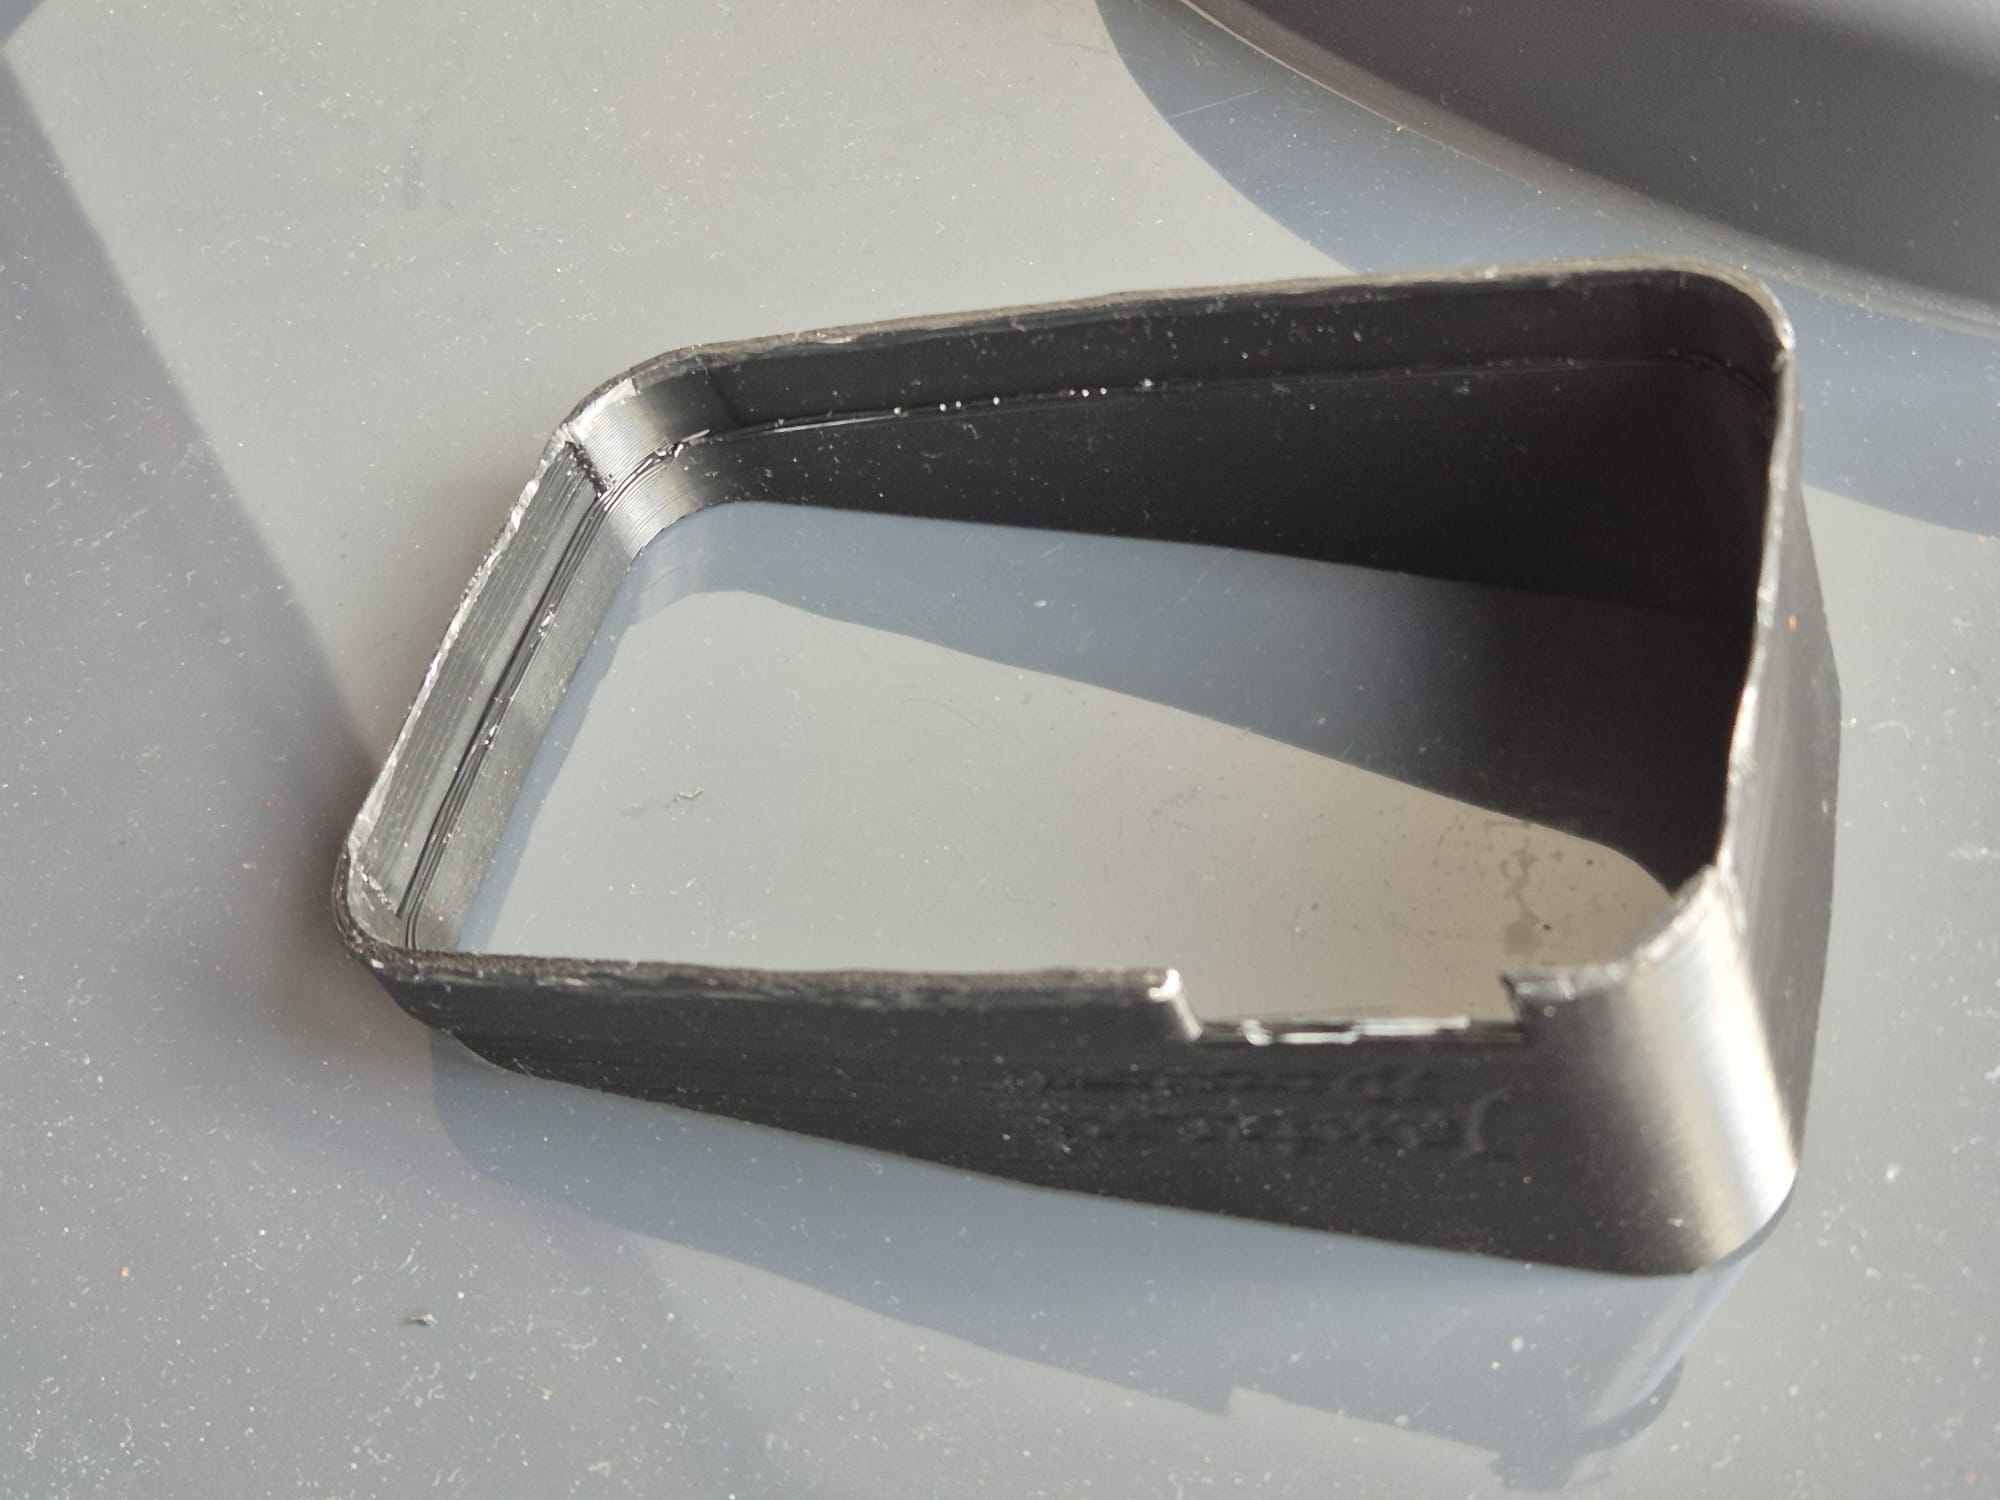
The sun shade fits snug around the Rider 550 but if you feel it is not tight enough, then print the sun shade at 99 % for the X and Y multiplier factors in your slicer.
And- yes, you should be able to print this STL file on any 3d printer with any filament and use your own preferred printer settings.
You will get much nicer prints when you use a 0.4 nozzle in your hotend and set it at 0.2mm layer height. It will then take around 2 hours + to print. Cheers!
Please donate $1 to my paypal account if you use my original designs !
UPDATED (nightly version)
Tomtomrider550_sunshade_vertical_L_20251011V10

Tomtomrider550_sunshade_vertical_XL_20251011V10

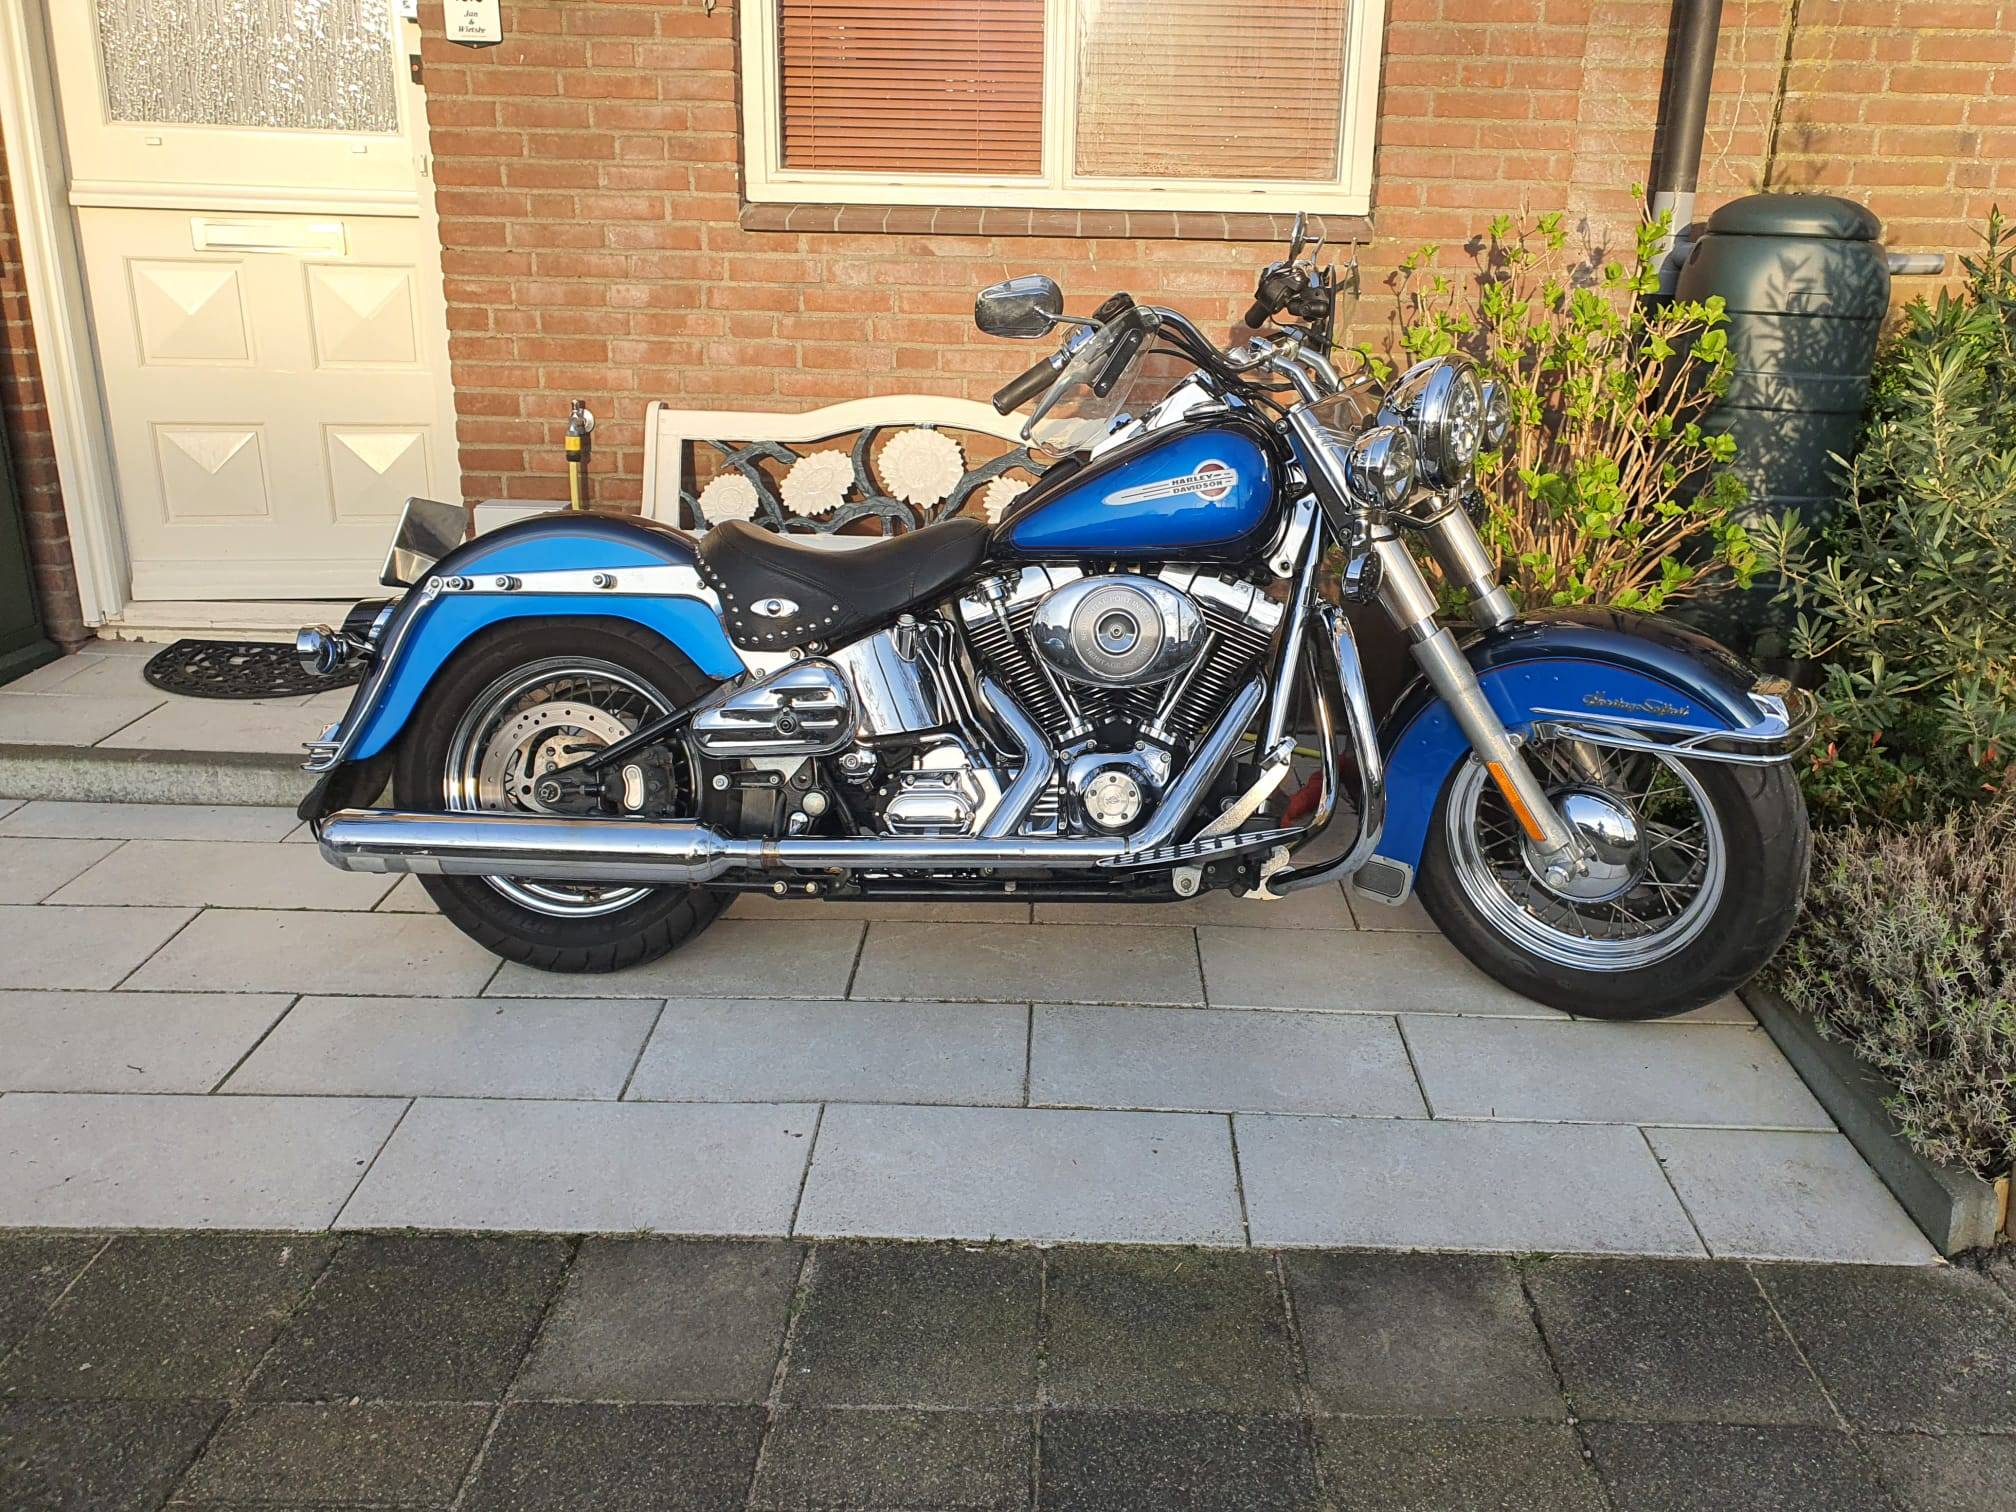
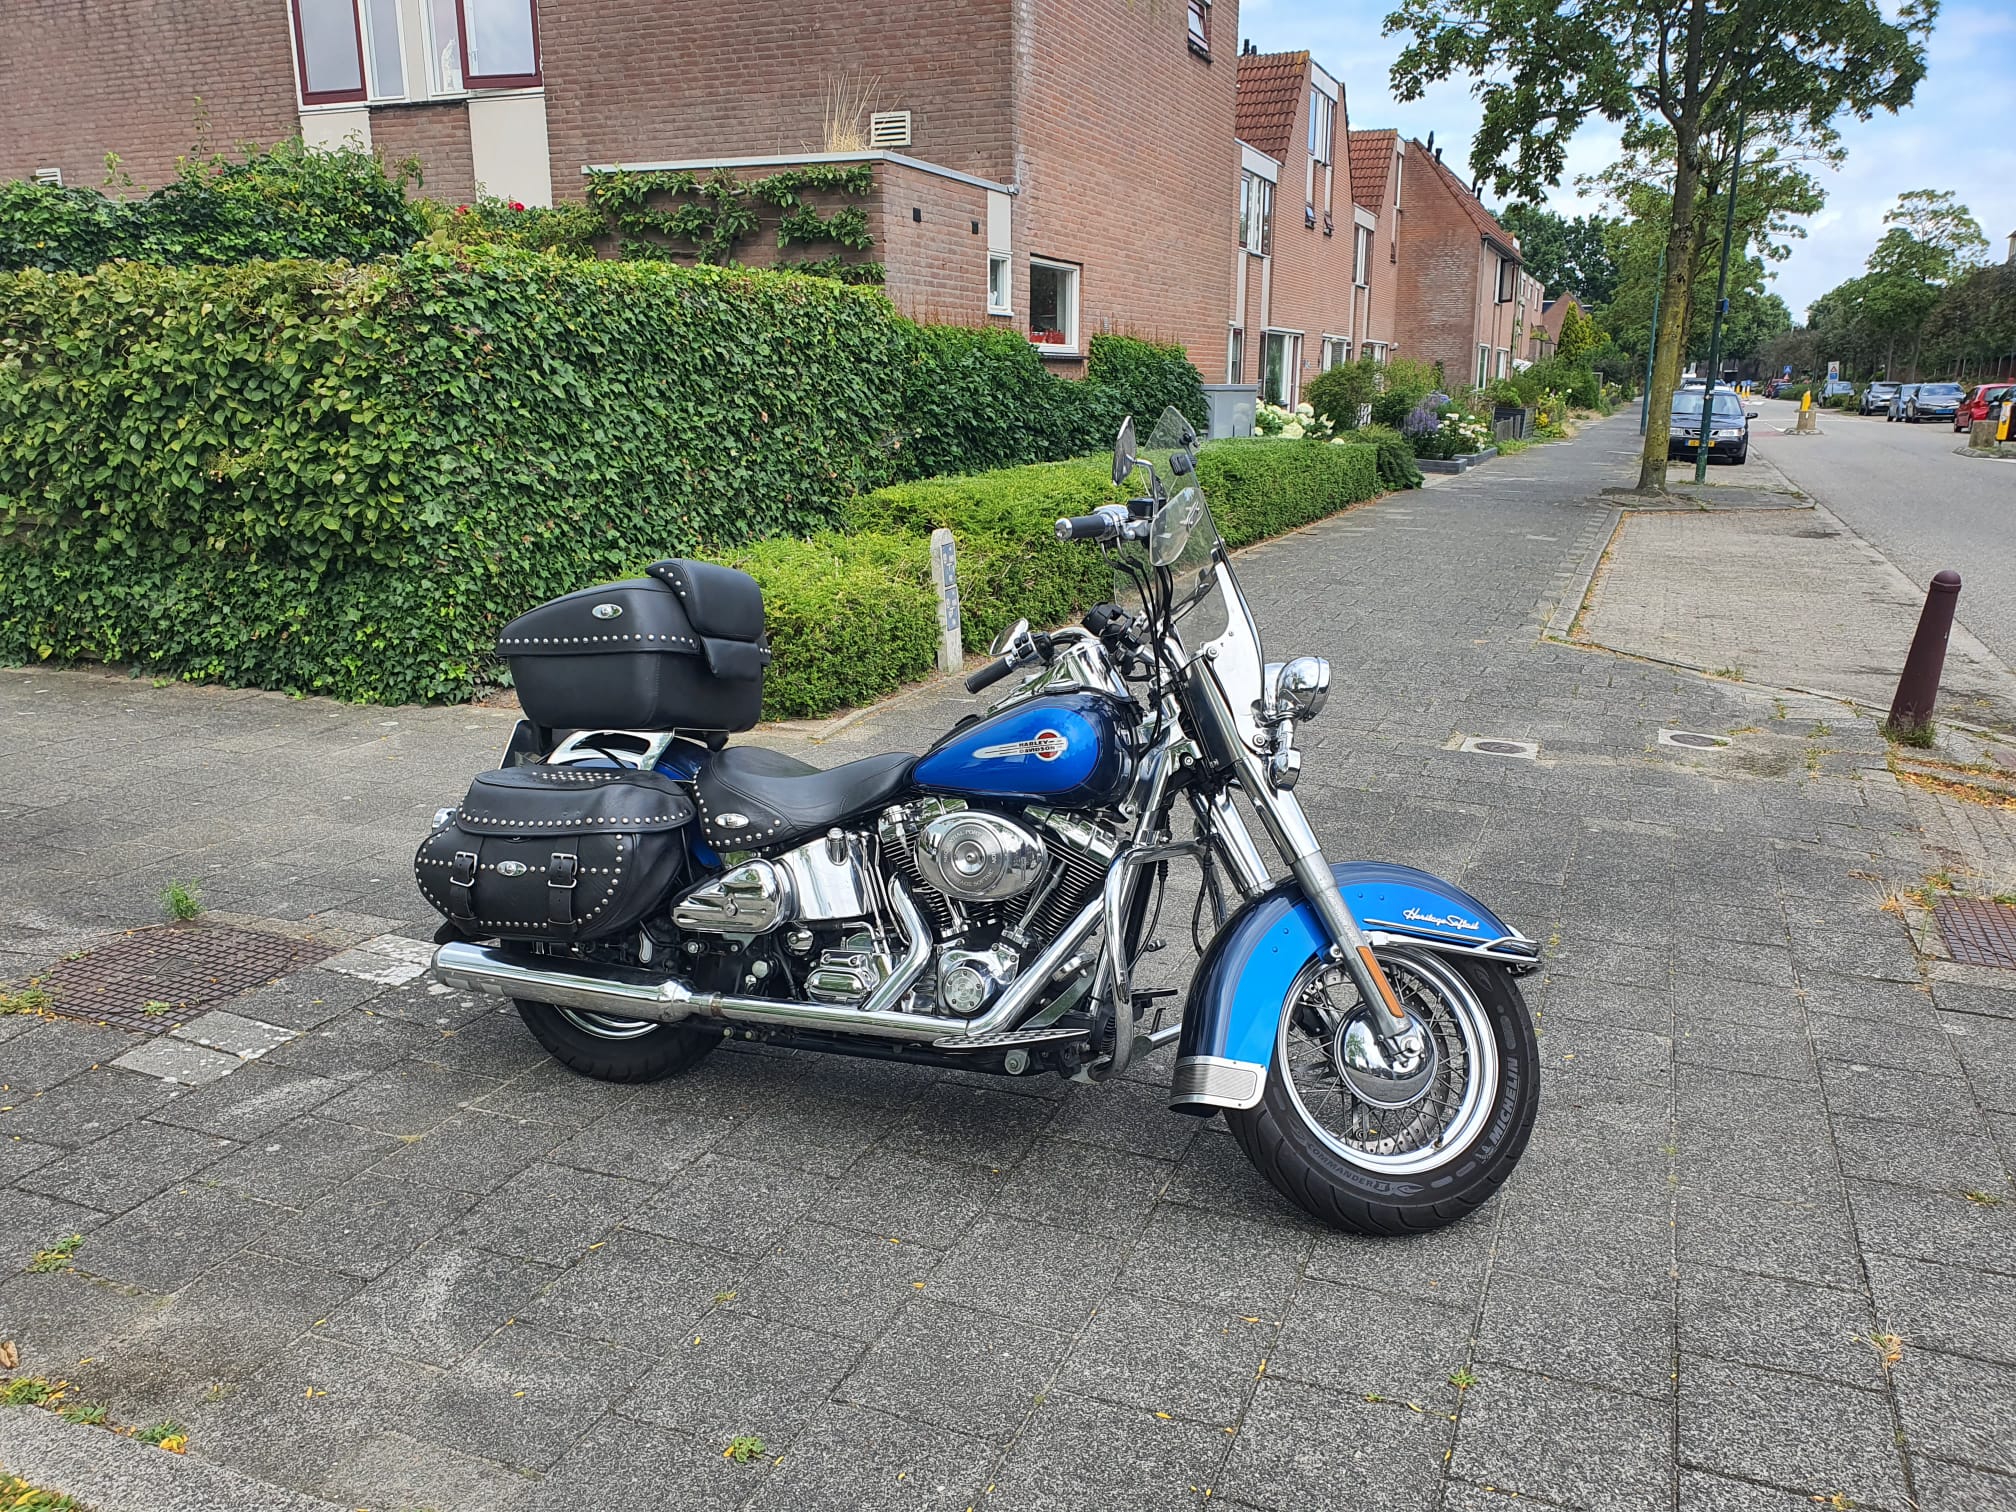
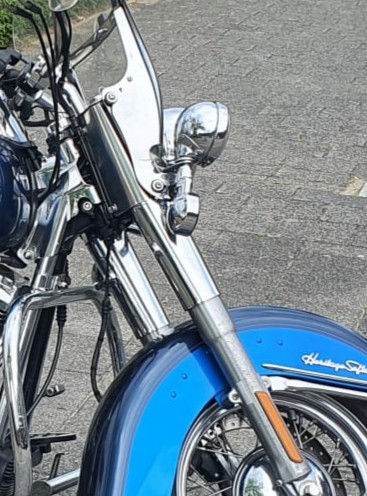
I often drag my HD Heritage softail on roundabouts when I am not paying attention just with my left and right sides across the street.
This can be solved by giving the bike a slightly higher position.
To do this, you can lengthen the front fork slightly at the front and you can also raise the rear slightly by shortening the shock absorbers slightly on my Heritage softail. This is because a softail’s shock absorbers are not PUSH but PULL versions, so shorter shock absorbers mean a higher seat. If you make the shock absorbers longer, you lower the bike.
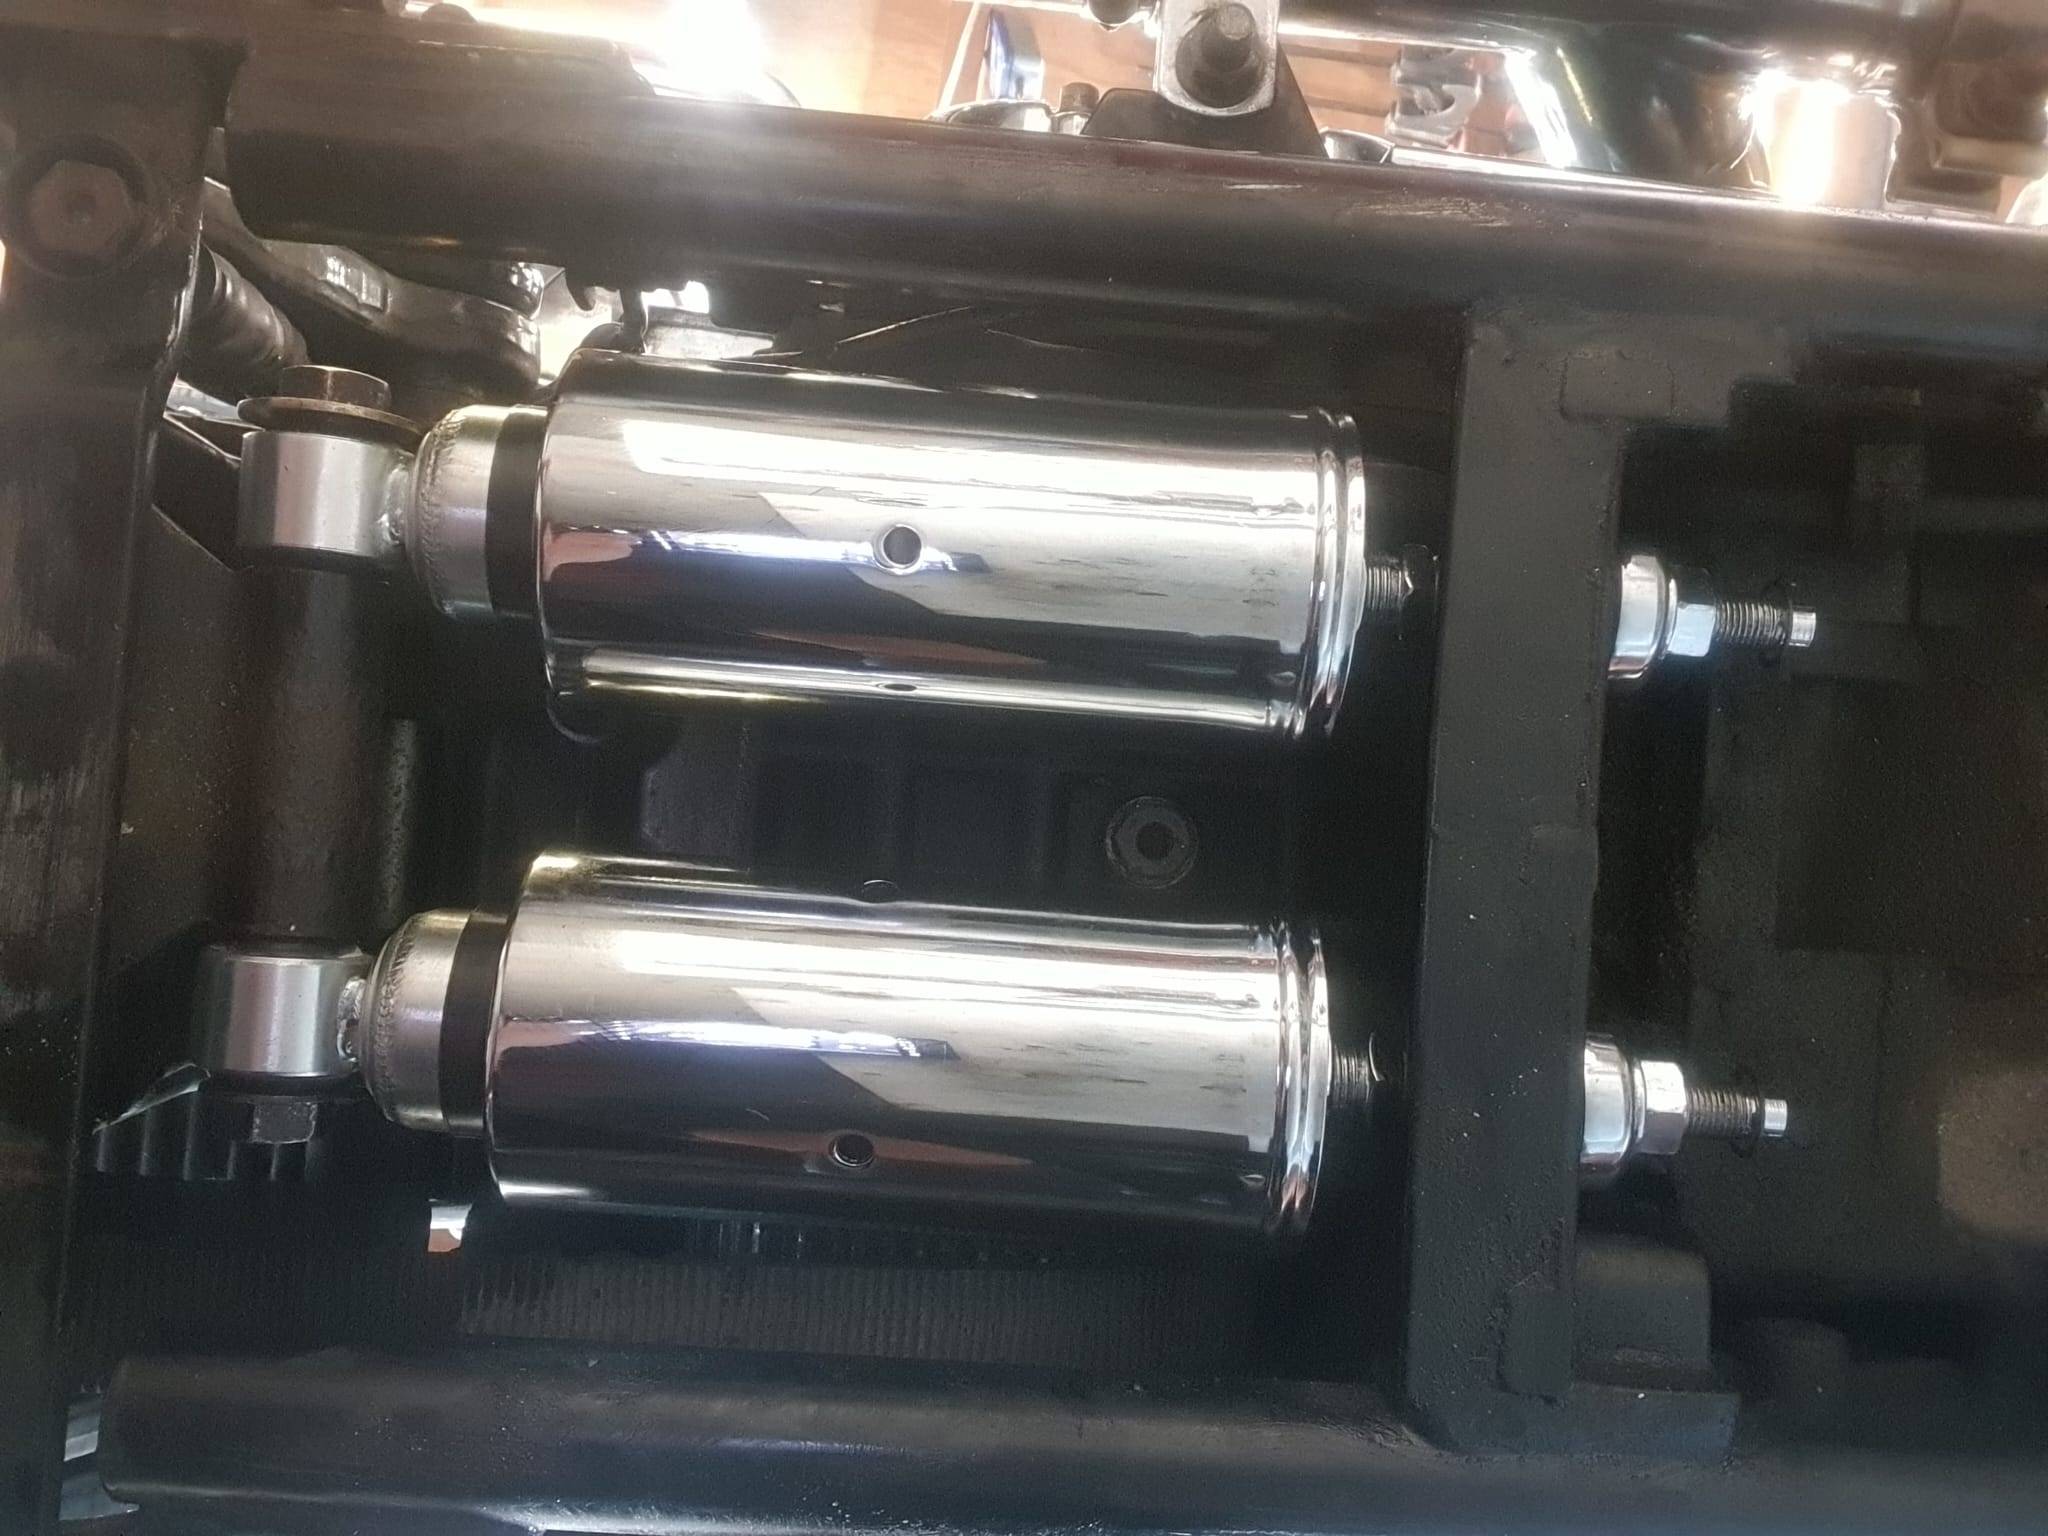
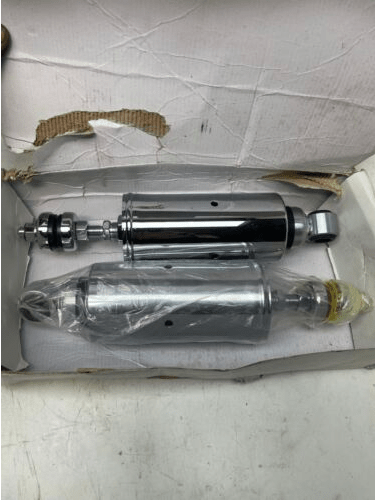
At Midwest motors in Australia a while back, I ordered 2 new chrome shock absorbers that have a wide adjustment range.
I adjusted these shock absorbers to the shortest setting and then fitted them.
This raises my bike about 3 cm higher at the rear while riding.
All done!
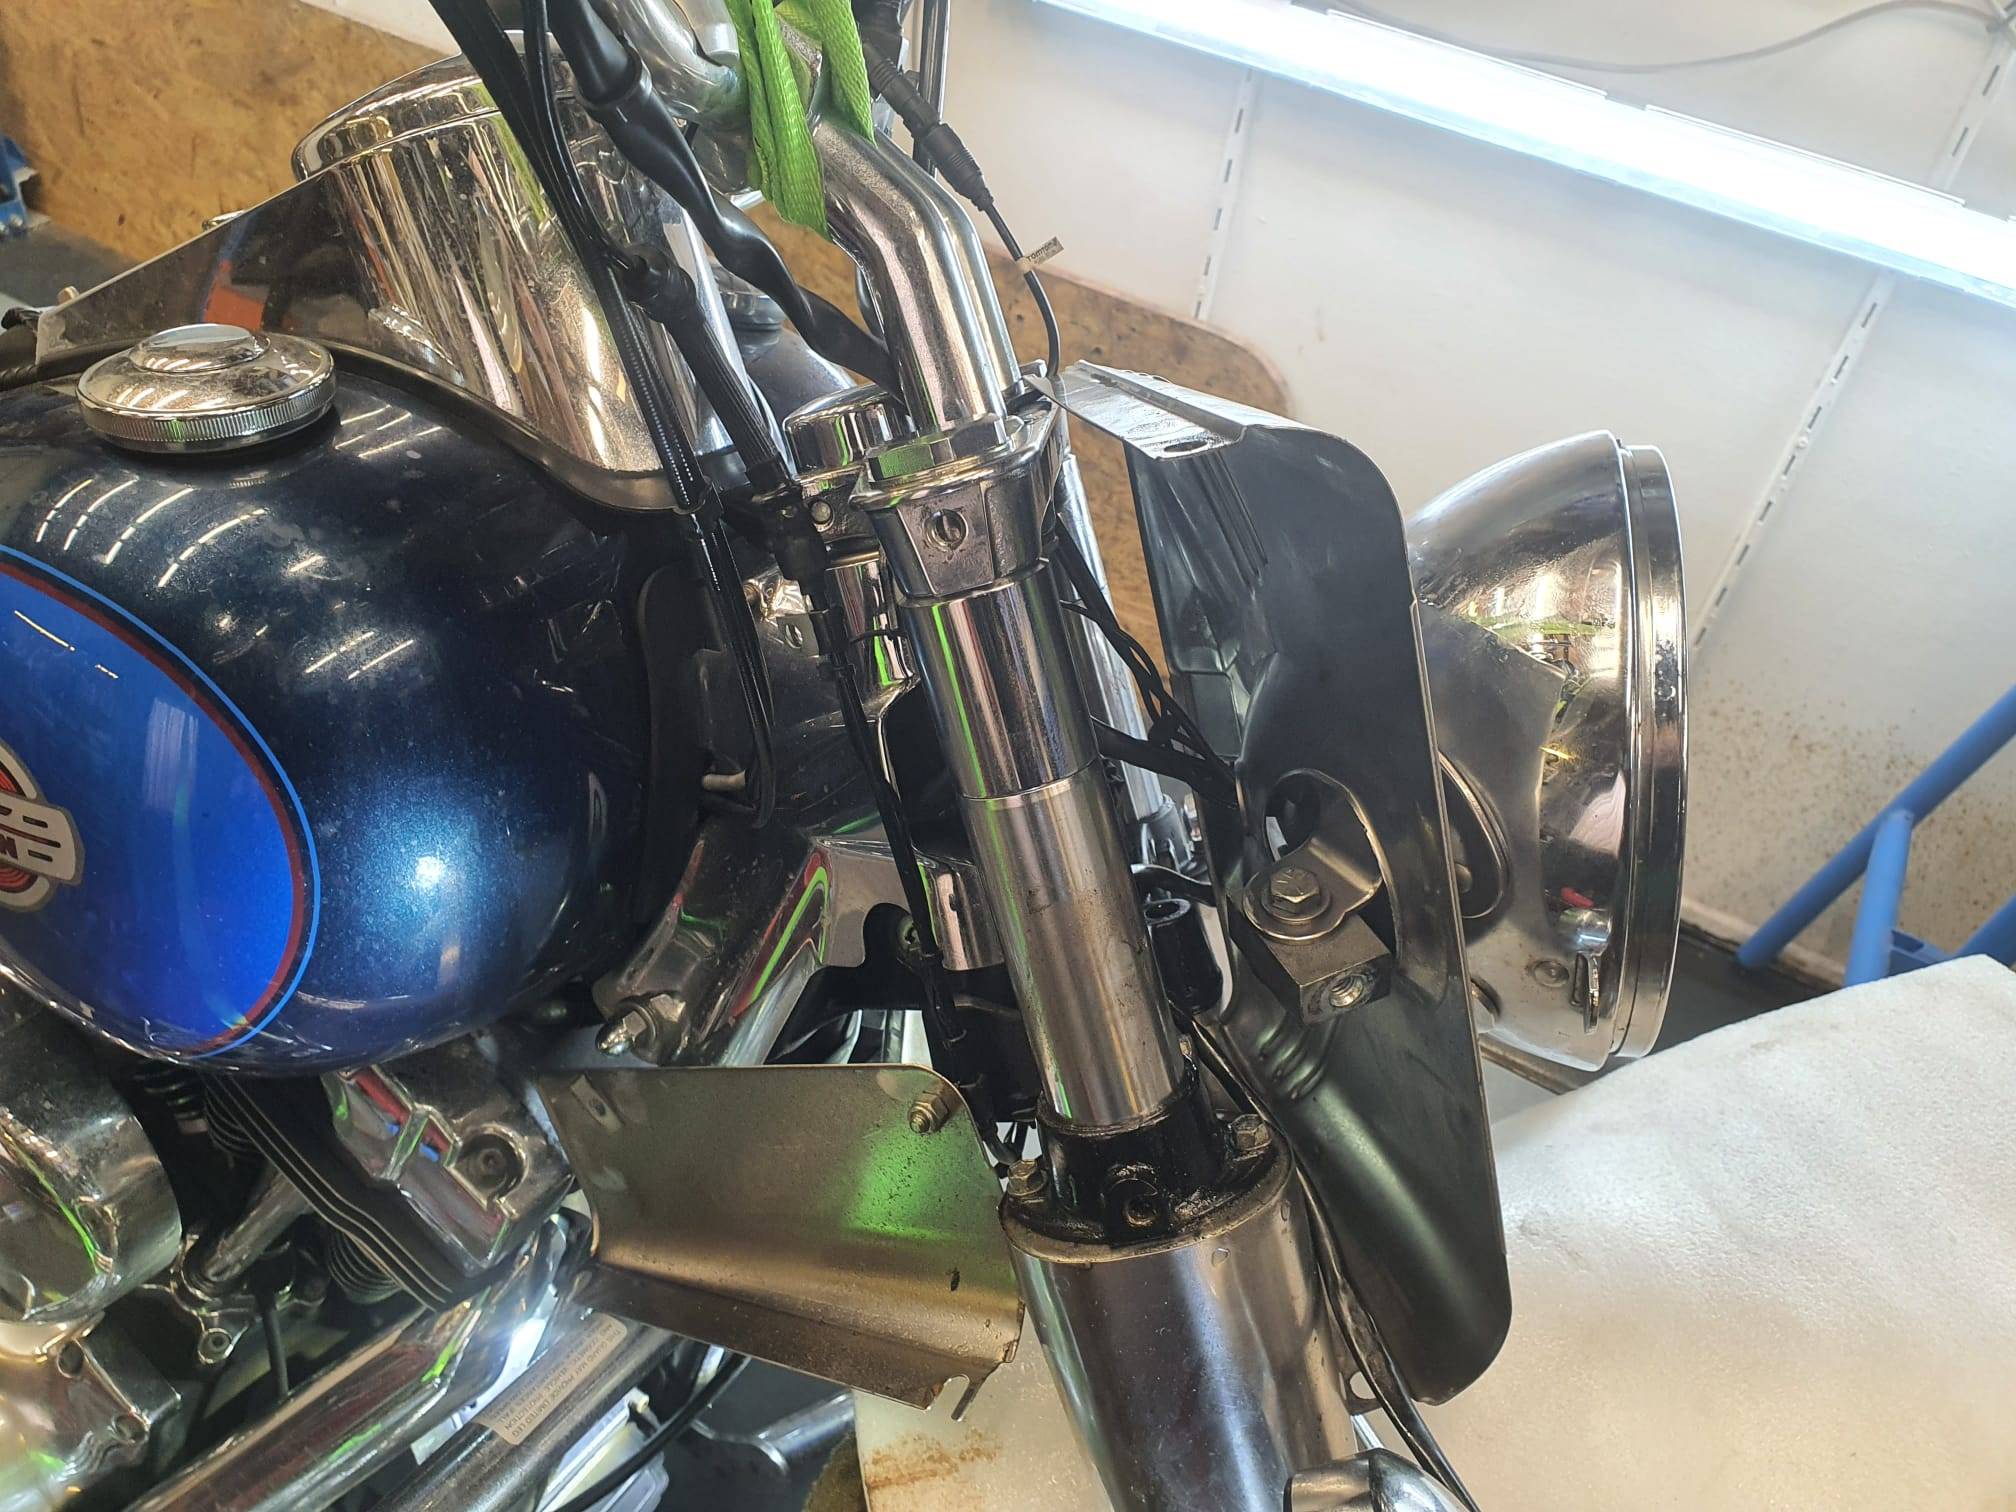
First, the light housing/ shroud’s rear parts are removed, the brake line to the front caliper loosened and the headlight’s internal unit has been removed.
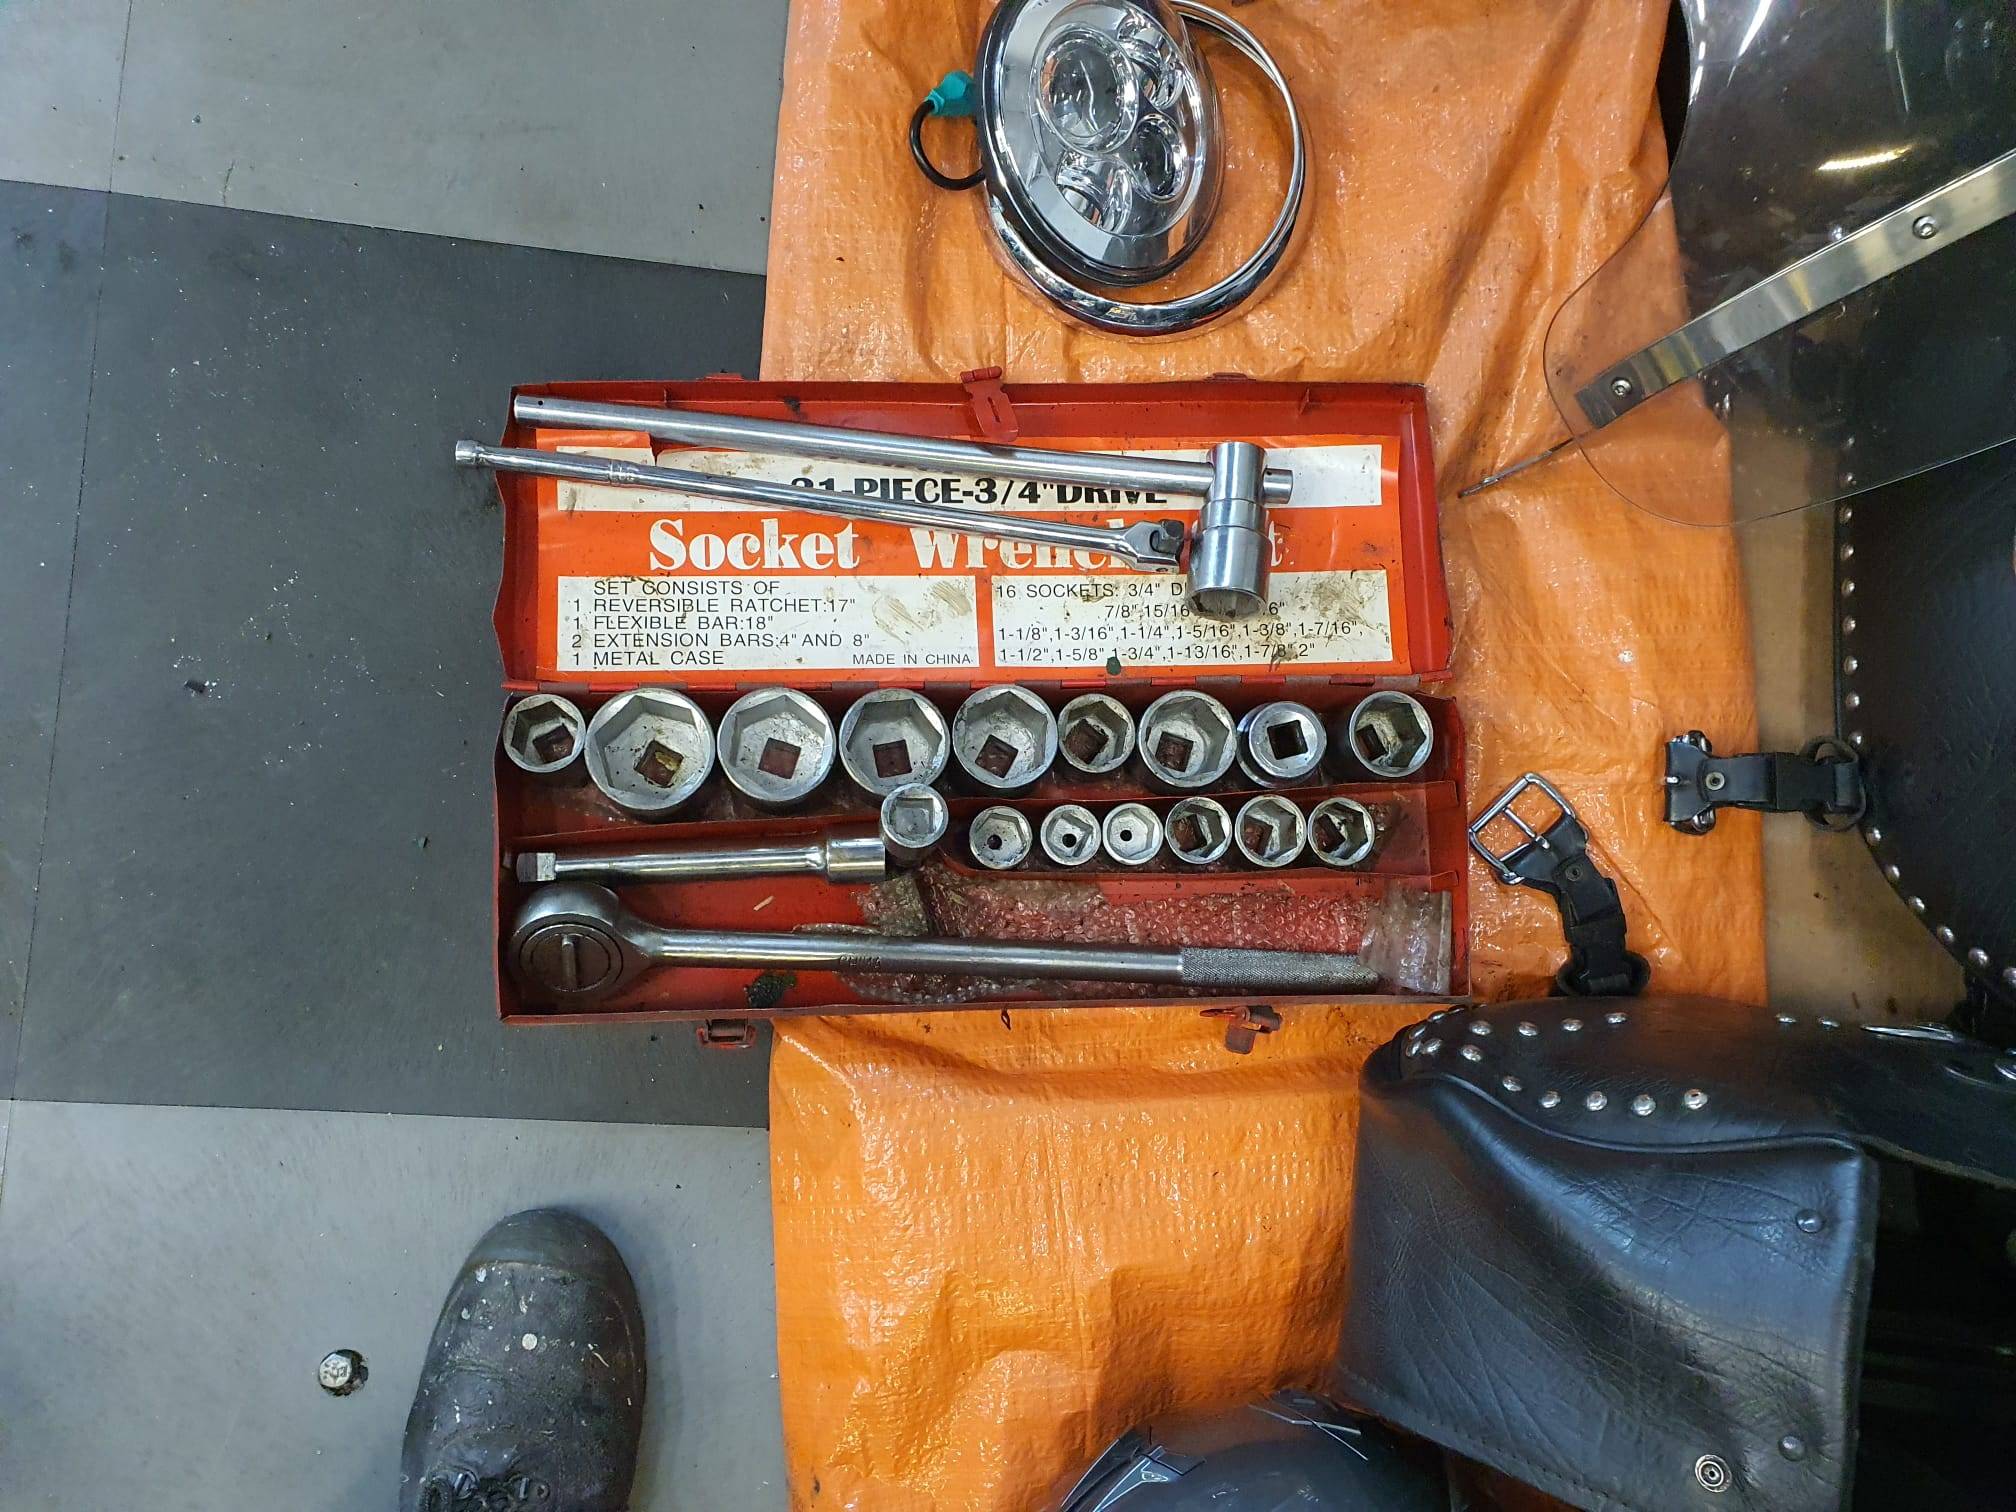
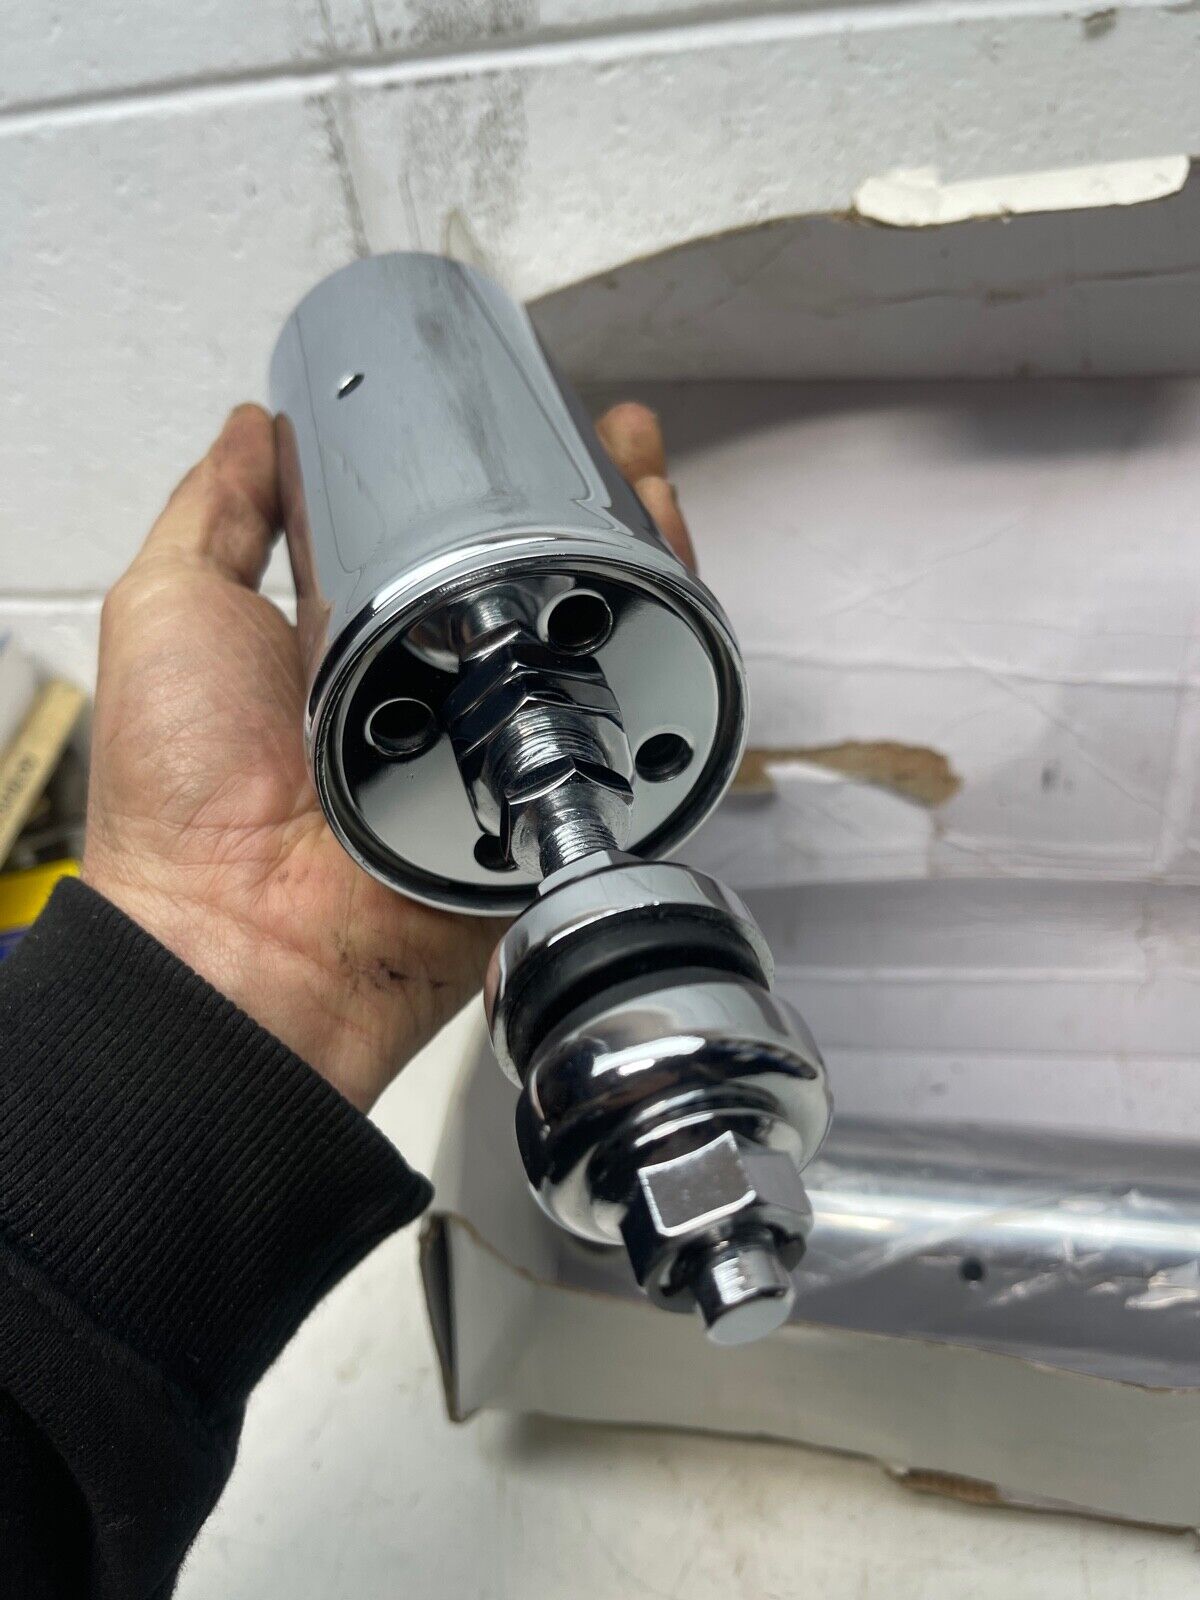
Then, the top BIG screws can be removed from the front fork units. For this, I used my large socket wrench kit:
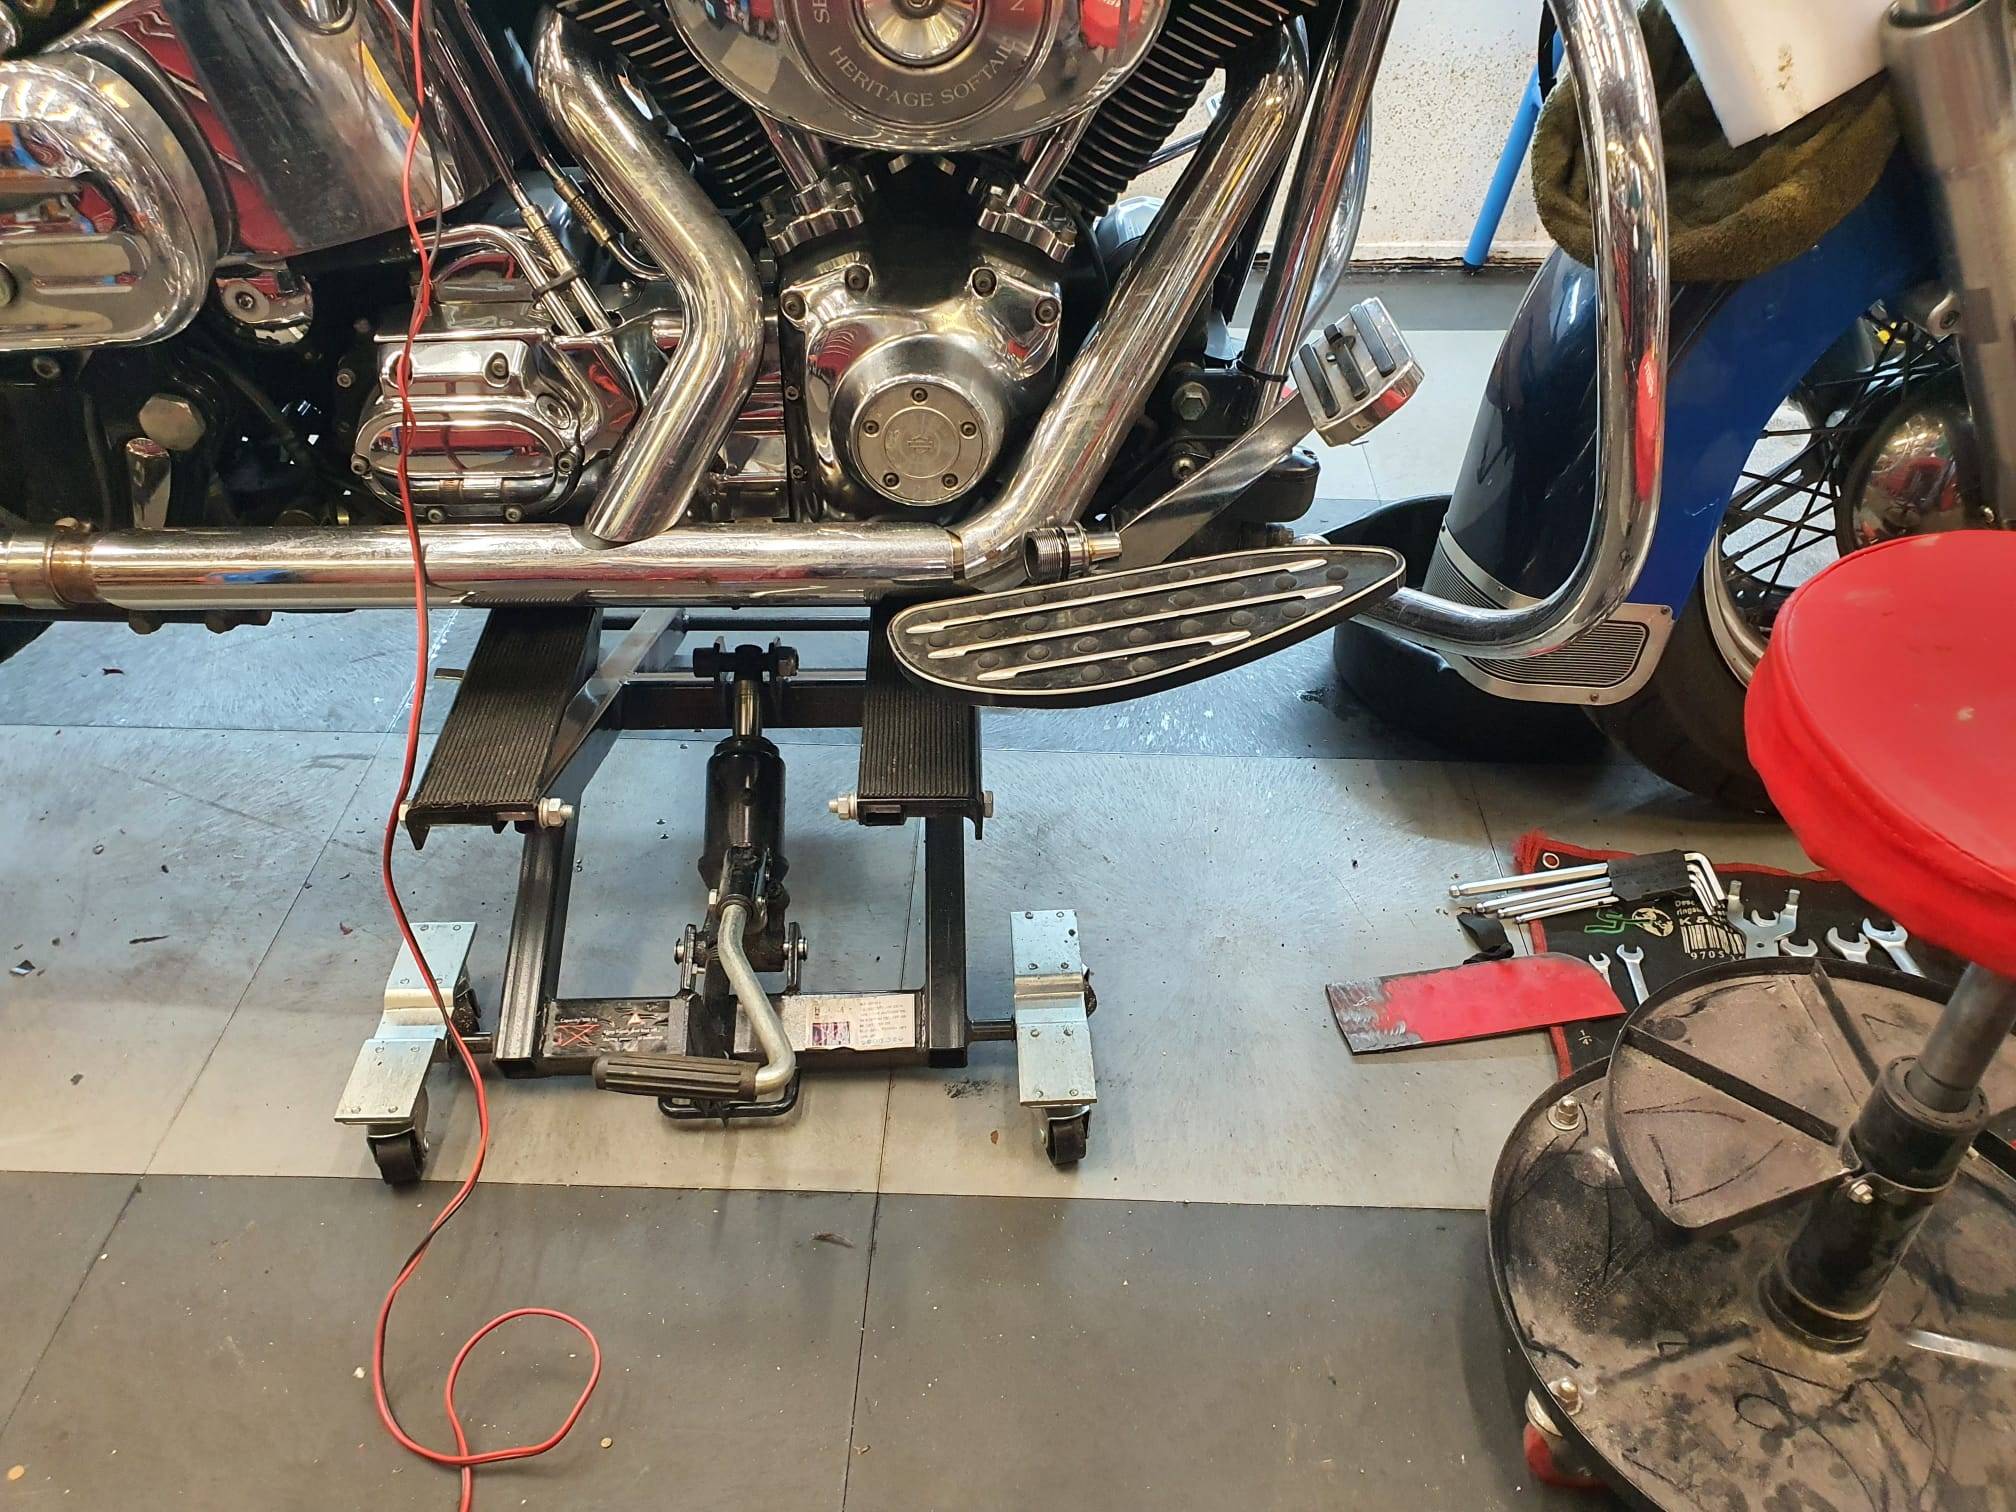
Then, I loosened the 2 bolts that clamp the front fork units in the lower steering plate. Then, I upped the bike a bit with my Harley center lift unit:
 With a little effort and use of some lubricant in the area around the lower forkplate at the place where they are munted, the forks will slide down. I let them slip down around 2 inch under the top steering plate.
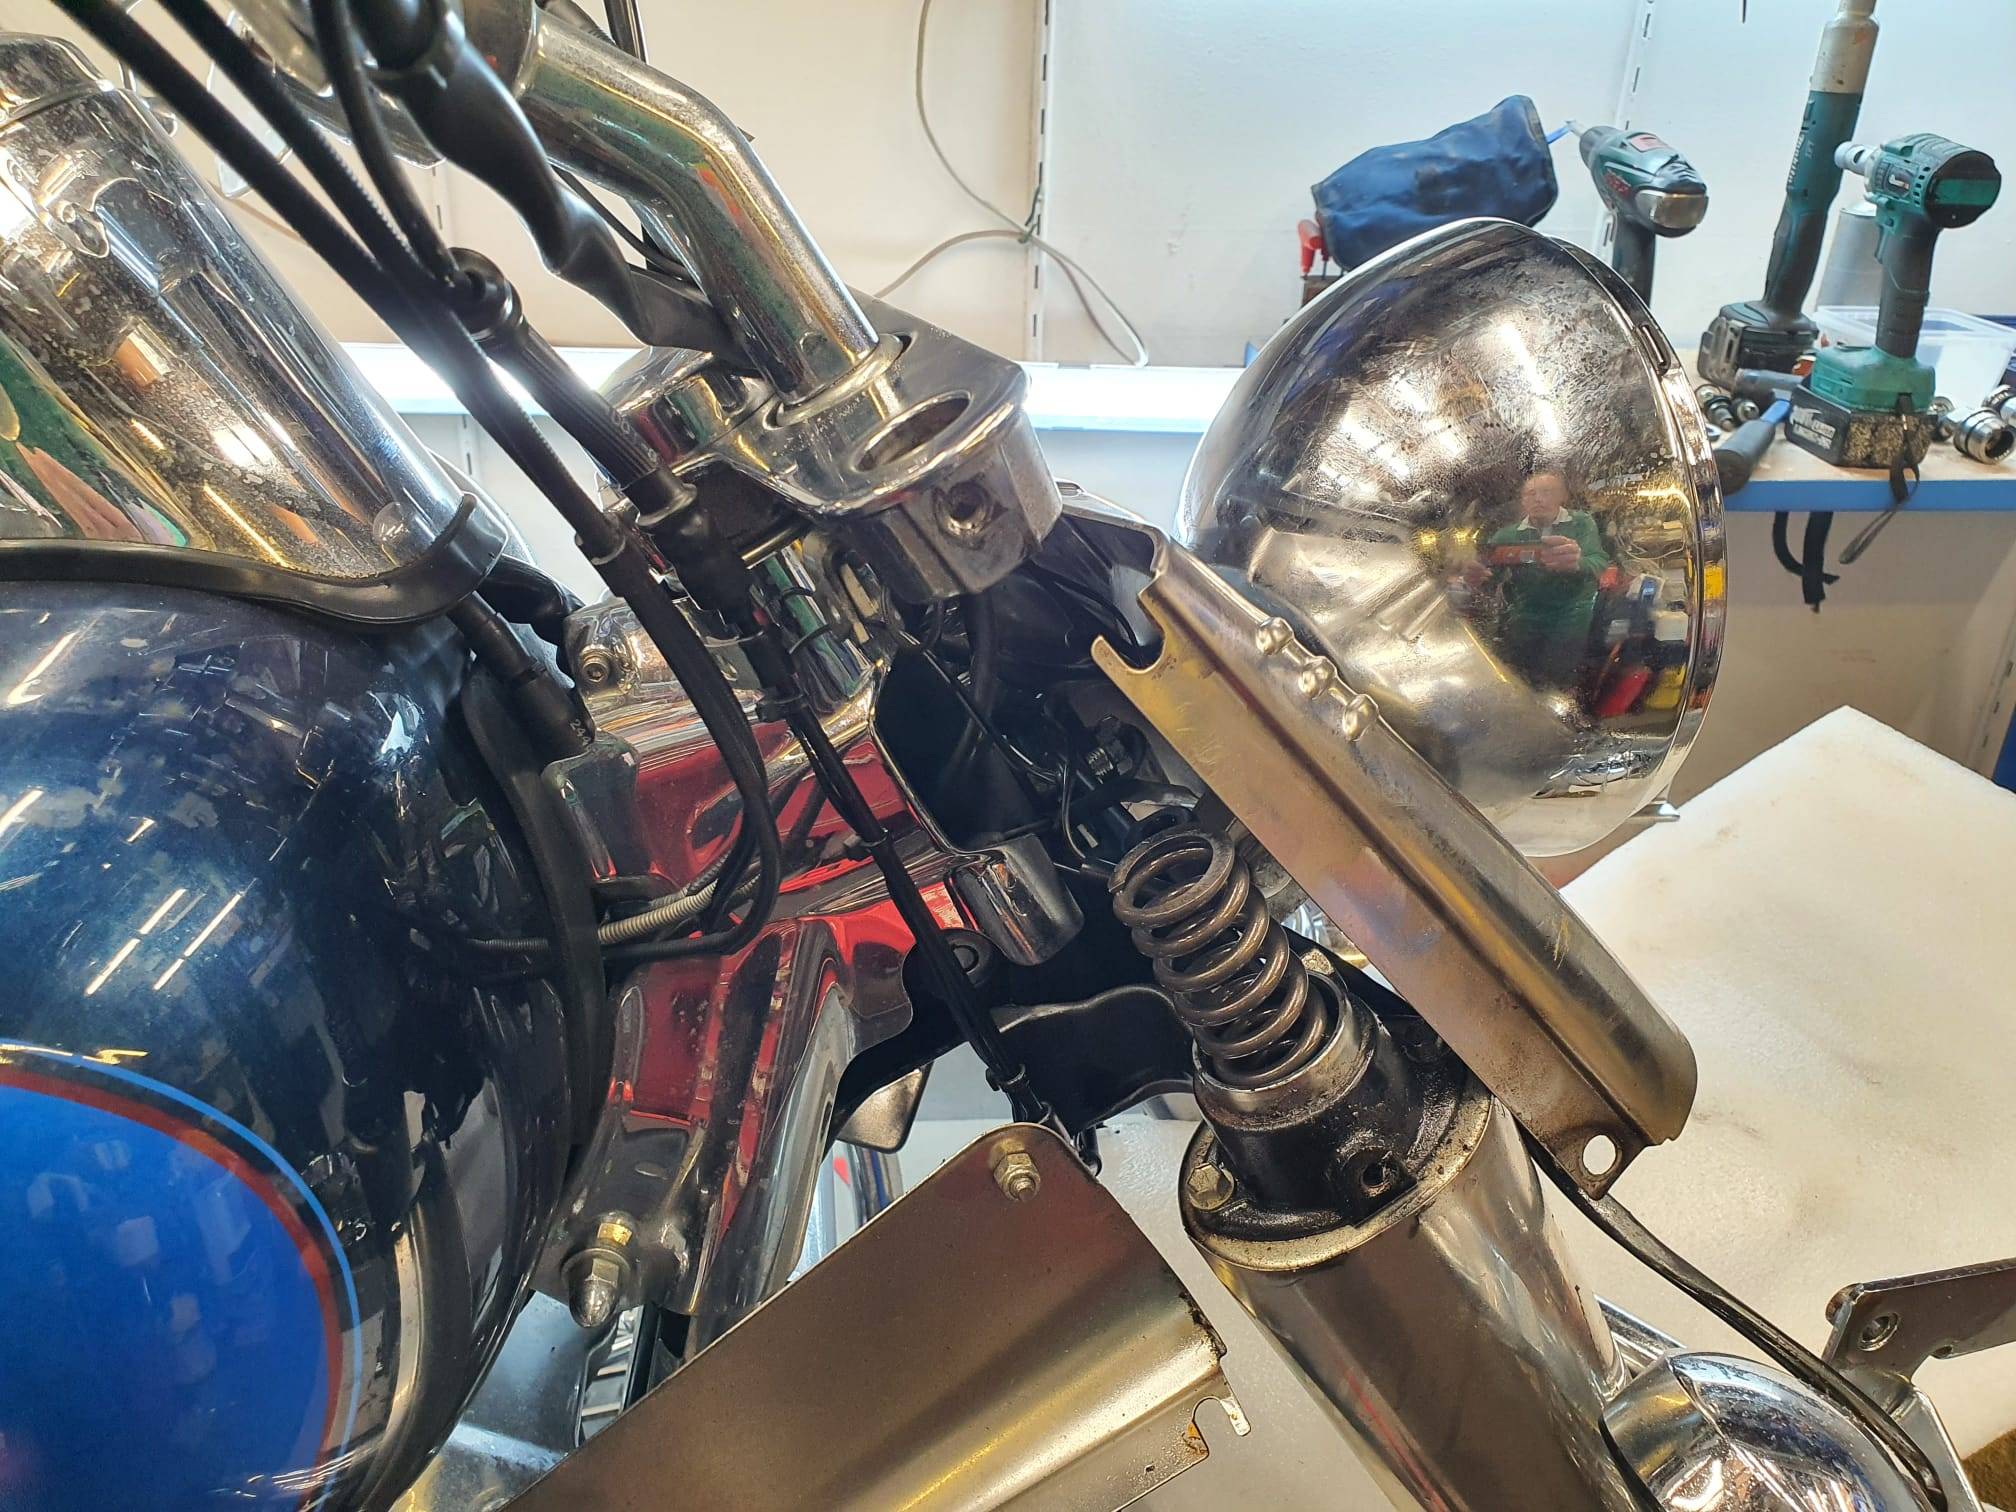
The, remove the large bolts and be aware that there is quite some pressure under these bolts, due to the fork springs. I put a steel plate between the bolt’s top and the hole where they were previously bolted. The bolts come off with a bang. The, they are captured by the plate. Ater both bolts are loose and held by the steel plates, you can slowly upp the motorlift so the springs can move freely. The bolts will fall down so be arare to either catch them of prevent damage to your front fender and gastank.
NB: My HD Heritage model holds 2 identical springs so the procedure is the same for each of the fork units. In other models, you can encounter different situations like 1 spring on 1 side and no spring on the other side. This is normal.
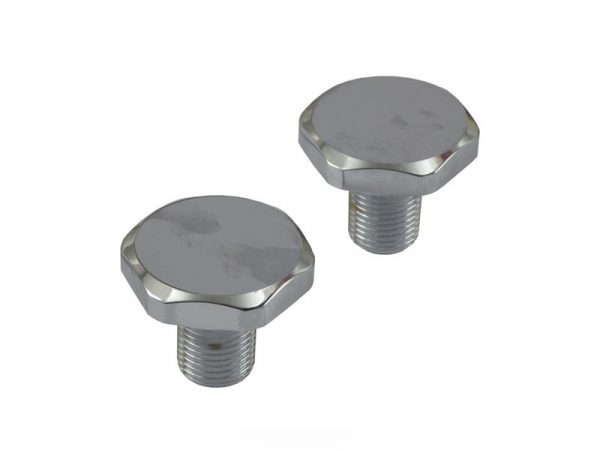
Now, the new extenders can be mounted. Put them between the spring and the plate with bolt from a pulley pull-off device, as shown in the picture:
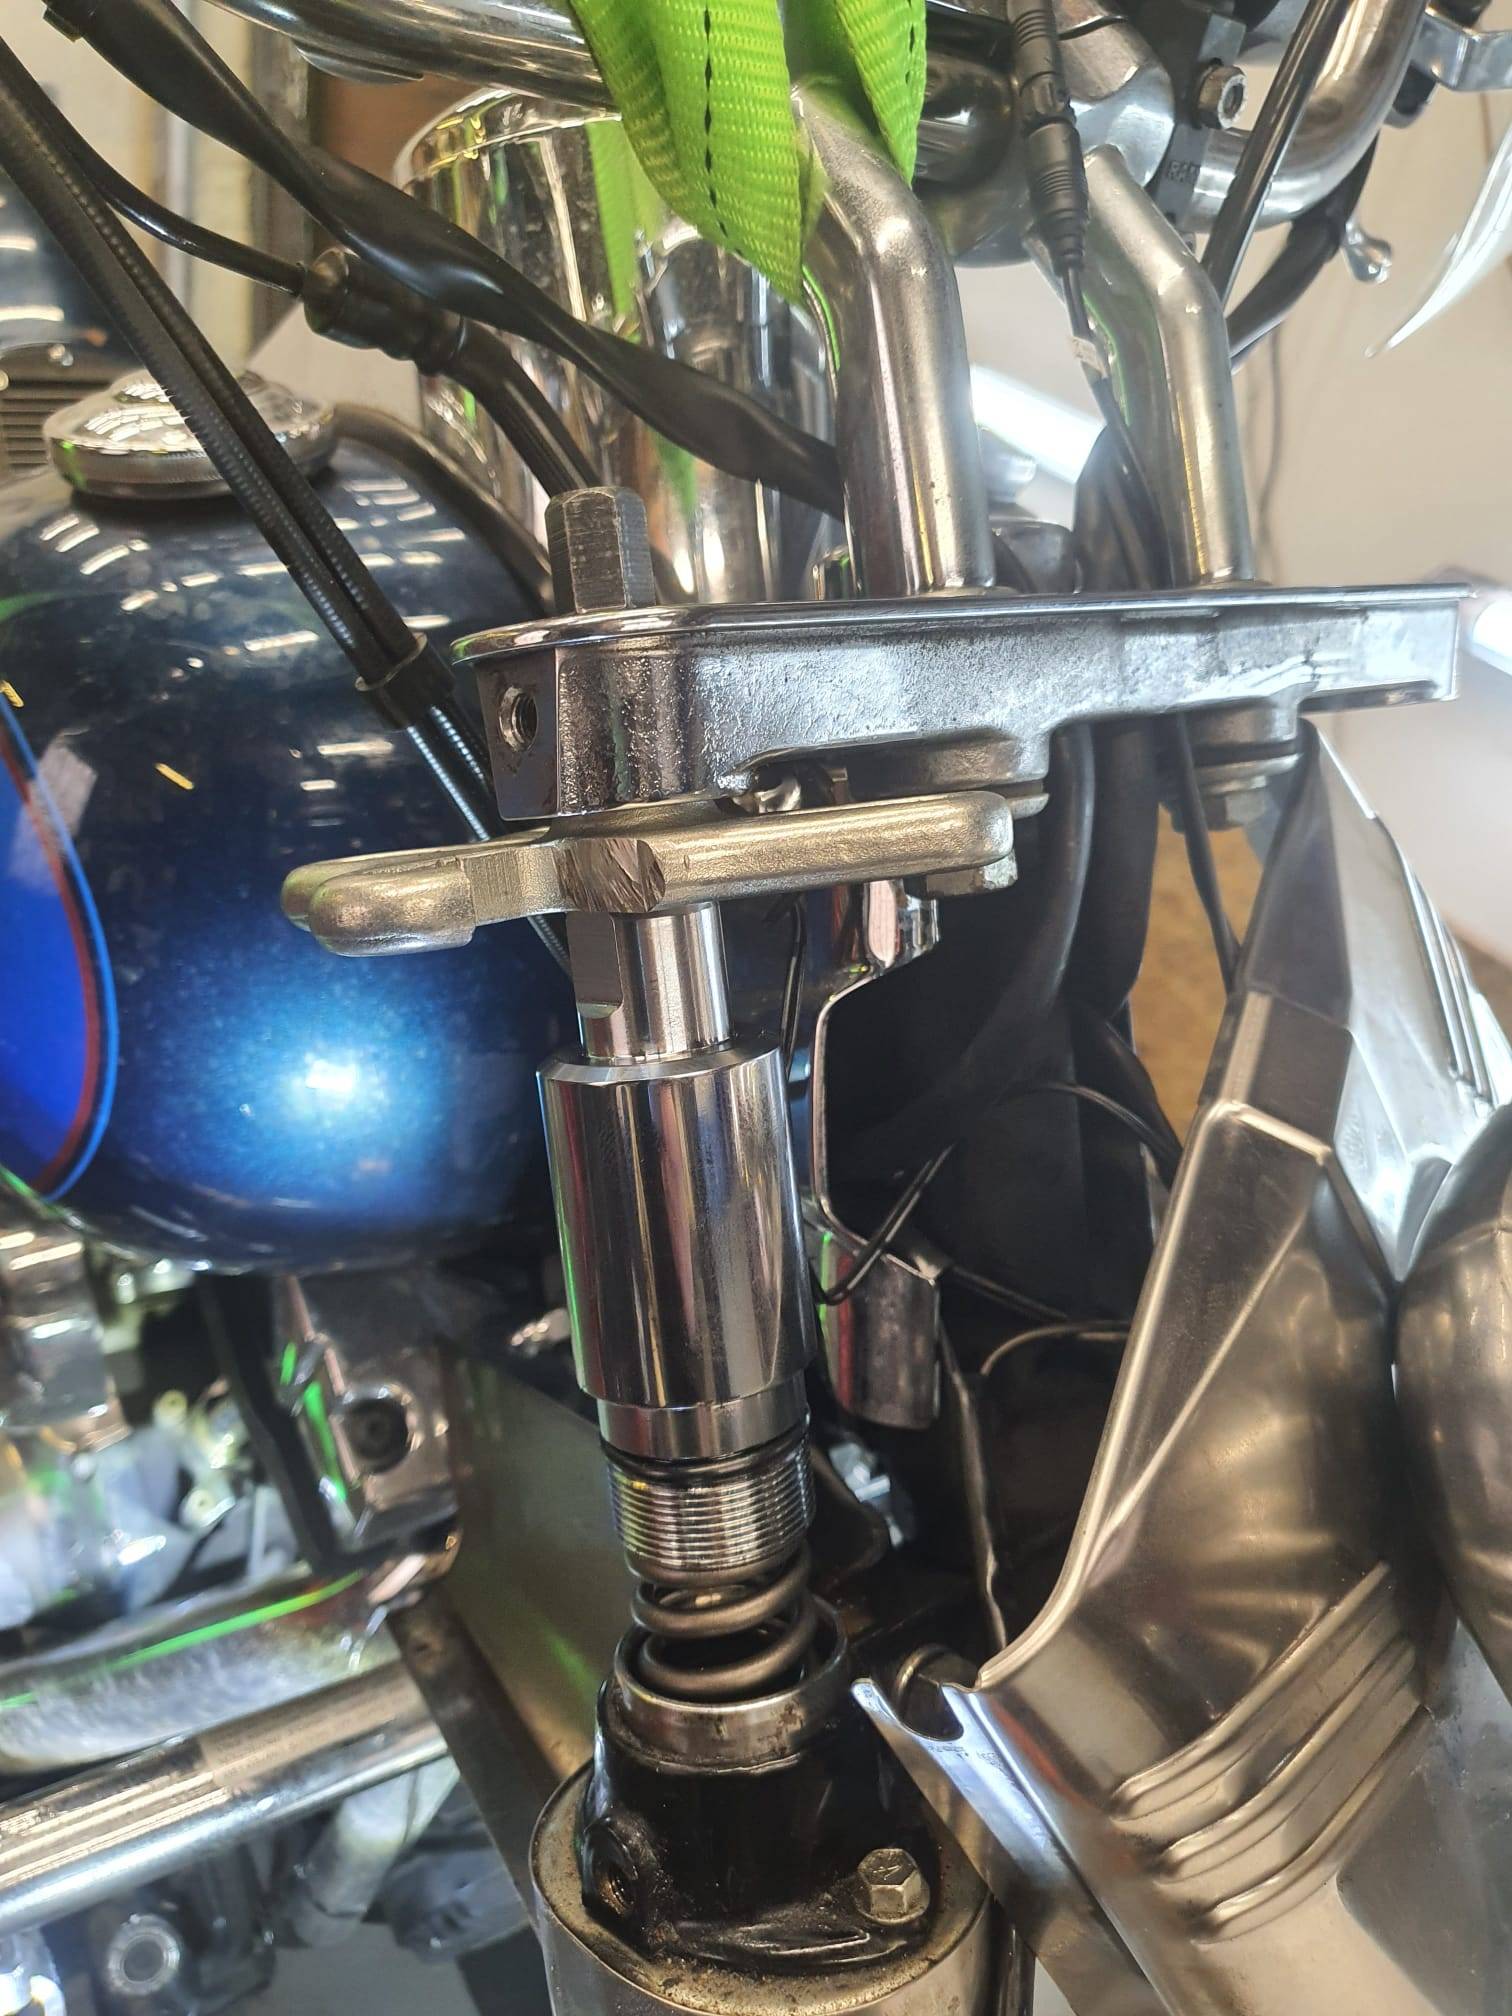
Then, drive the pulley device’s bolt through the bottom and push the spring in the fork, at the end screwing the new overstock bolt in the fork. It should then be like this:
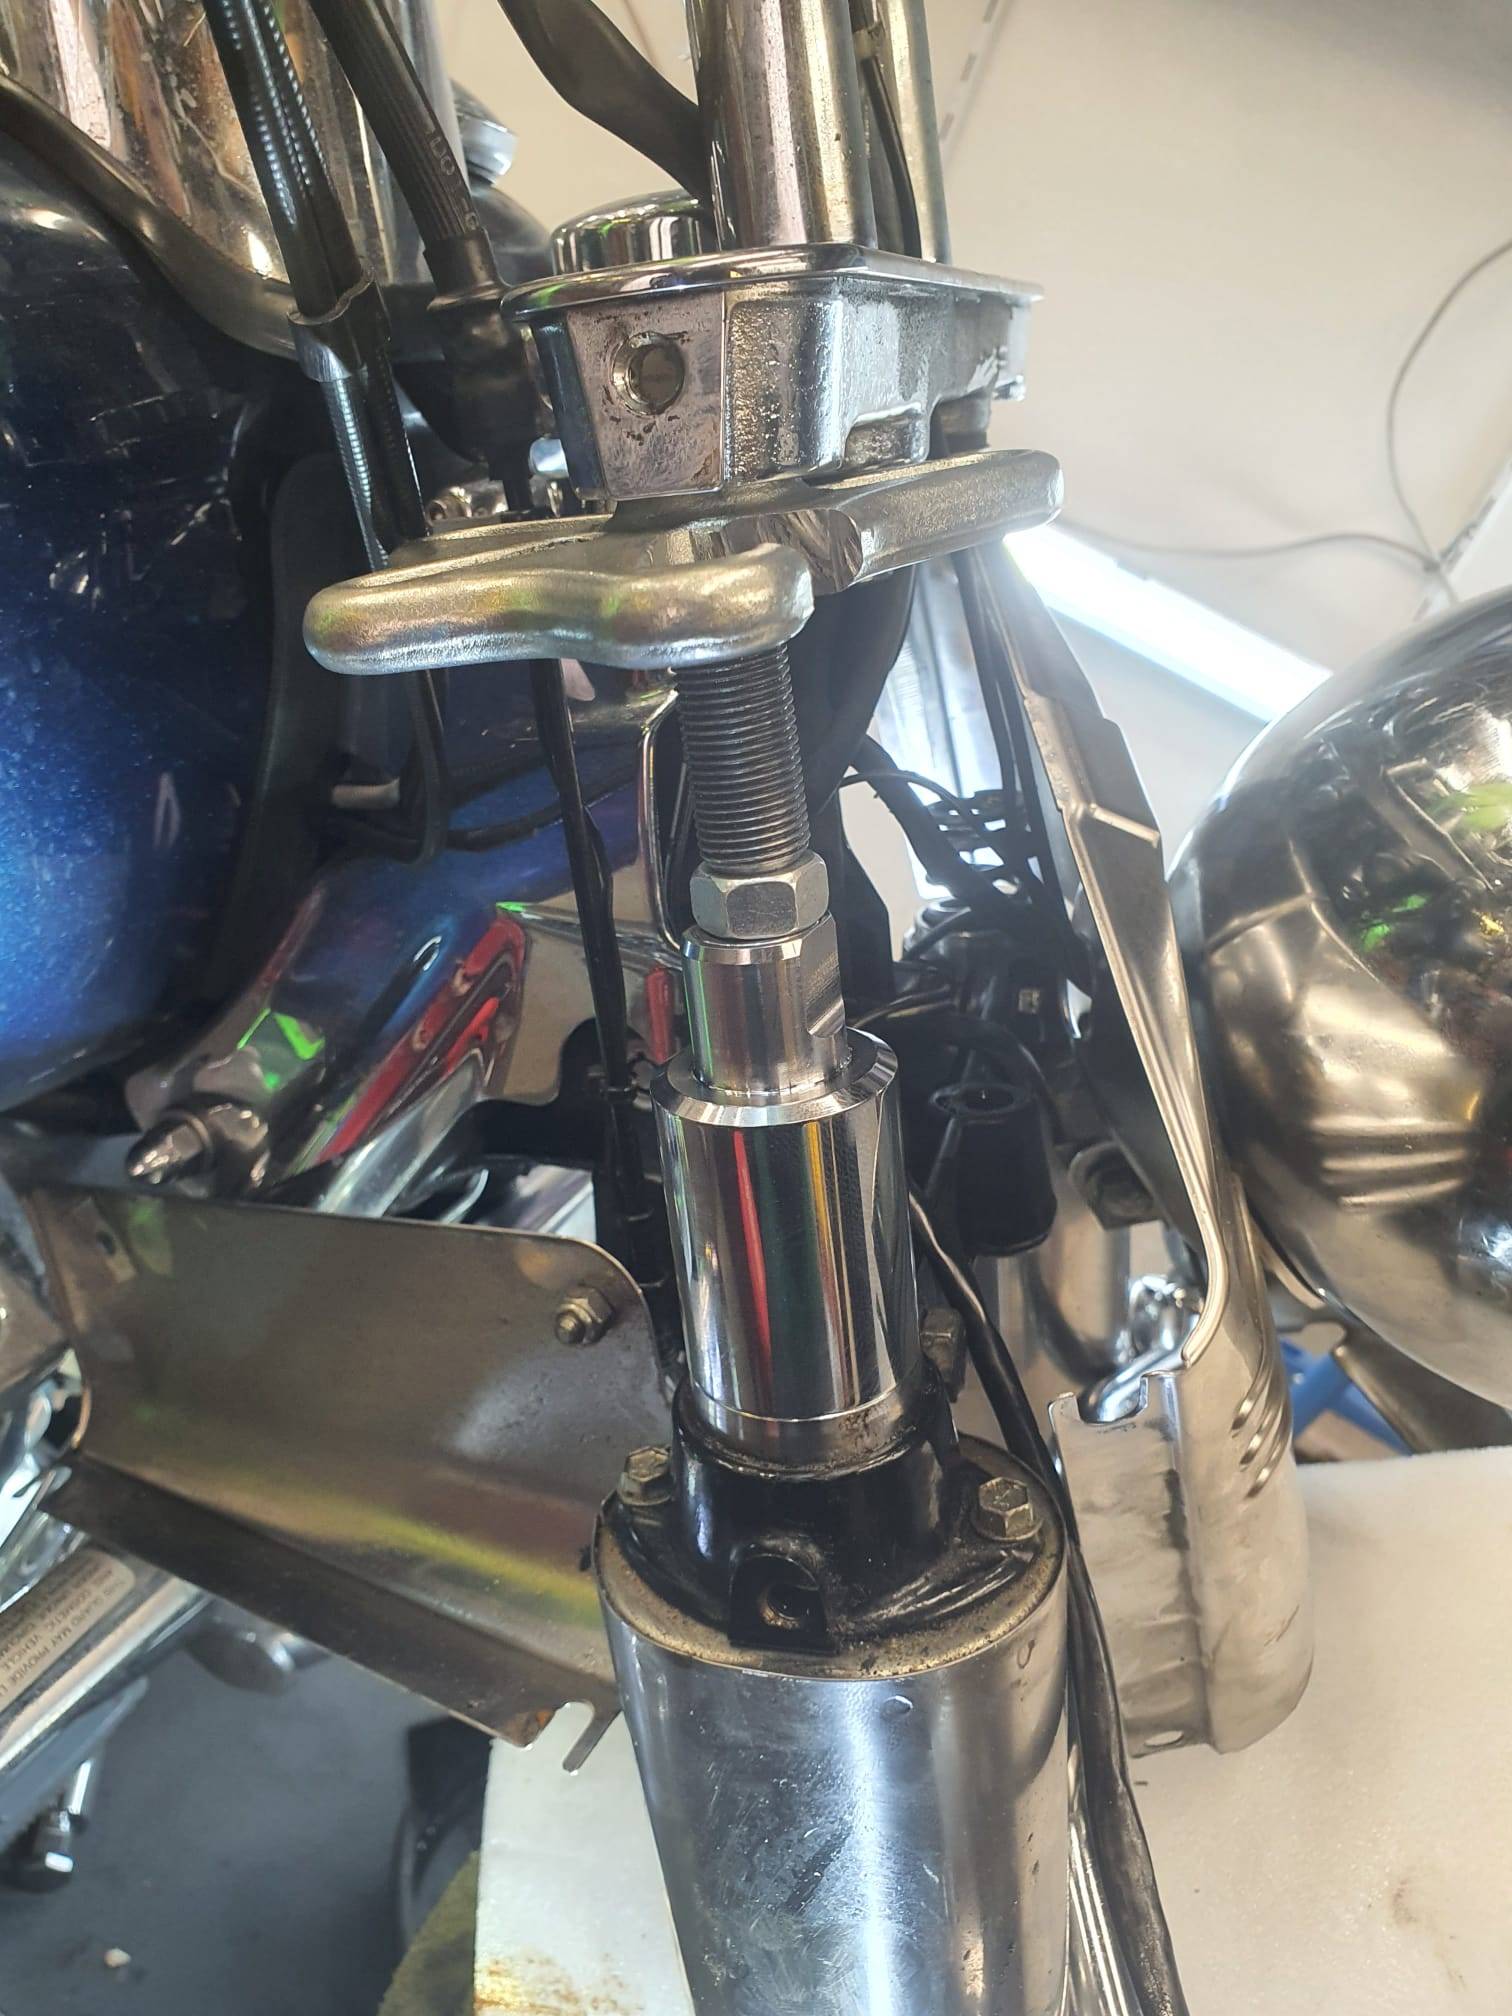
Secure the bolts in the foeks on both sides, push the forks up OR lower the lift and wiggle a bit until the bolt’s topsides are in the upper steering plate’s holes.
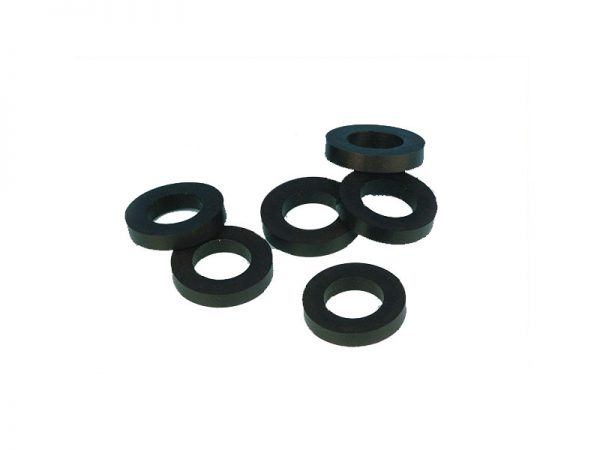
Then, put the endbolts with new rubber rings in and mount everything back, Don’t forget the front brake’s line! I refilled with new brake fluid, Dot 5.
So- I was searching for new 2 inch overstock shrouds but could not get them anywhere nearby. Eventually, I ordered a new set with 4 inch overstock. If it is too long, I will machine them down to 2 inch overstock on the lathe. But that will be another post.
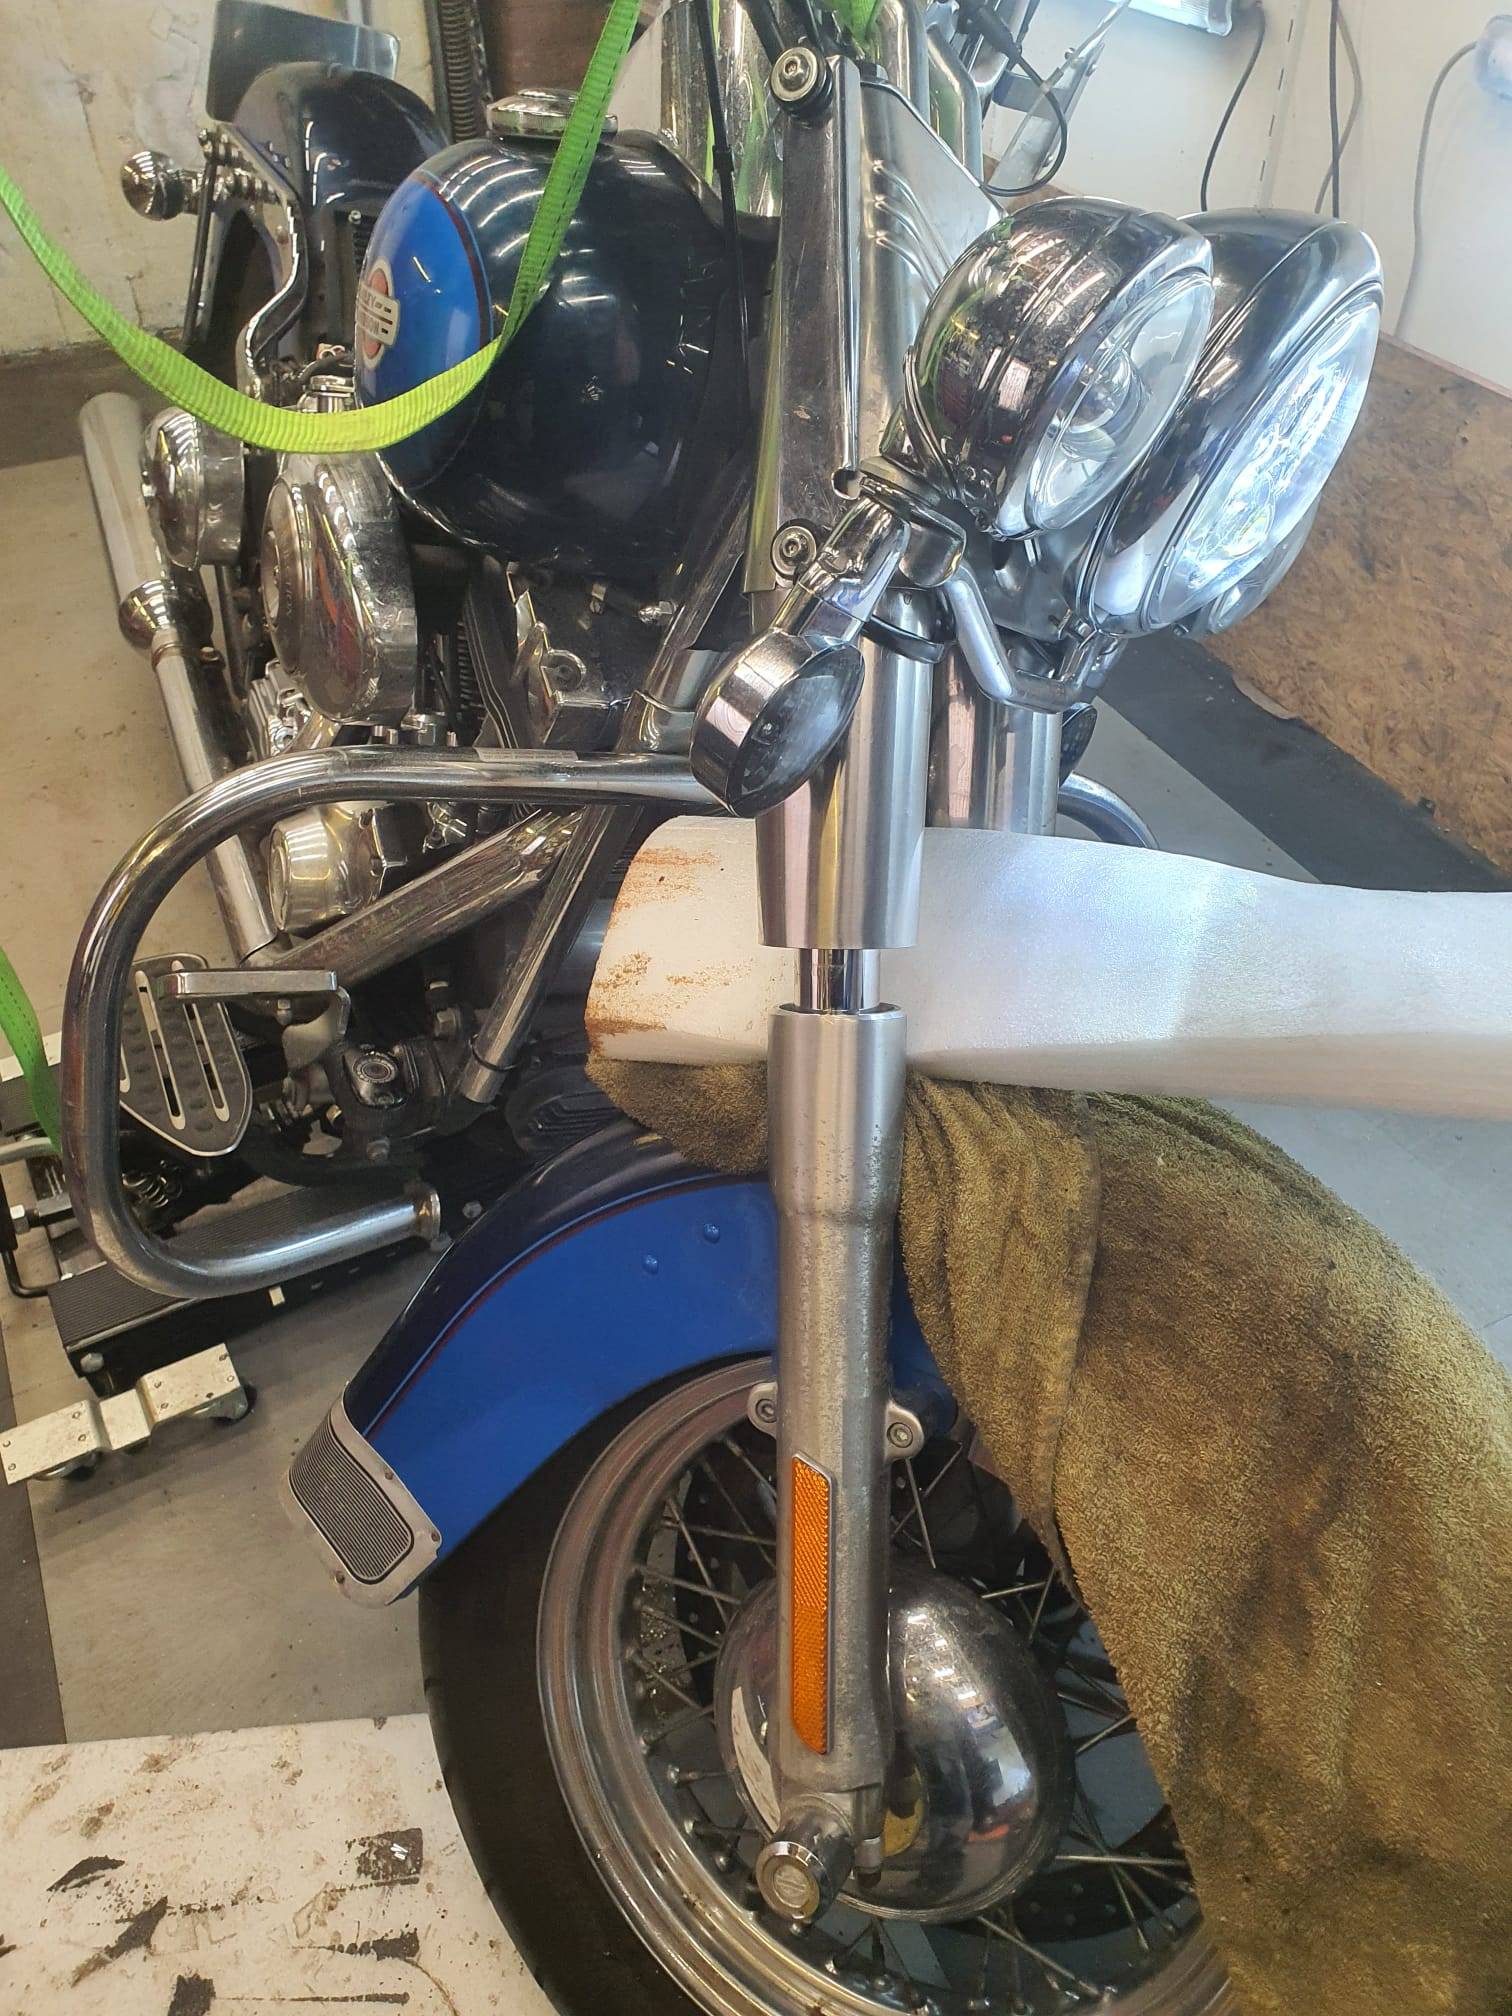
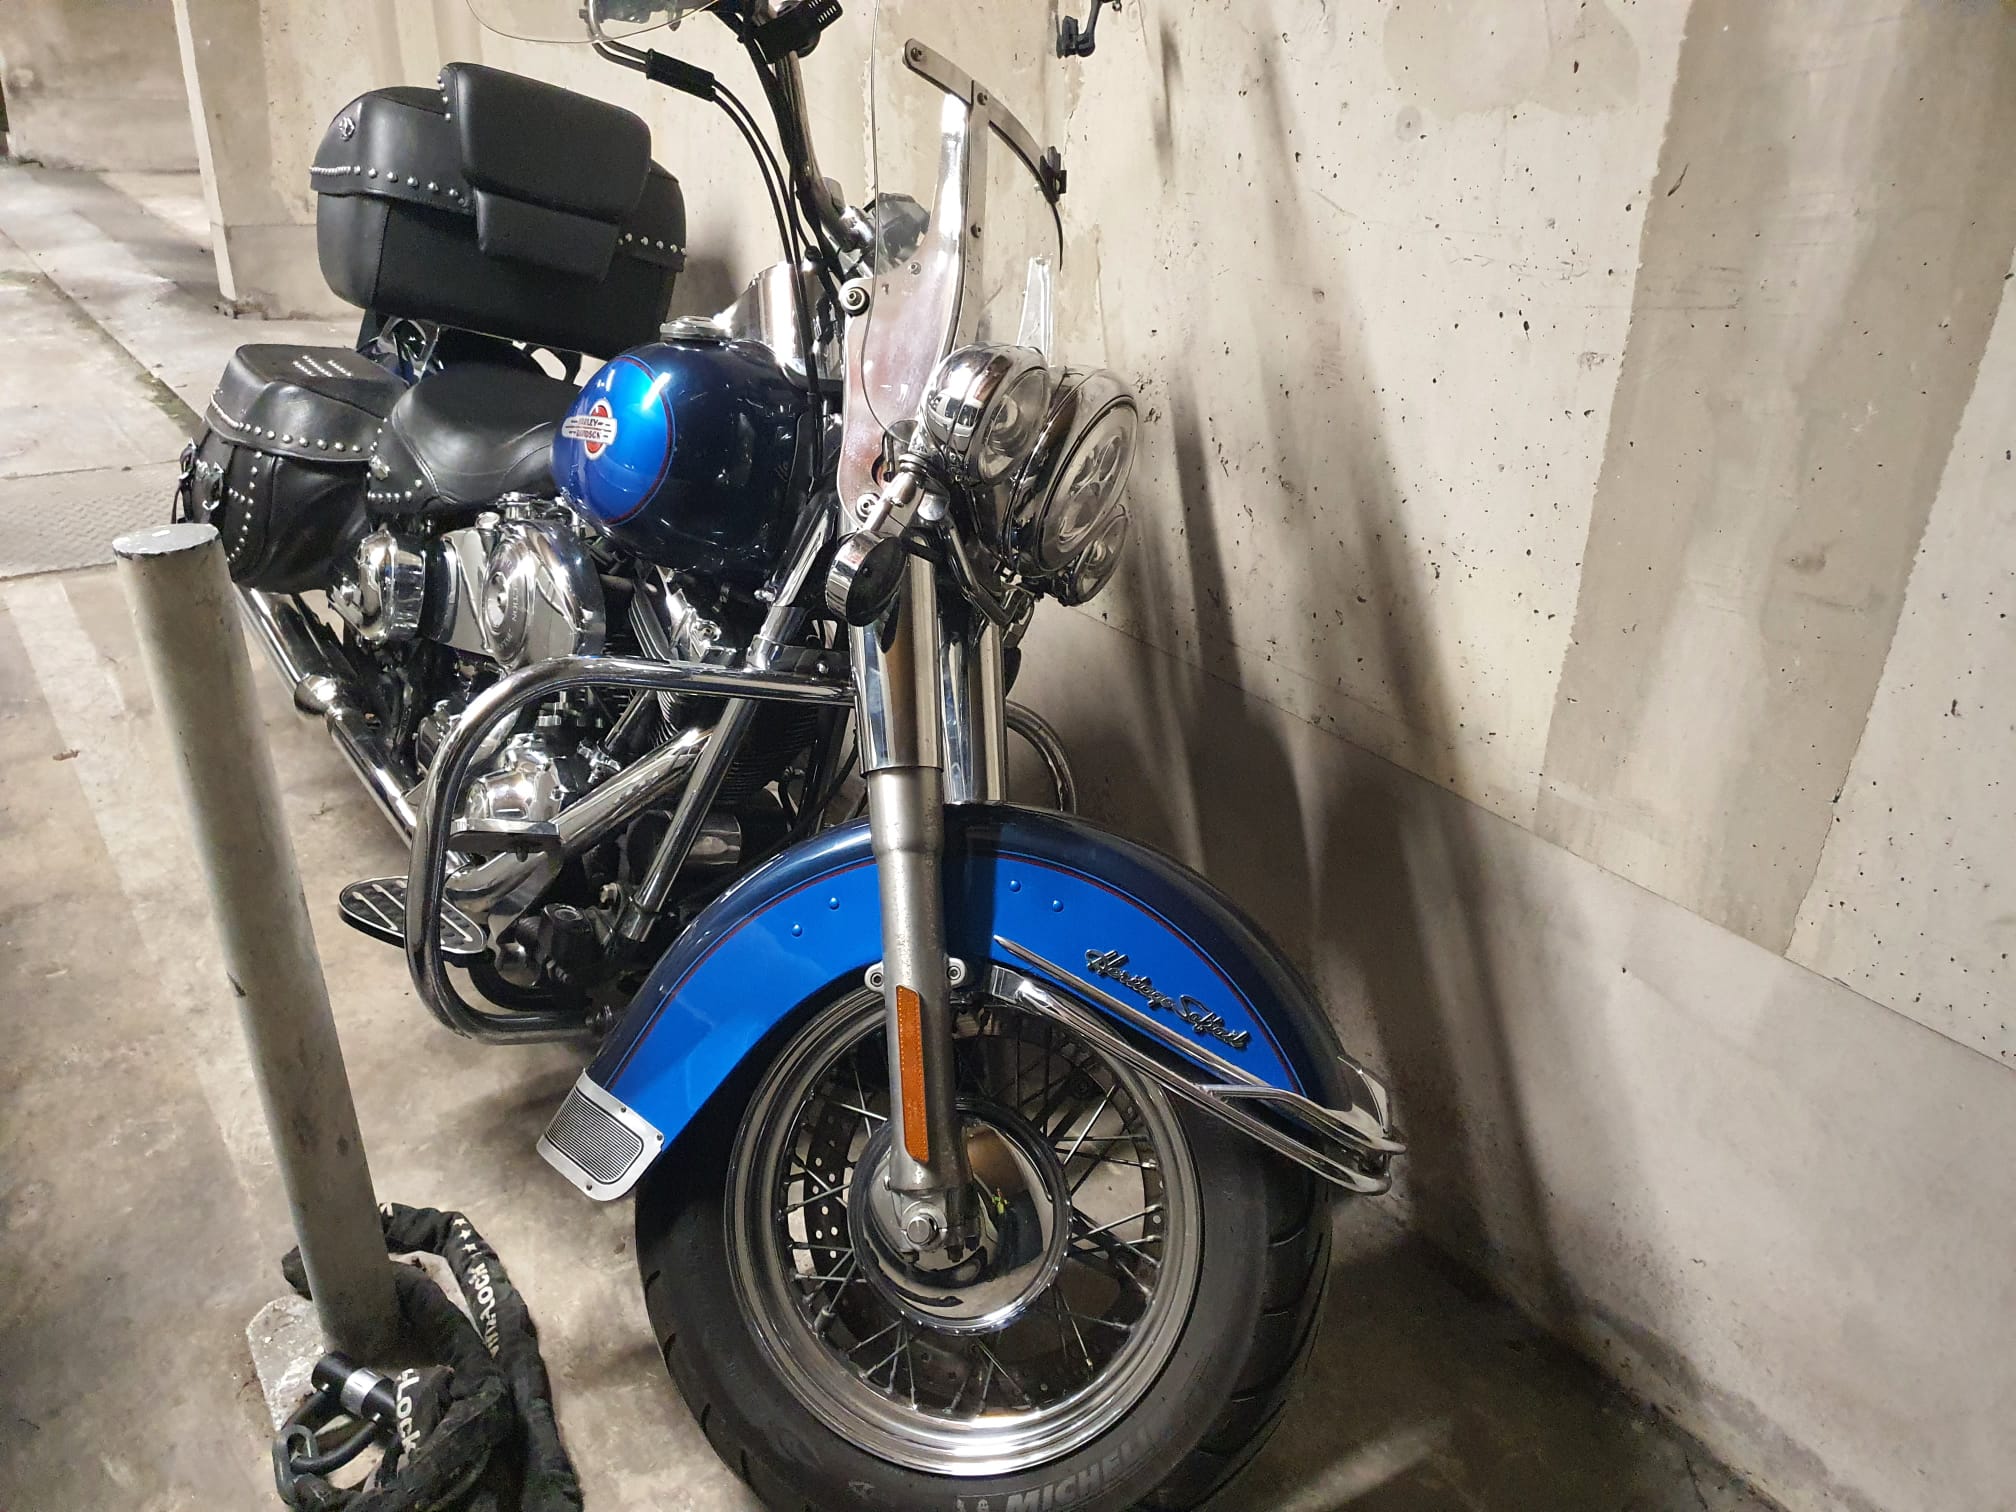
This is how it looks in real life:
And with the full package installed:
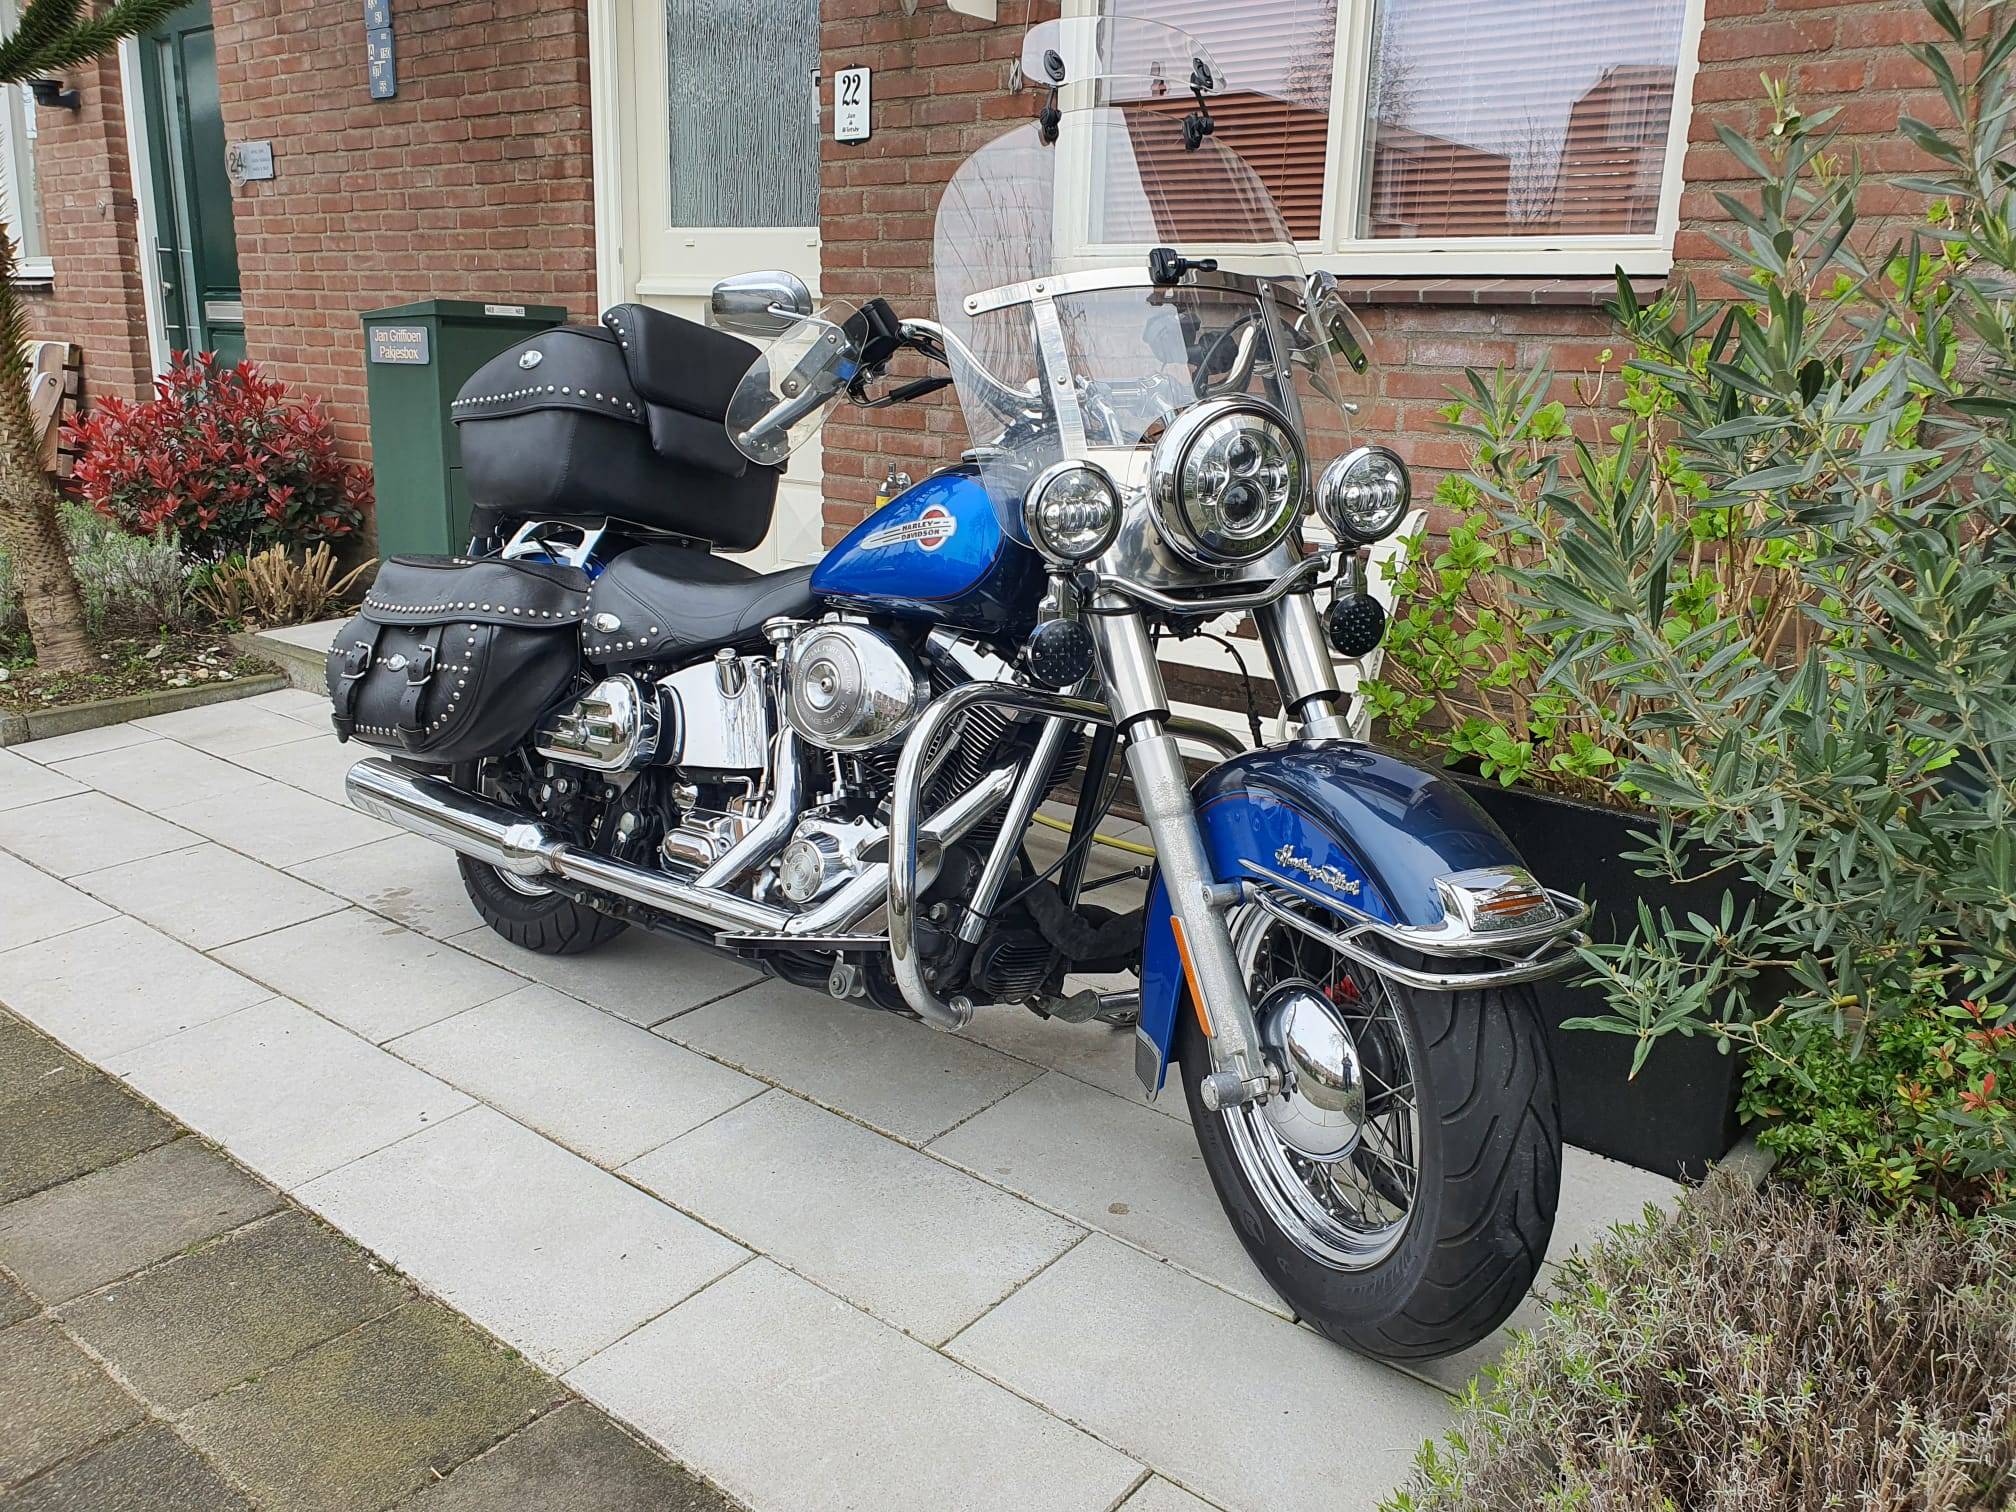
And- 2 months later: with the new overstock shrouds mounted:
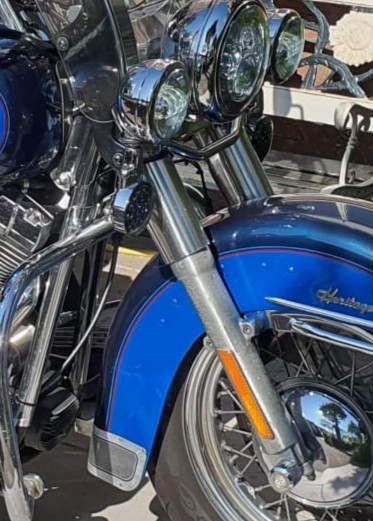
Before and after the 2 inch extension:
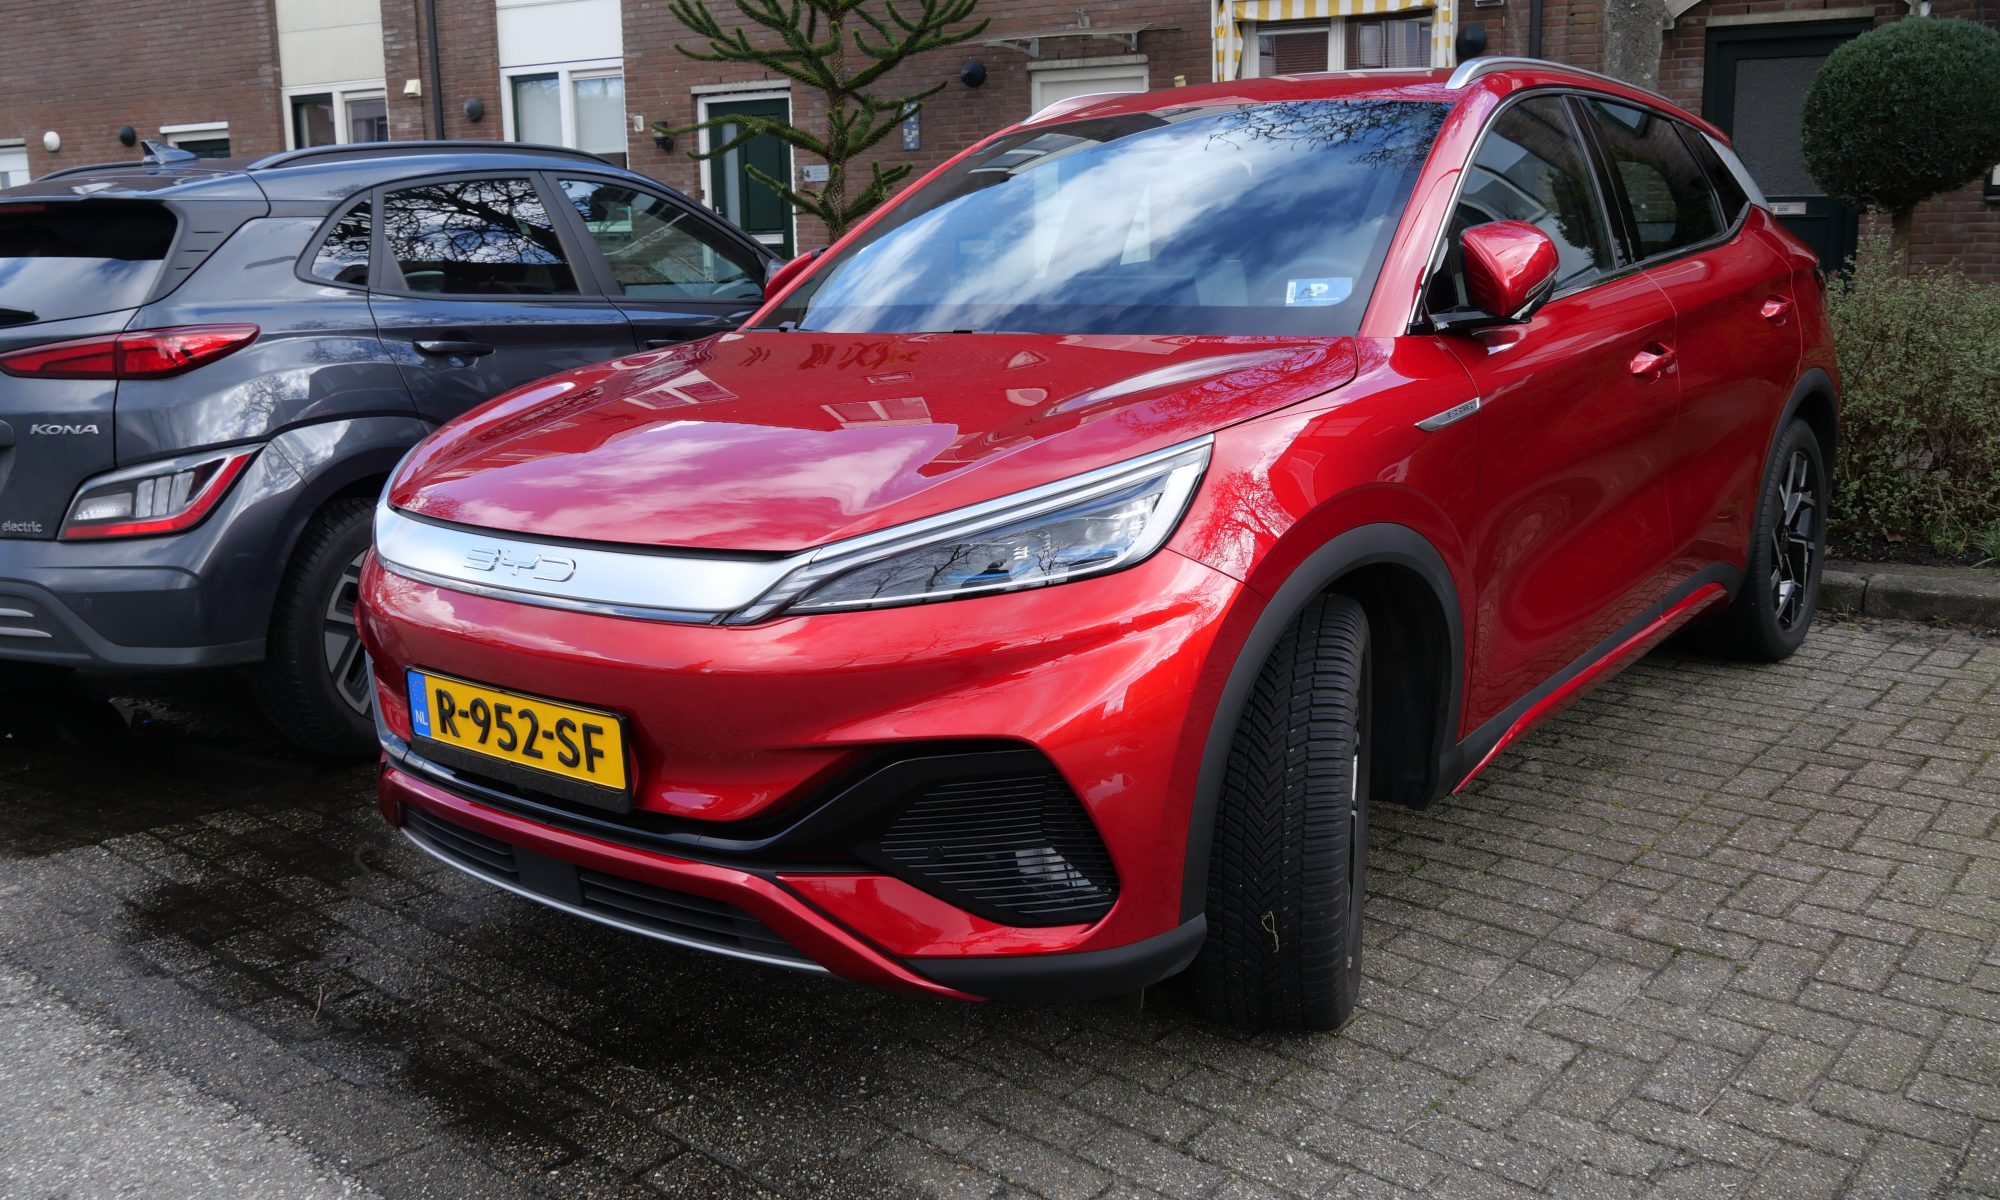
This review replaces my previous reviews of my Atto 3, as all of my desired software enhancements have been completed filled in by BYD.
Meanwhile, software version 1.4 was loaded into the car via OTA on 18-9-2023 and as far as I am concerned, the car is completely OK in terms of software.
This is of course very personal. by now I am used to the beeps and other sounds the system makes when something is signaled or detected that I do not always immediately interpret as dangerous.
I have even learned to appreciate the fact that the system intervenes in dangerous situations. The other day I was driving behind a driver who suddenly hit the brakes in the middle of the intersection for some unknown reason. Before I could brake, the car was slowed down so that no collision occurred. I had not had similar intervention from the car before and was very pleased with it. It also shows that you really only know what you need when you have (unnoticed). So at this point I’m all over the place. Safety sometimes seems patronizing but avoiding a collision is enough reason, as far as I am concerned, to learn to appreciate the safety aspects of the Atto 3.
Intervention by the car on the steering wheel when you approach the edge of the road too much I previously found very annoying, and so did the accompanying beep. But I can also keep a little more distance from the shoulder and avoid the intervention. Matter of doing.
As I had mentioned in my earlier reviews, there were quite a few things that were just not set up nicely, which made driving the car uncomfortable. These were things like faltering A/C controls, or just the wrong air freshening functions available but also things like the fact that the A/C did not remember what the last setting was and should start with that again by default next time. That’s all fixed now, though.
Also promised afterthoughts like Apple Carplay and Android auto have been around for a while. I myself use Android auto and that works absolutely great!
Issues that remained:
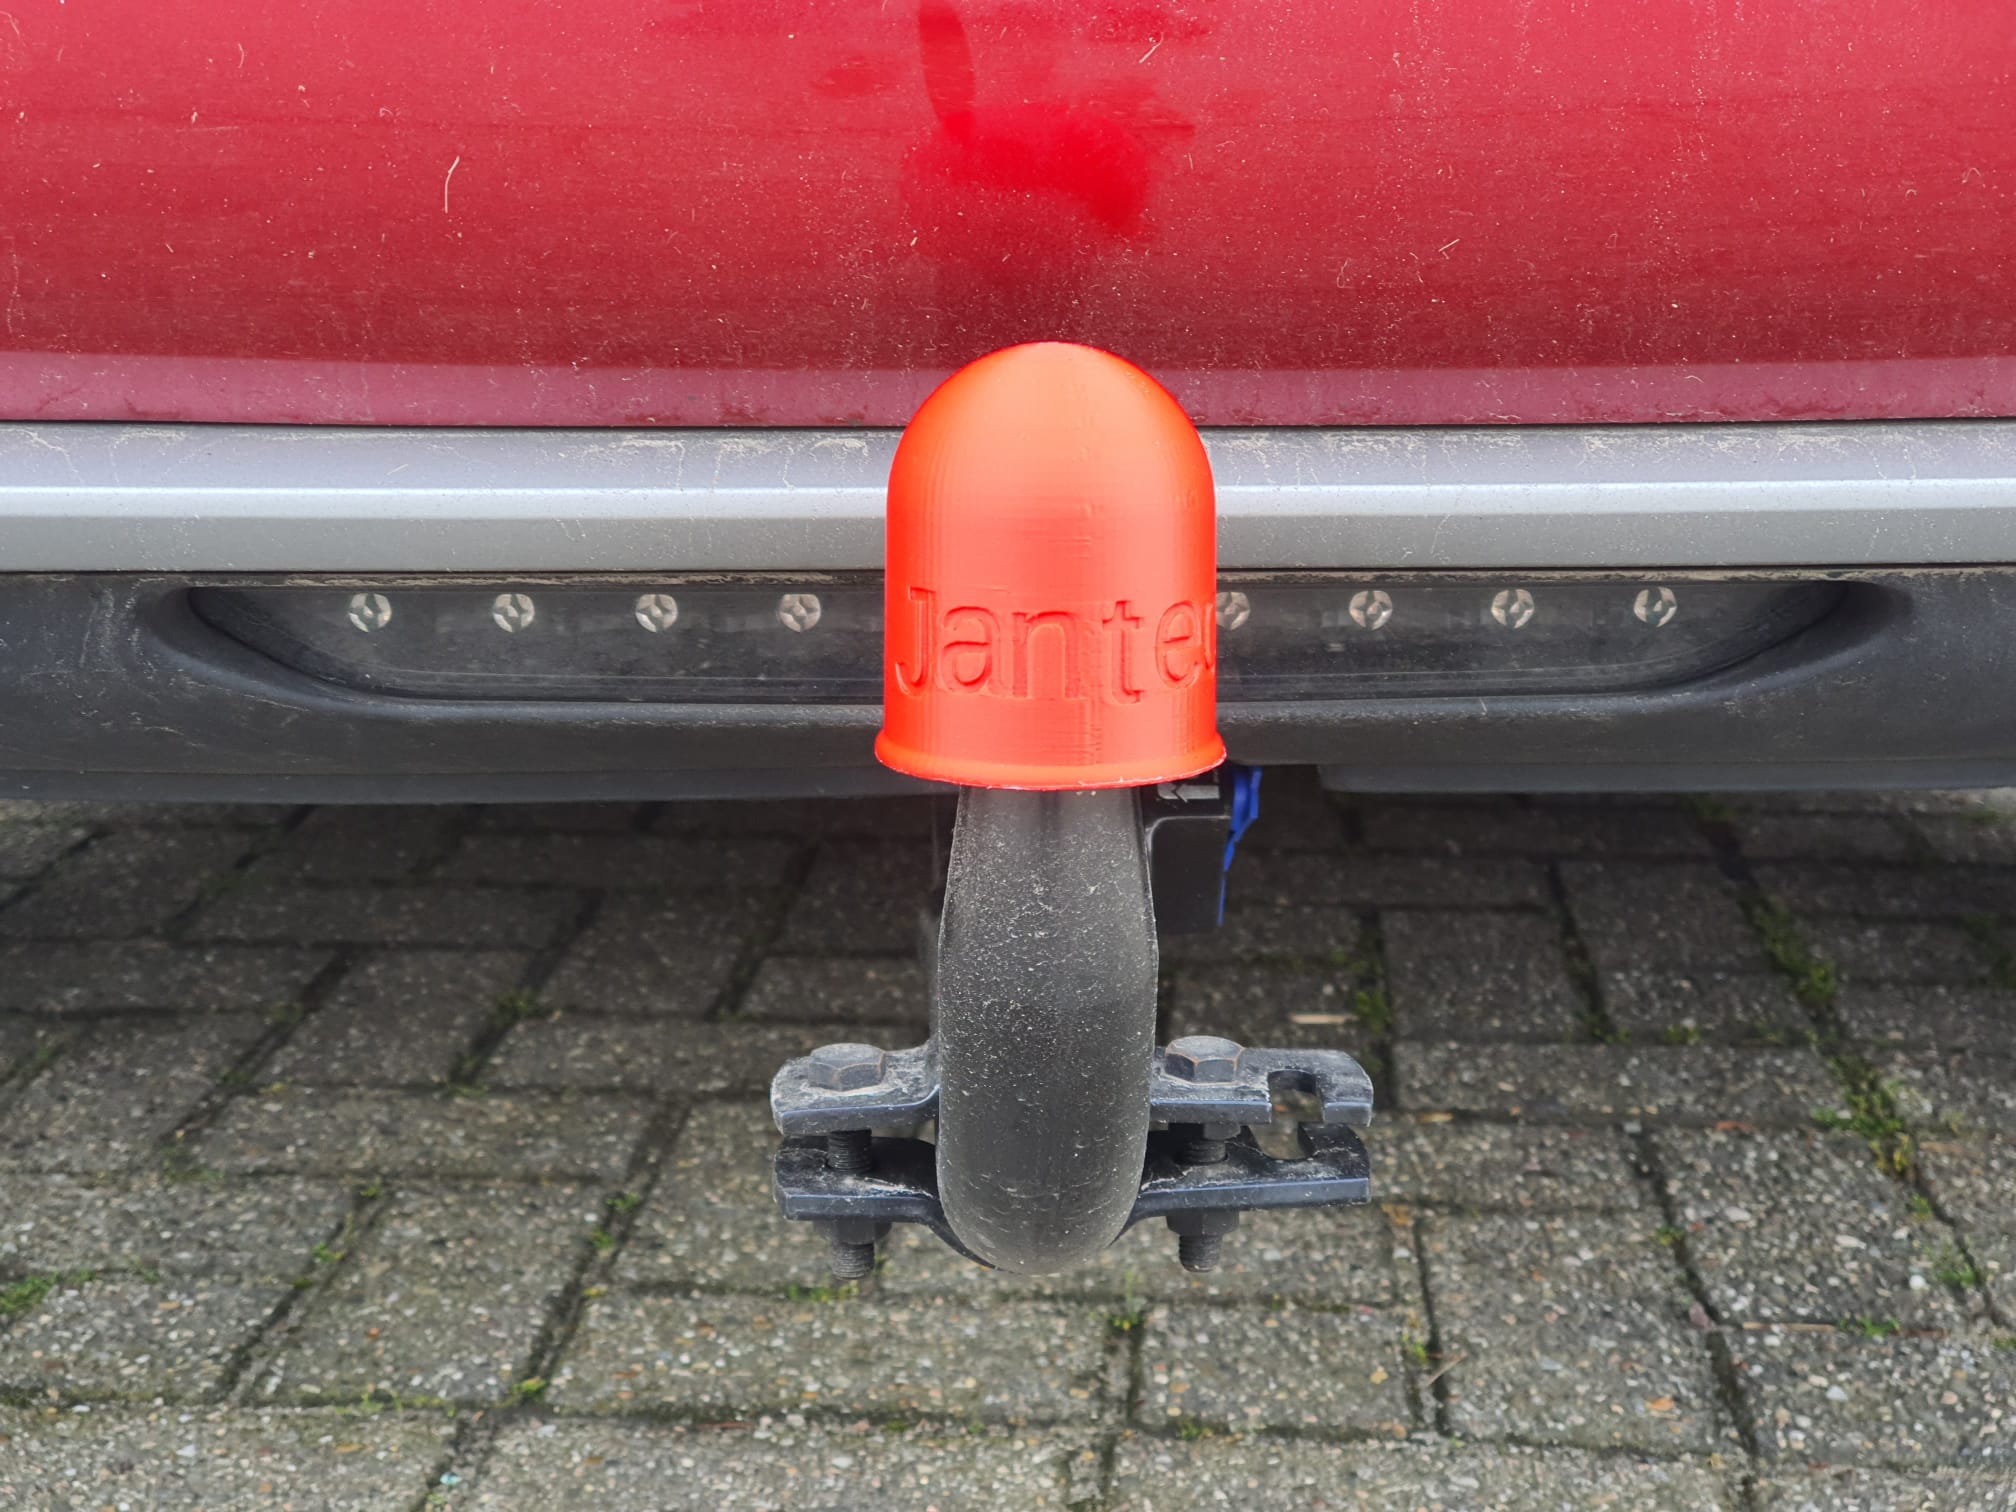
1) I have the tow bar, but the car is officially not allowed to tow any weight because the car is not “homologated”. That is, there is no towing weight on the car’s Certificate Of Conformity. You can never get that later, only when the car is registered. Very unfortunate, especially since we were more or less verbally promised at the time of purchase that all that would still come.
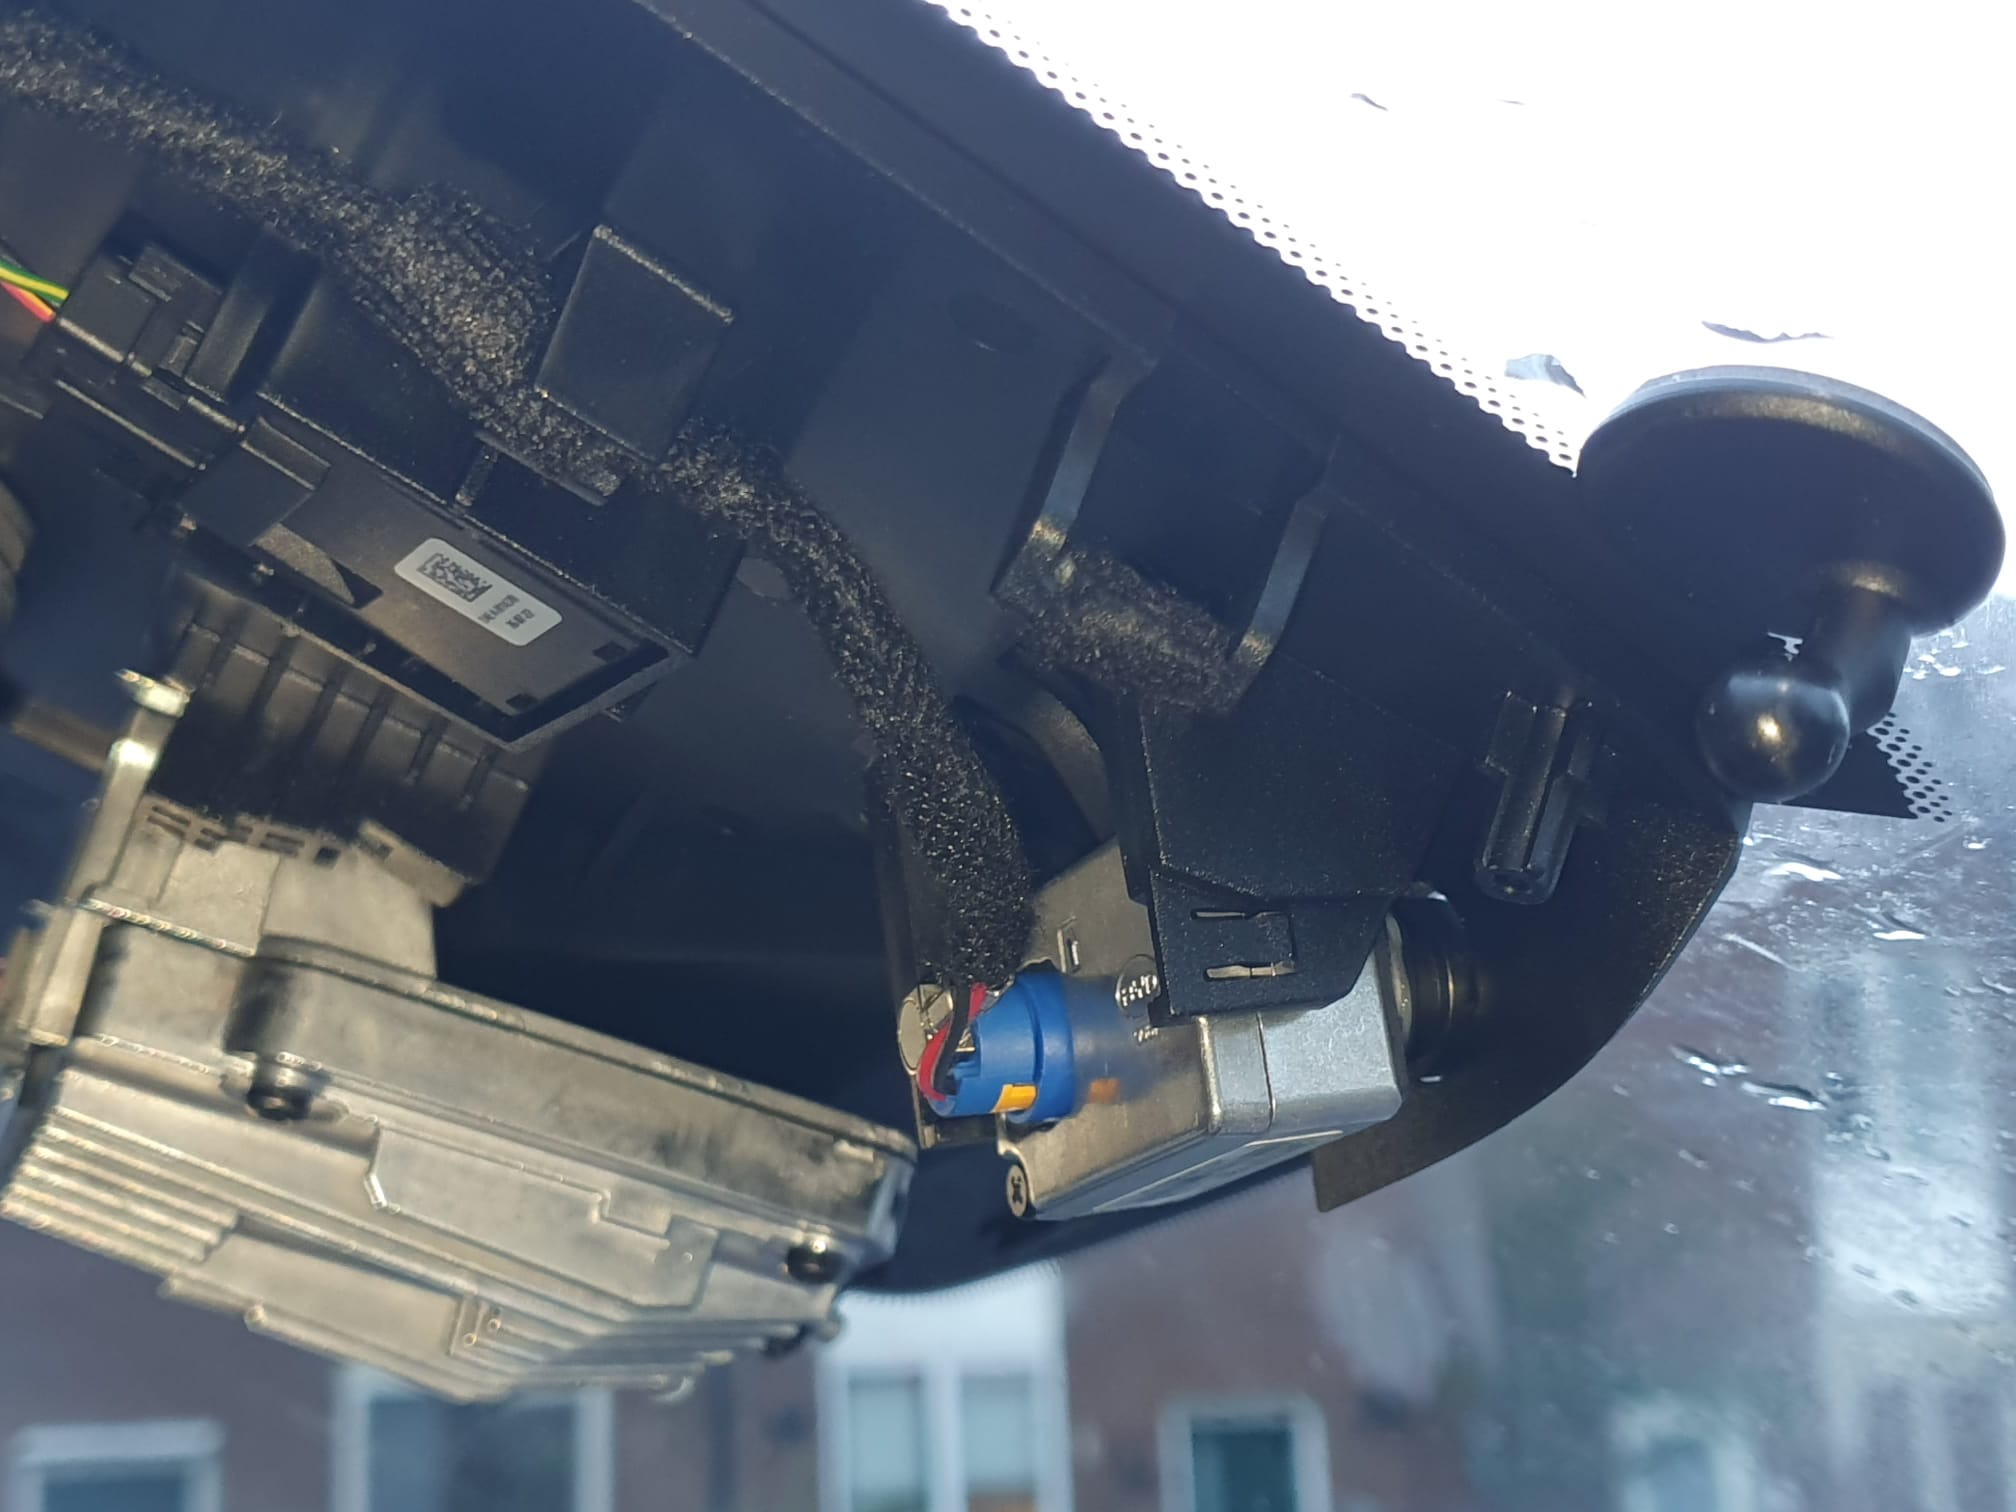
3) No rain sensor for the windshield wiper. I was not used to that at all so it was getting used to having to operate the switches myself all the time. I can fix this and ordered the parts but I haven’t started yet. Read the progress HERE .
Other topics:
I retrofitted a spare tire myself, of course you never need it but when you do… yes, exactly!
And immediately upon geting the car I had the standard summer tires replaced with all-weathers.
Driving experiences
I have liked the car from my first drive in November 2022 in terms of driving experience and handling. The software improvements have made my experience even better. The Atto 3 does not drive like a small mid-size car but behaves on the road very similar to my previous car(s), Volvo V70. Maybe an odd comparison, but I also drive other cars with regularity and with that I experience difference but between the Atto 3 and a latest version V70 so not. You could also say that a V70 is a dodgy car, but that is not my experience with the last made version V70’s. PS: My last version V70 F (BW), 2 liter gasoline/LPG had an empty weight of ‘only’ 1450 kilos, the Atto weighs empty 1825 kilos….
Anyway, I was and still am very satisfied with the Atto 3.
As far as driving experiences and the range of the car are concerned, I have also experienced a few things over the past 15,000 kilometers.
Driving an EV is very different from driving a fossil fuel car. Filling up the charge level takes longer than filling up at the gaspump.
The Atto 3 weighs 1,825 kilos. Minus point associated with a relatively heavy EV: You really have to be very careful with some speed bumps, not to always just go over them at the advised speed. Often it goes well but I now have 1 in my route where I don’t want to go faster than 40 while there is an advisory of 60. On an 80 km/h meg. driving on it is OK, but when driving off at 60km/h it’s like falling off a platform.
Consumption and charging
But, especially on the trips abroad this past year, it turned out that everything goes very well when you check in advance WHERE you can charge WHAT with which pass or app. Because the Atto3 can ‘only’ fast charge at 88 kiloWatts it does take a while to charge the car all over again. So I do that at 40-50% remaining charge. And then 15 minutes is enough to be back at 90-95%. Then you may have to stop more along the way but I don’t mind that for 15 minutes. You drive with the Atto 3 from 100% to 50% about 210 kilometers. So stopping at about 200 km after 2 hours of driving so suits me very well.
And then you come to the real difference between fossil driving or electric: Everything you do costs electricity, and with an EV, so does range. Headwind: 10% less range. Average consumption at 90 km per hour is about 14 kW for 100 km, so a full tank of 60 kWh will get you over 400 km, even 420 km WLTP. At least, in summer at 90-95 km/h on a flat road without storm, without headwind and without too much load.
I have tried a number of driving scenarios and my most notable one is on the A2 from Breukelen to Abcoude at 130 km/h with no headwind or storm, though at night with lights on. Average consumption: 35 kW for 100 km. So if you would drive 130 km/h for a longer period of time, you would get barely 250 kilometers and then the battery would be empty.
Suddenly I understood why the Atto 3, but now most new EVs are capped at 160 km/h….
If you drive mostly on county roads and/or urban and you can control your foot a bit with acceleration, you can easily stay under 15 kW/100km, I sometimes even manage to average 14 kW/100km.
Of course, it still remains a small/medium SUV and the streamline also affects consumption….
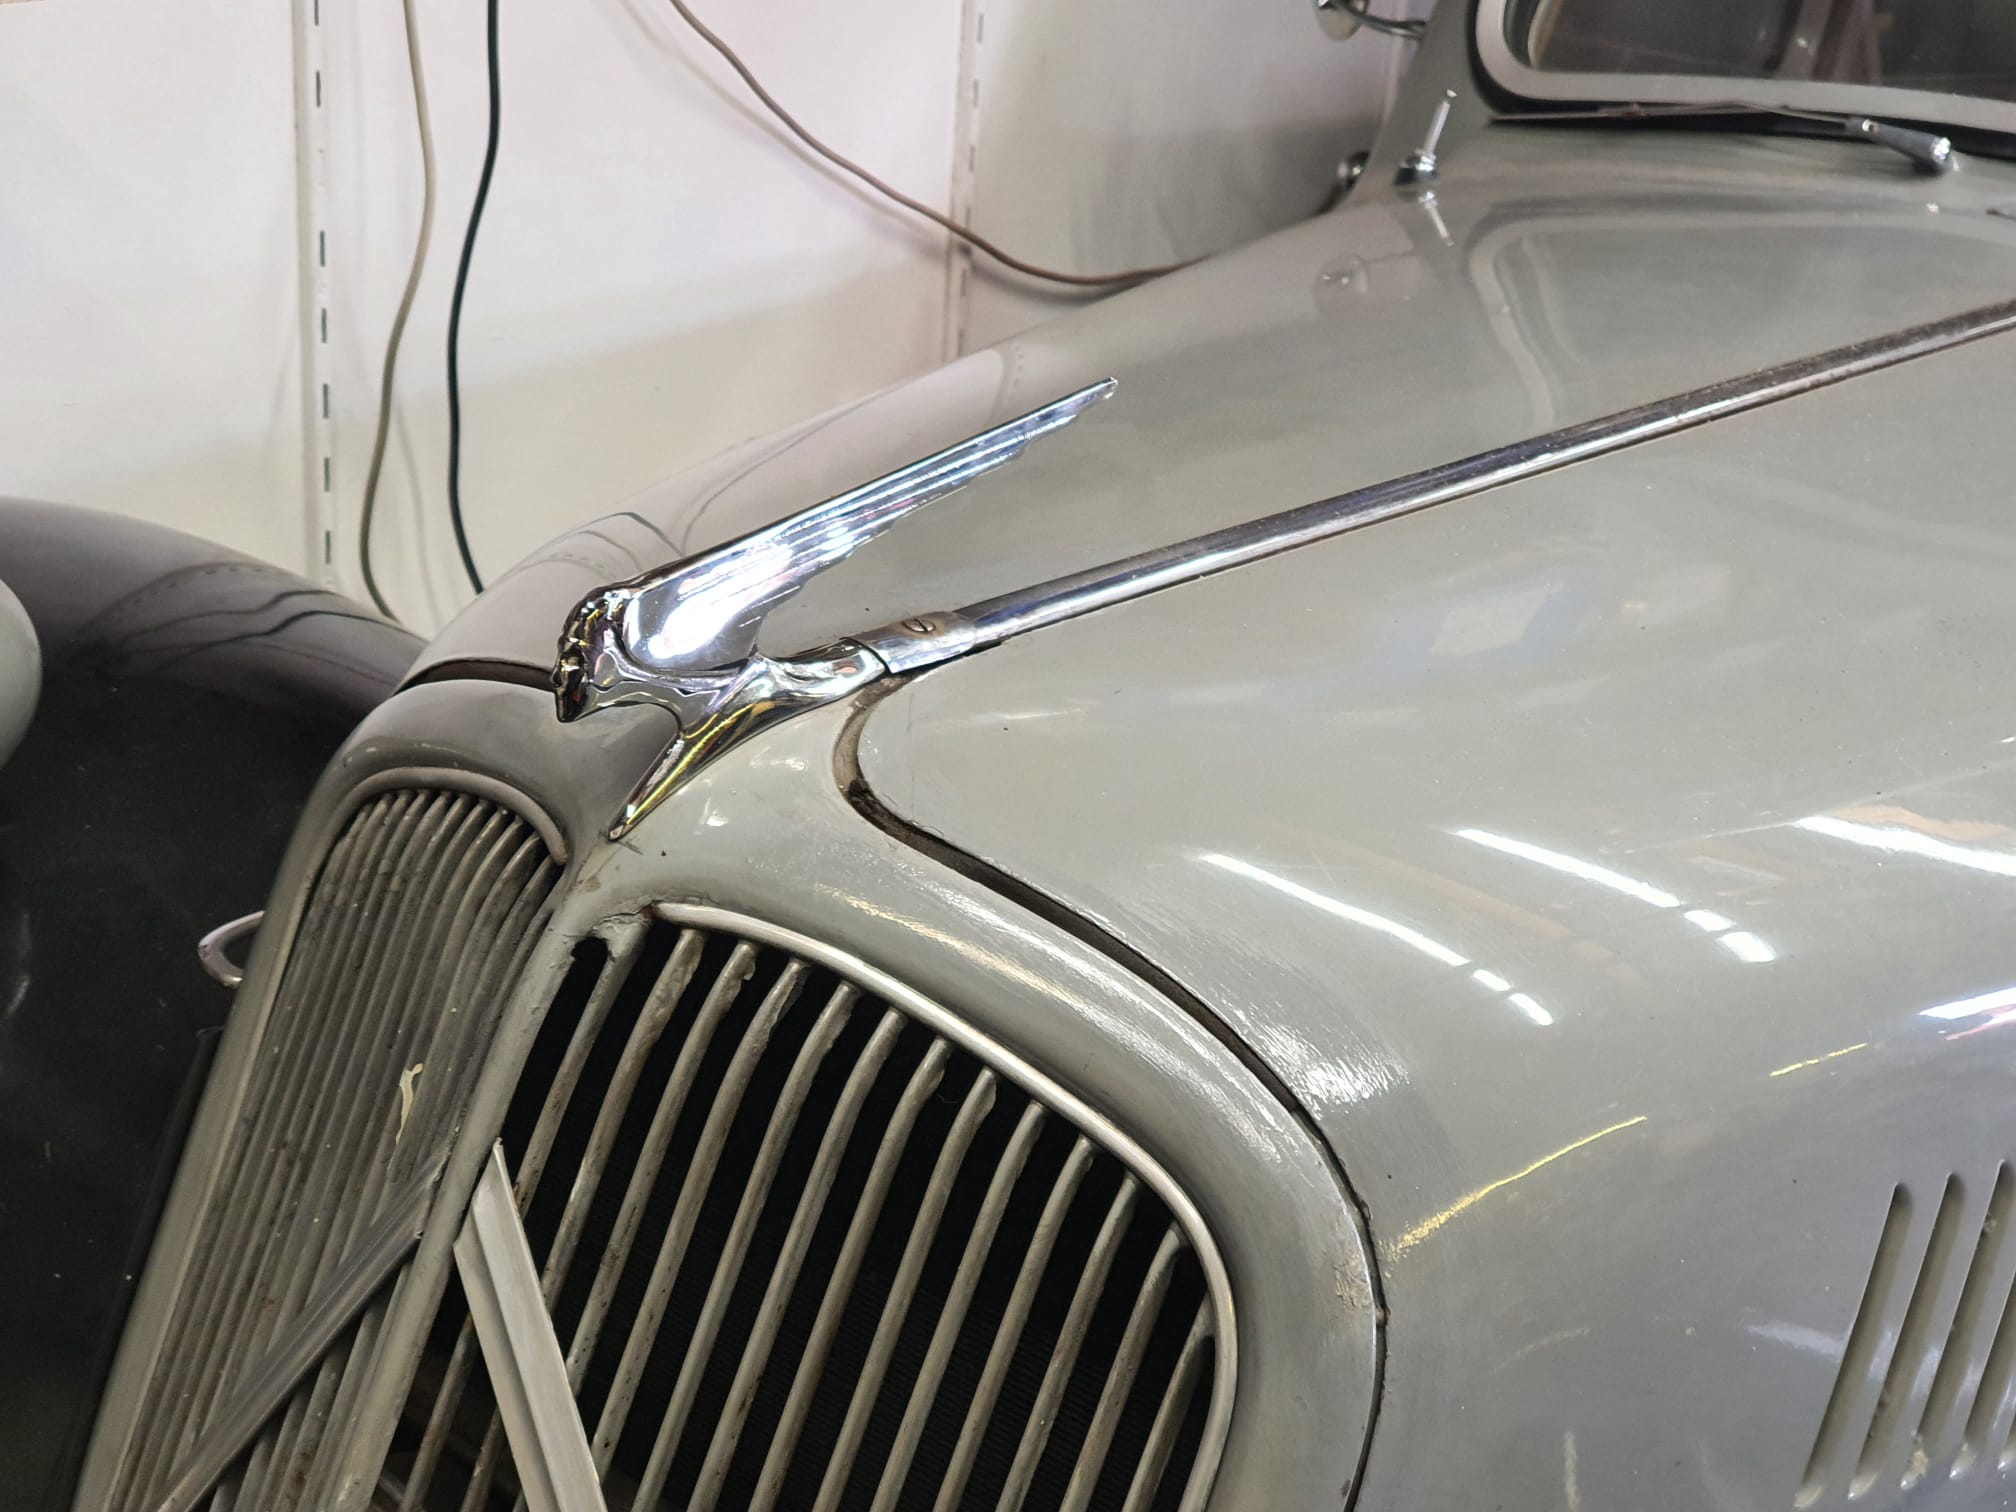
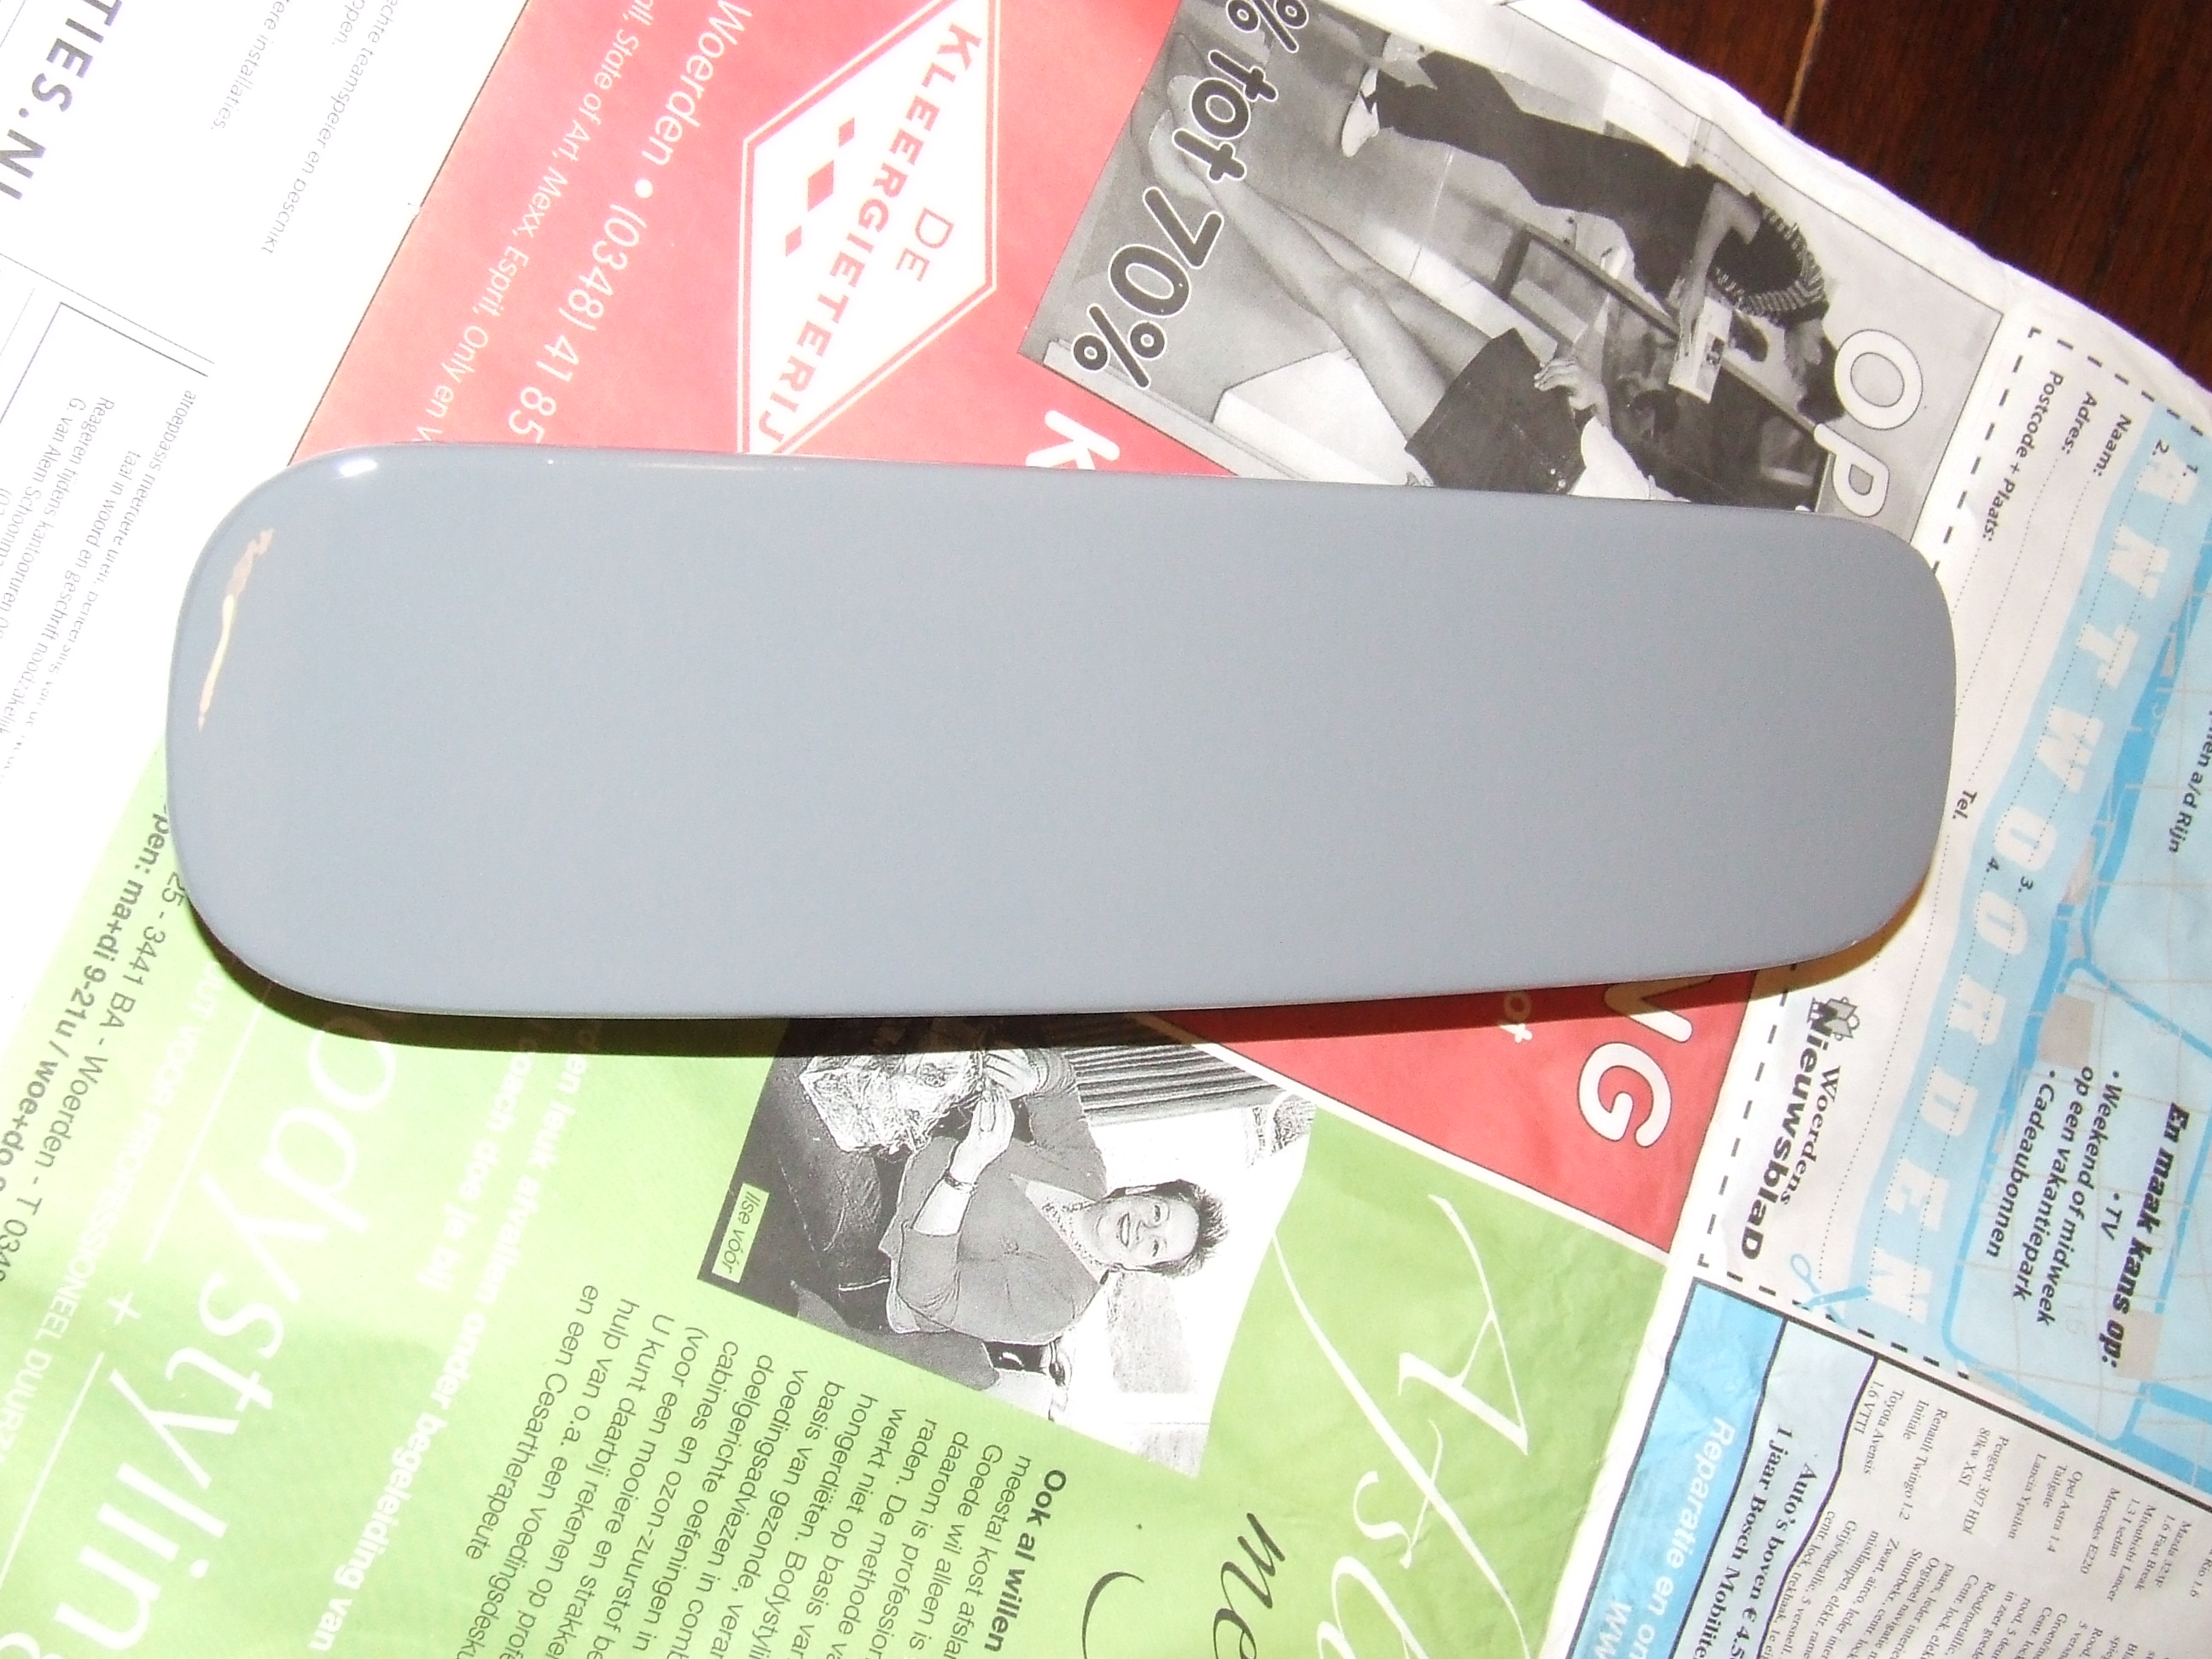
Now and then I check my preferred suppliers for the availability of a so-called ornement de capot, in French.
This is a hood mascotte, originally fabricated by ROBI for a.o. Traction Avant 11BN and BL.
To my surprise, Franssen in Belgium had a new stock of these for my BN and I ordered me one, it got delivered very fast and today I installed it.
It does only fit in 1 existing hole, so I needed to drill the front hole new.
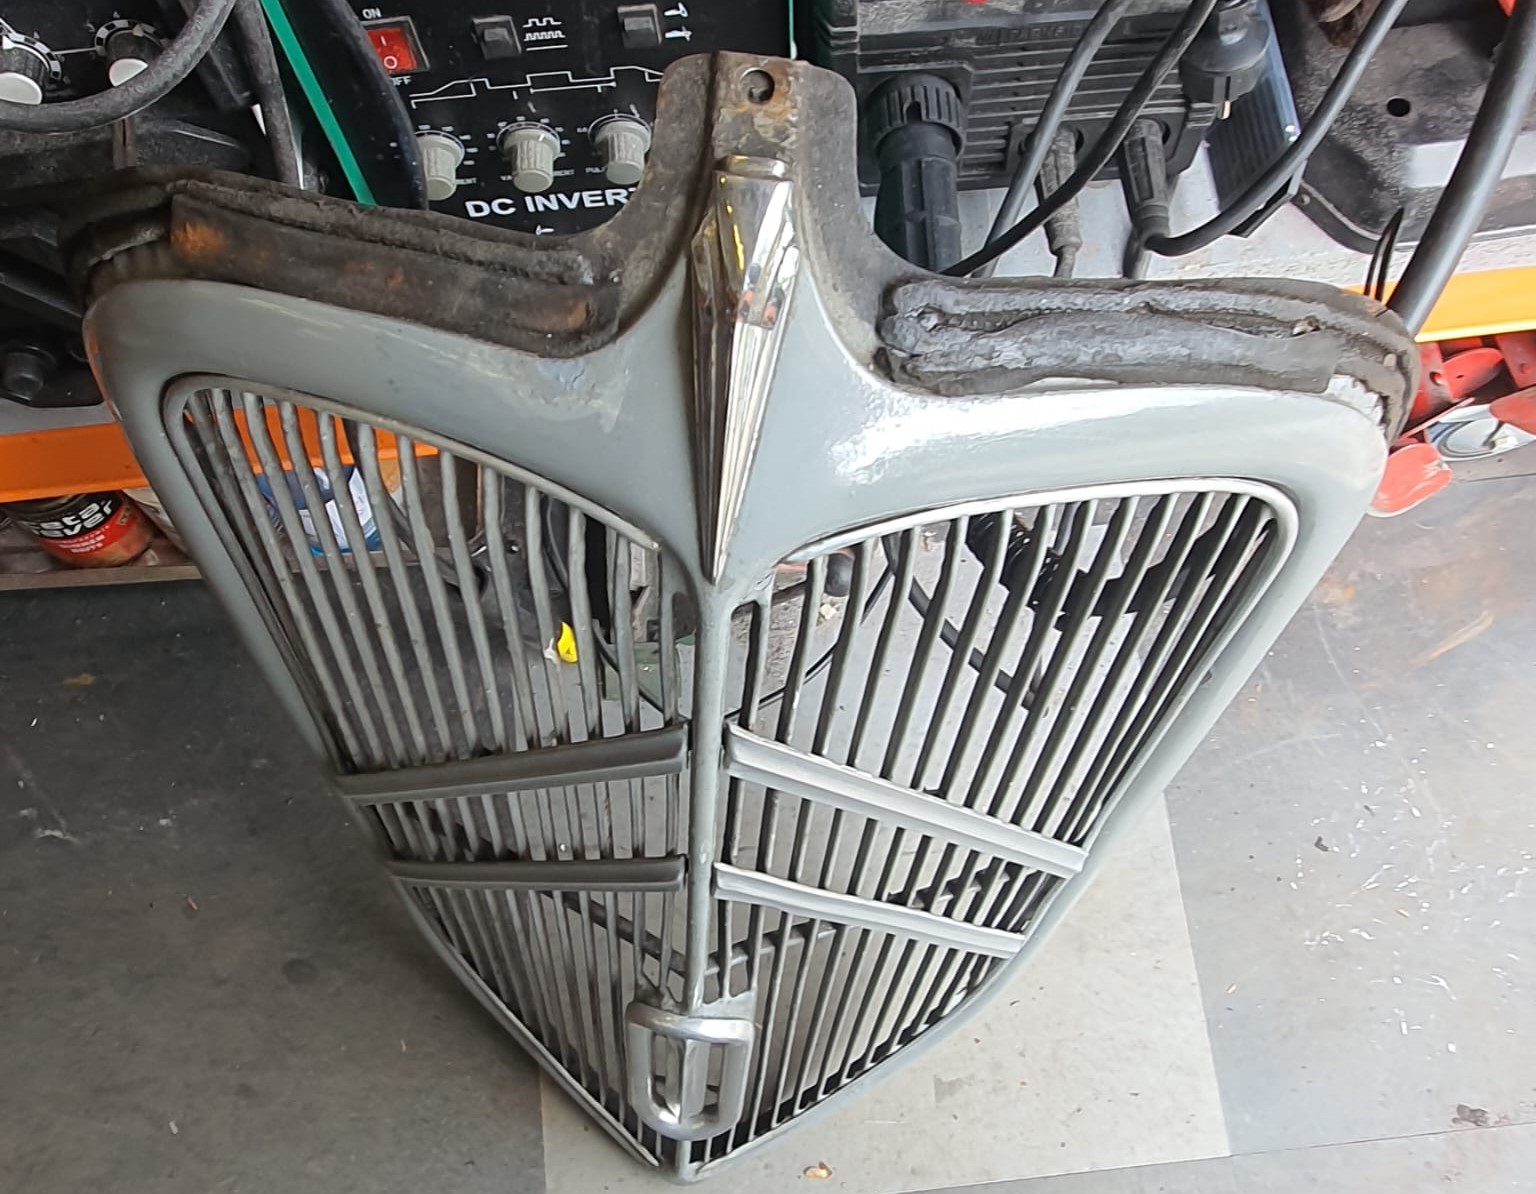
The radiator grill needs to be removed to do this.
I am very pleased with it!
It feel it matches my Traction with its repaired paint and original patina overall looks very well.
Whenever I drive off something higher than 4 inches,, I crash into the ledge that I drive off with the frame of the bike. Also, When driving on- and off the small typically Dutch roundabouts I often crashj both the Left- and the Right hand sided floorboards and also the jiffy on the pavement.
Coming from my previous bikes (HD-FXRS and my last was a Buell Ulysses), I never experienced these problems with those older bikes.
Therefore, I decided to raise the Heritage a bit and see whether this solves my problems. If not, I’ll sell the bike and buy me something else.
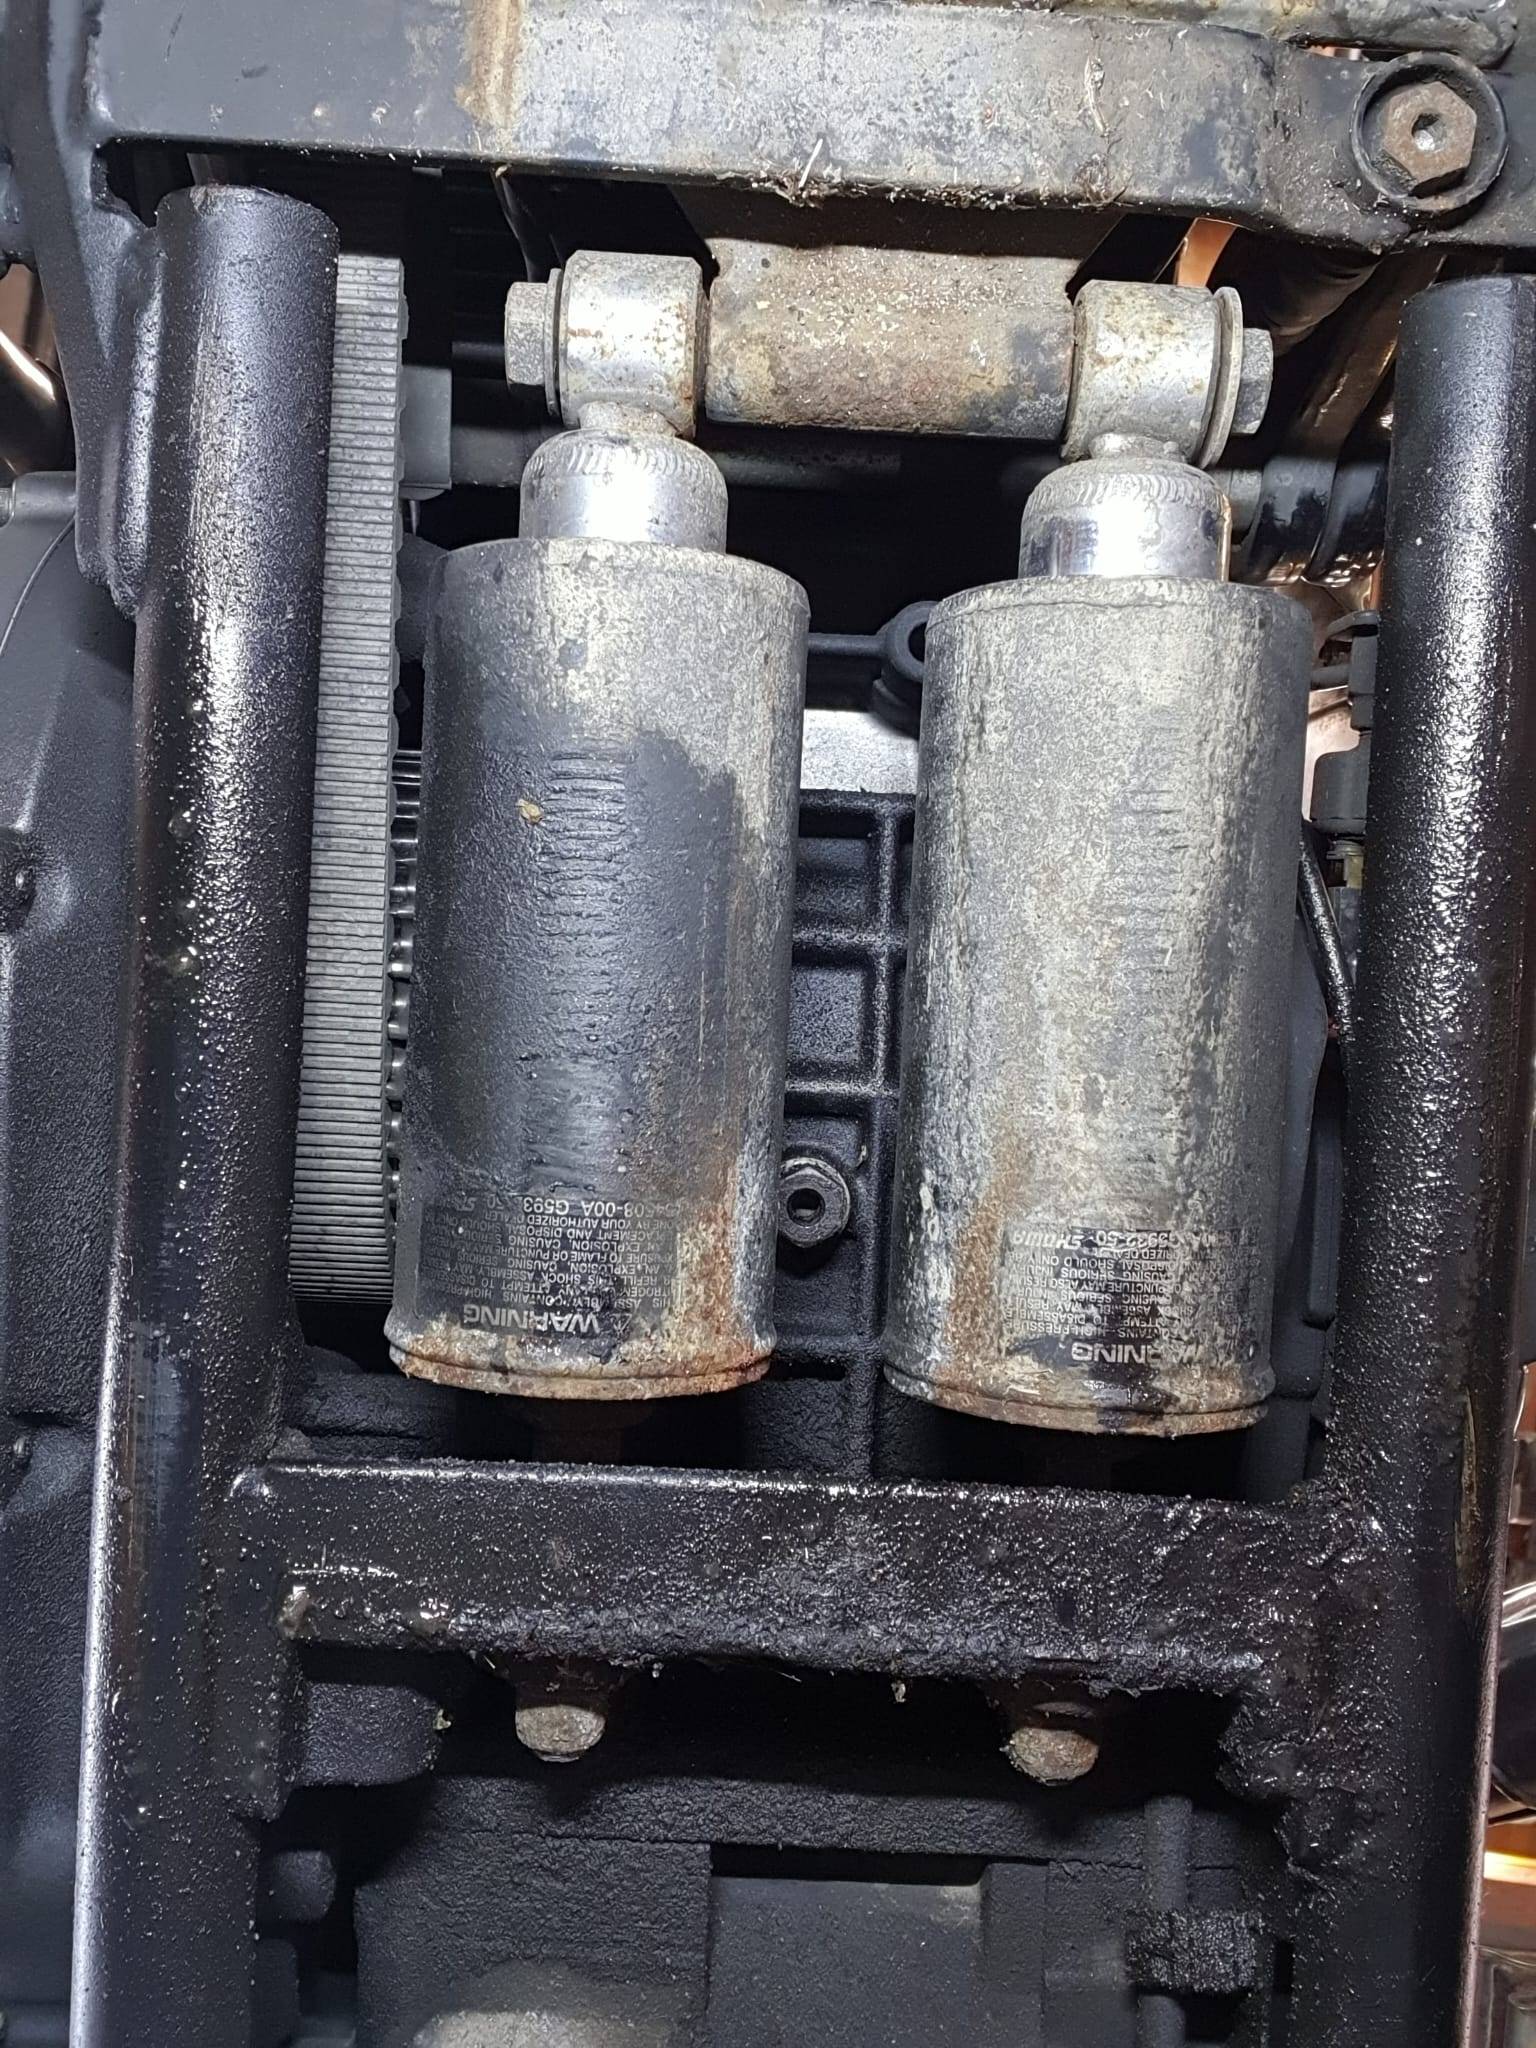
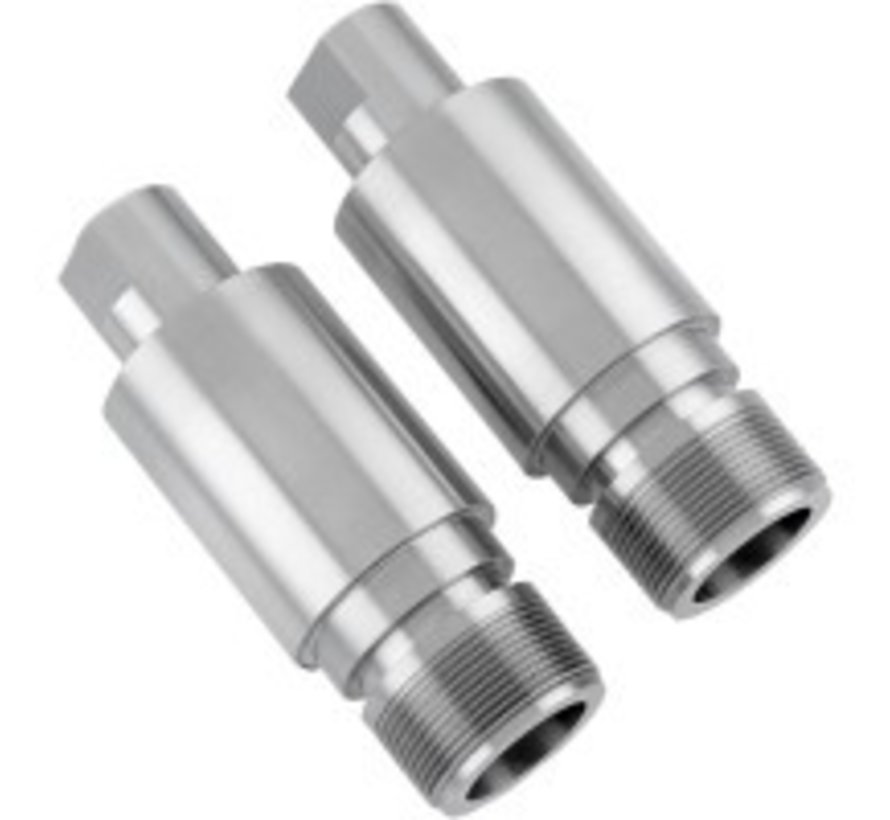
For the rear opf the bike I bought me a pair of adjustable “Ultima softail 2000-UP 116=233” shocks that I hope can be adjusted to be a bit shorter than the standard shocks.
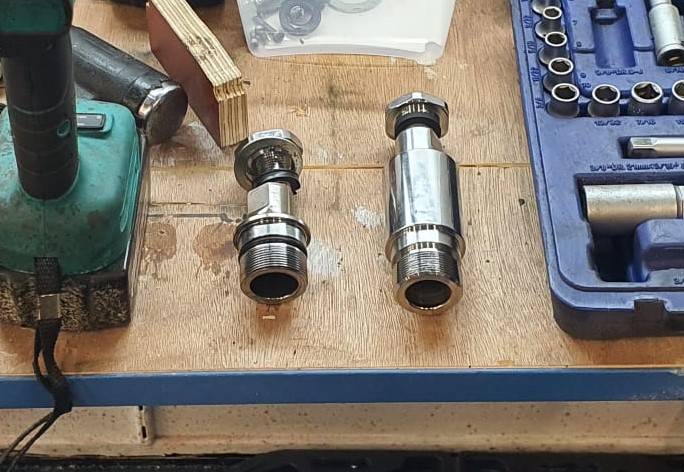
For the front, I bought me a set of Zodiac 2 inch 41mm front forks lengtheners. See the attached photo’s:
And suddenly the Traction Avant wouldn’t start.
It had been struggling a few times, as if the battery was dead but it was nicely full.
And suddenly just a click instead of a running starter motor.
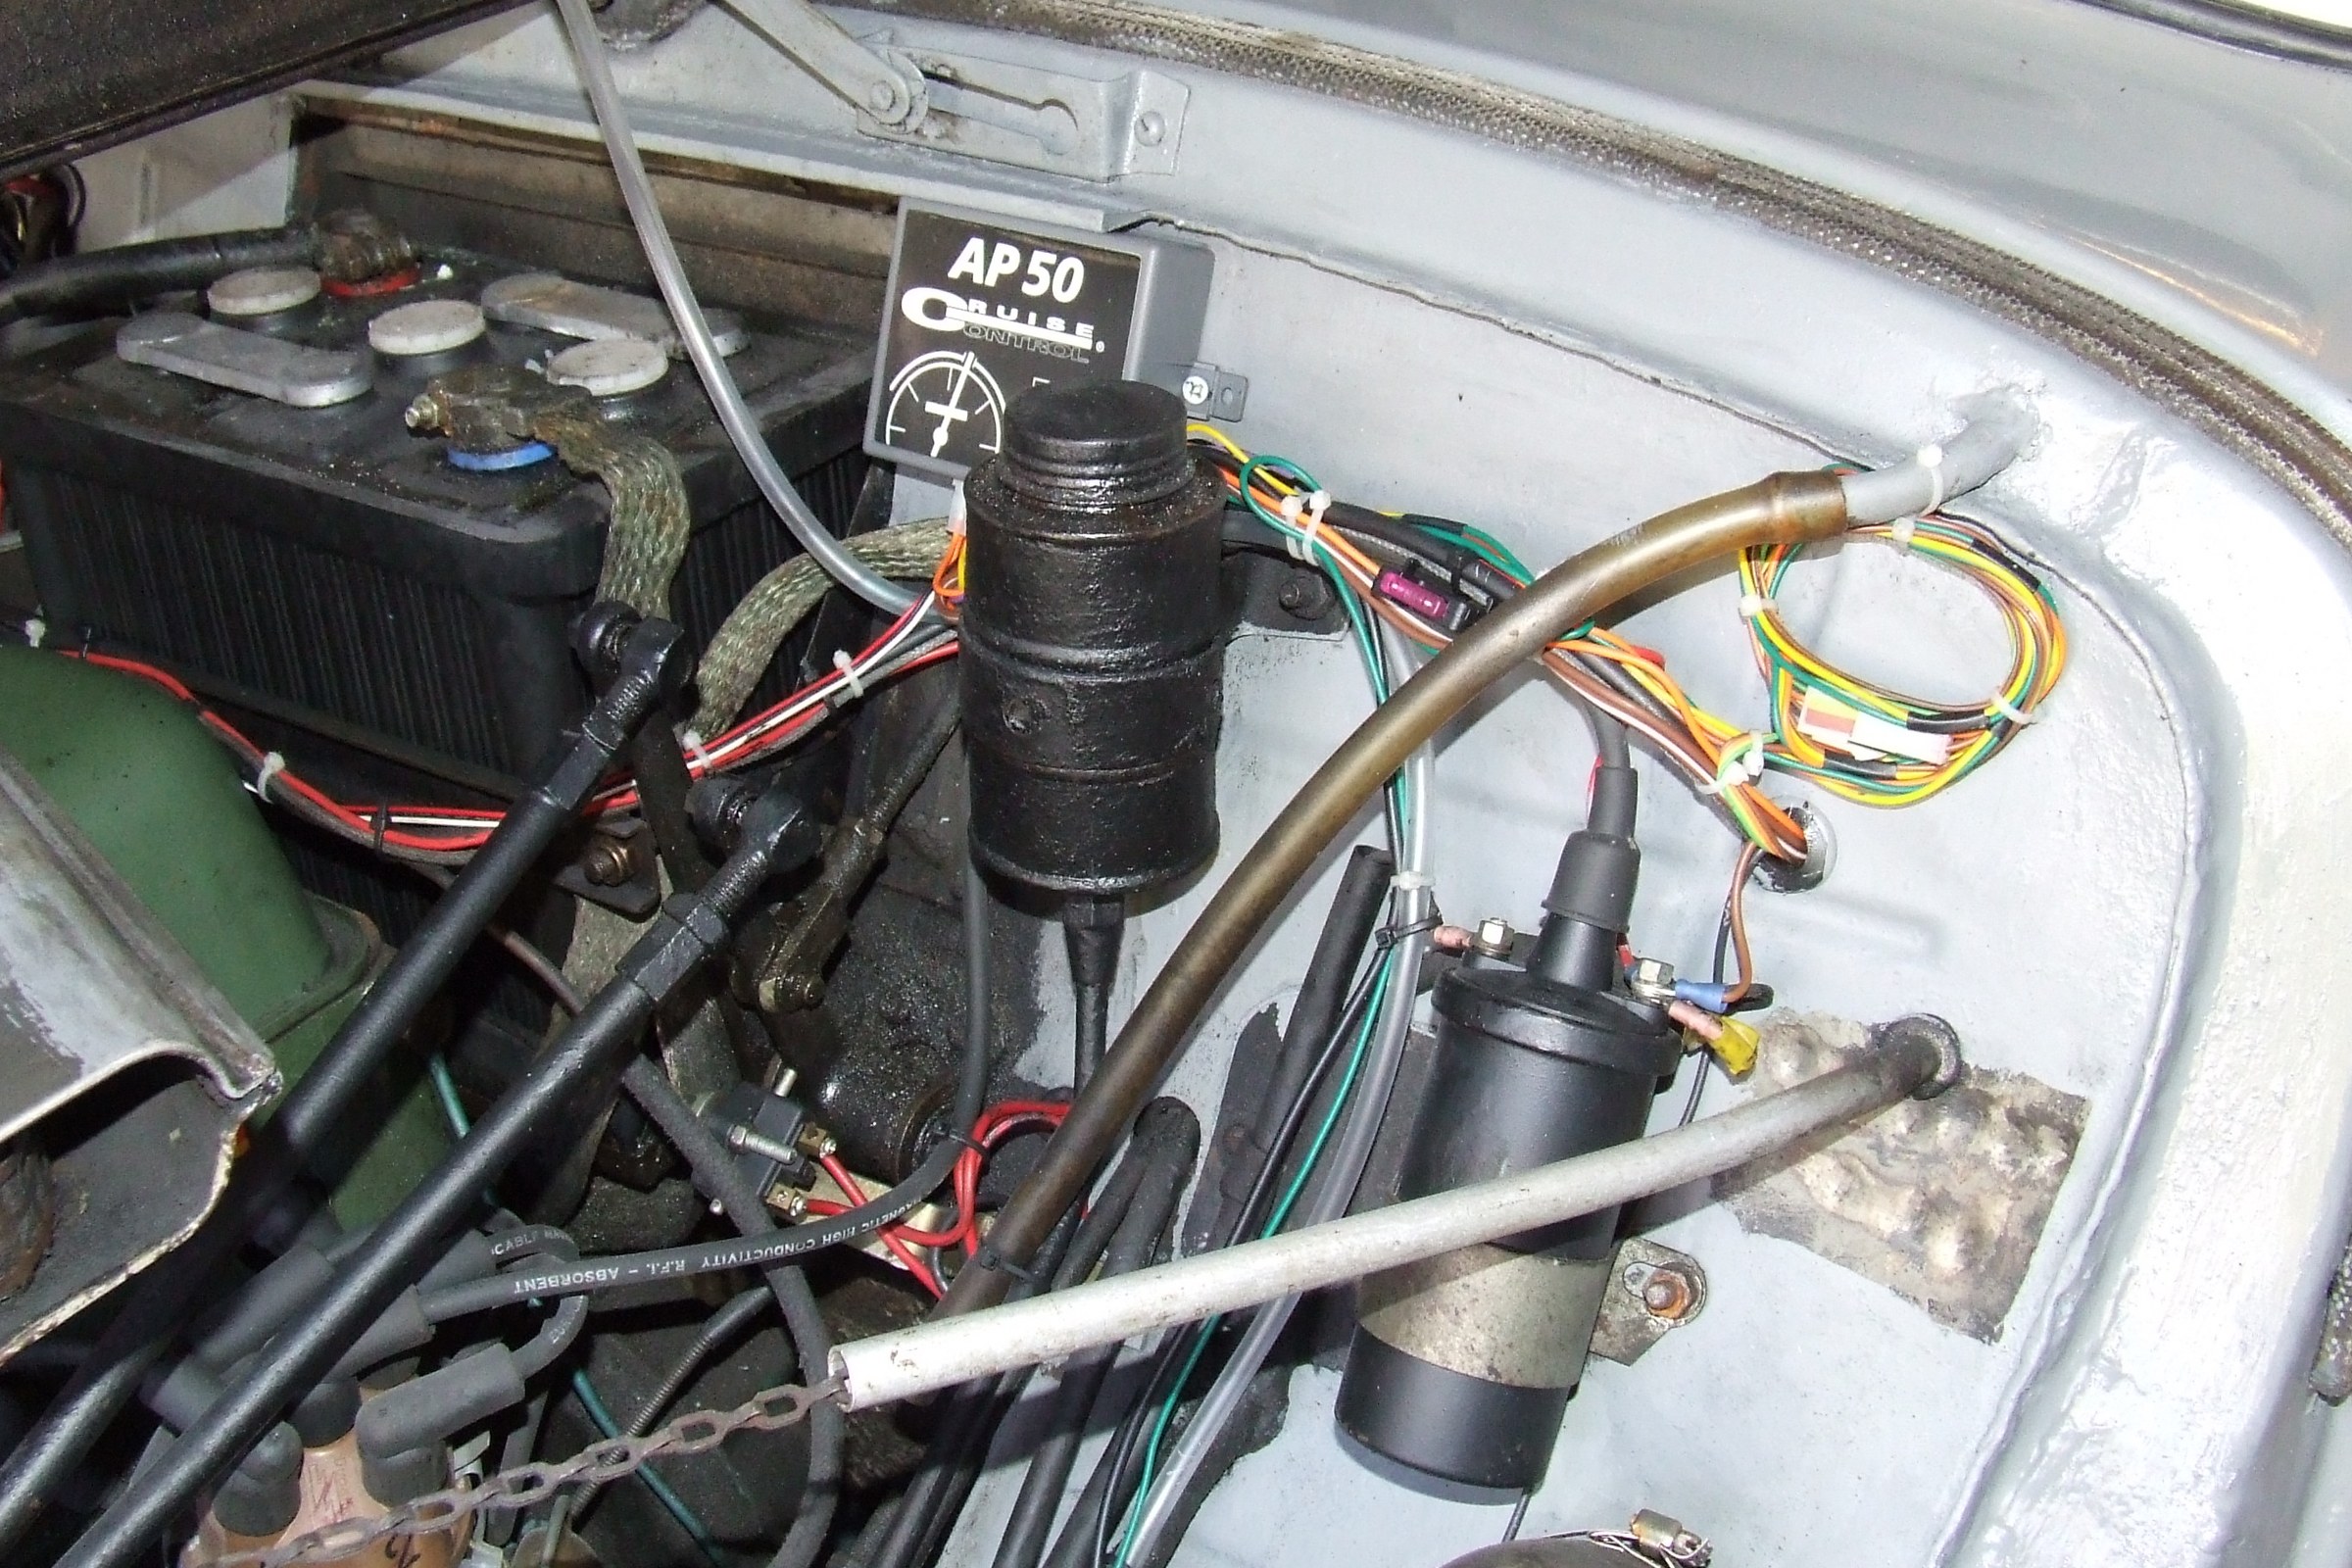
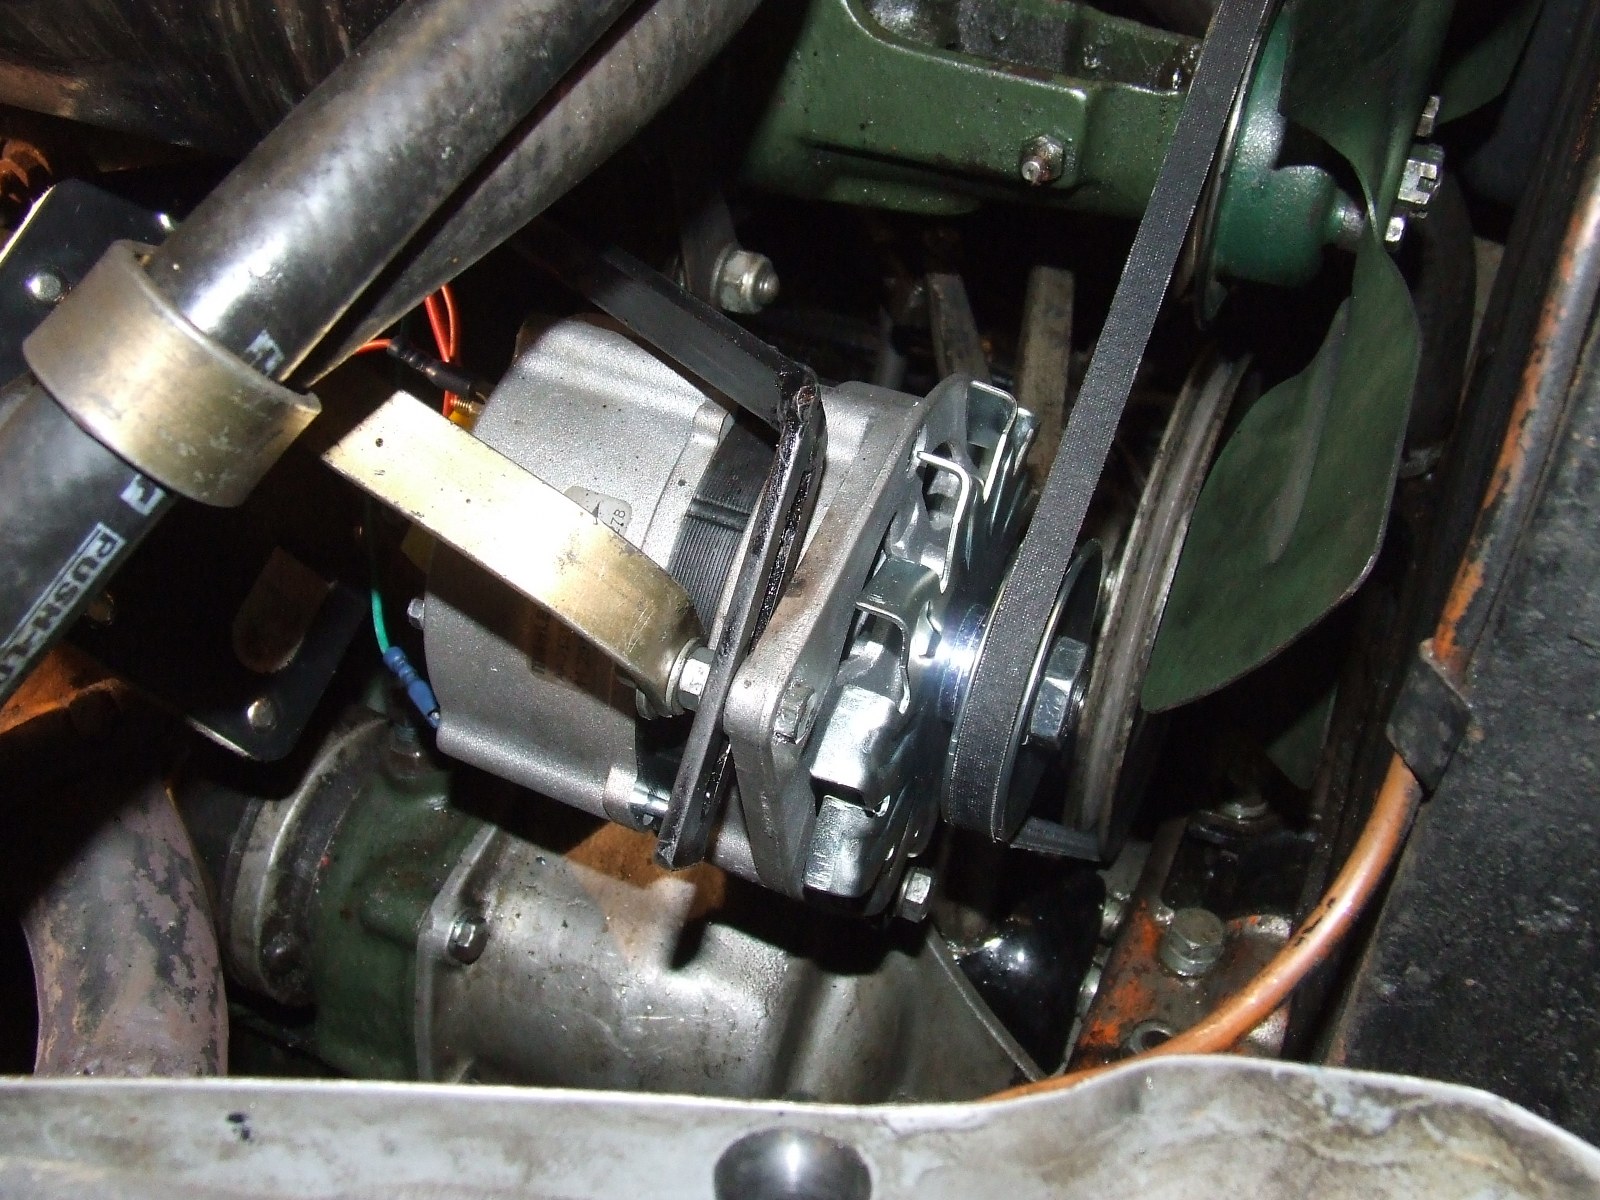
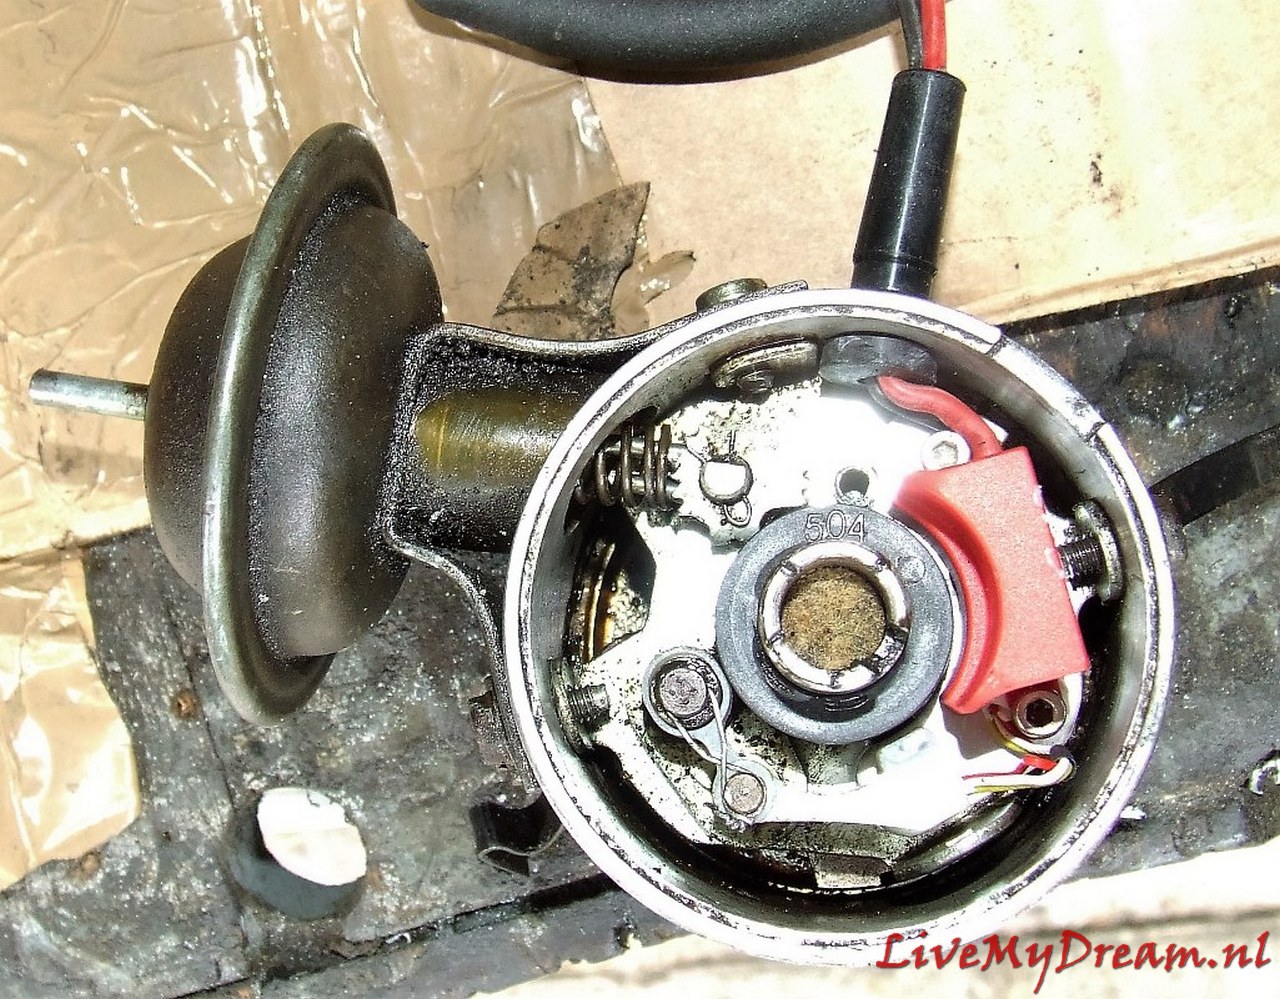
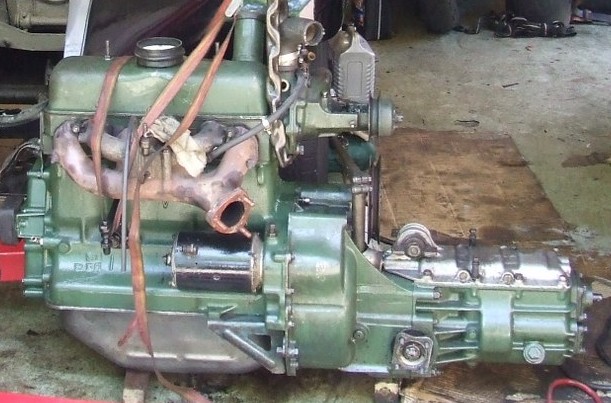
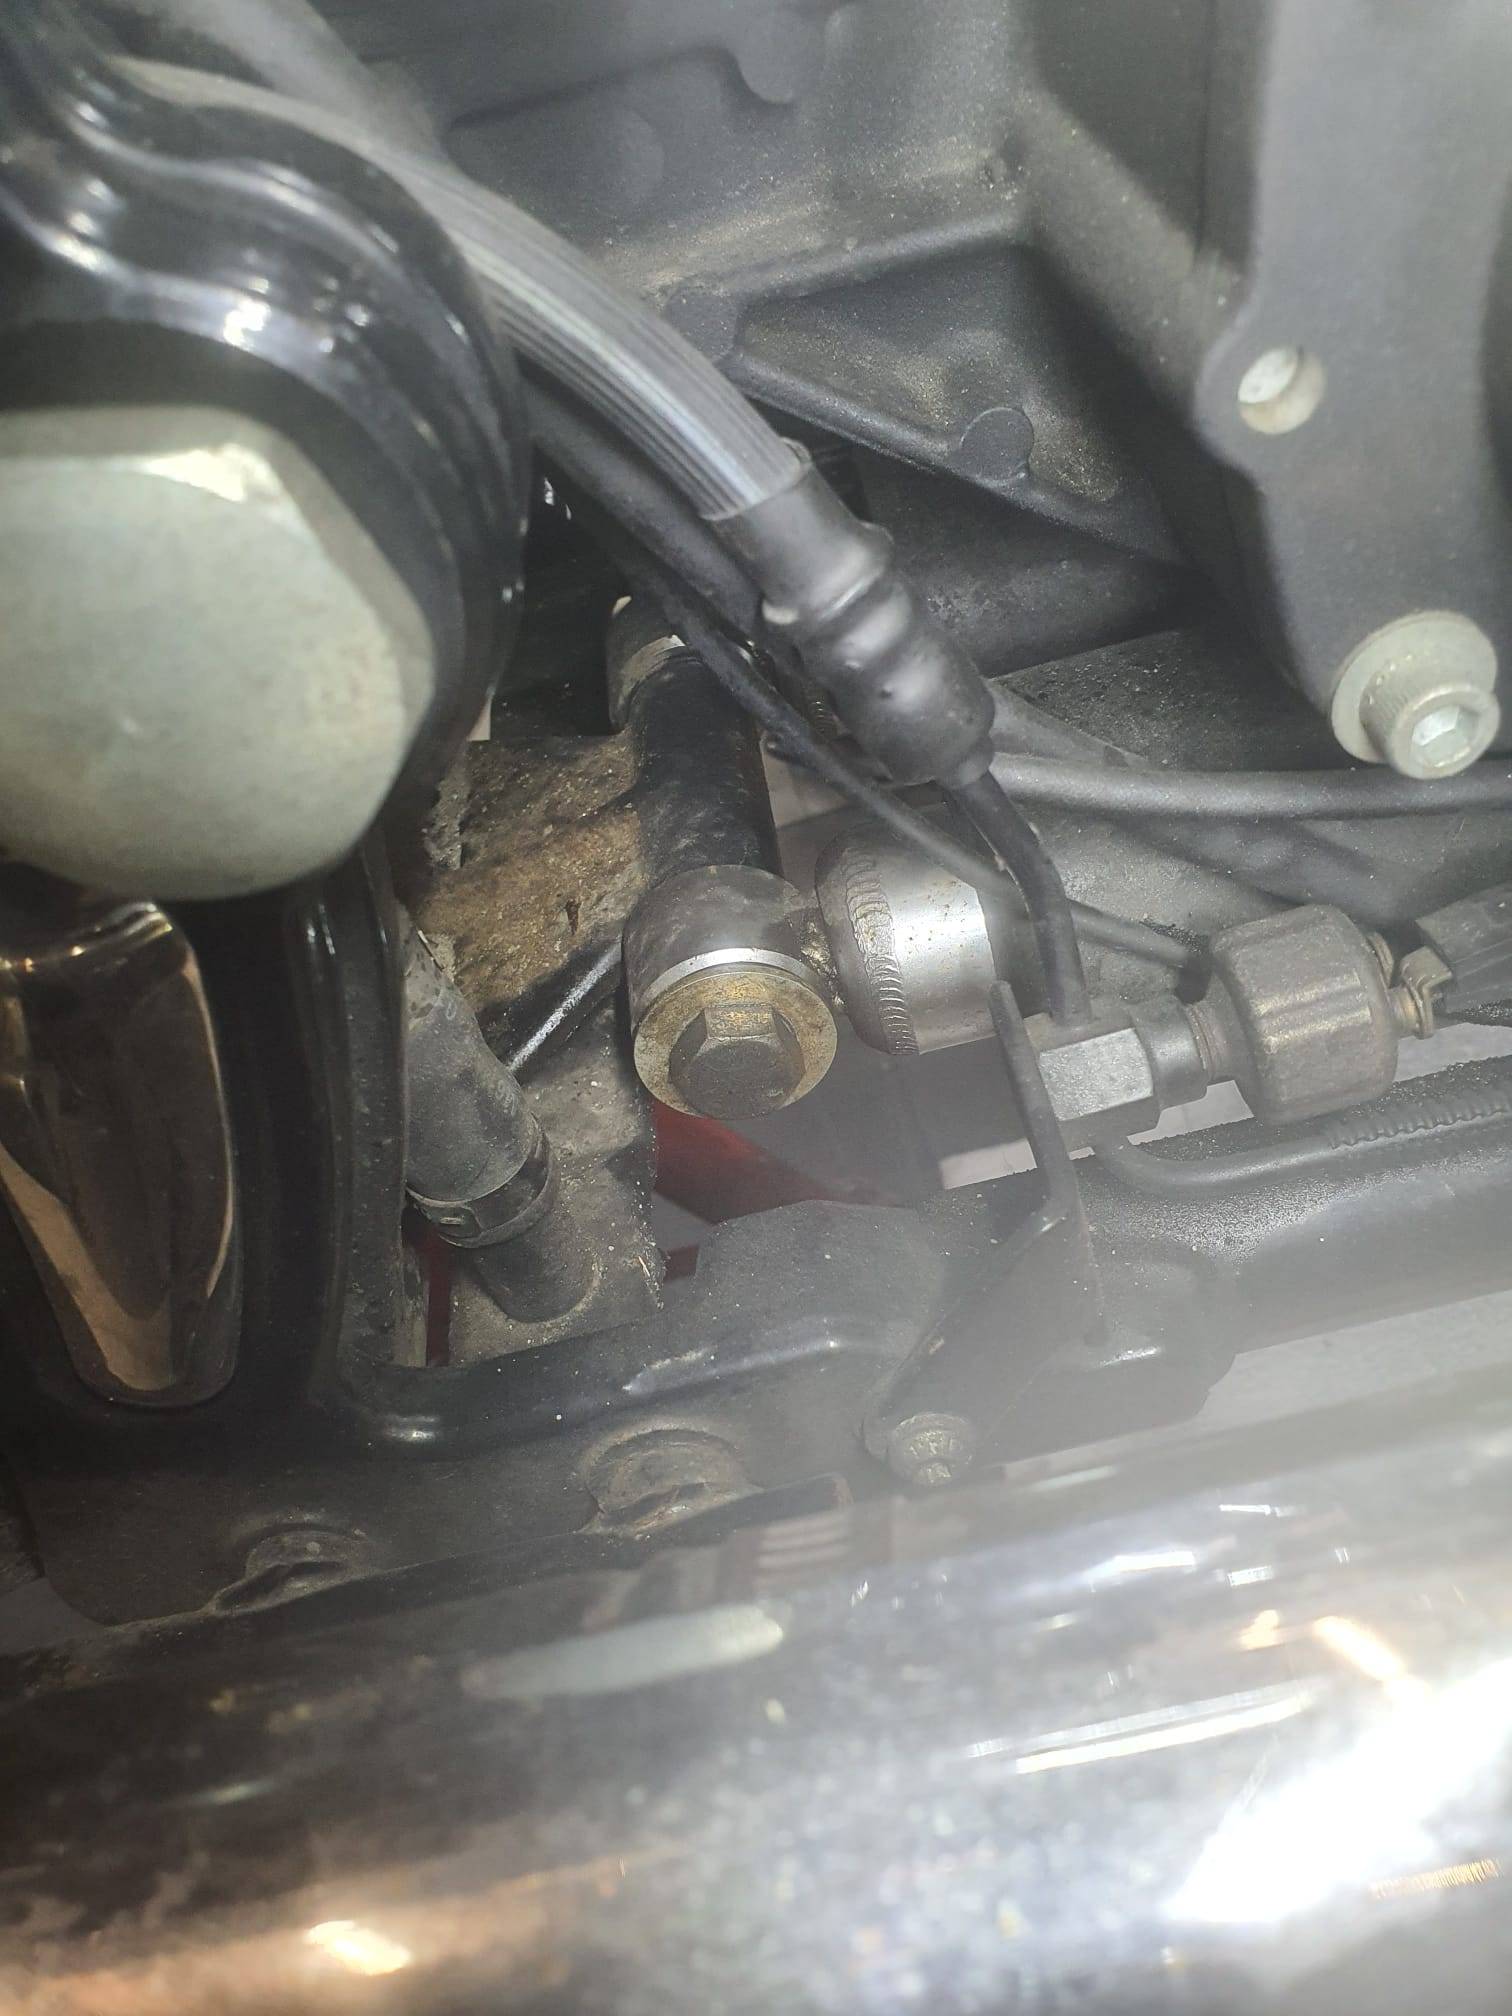
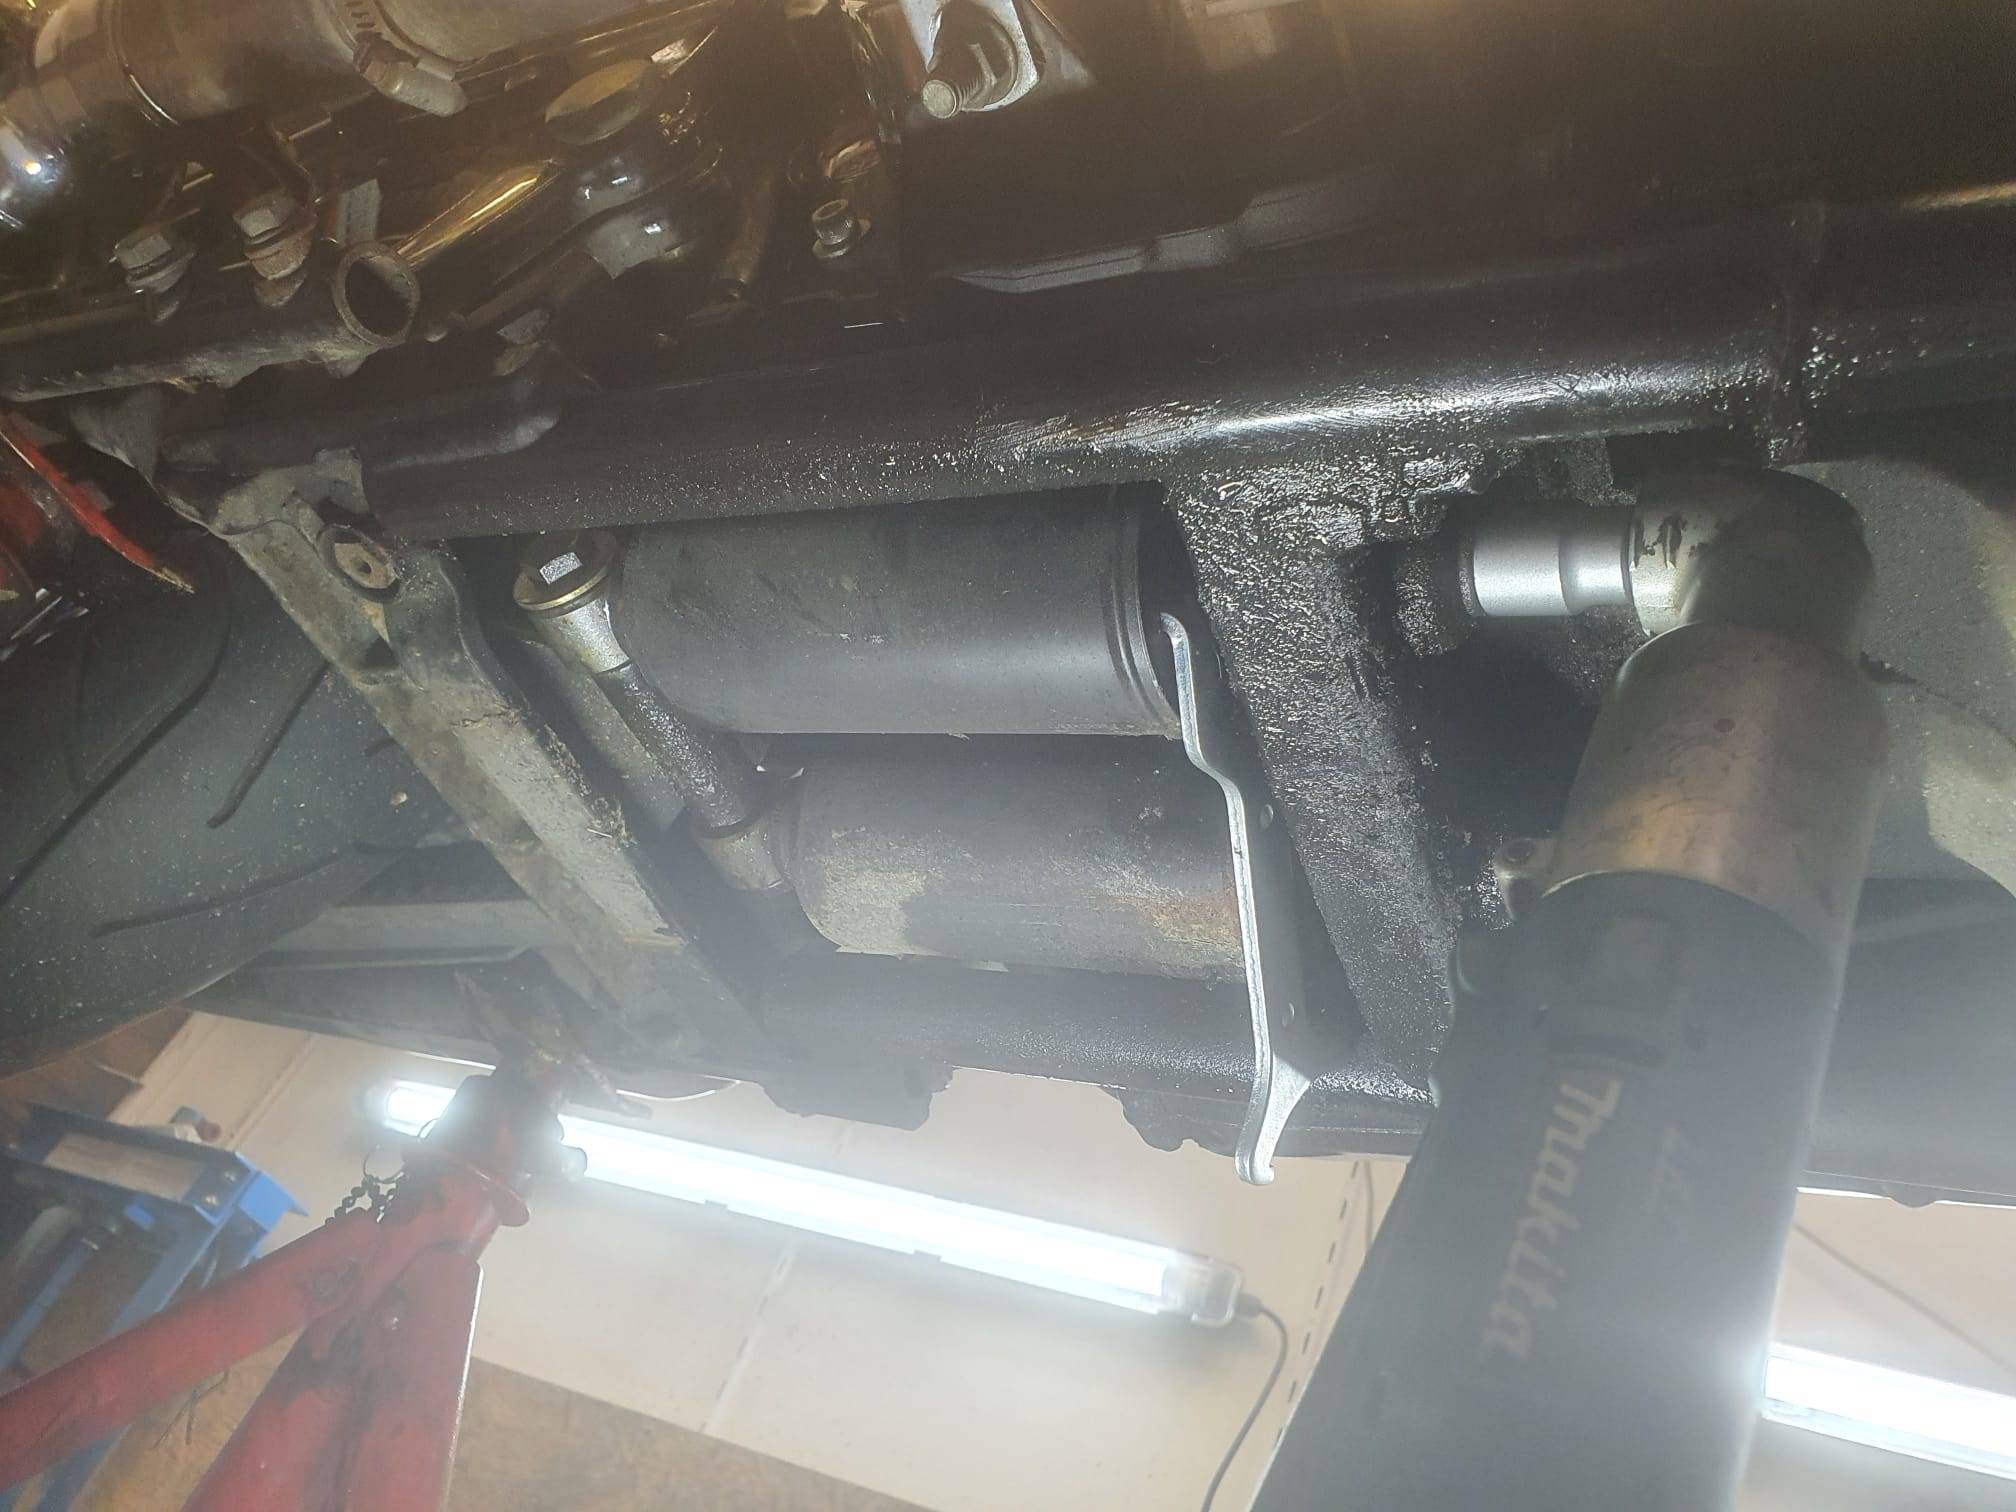
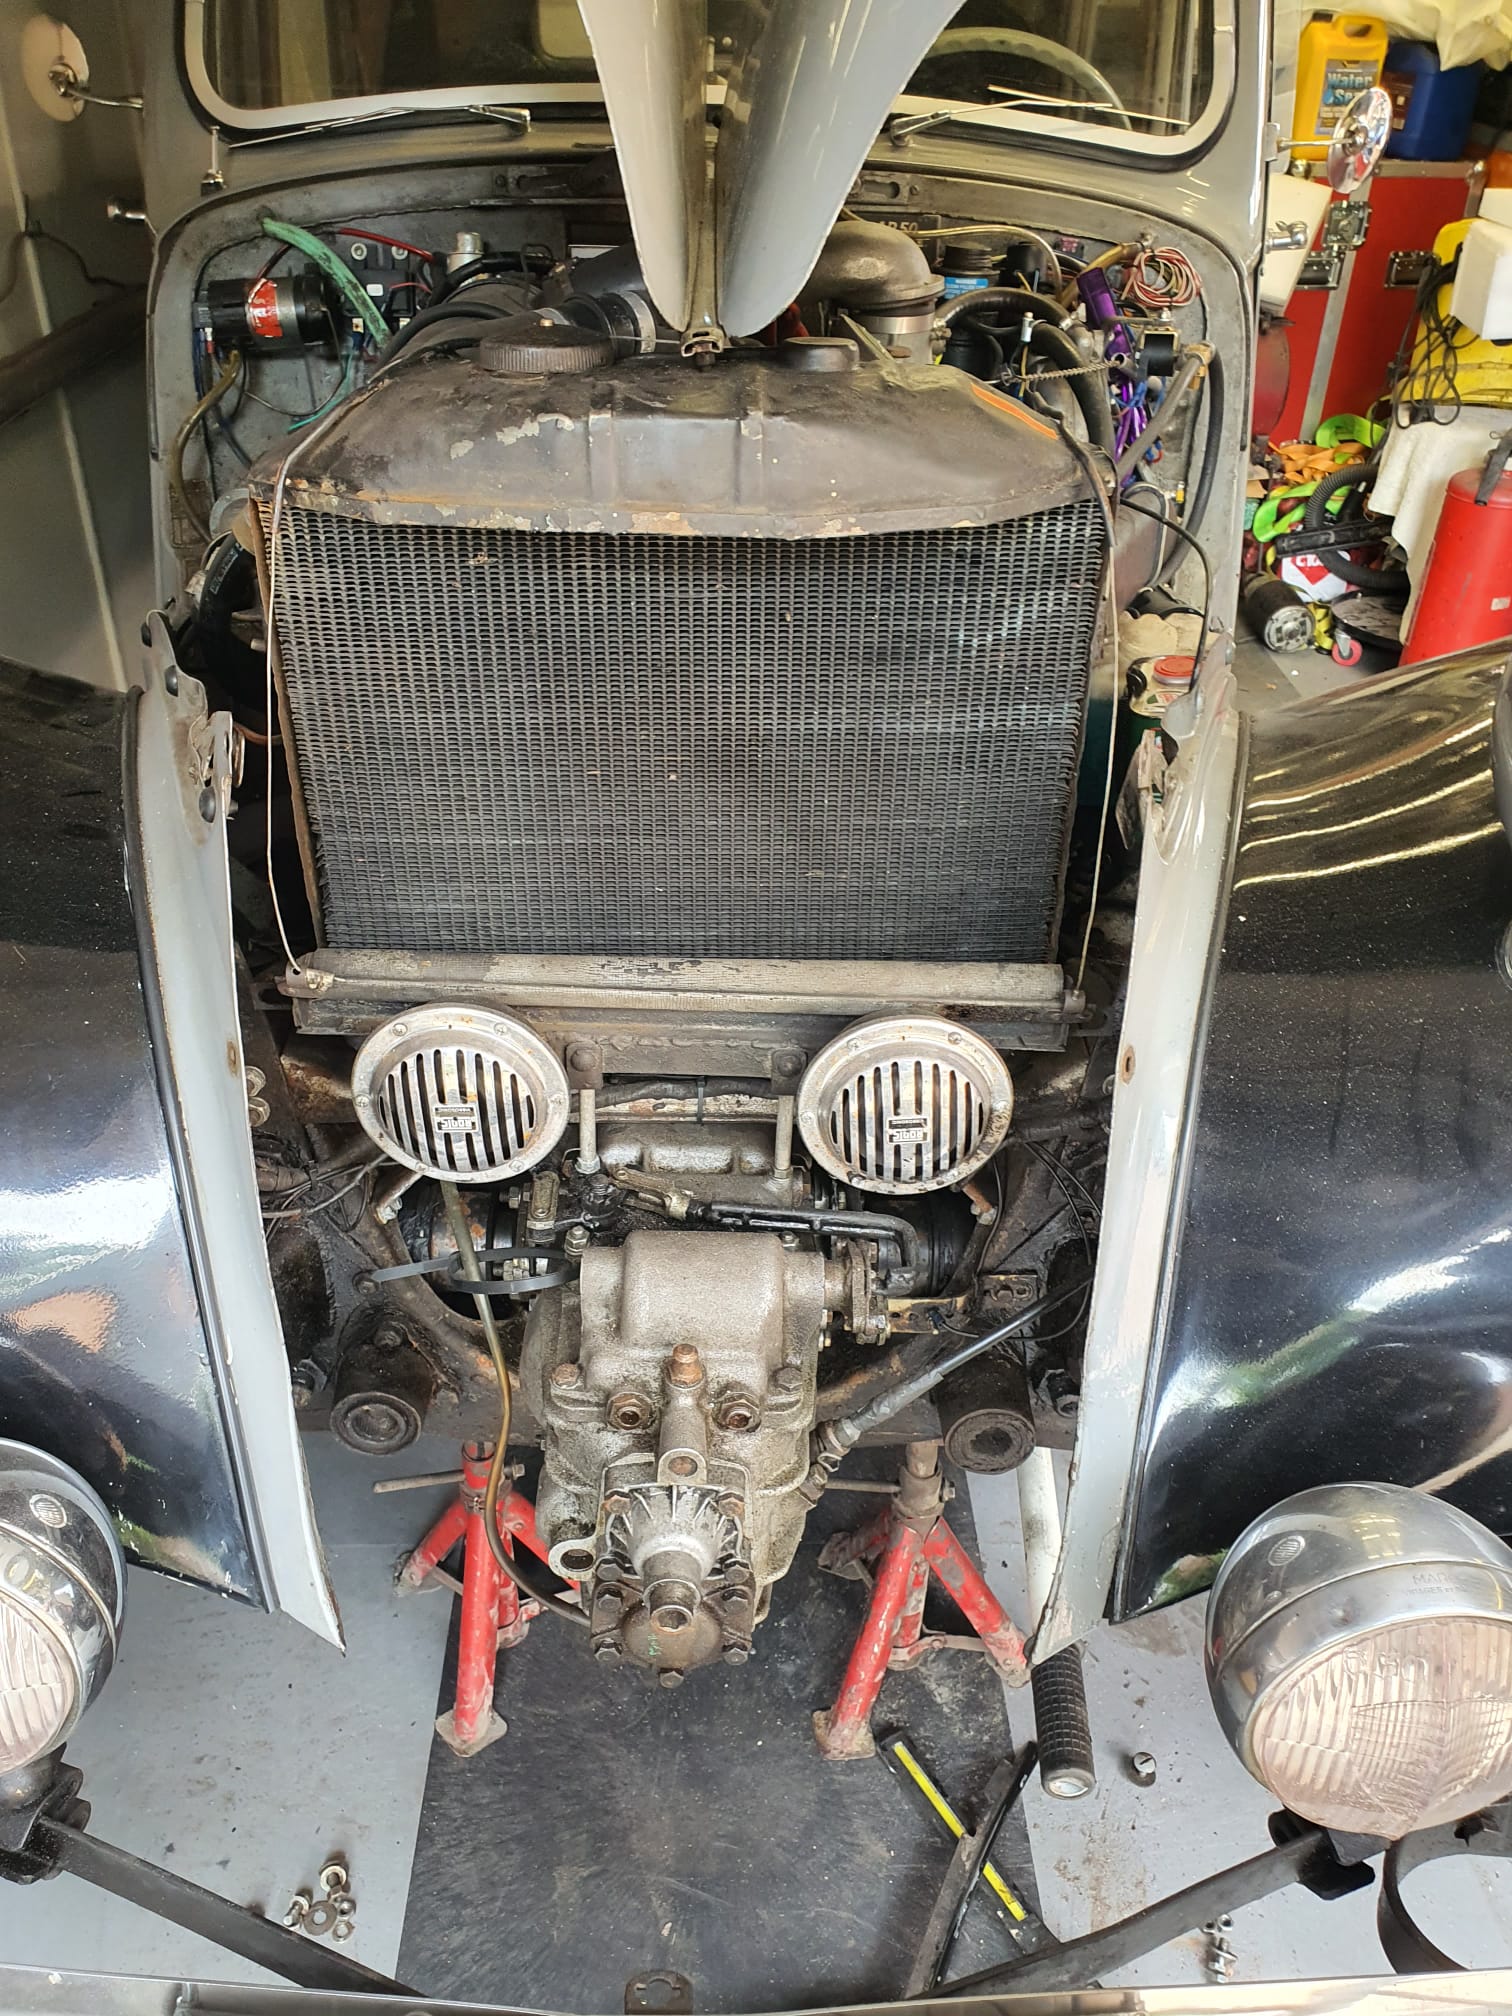
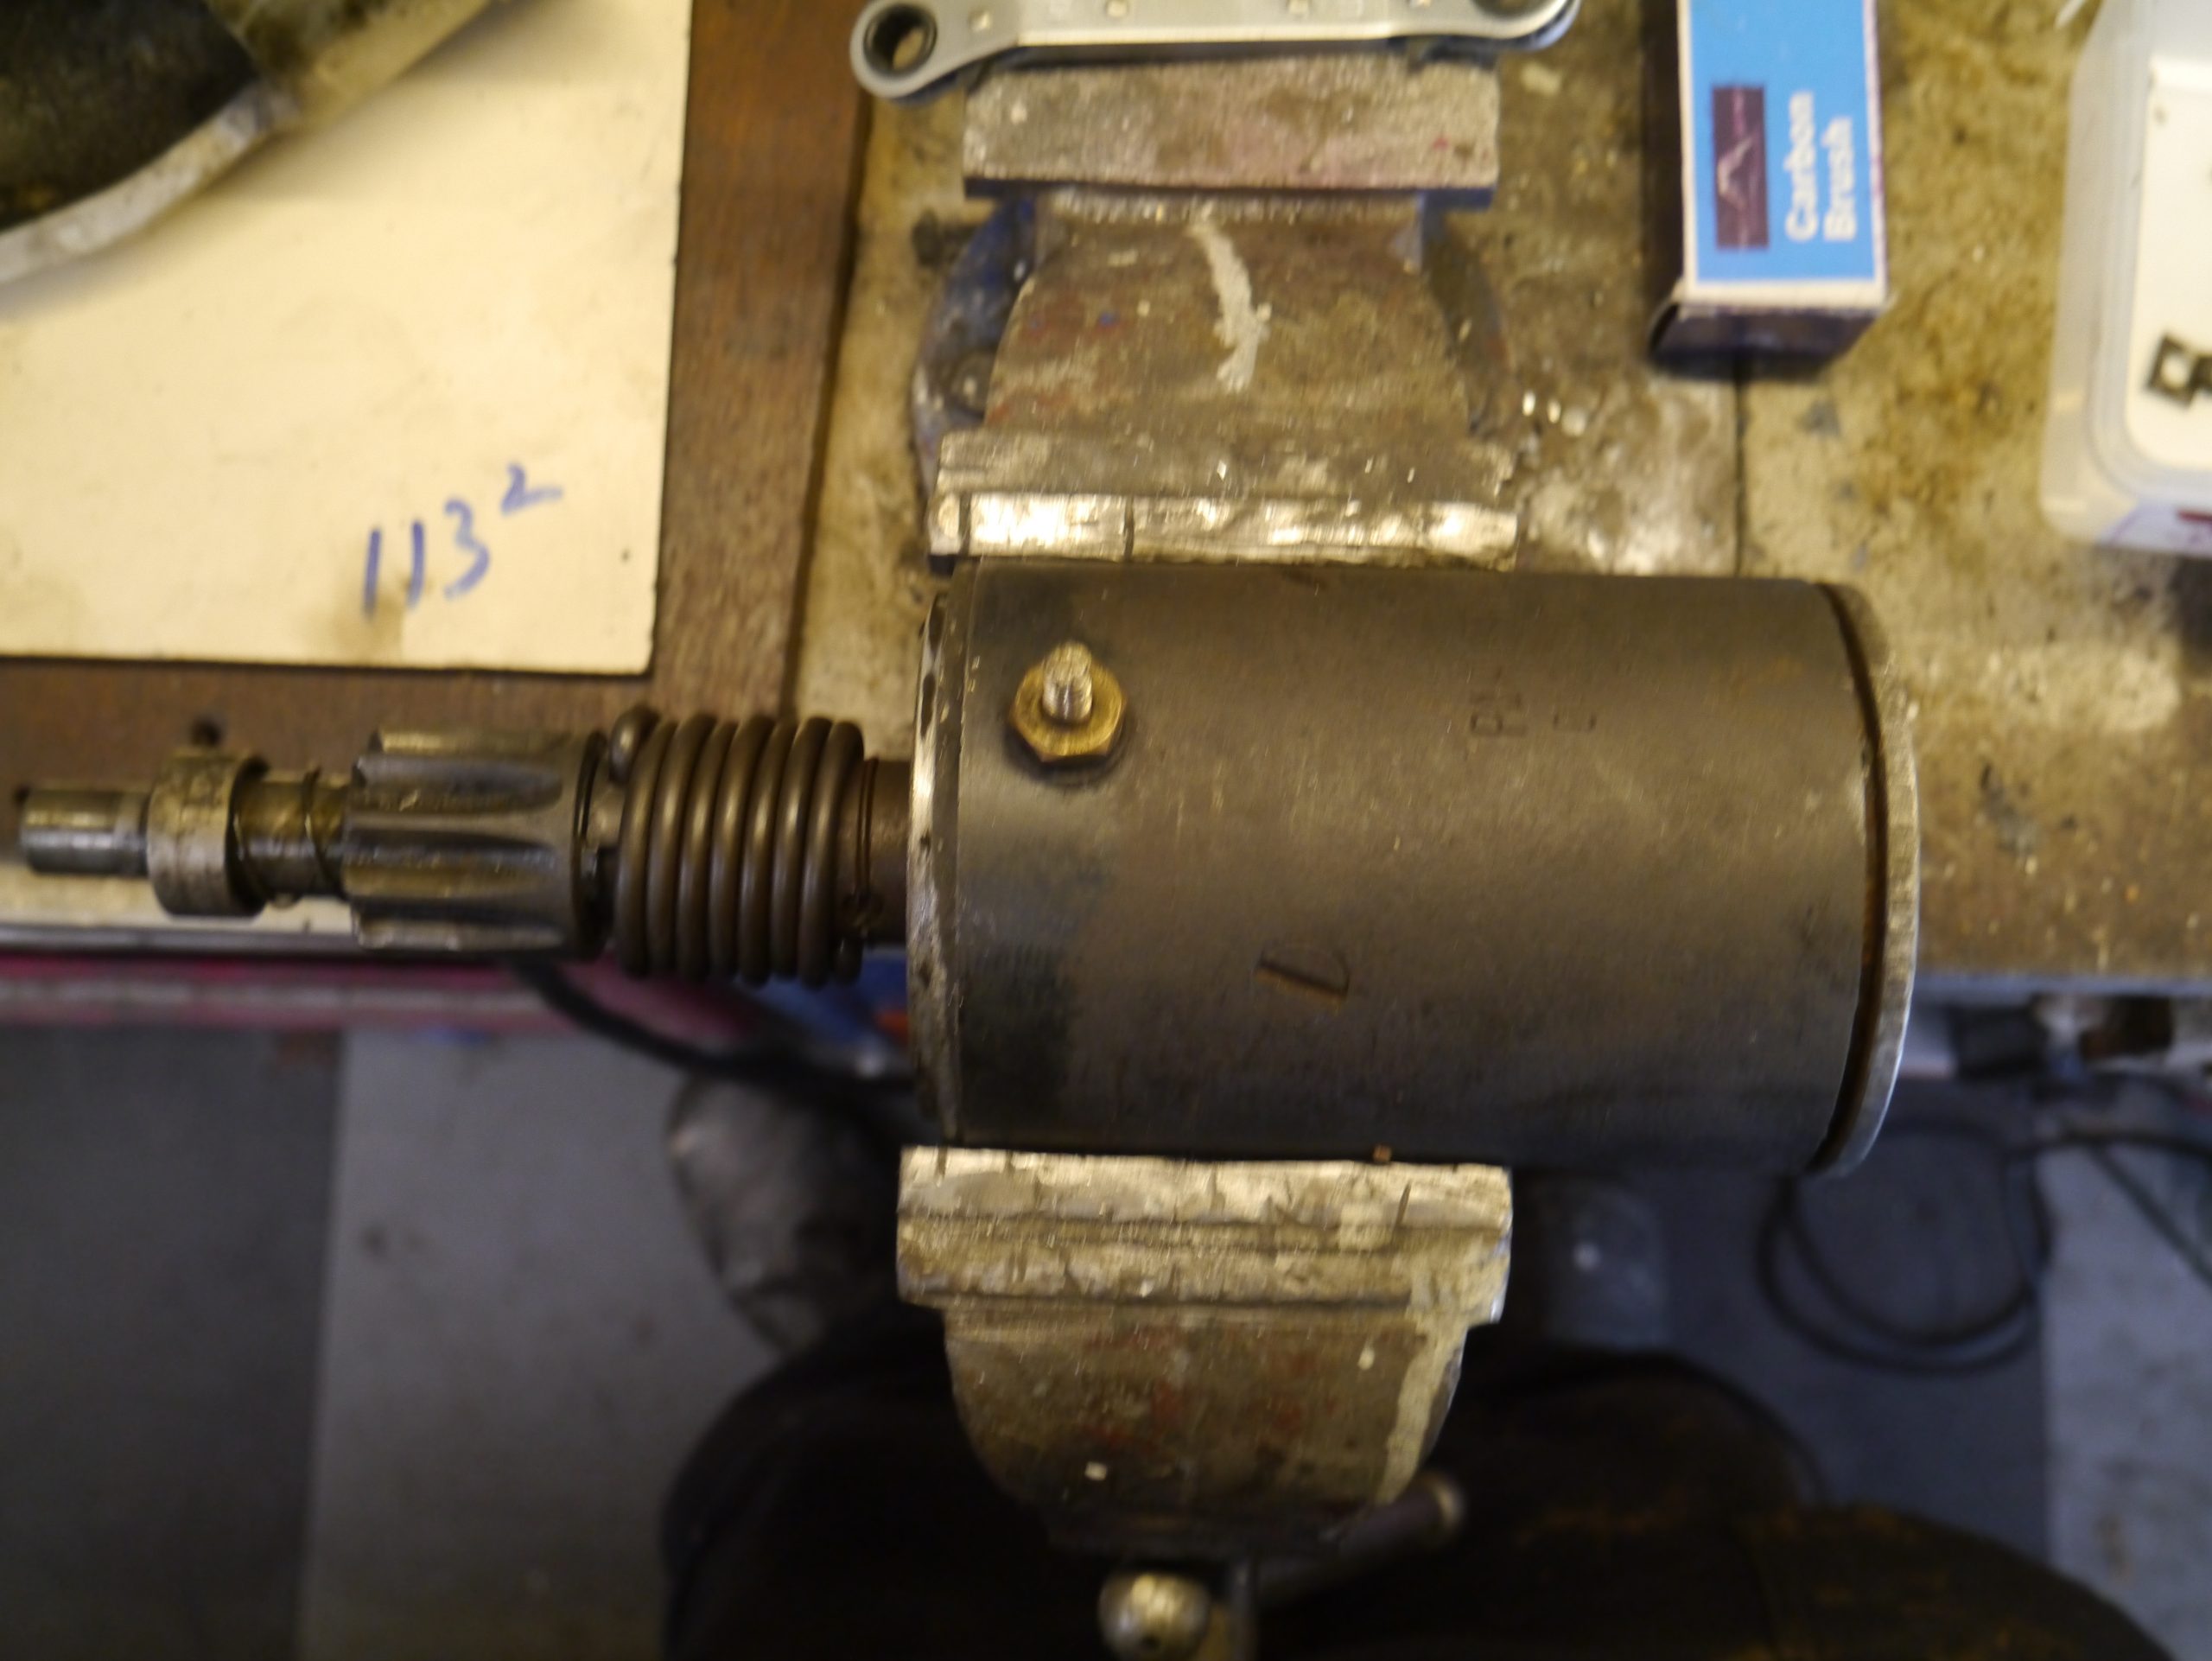
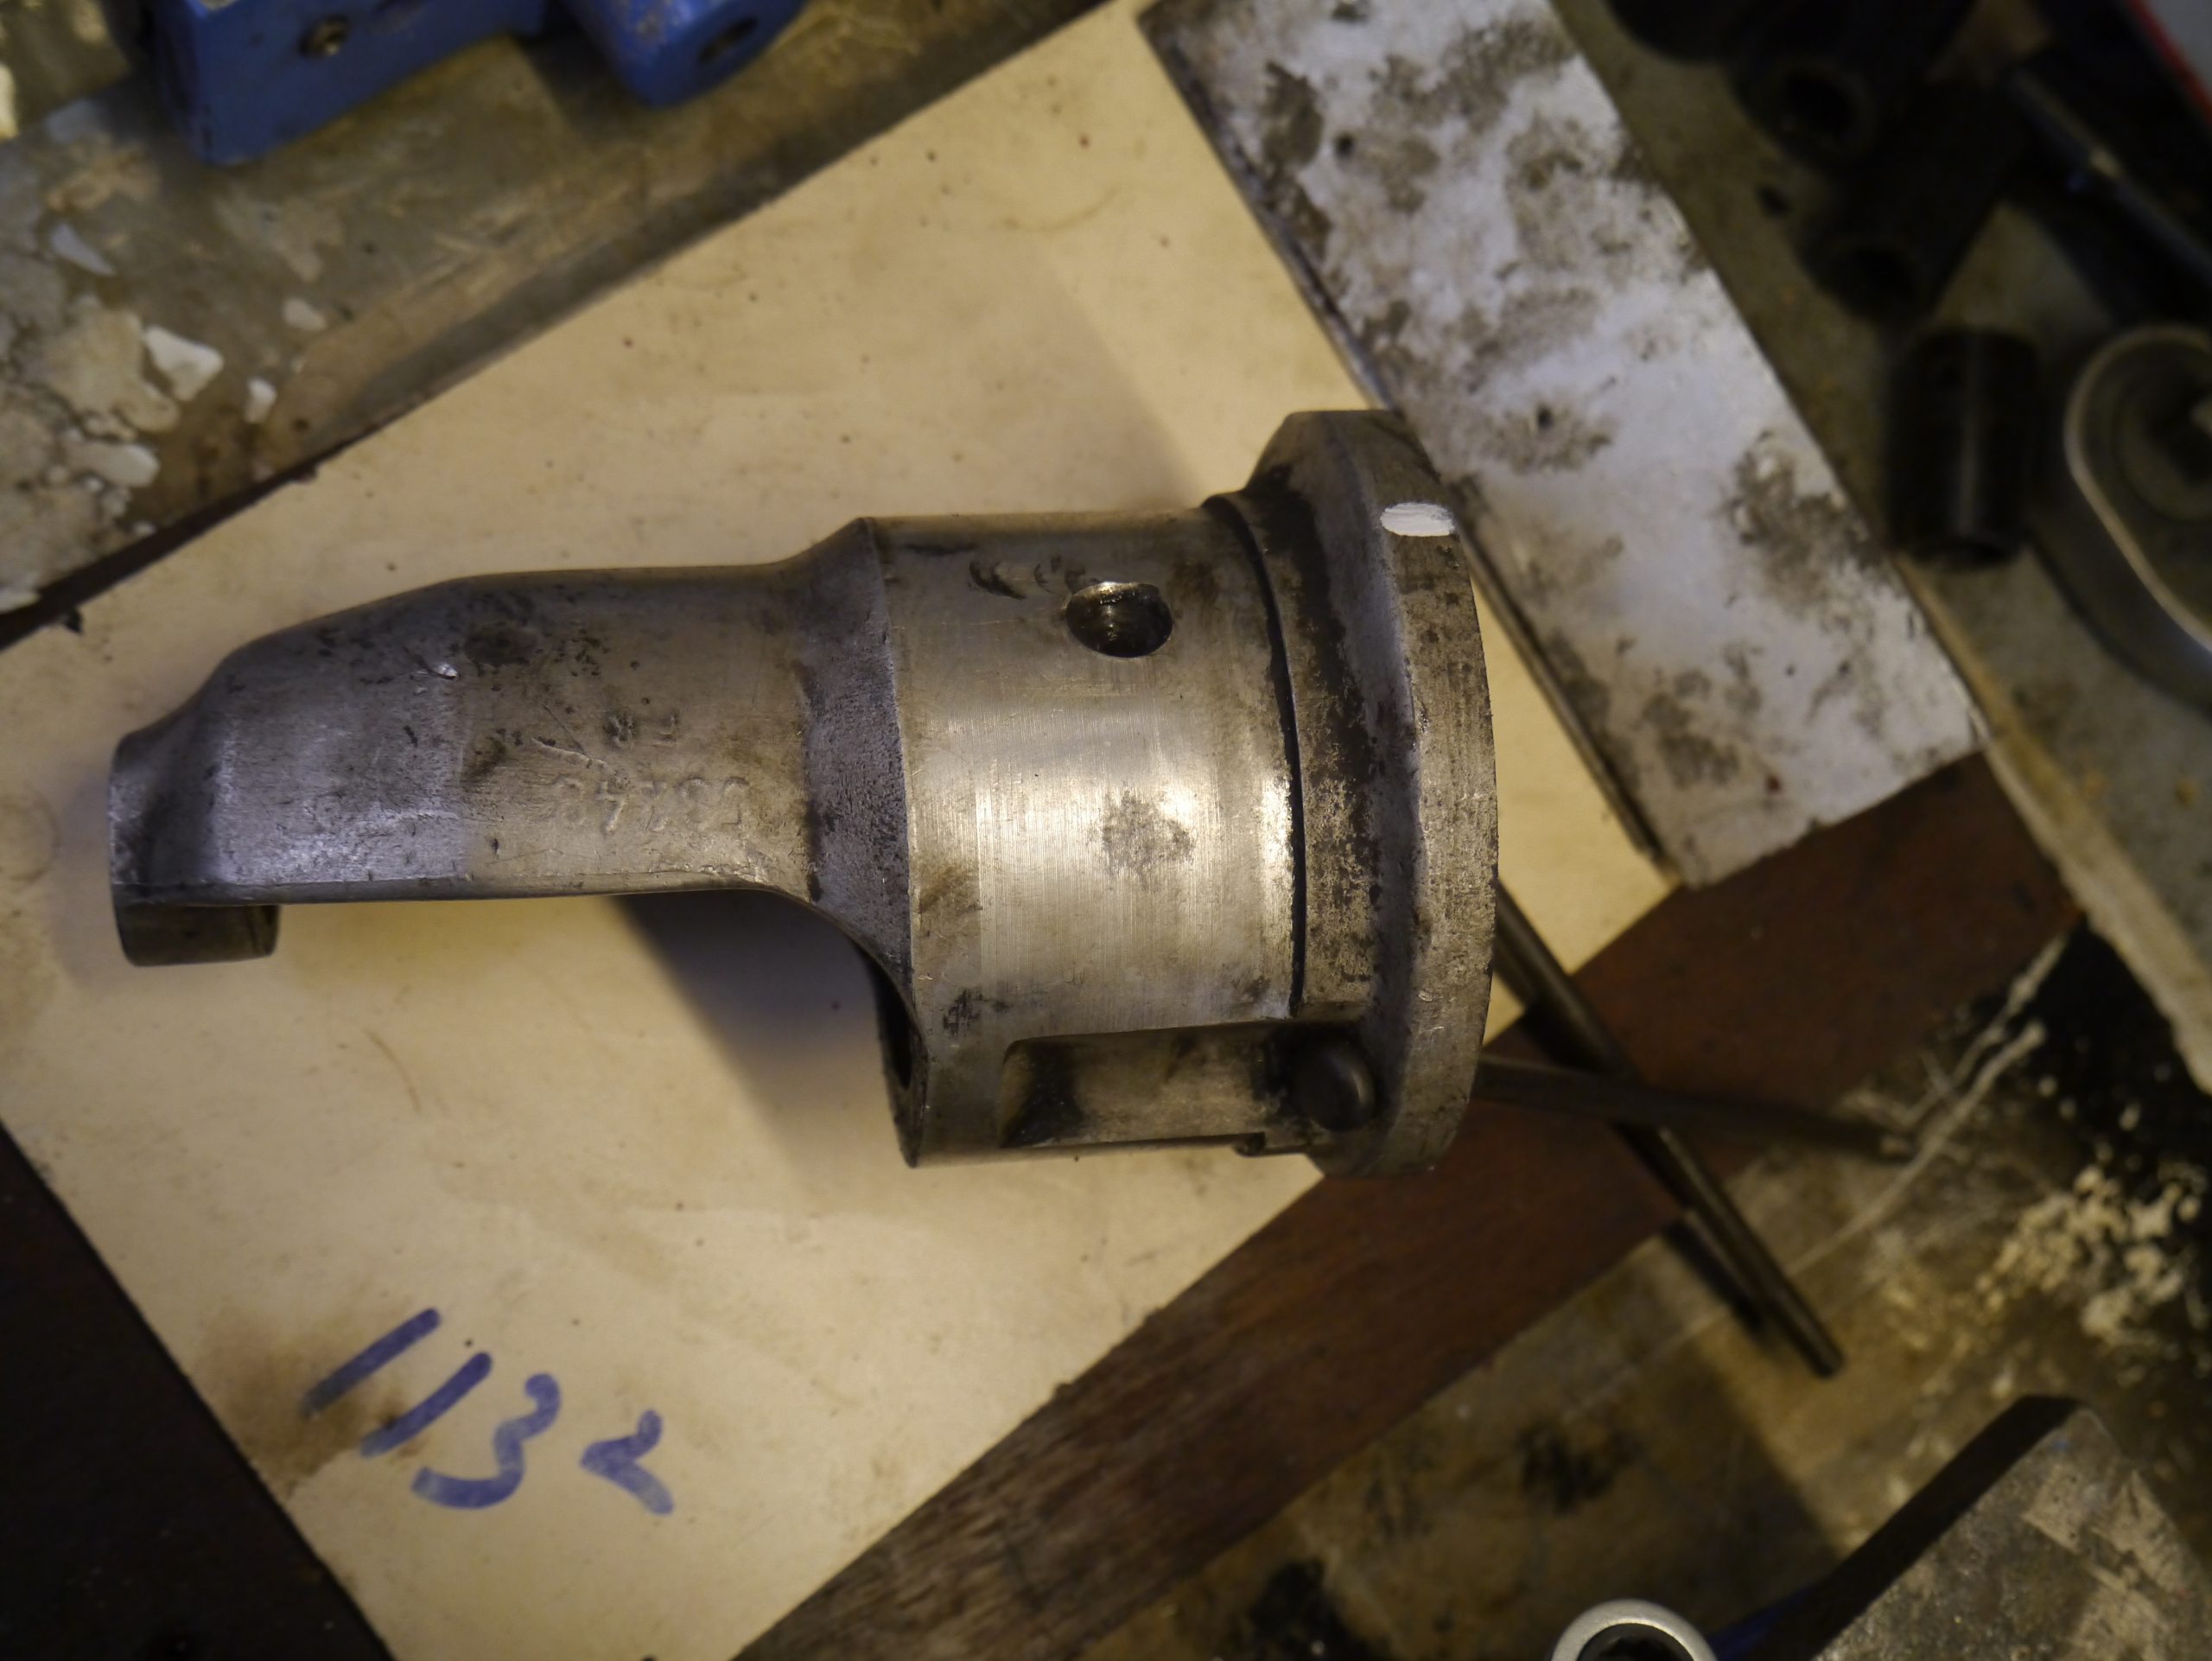
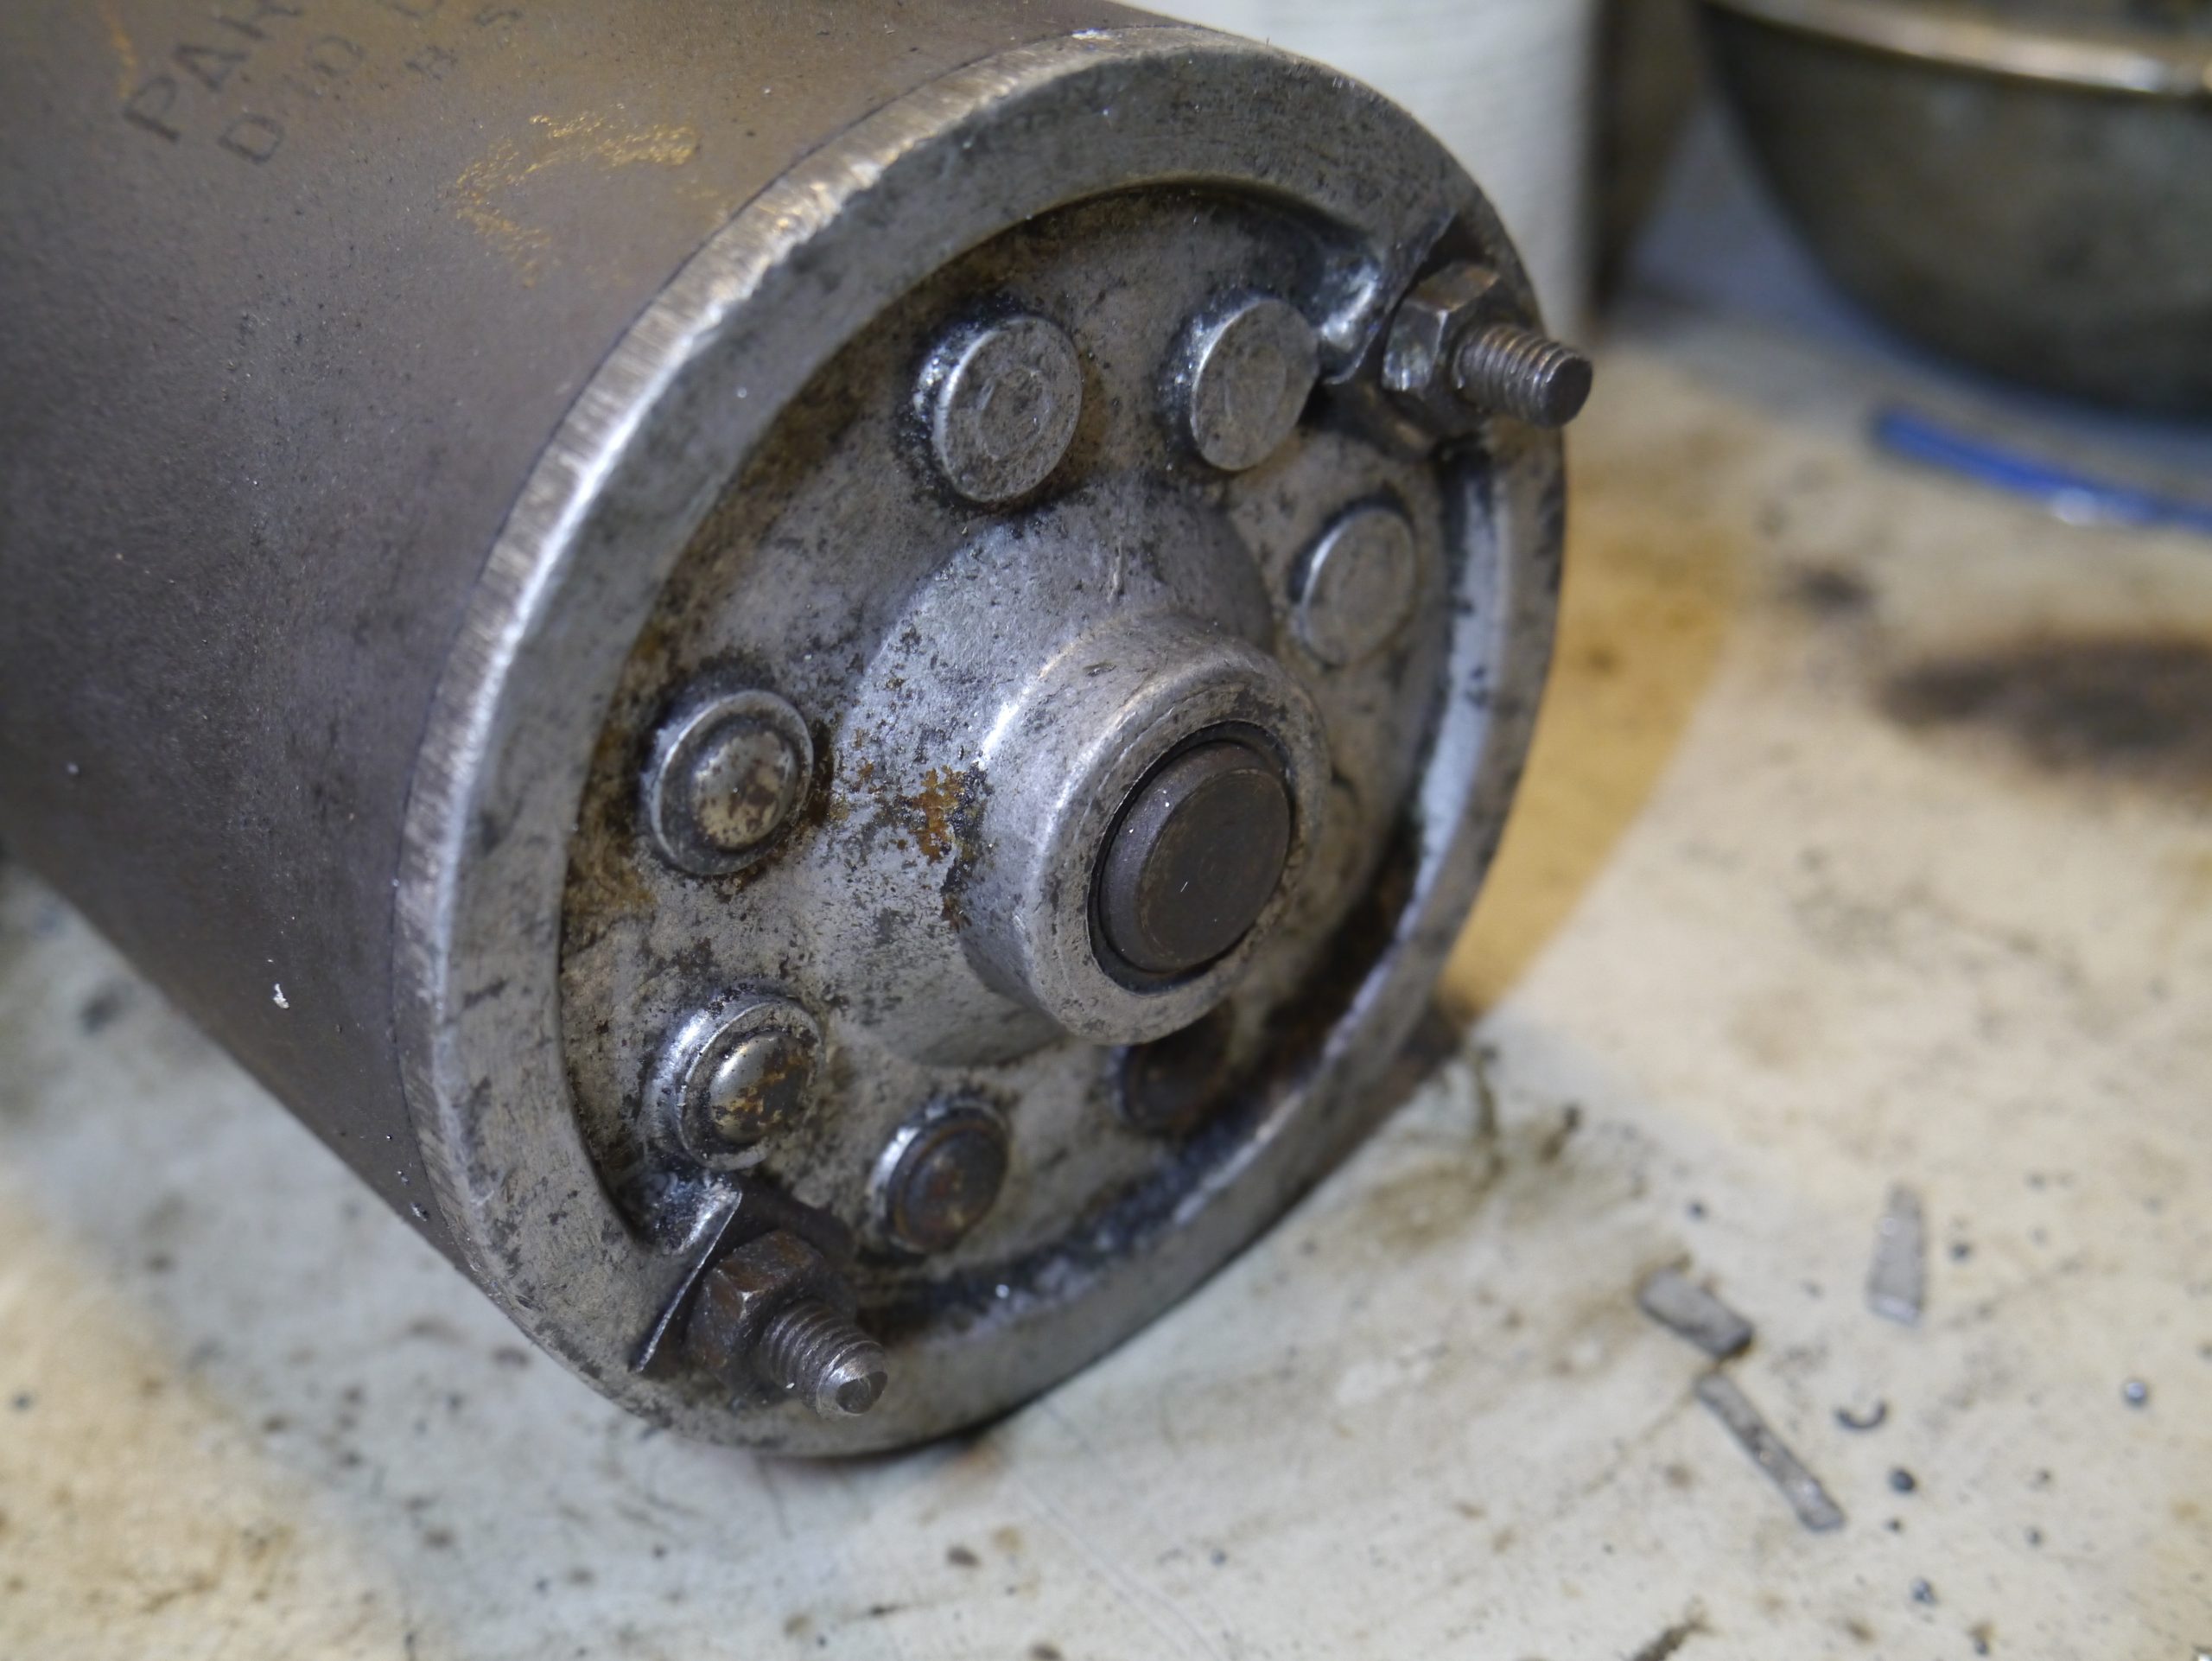
I have a Paris-Rhone 12V ID starter motor in my Traction Avant
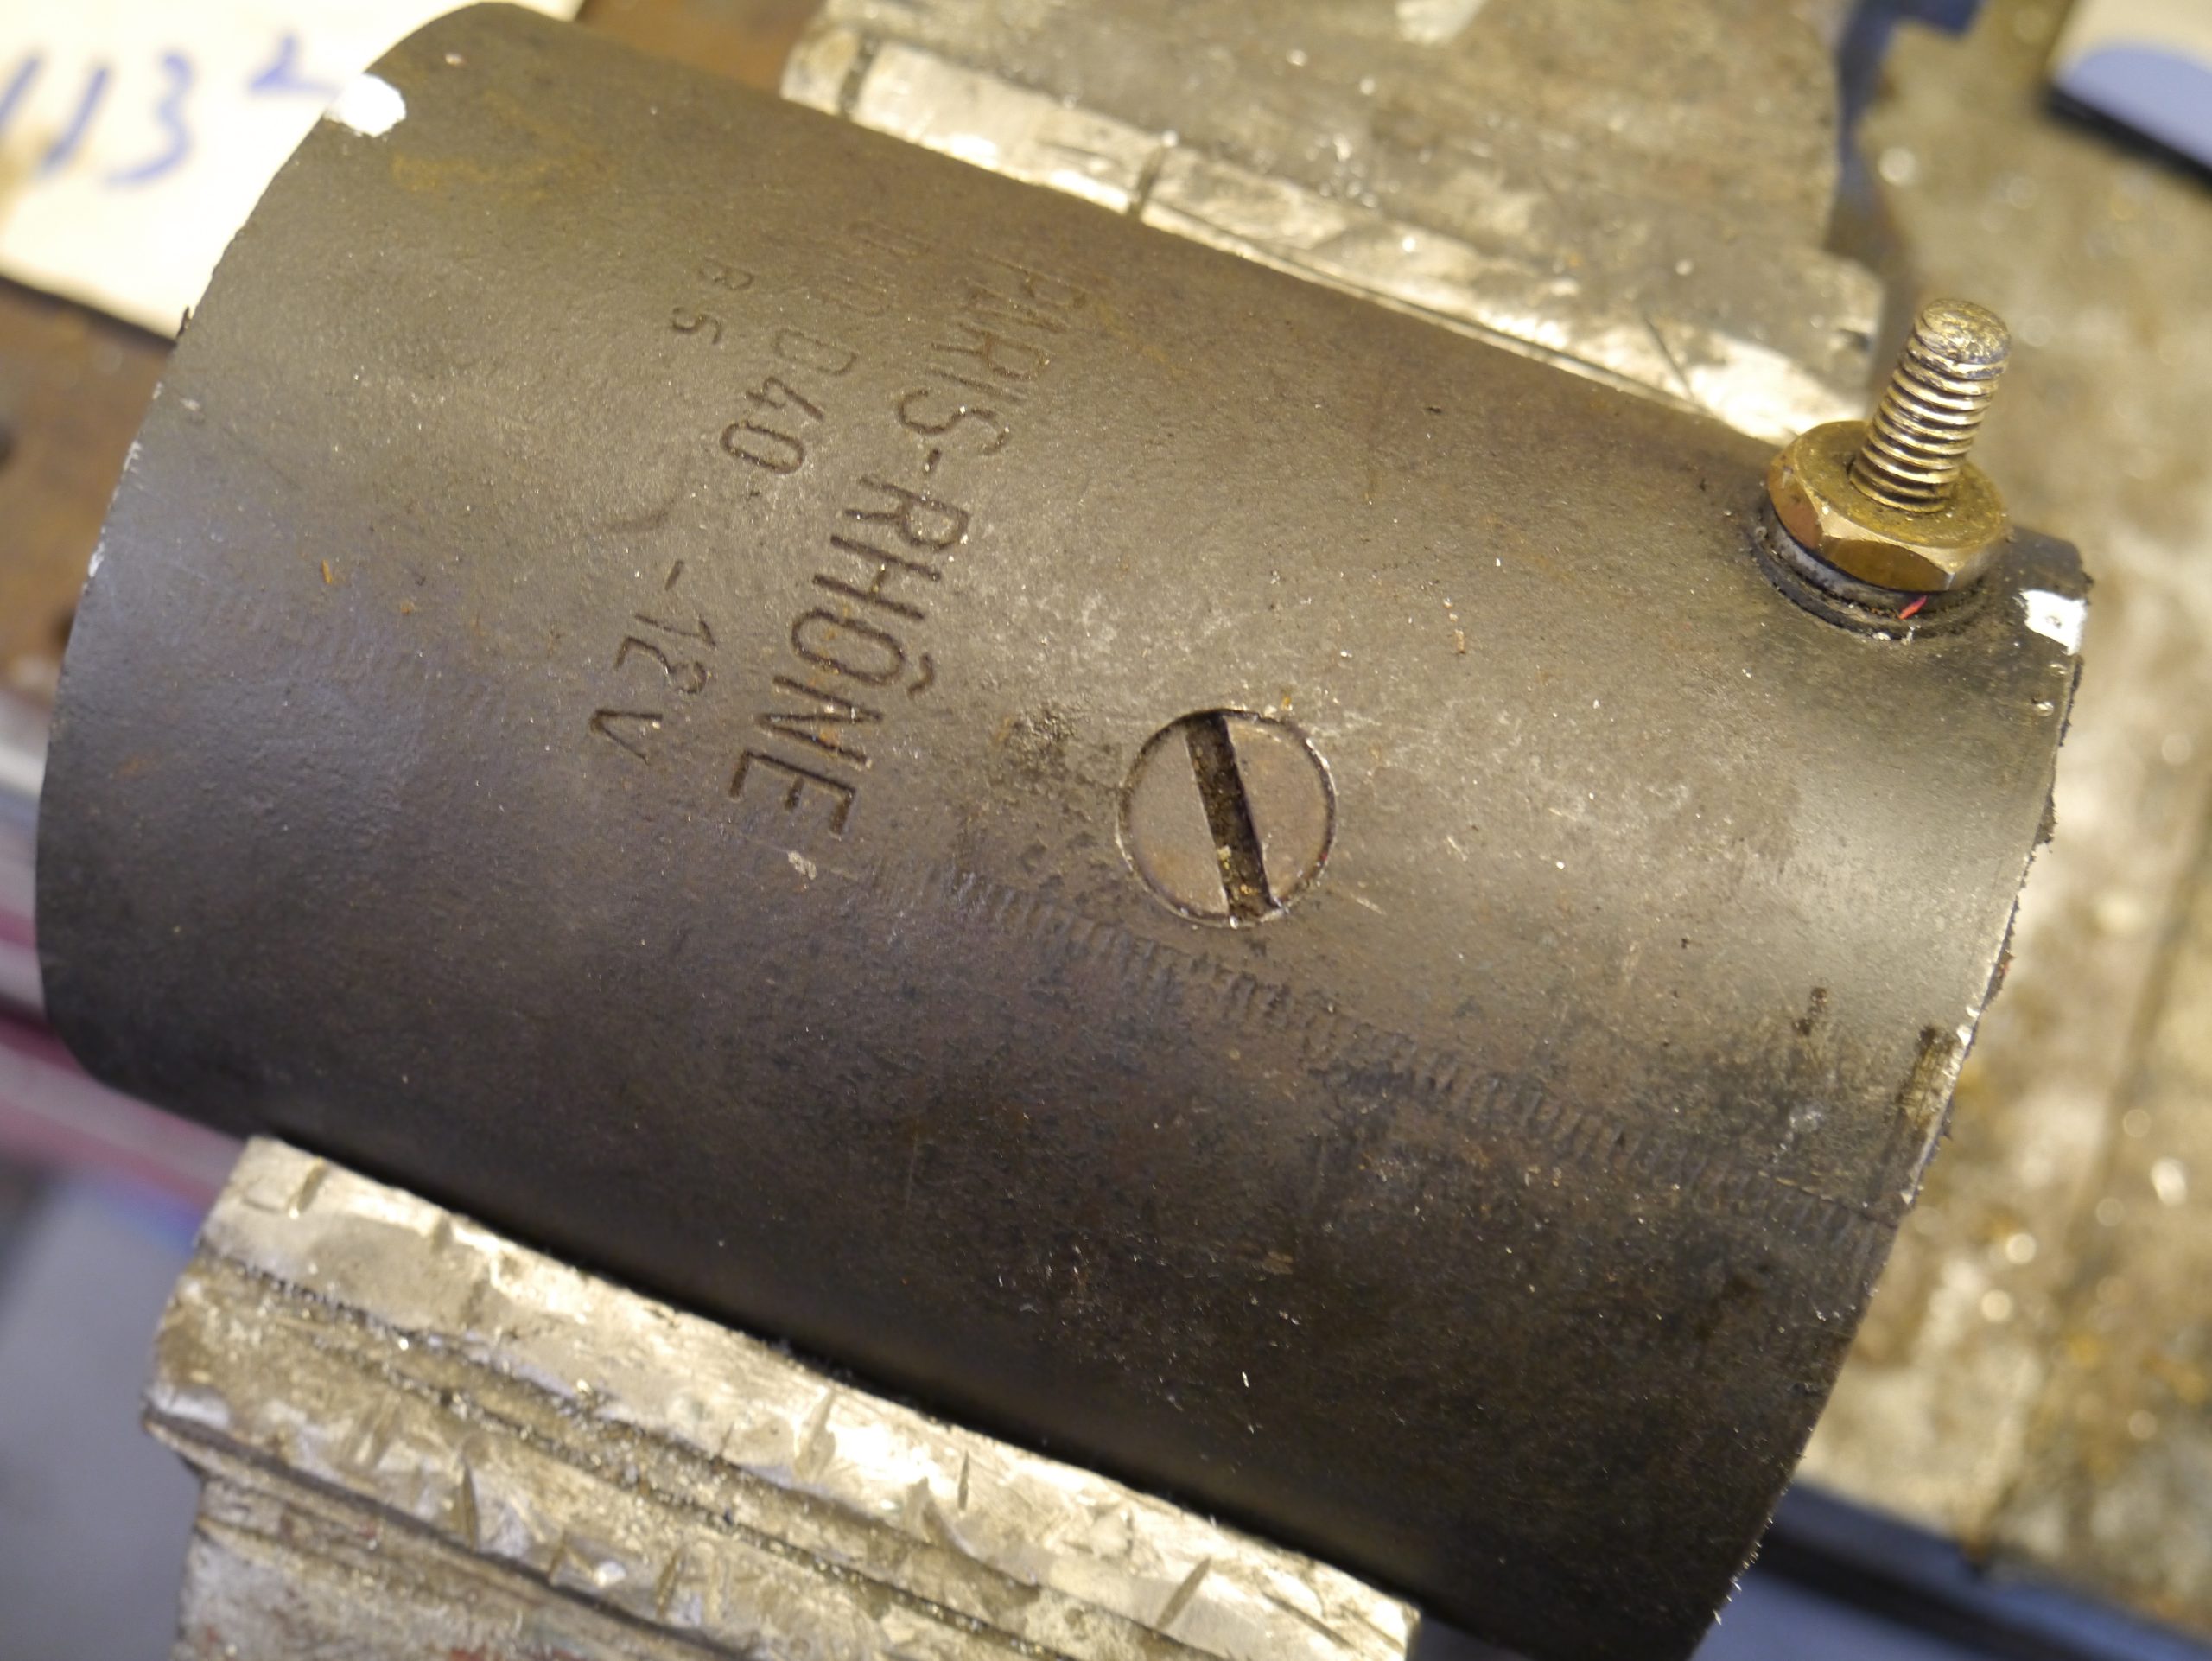
-which fits the flywheel of my long stroke Citroën ID (DW) engine once mounted in the TA.
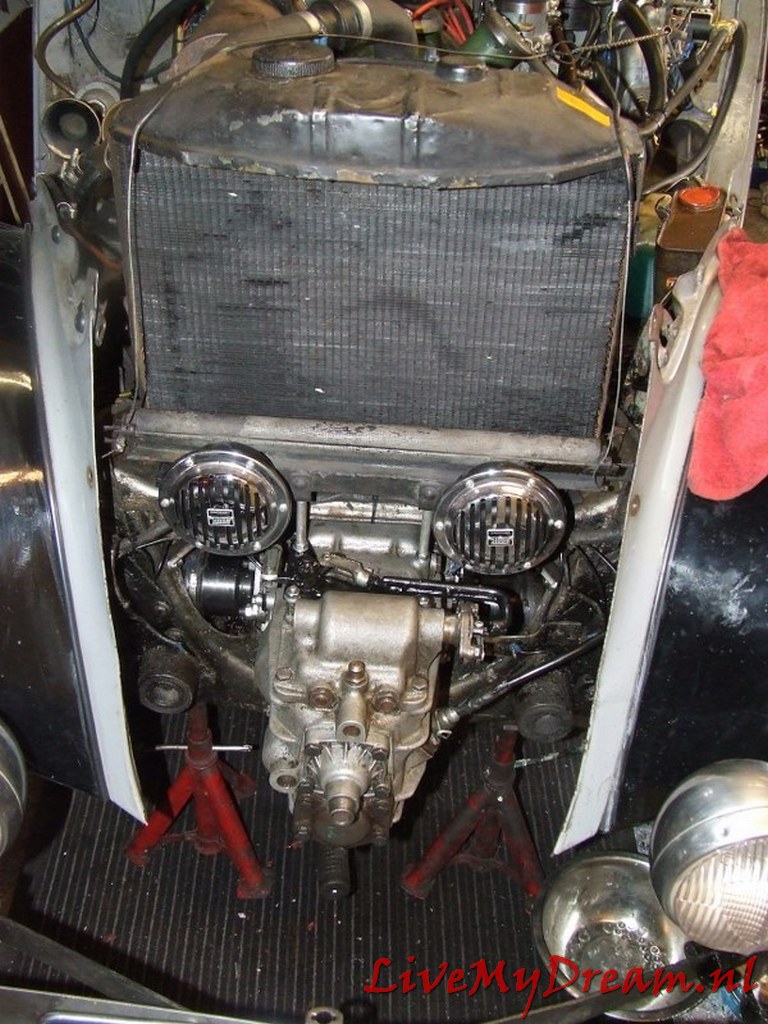
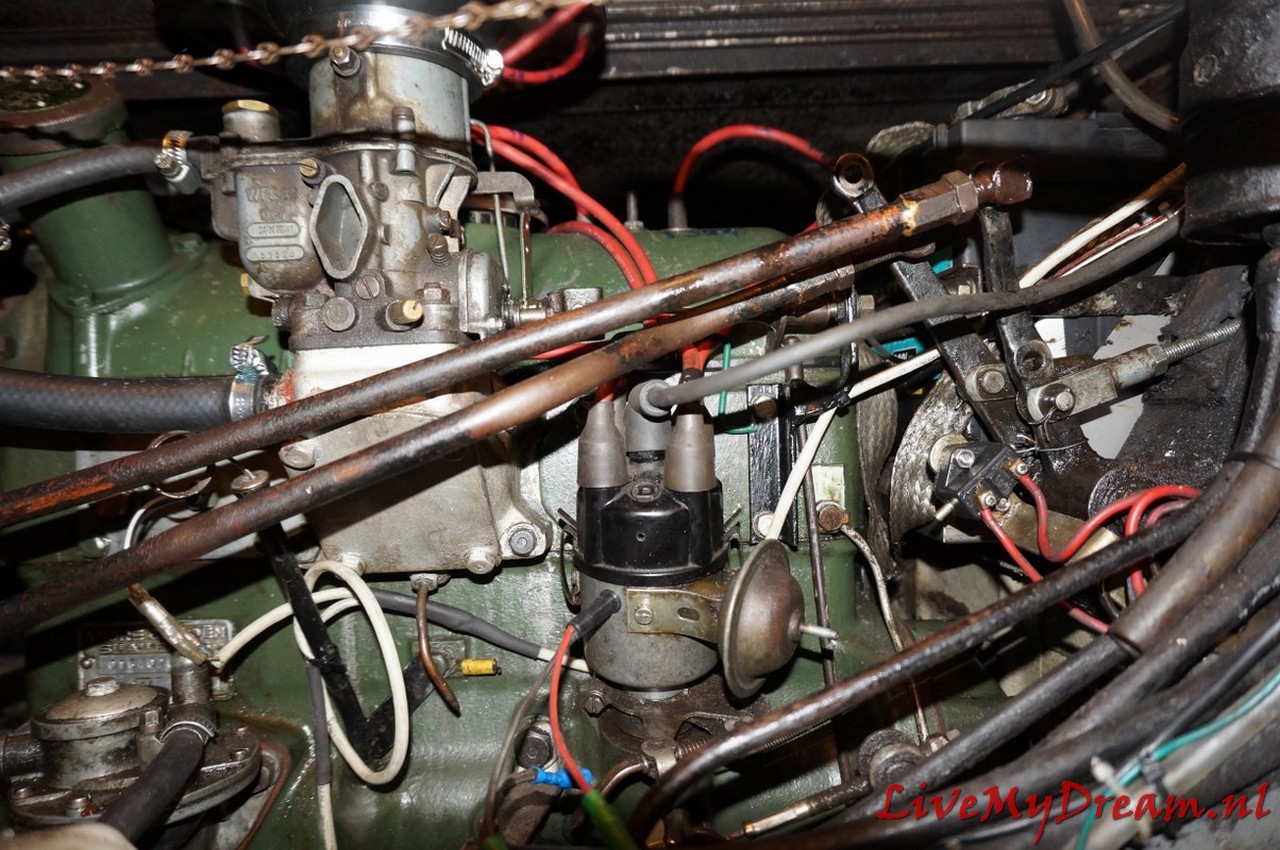
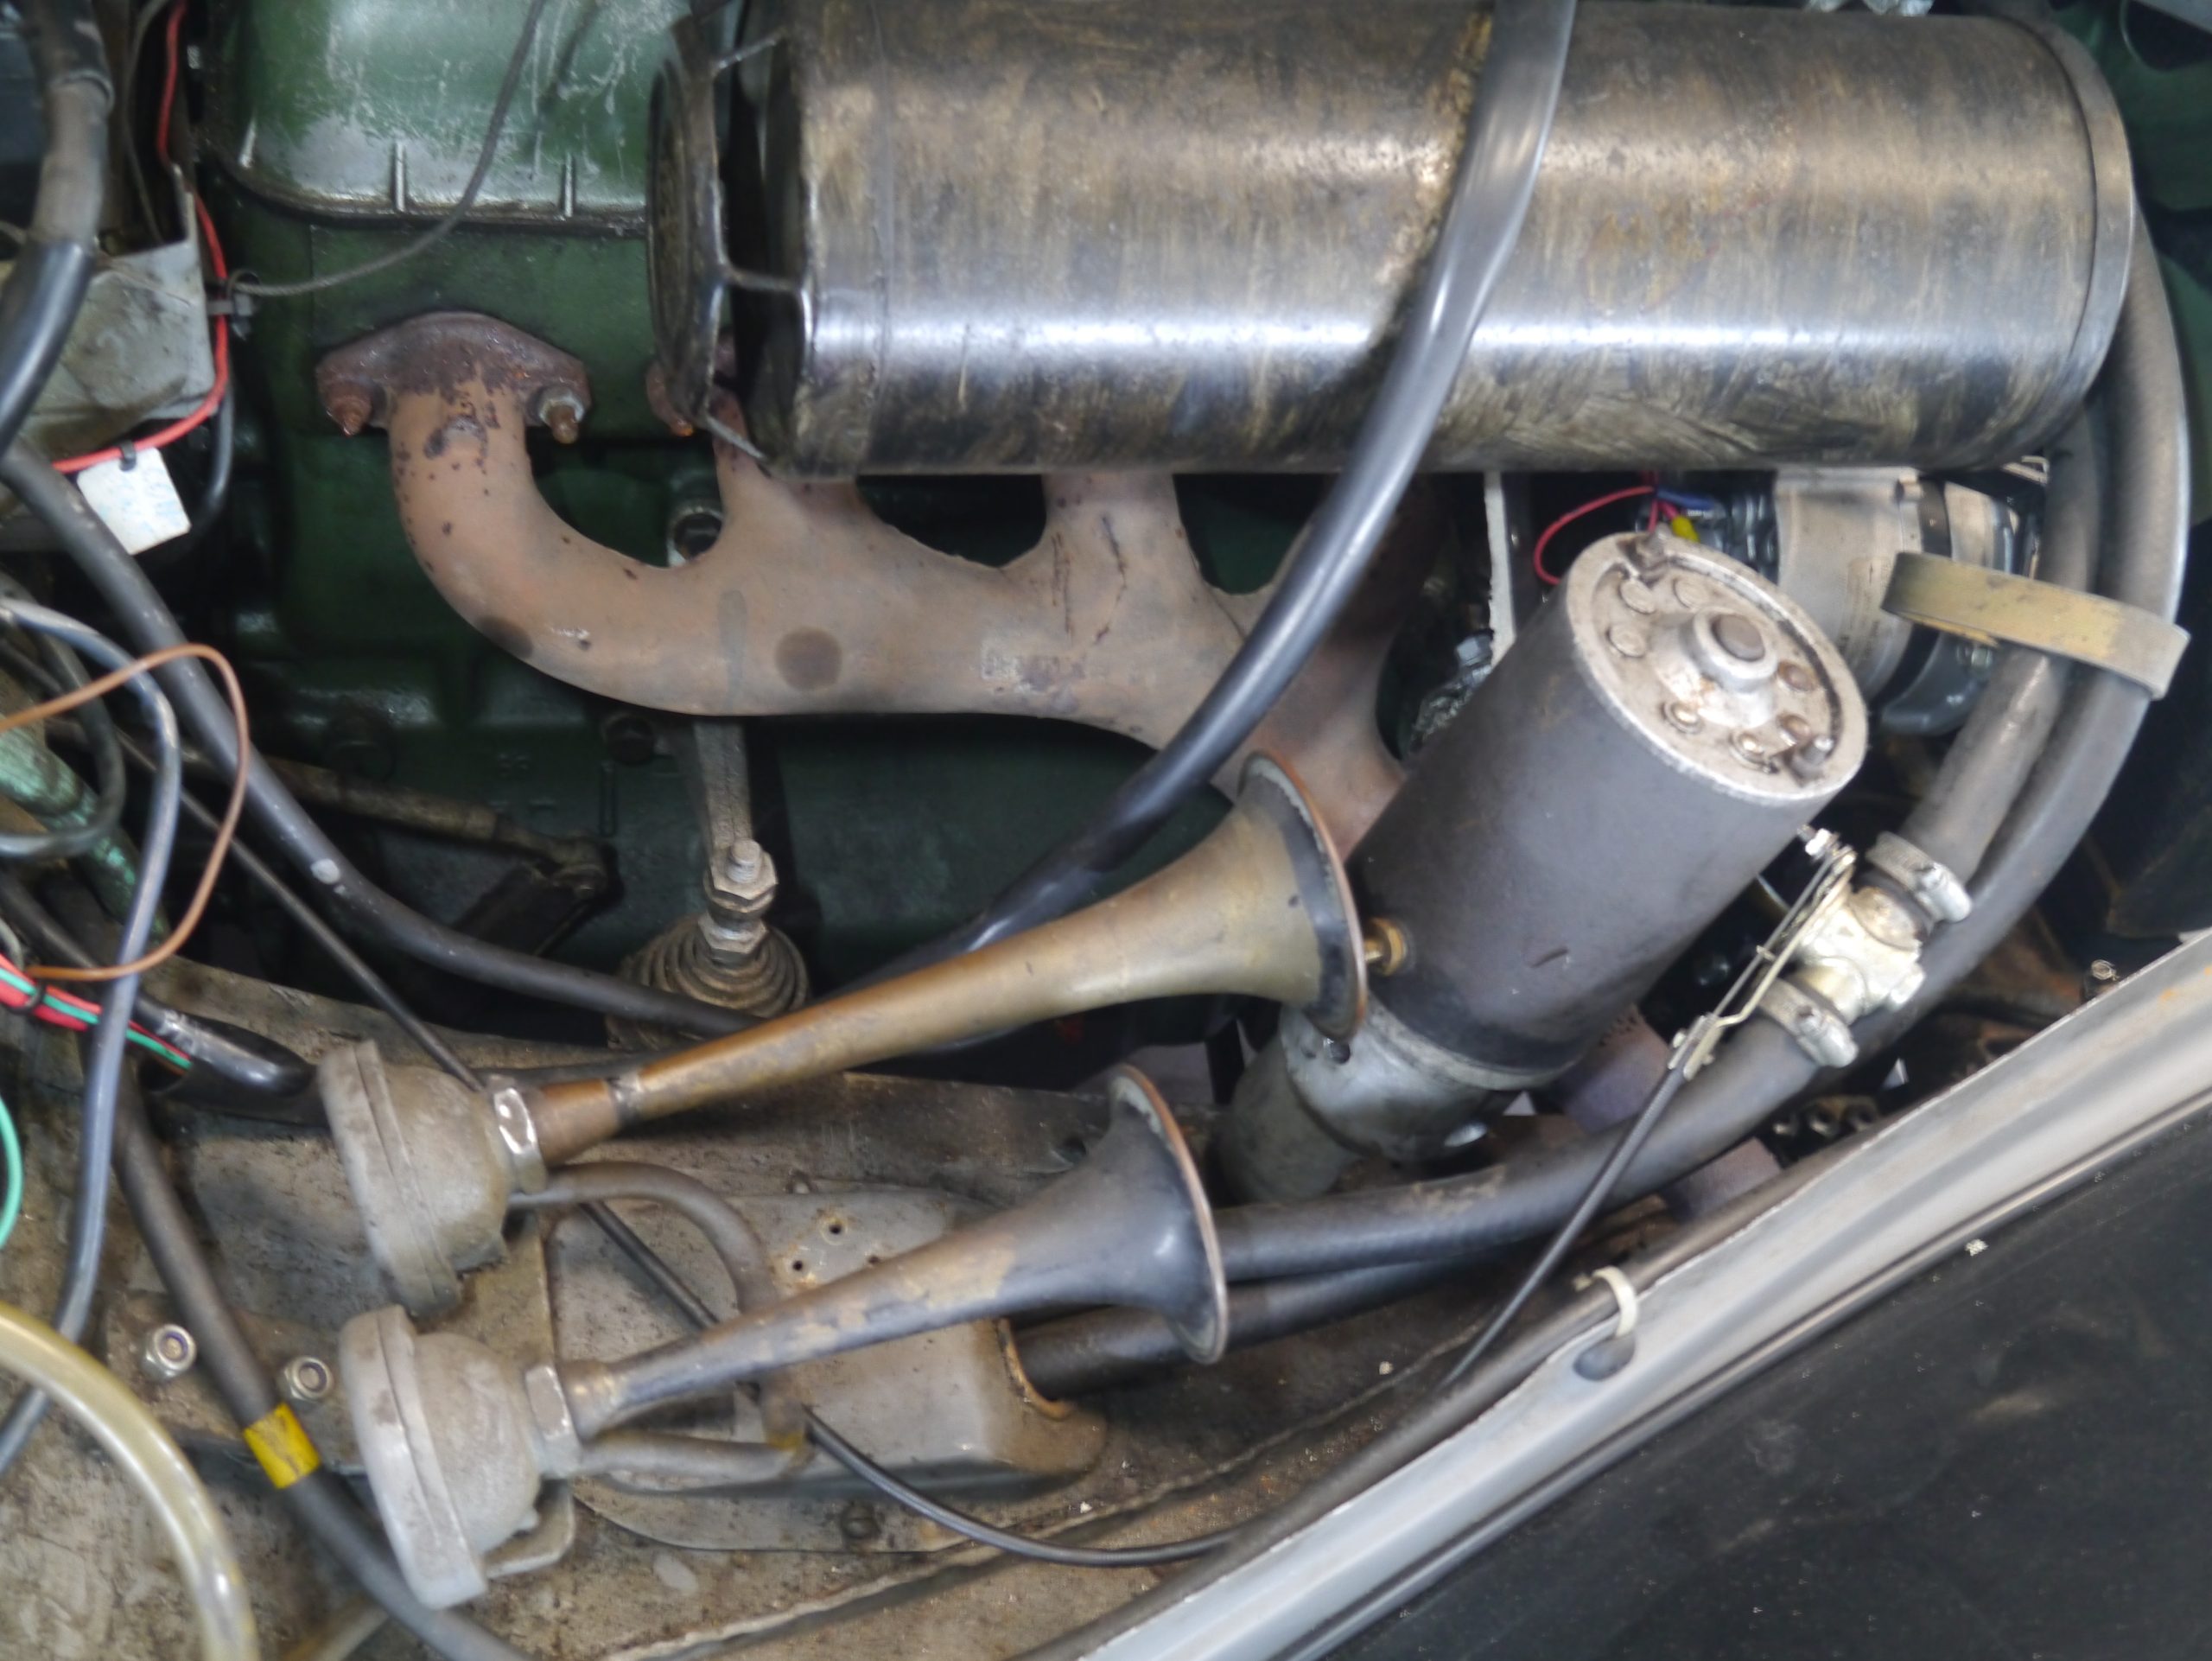
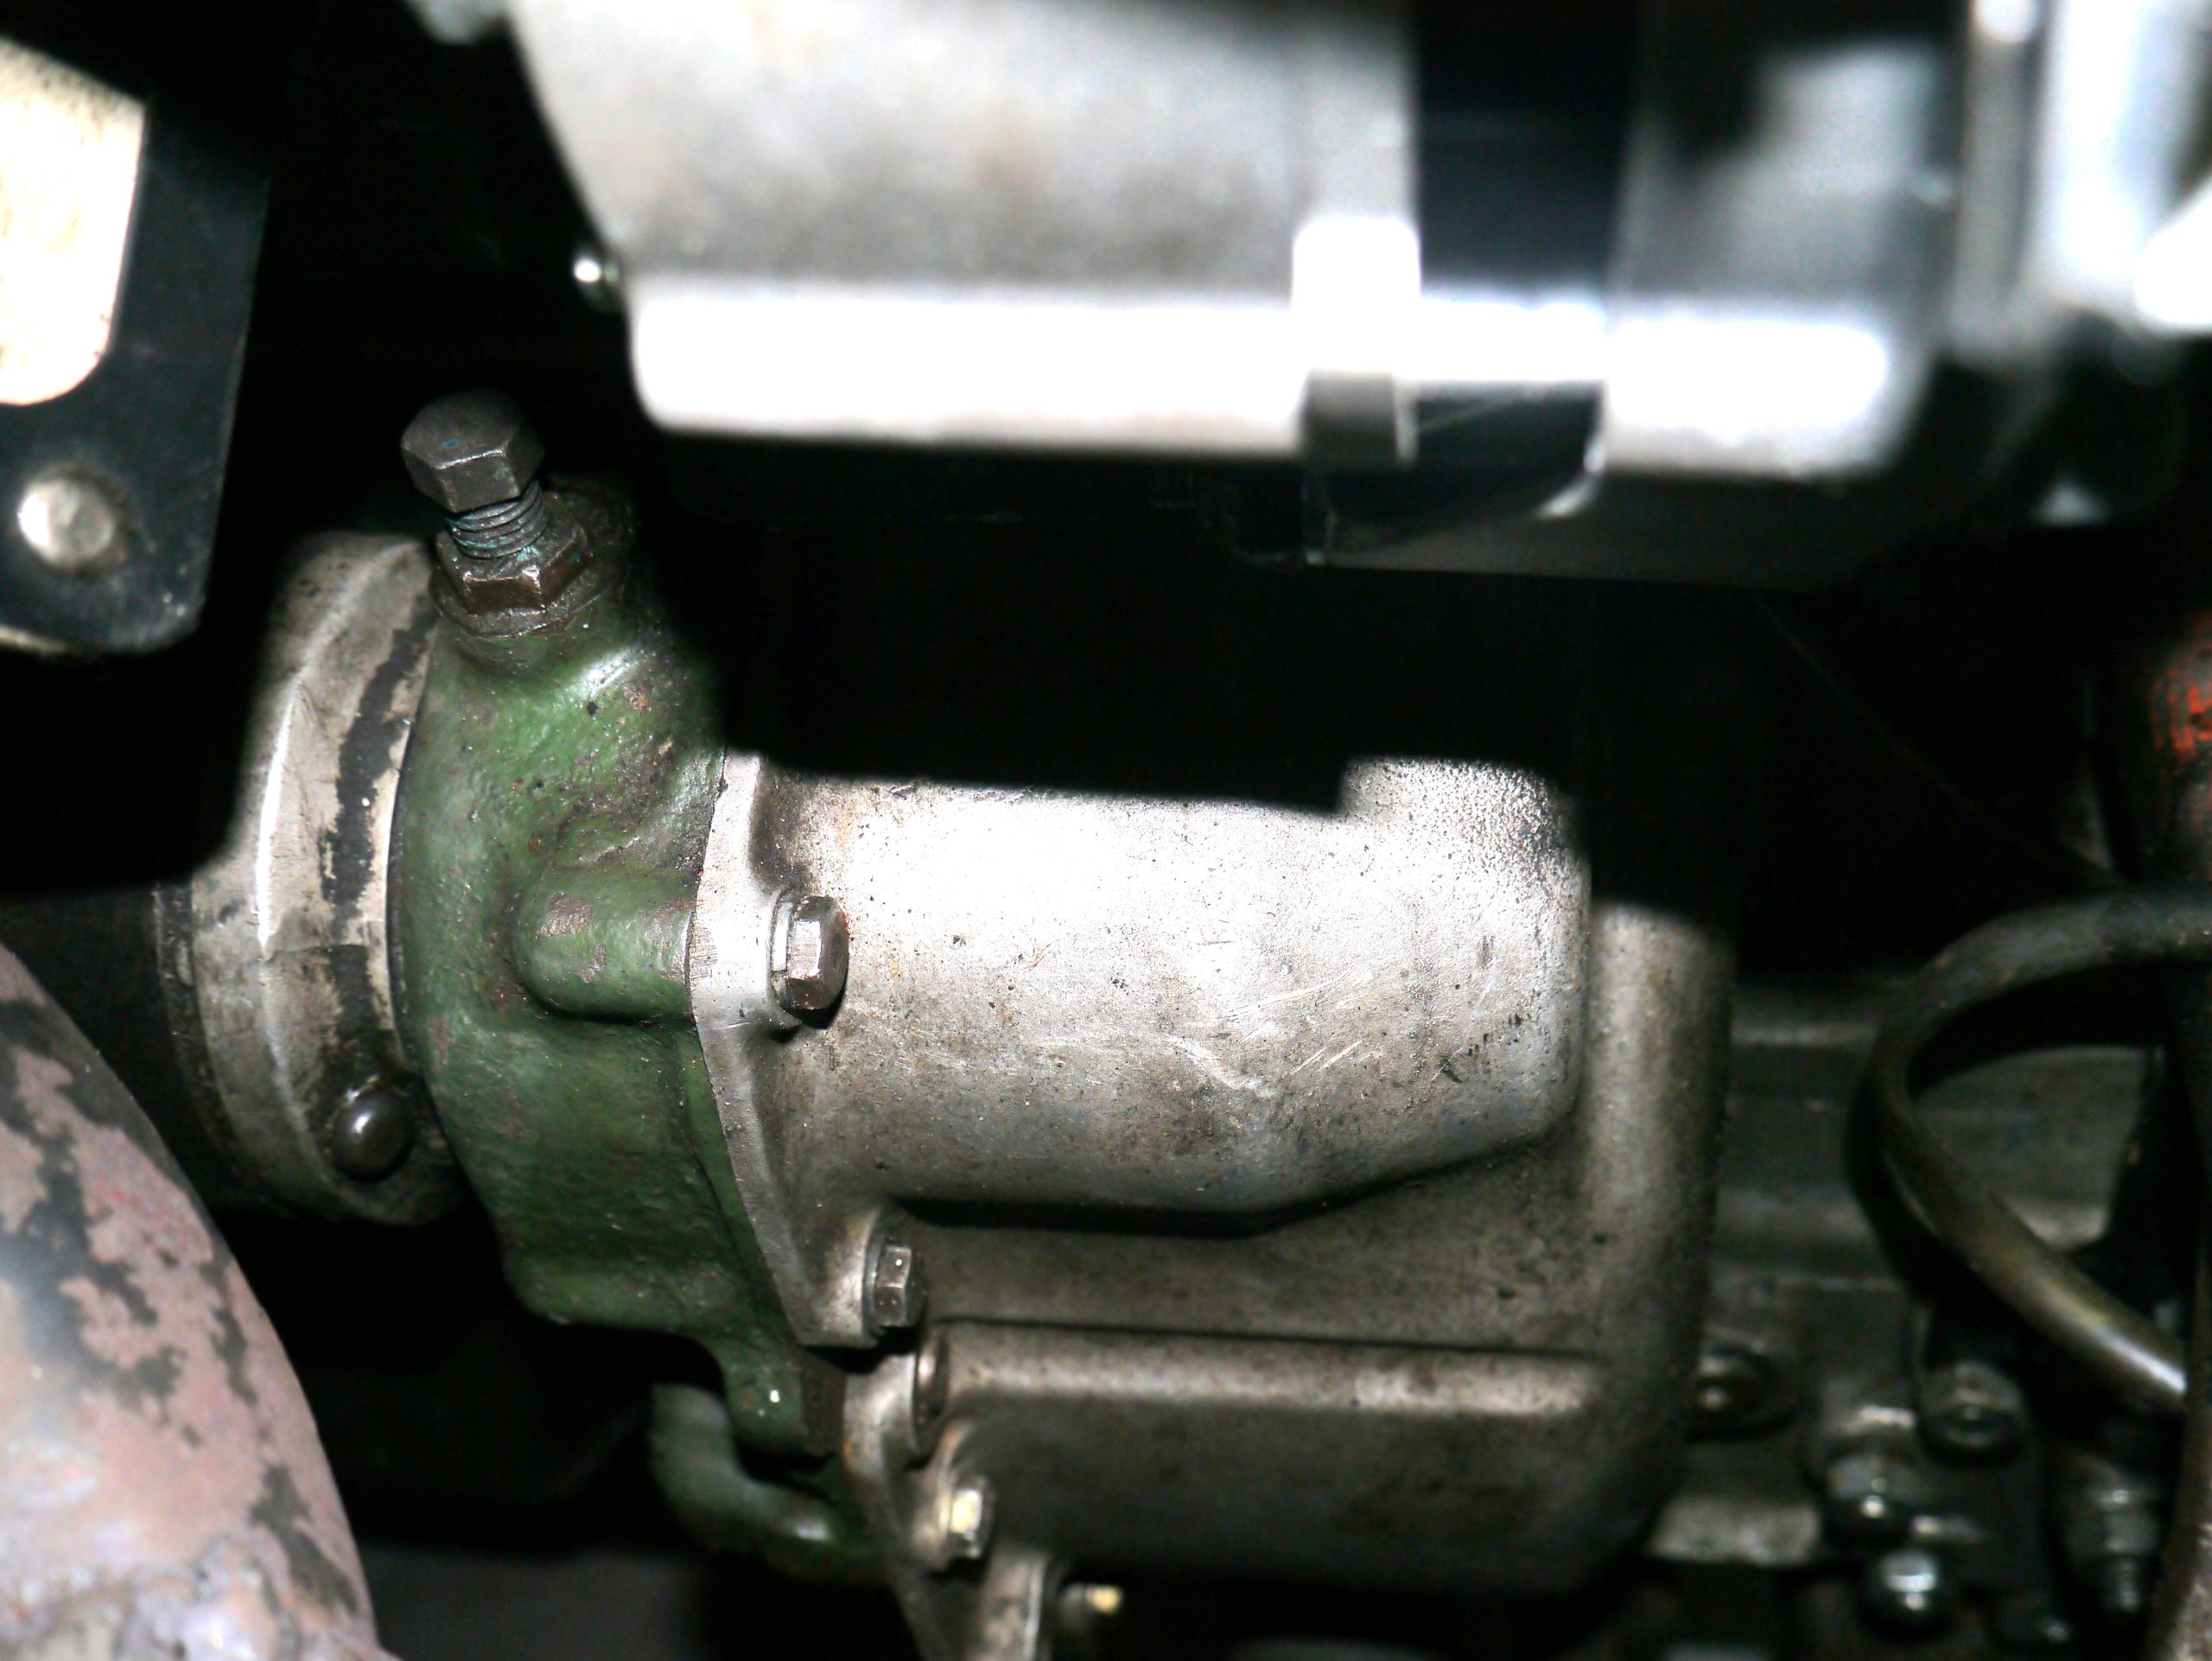
See photo below, The starter motor is under the exhaust manifold of this engine, in the same original location as on the Traction Avant 11D engine.
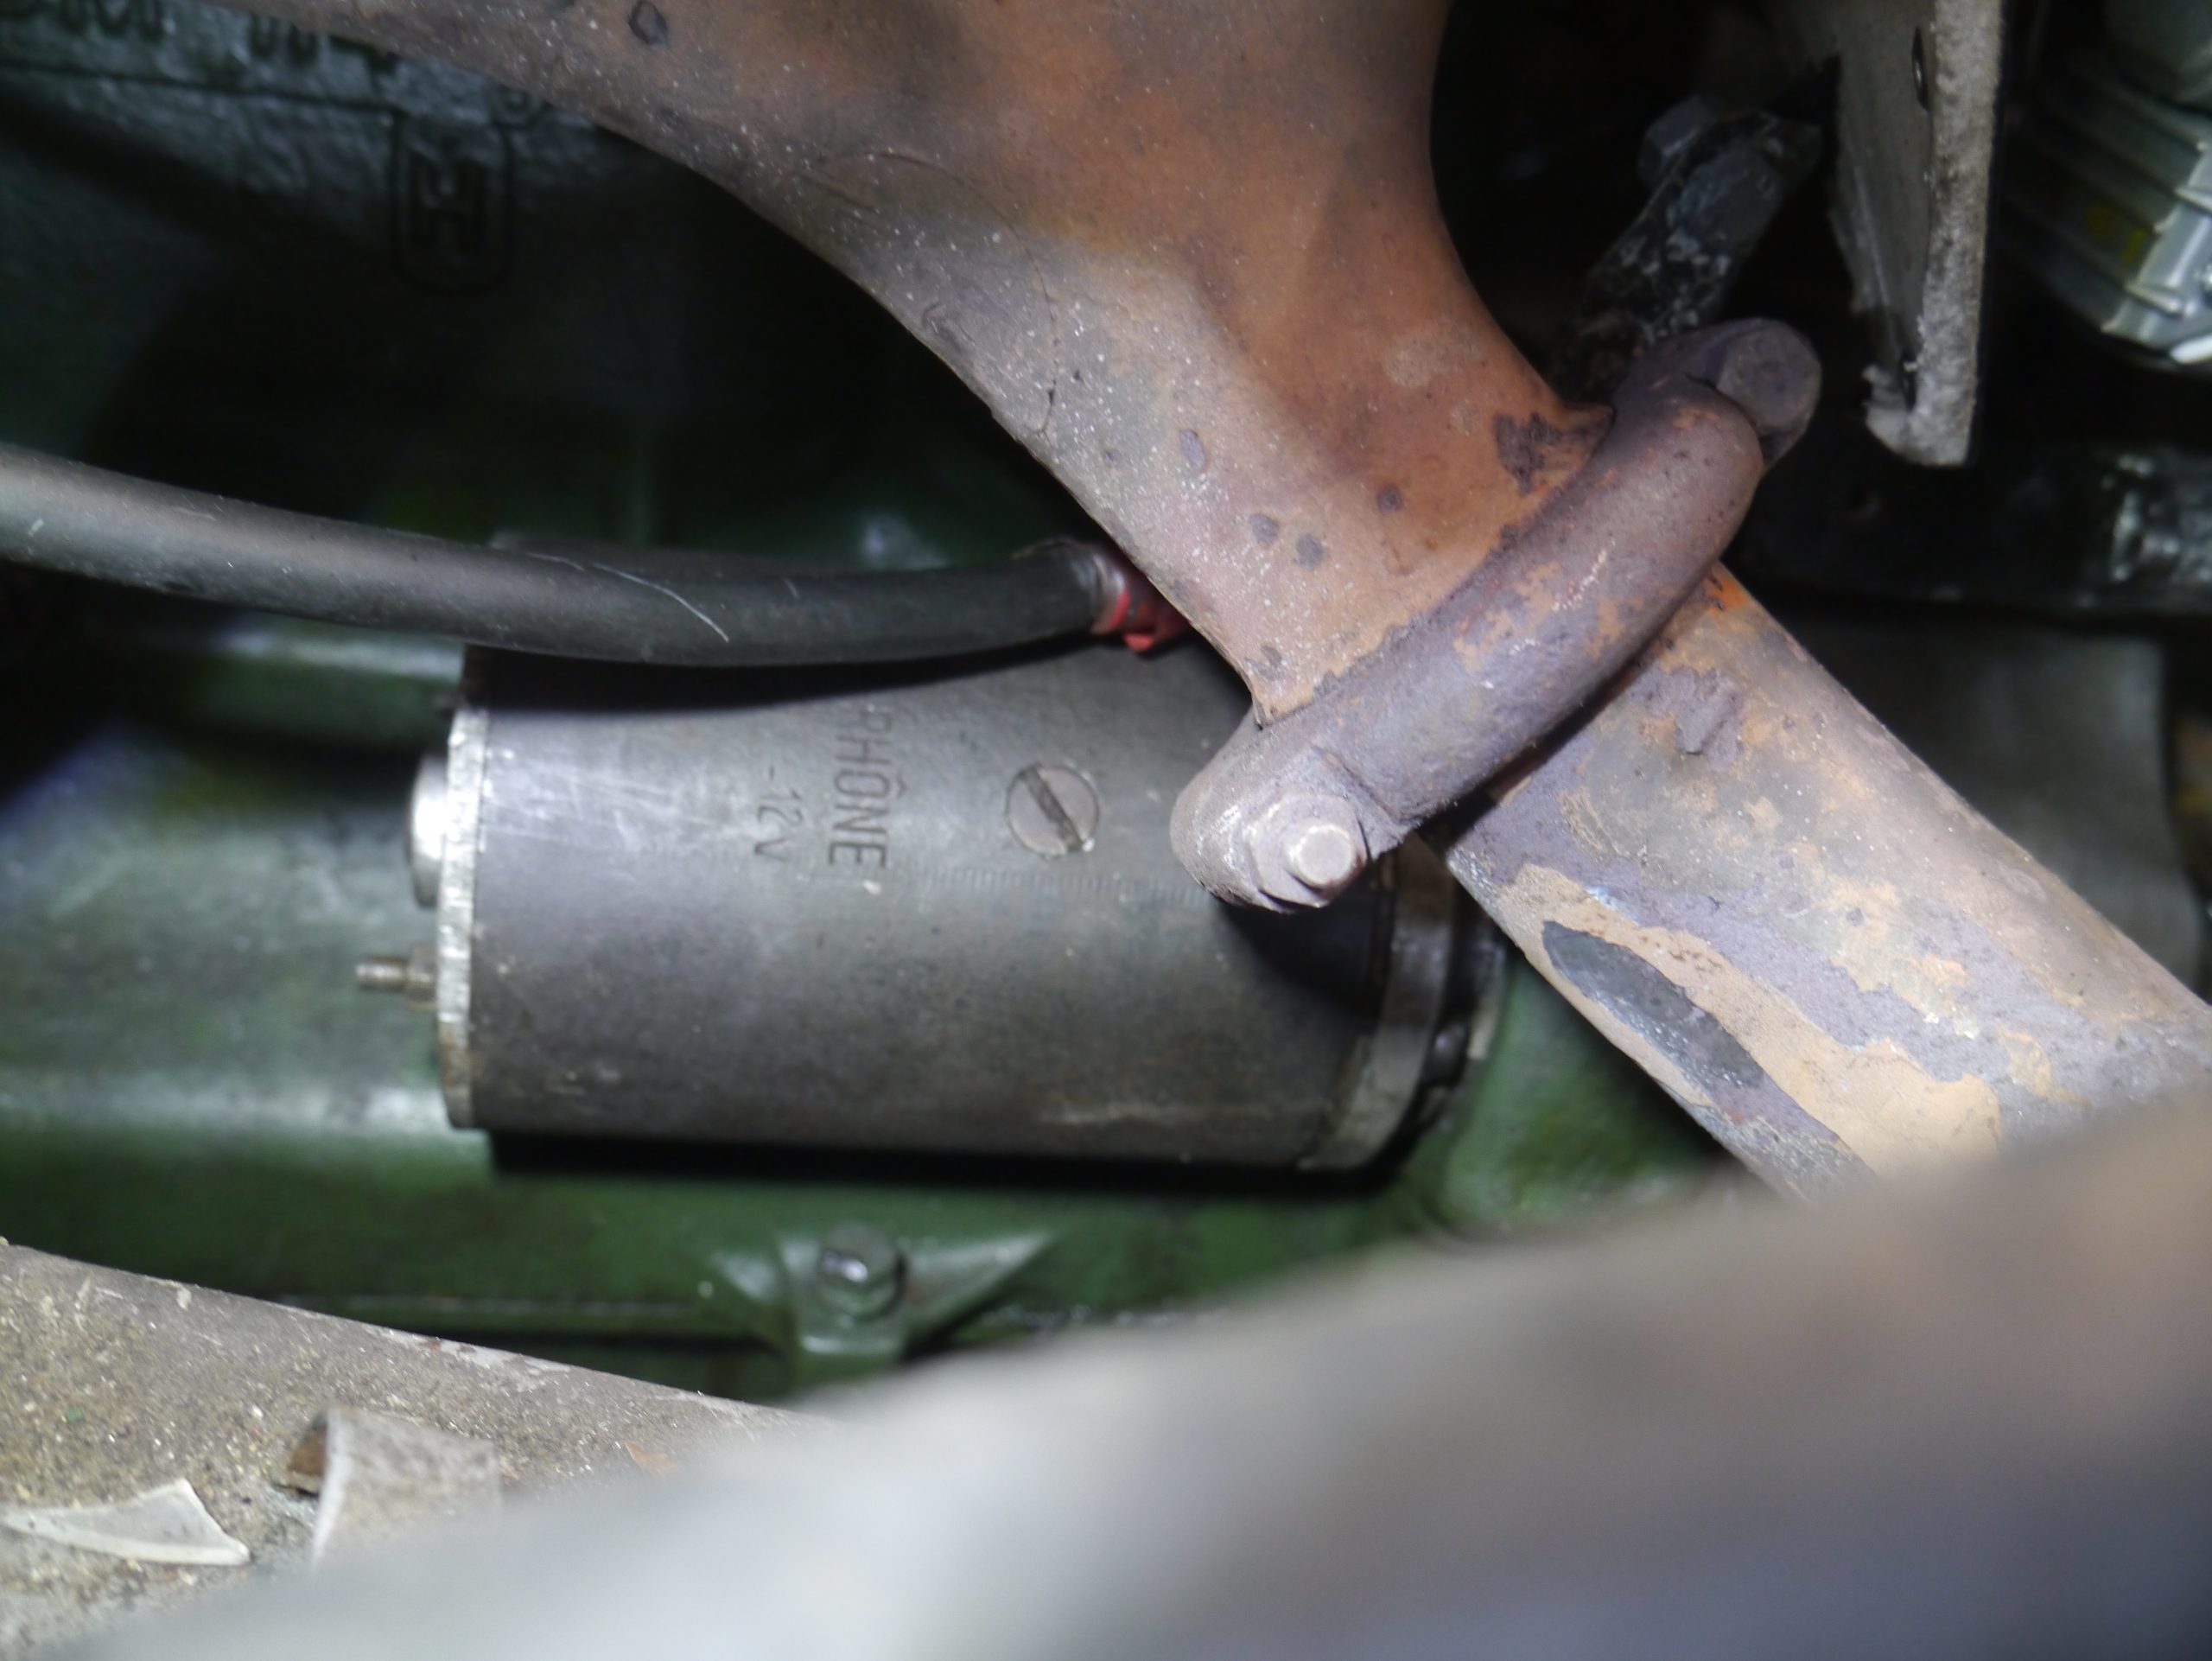
You can also remove the starter motor from underneath, but putting it back in is really easier from the top. Unless you have a bridge, of course.
As a possible emergency measure I mounted the original Traction Avant 6Volt starter motor, but it does not engage the Citroën ID flywheel. So quickly removed again.
The repair:
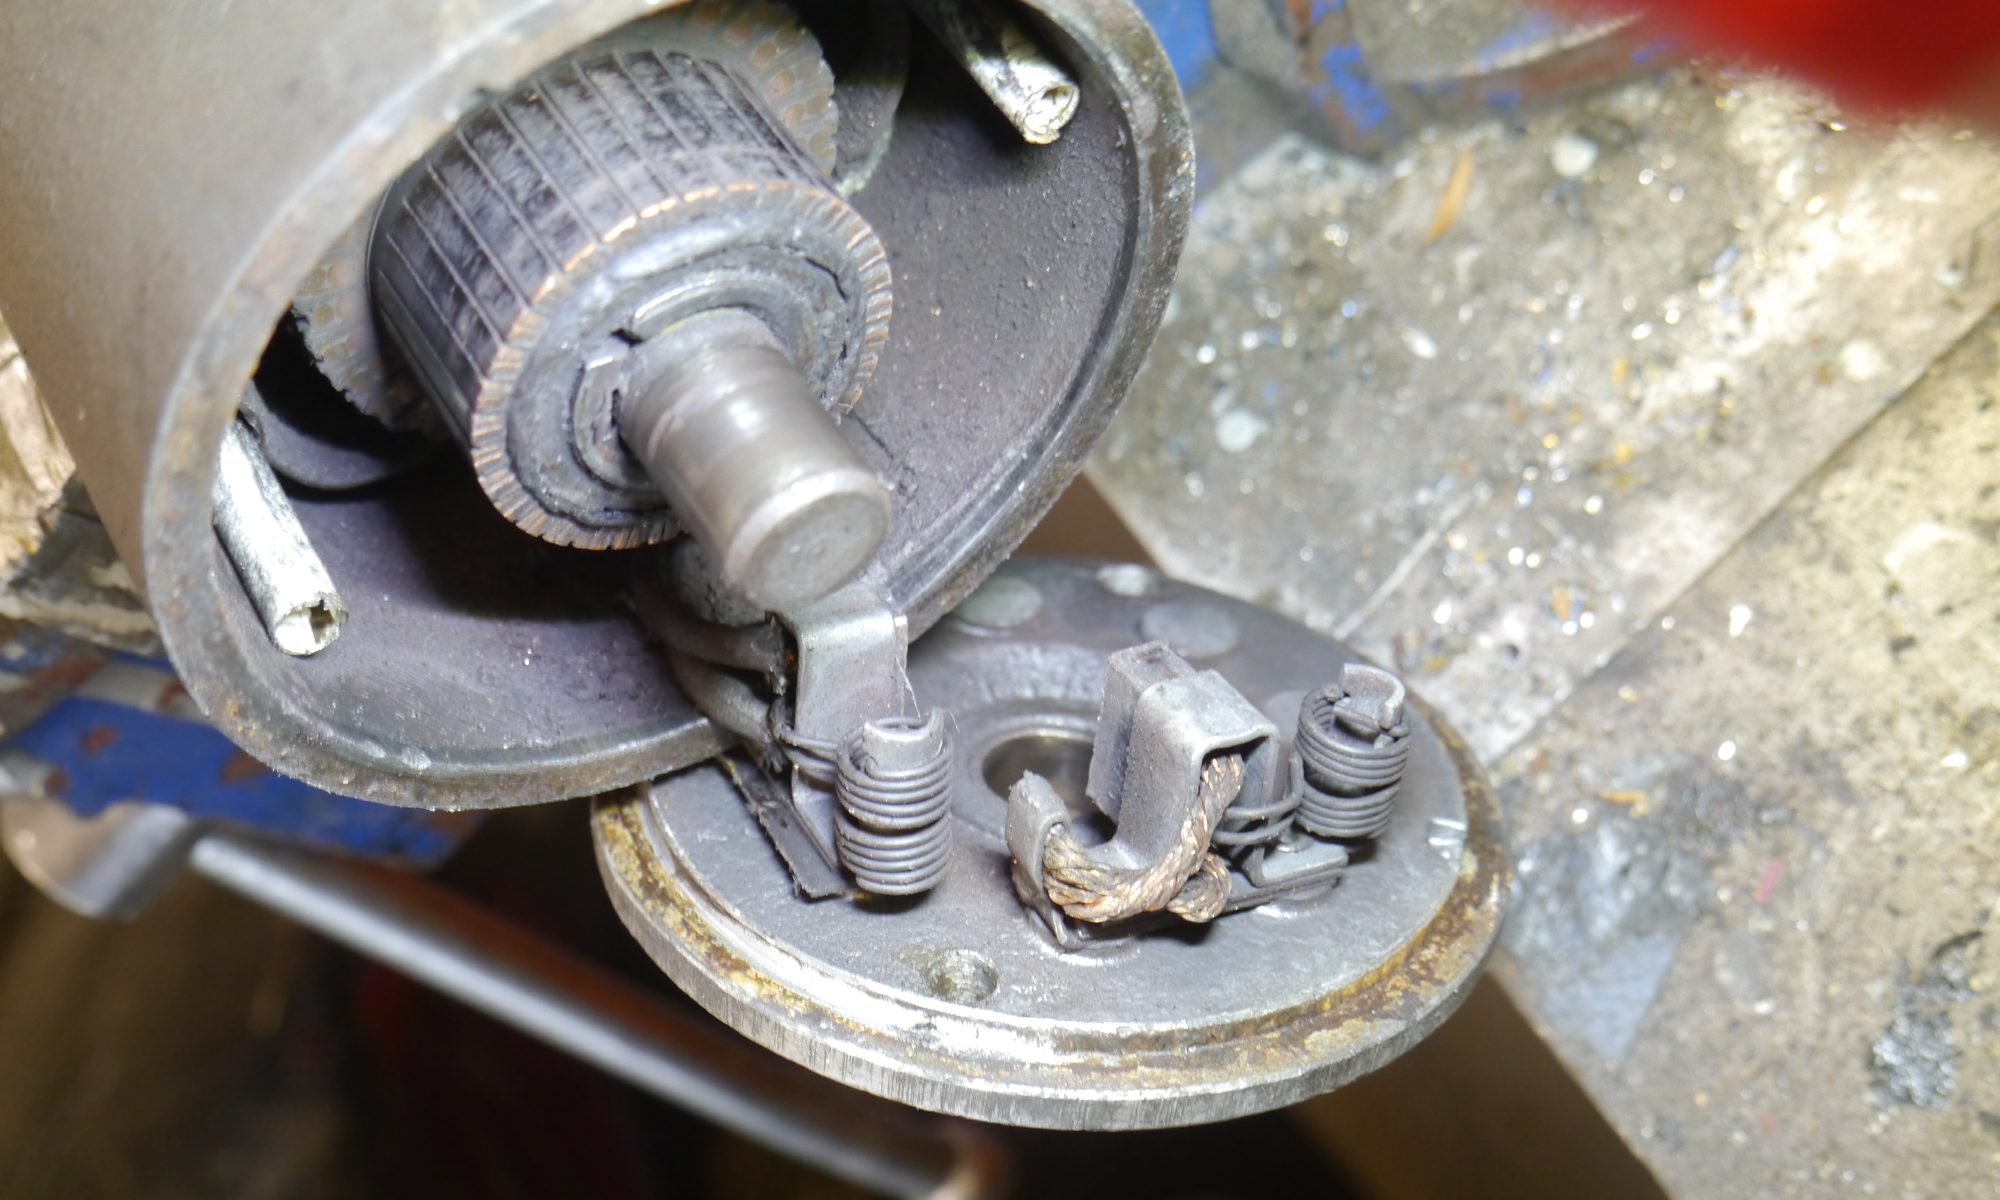
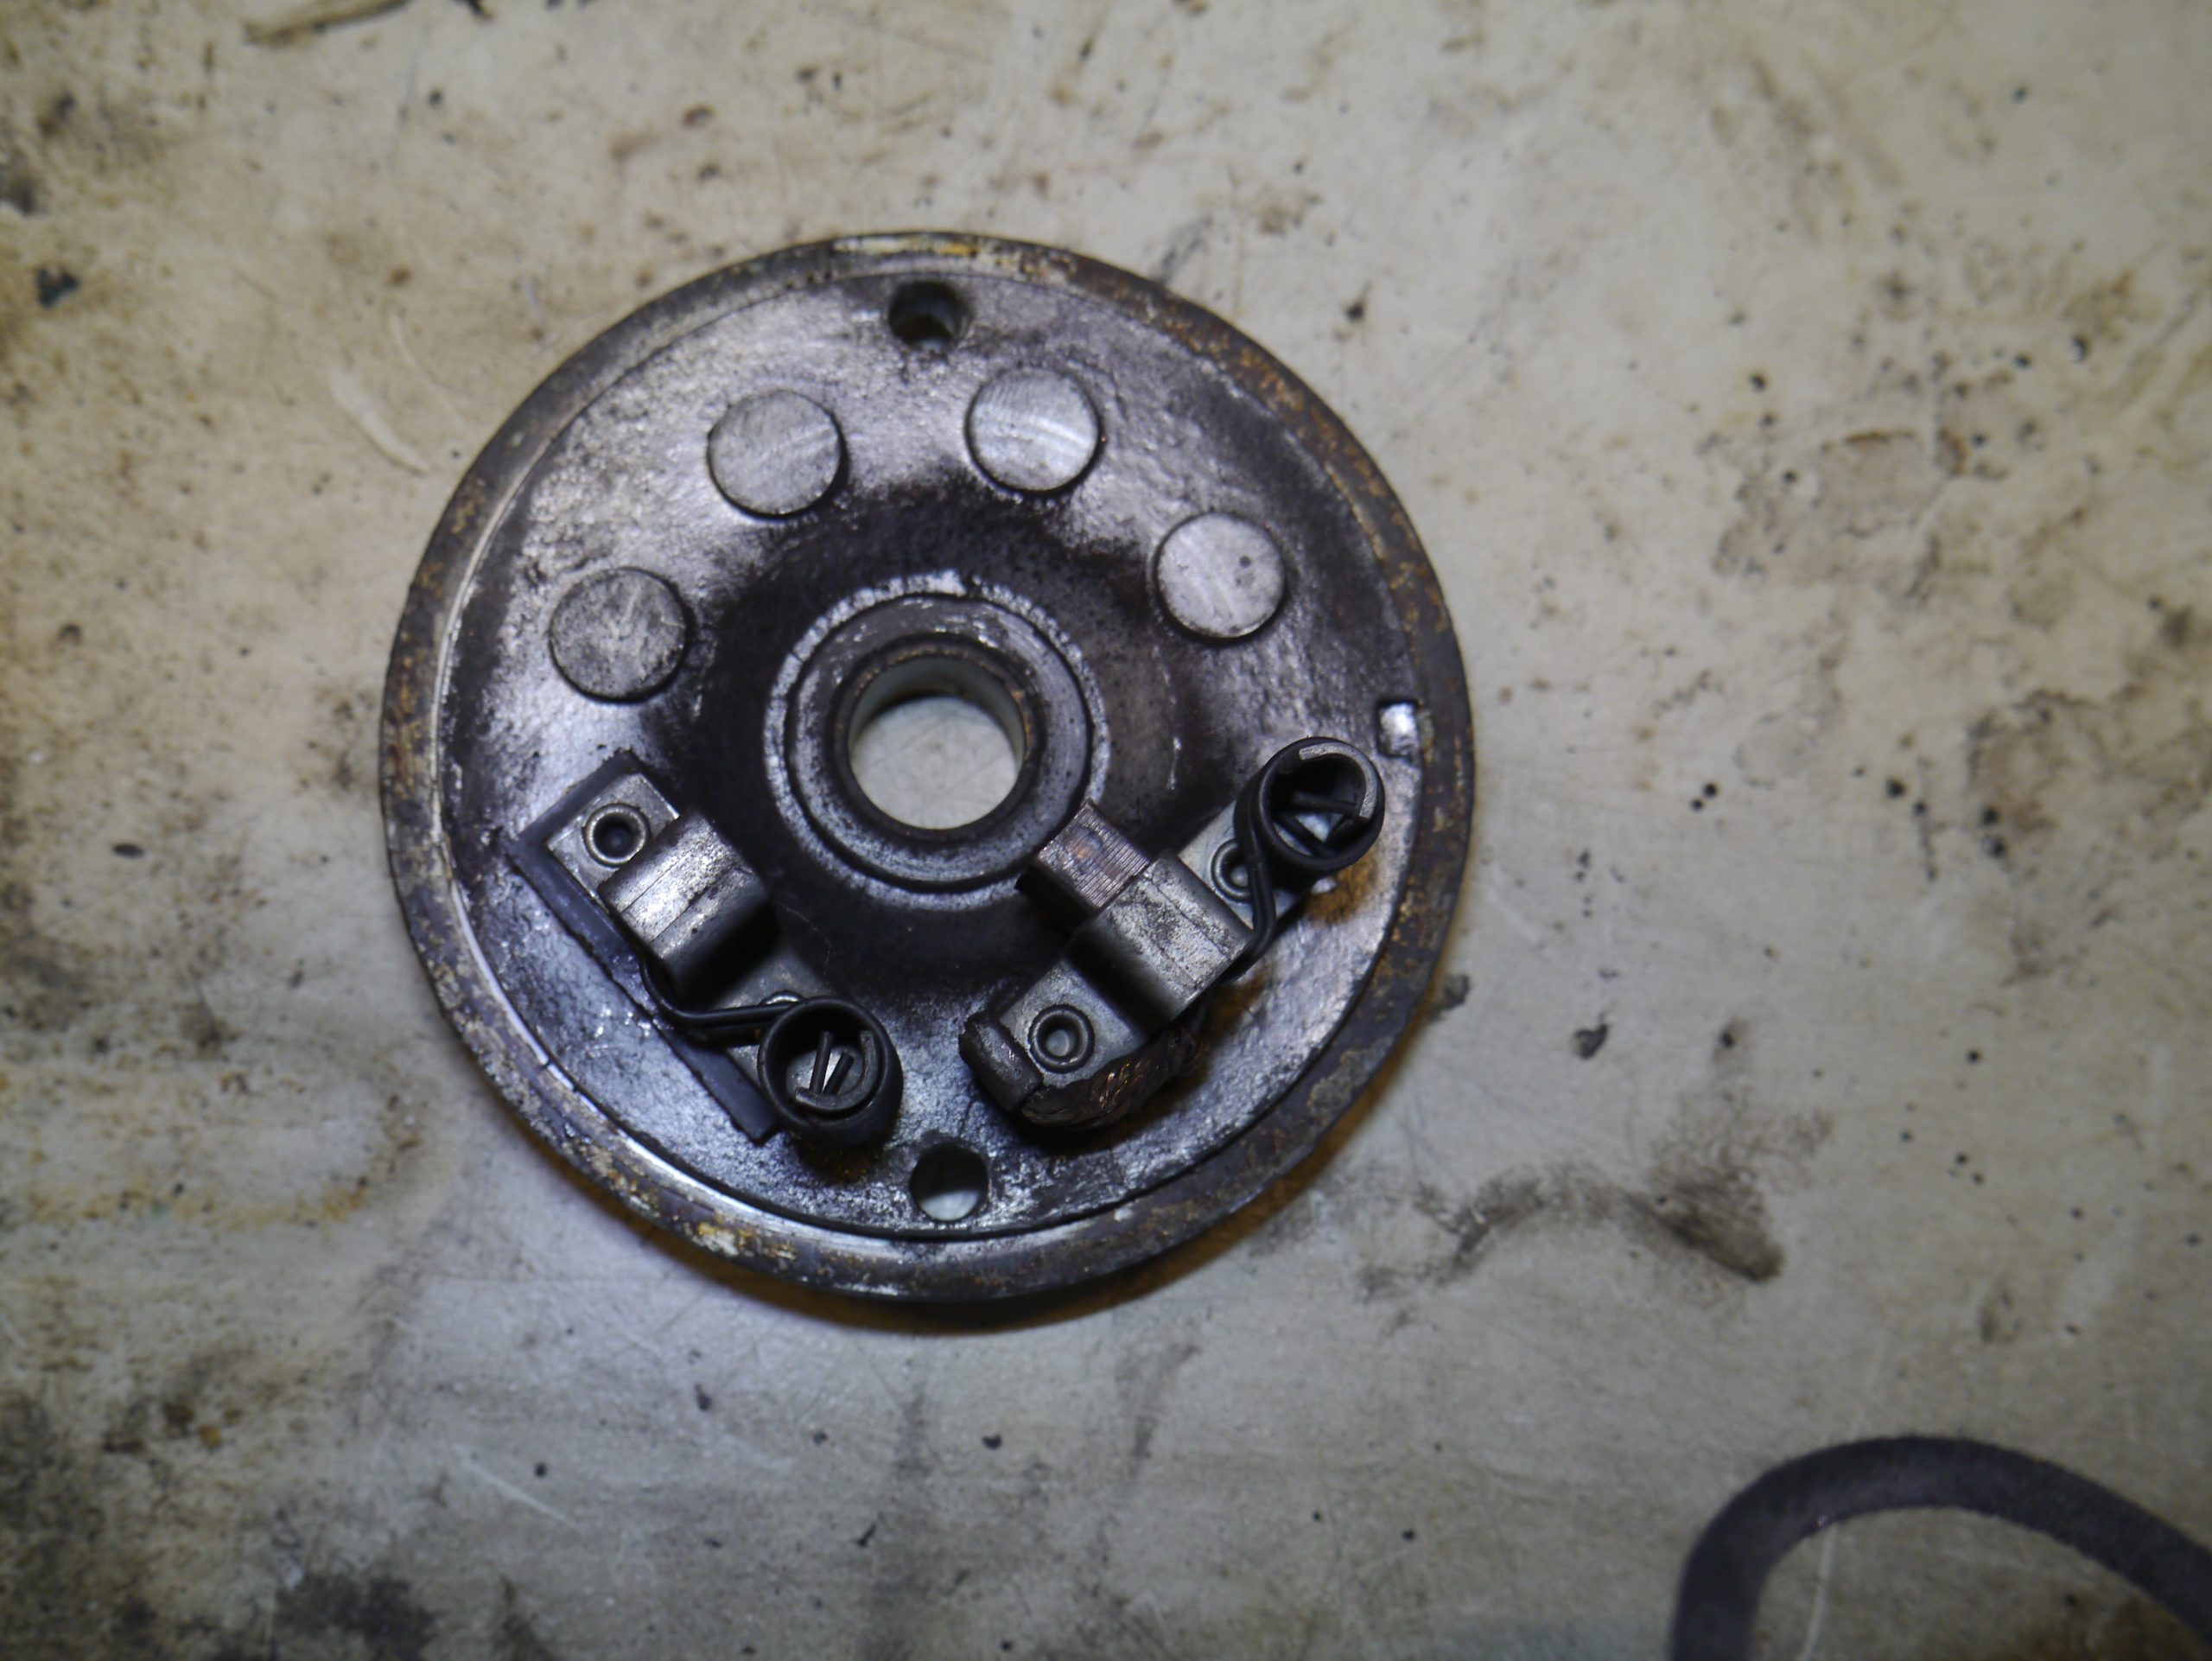
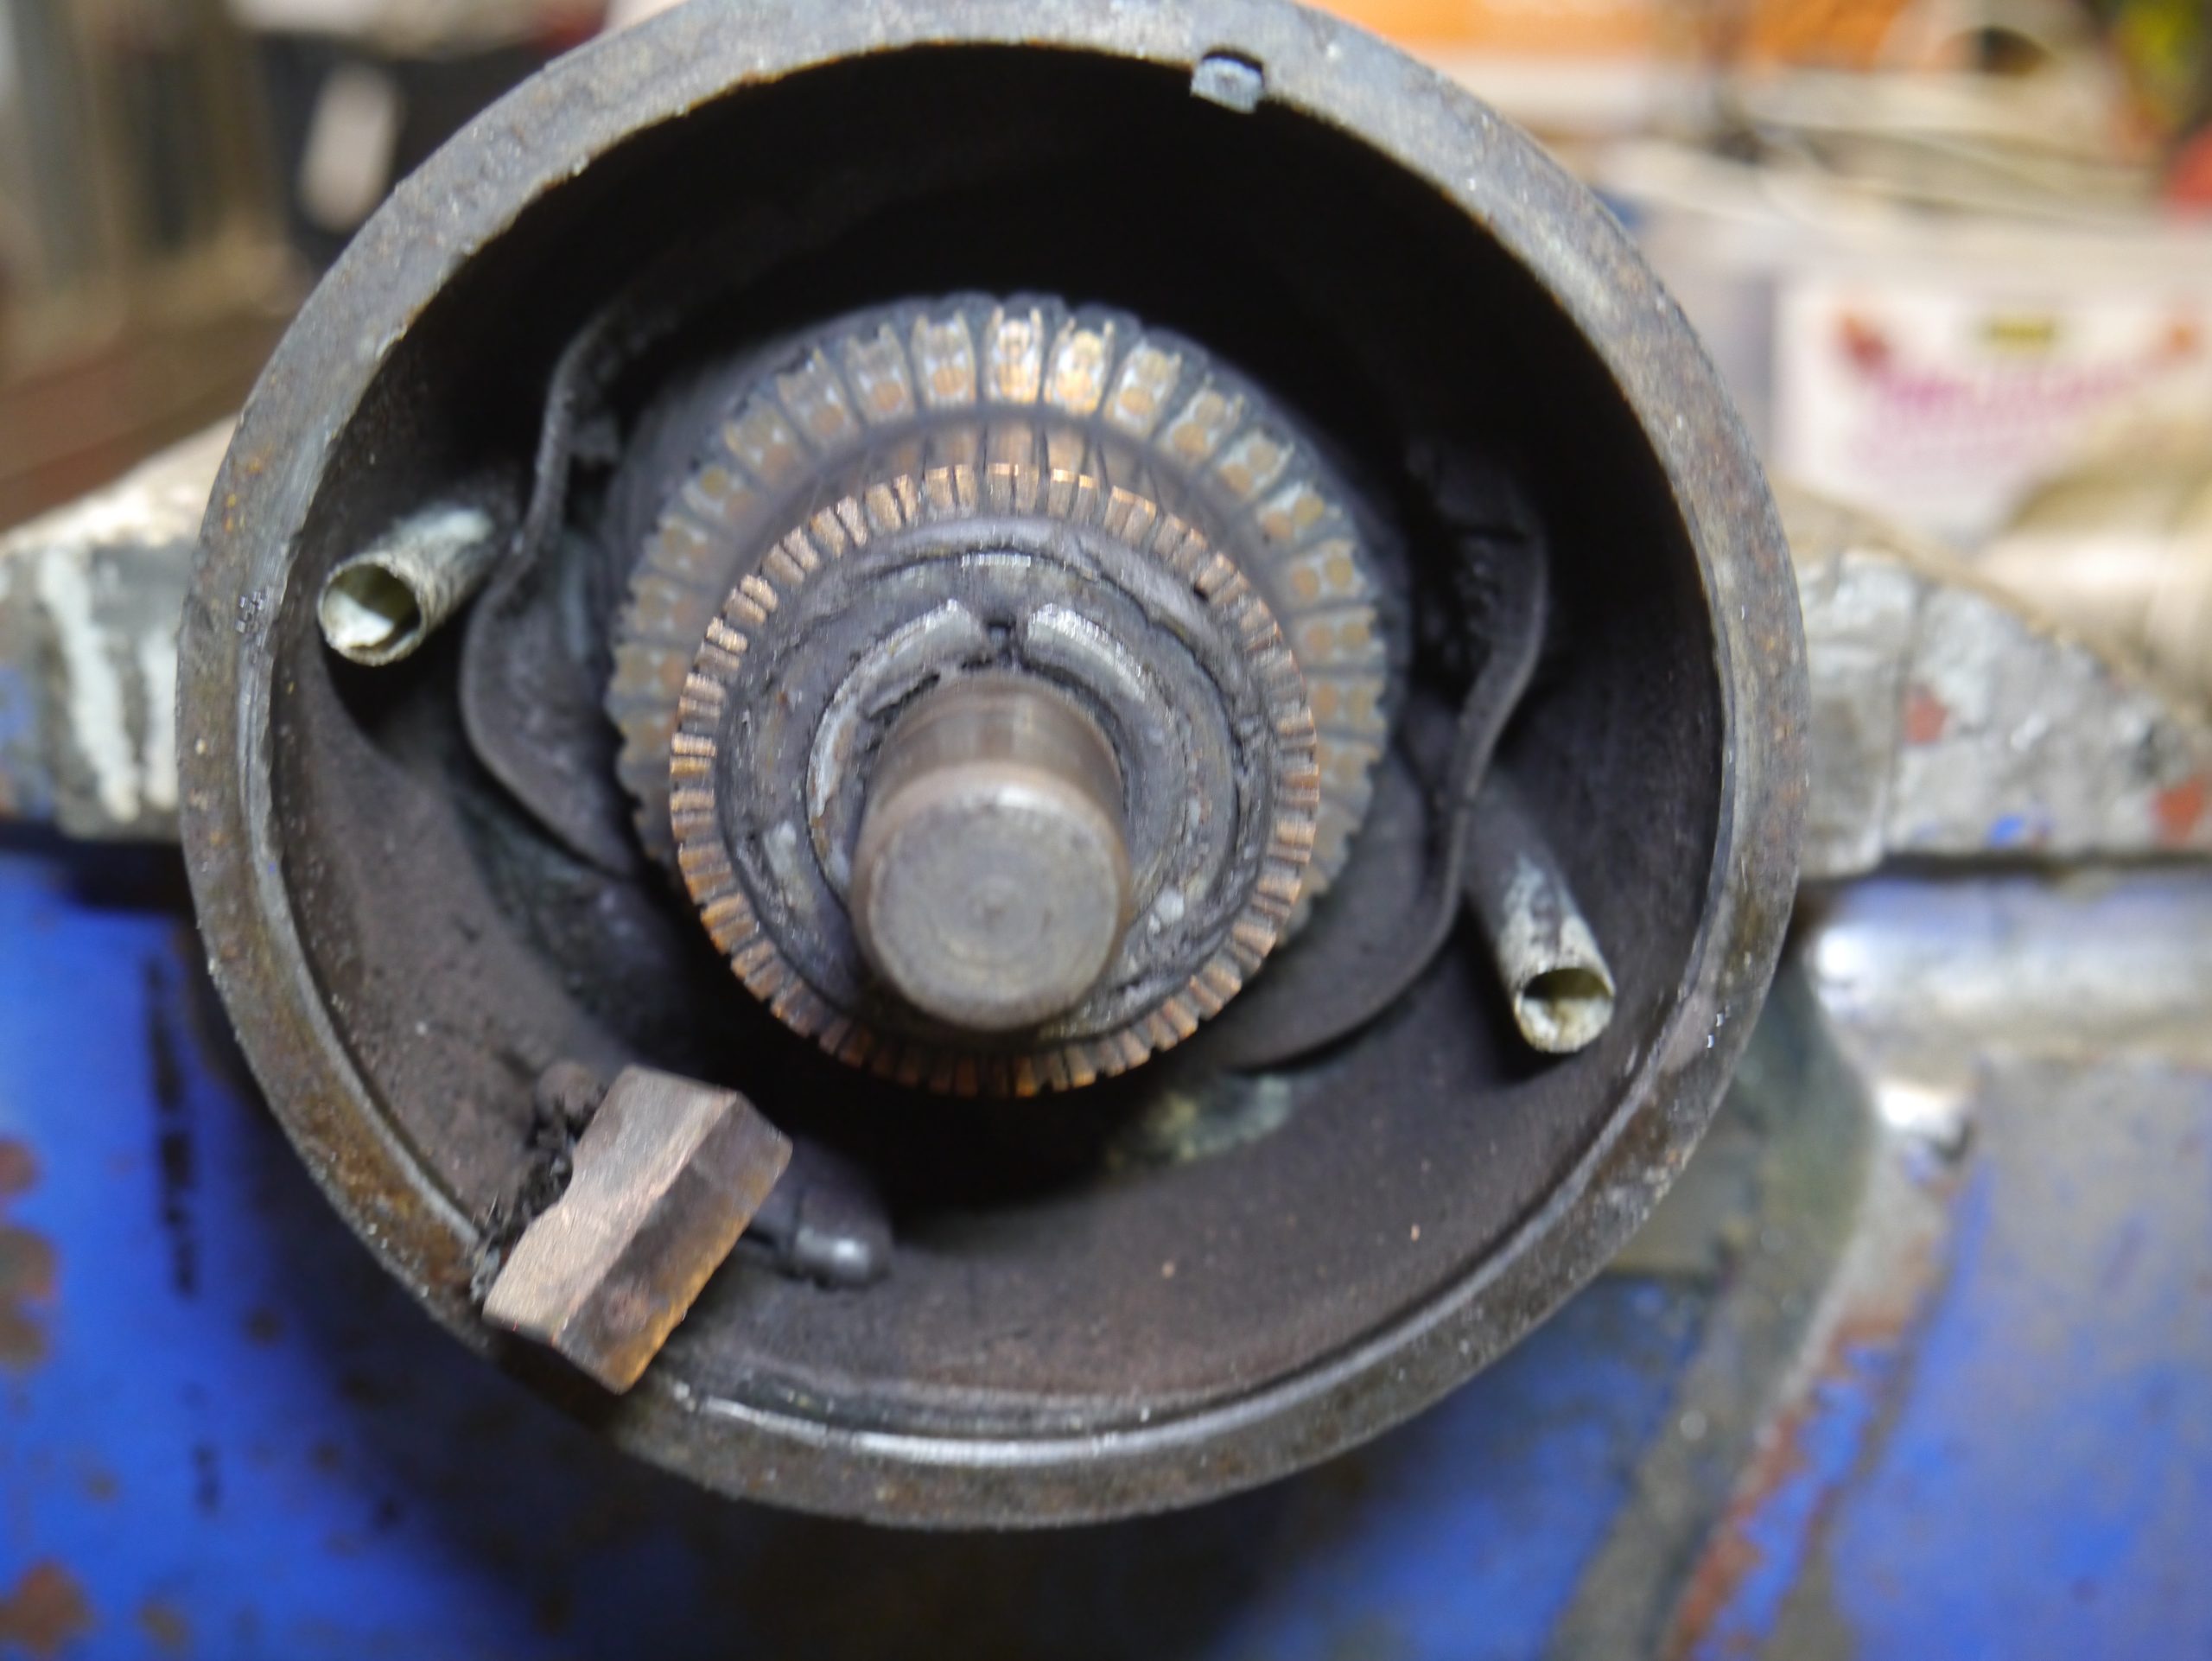
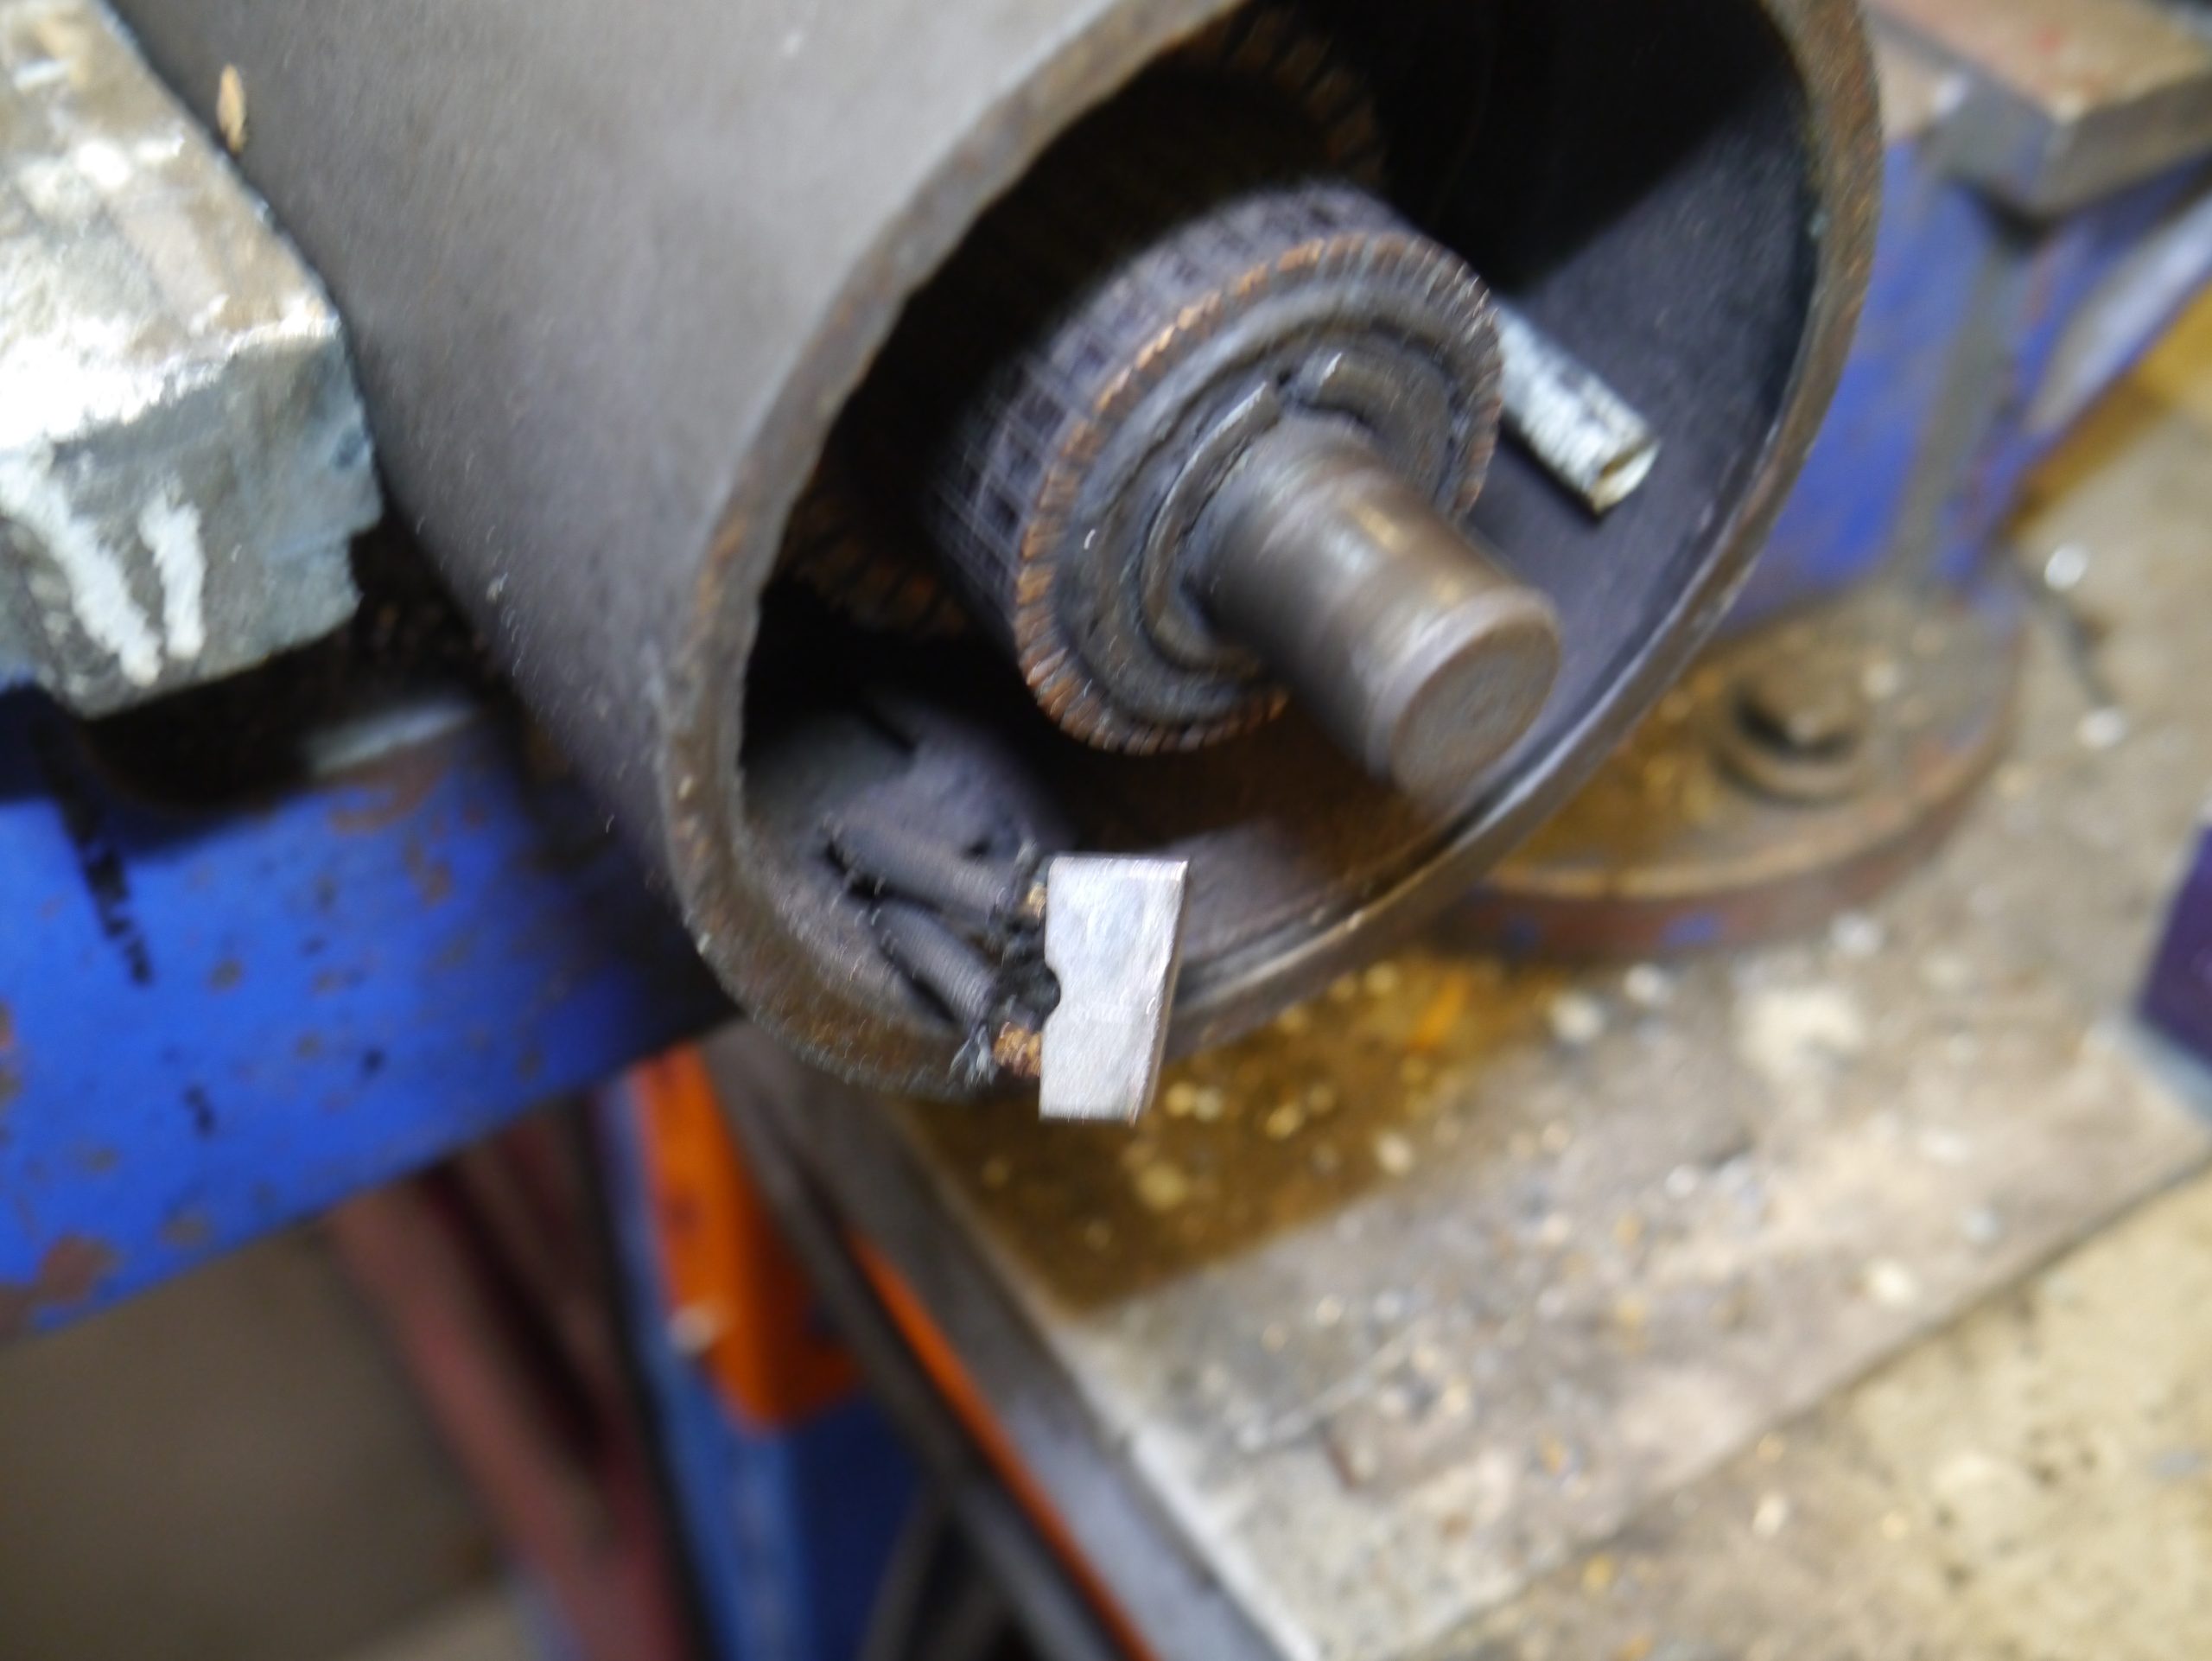
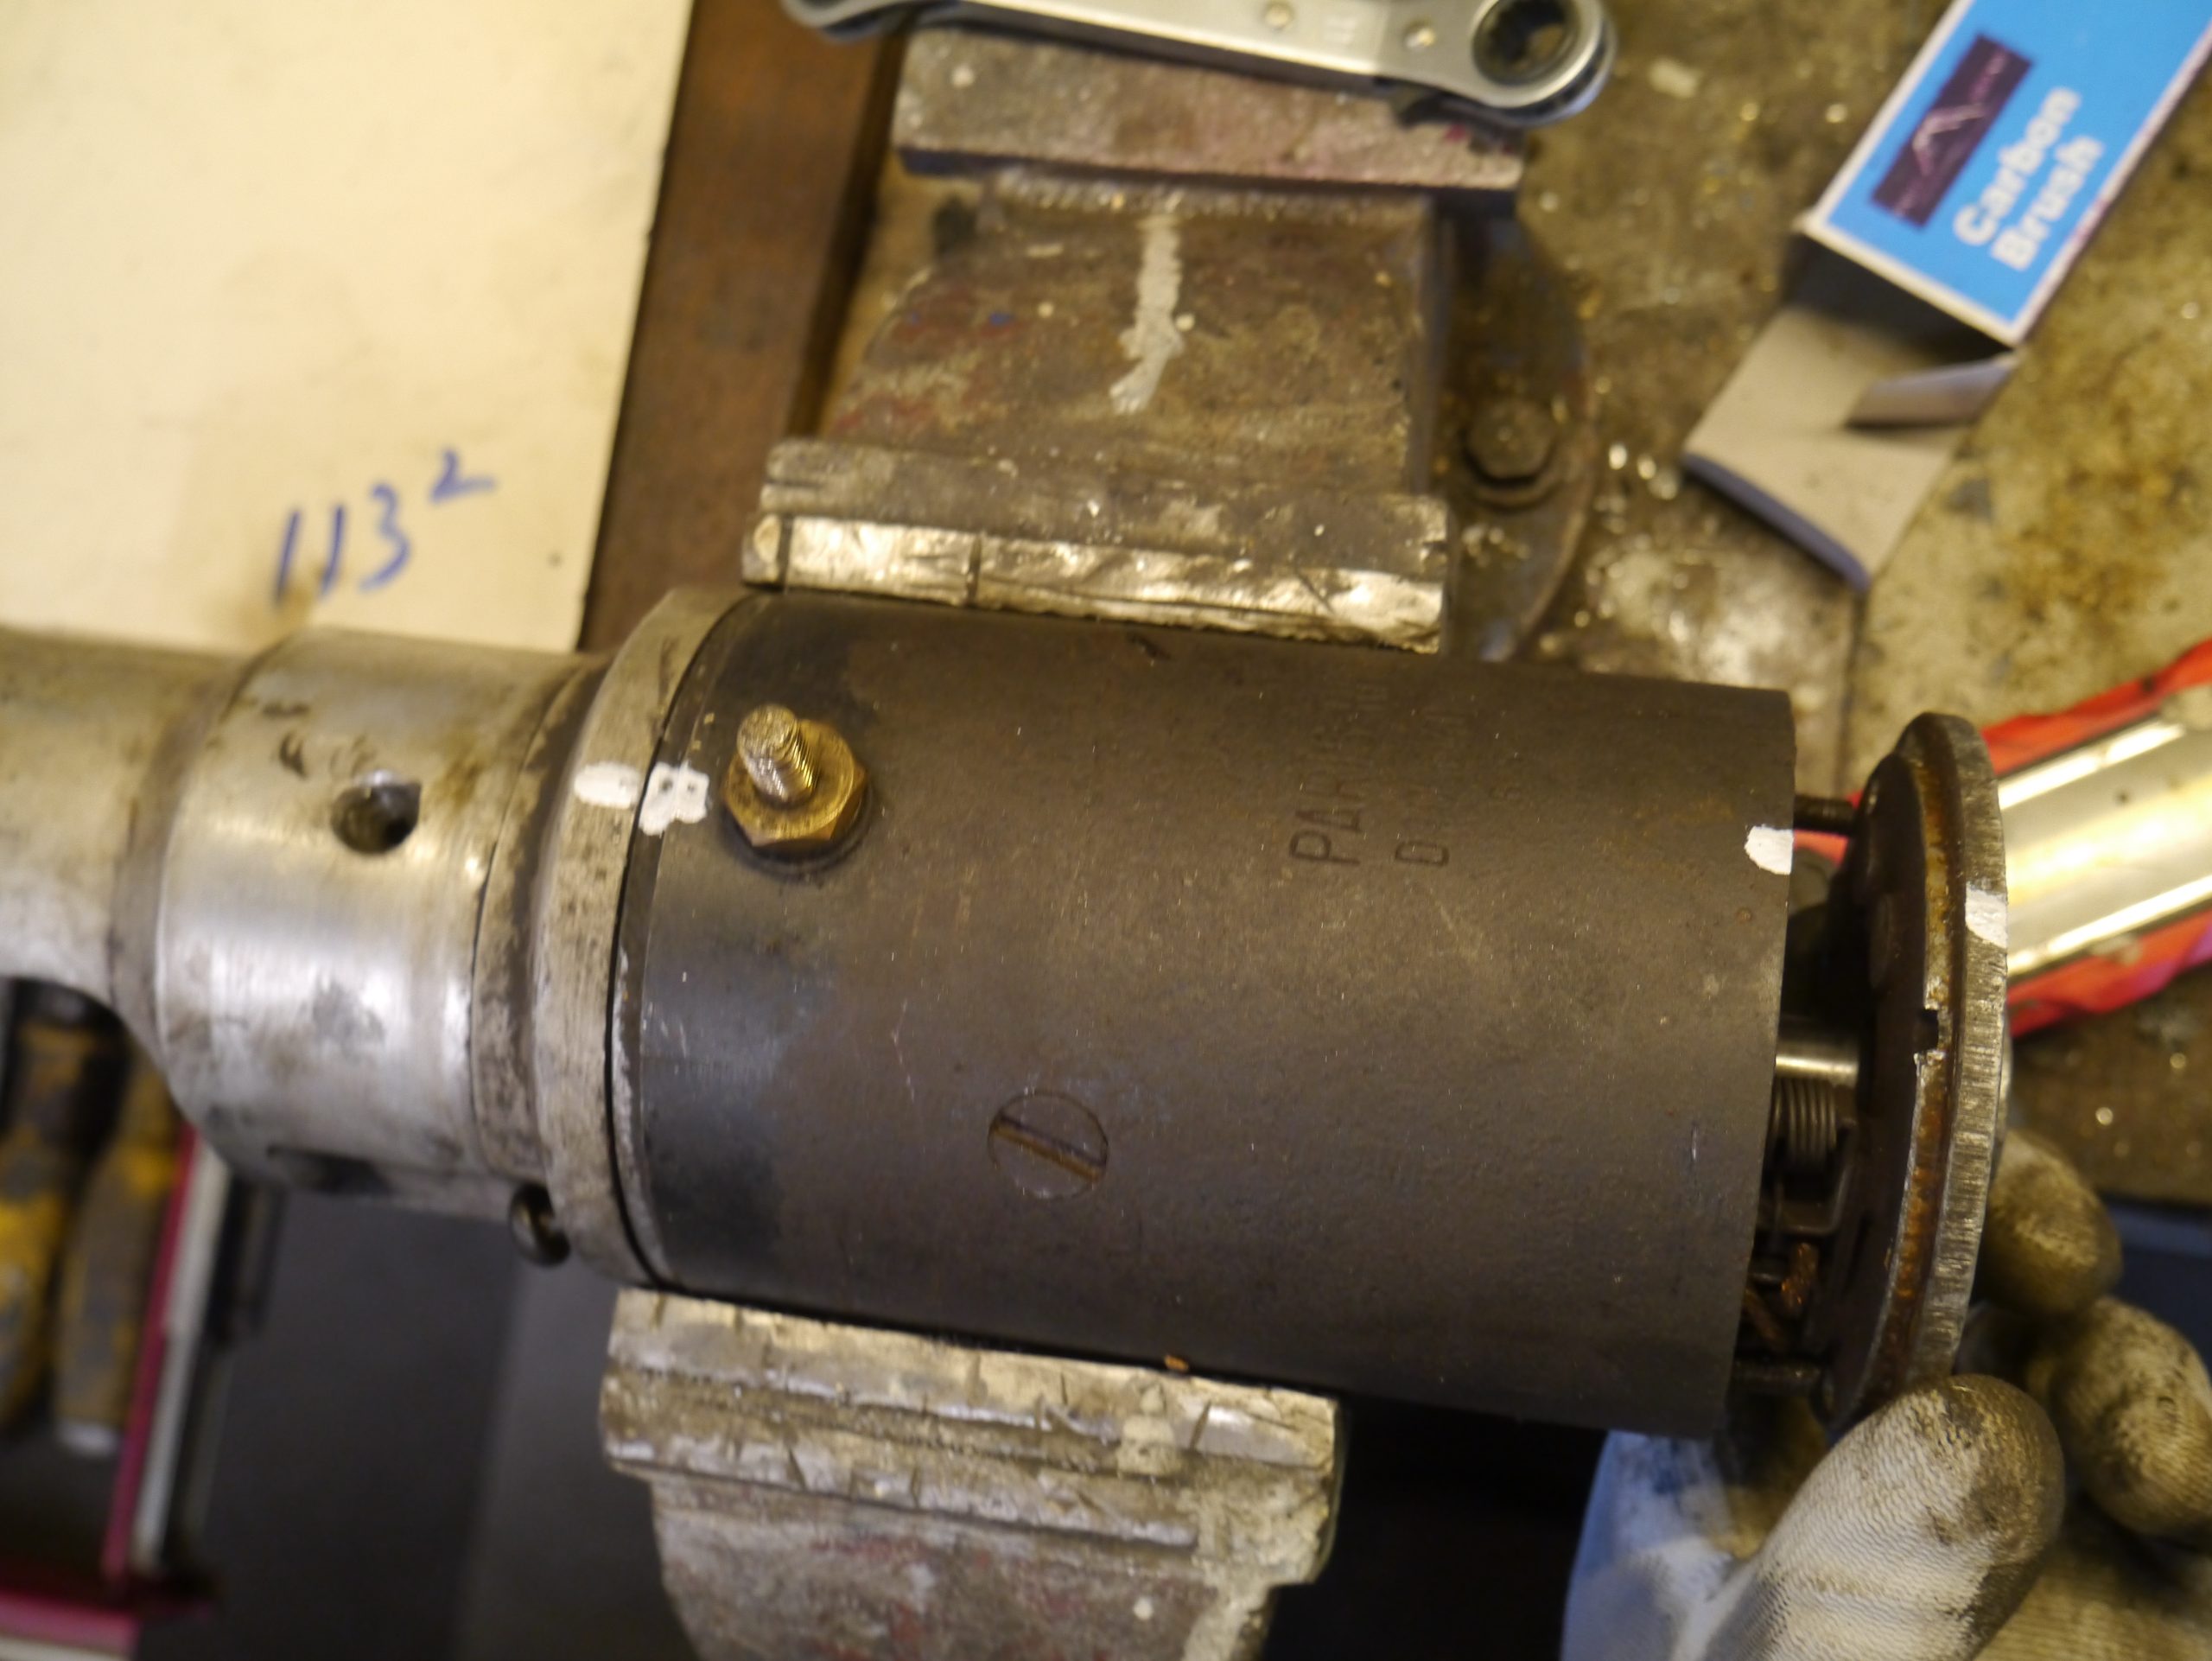
When you remove the two M6 nuts and locking plates on the back of the 12 Volt Paris-Rhone starter motor, you then slide the aluminum back including both carbon brush holders off a bit.
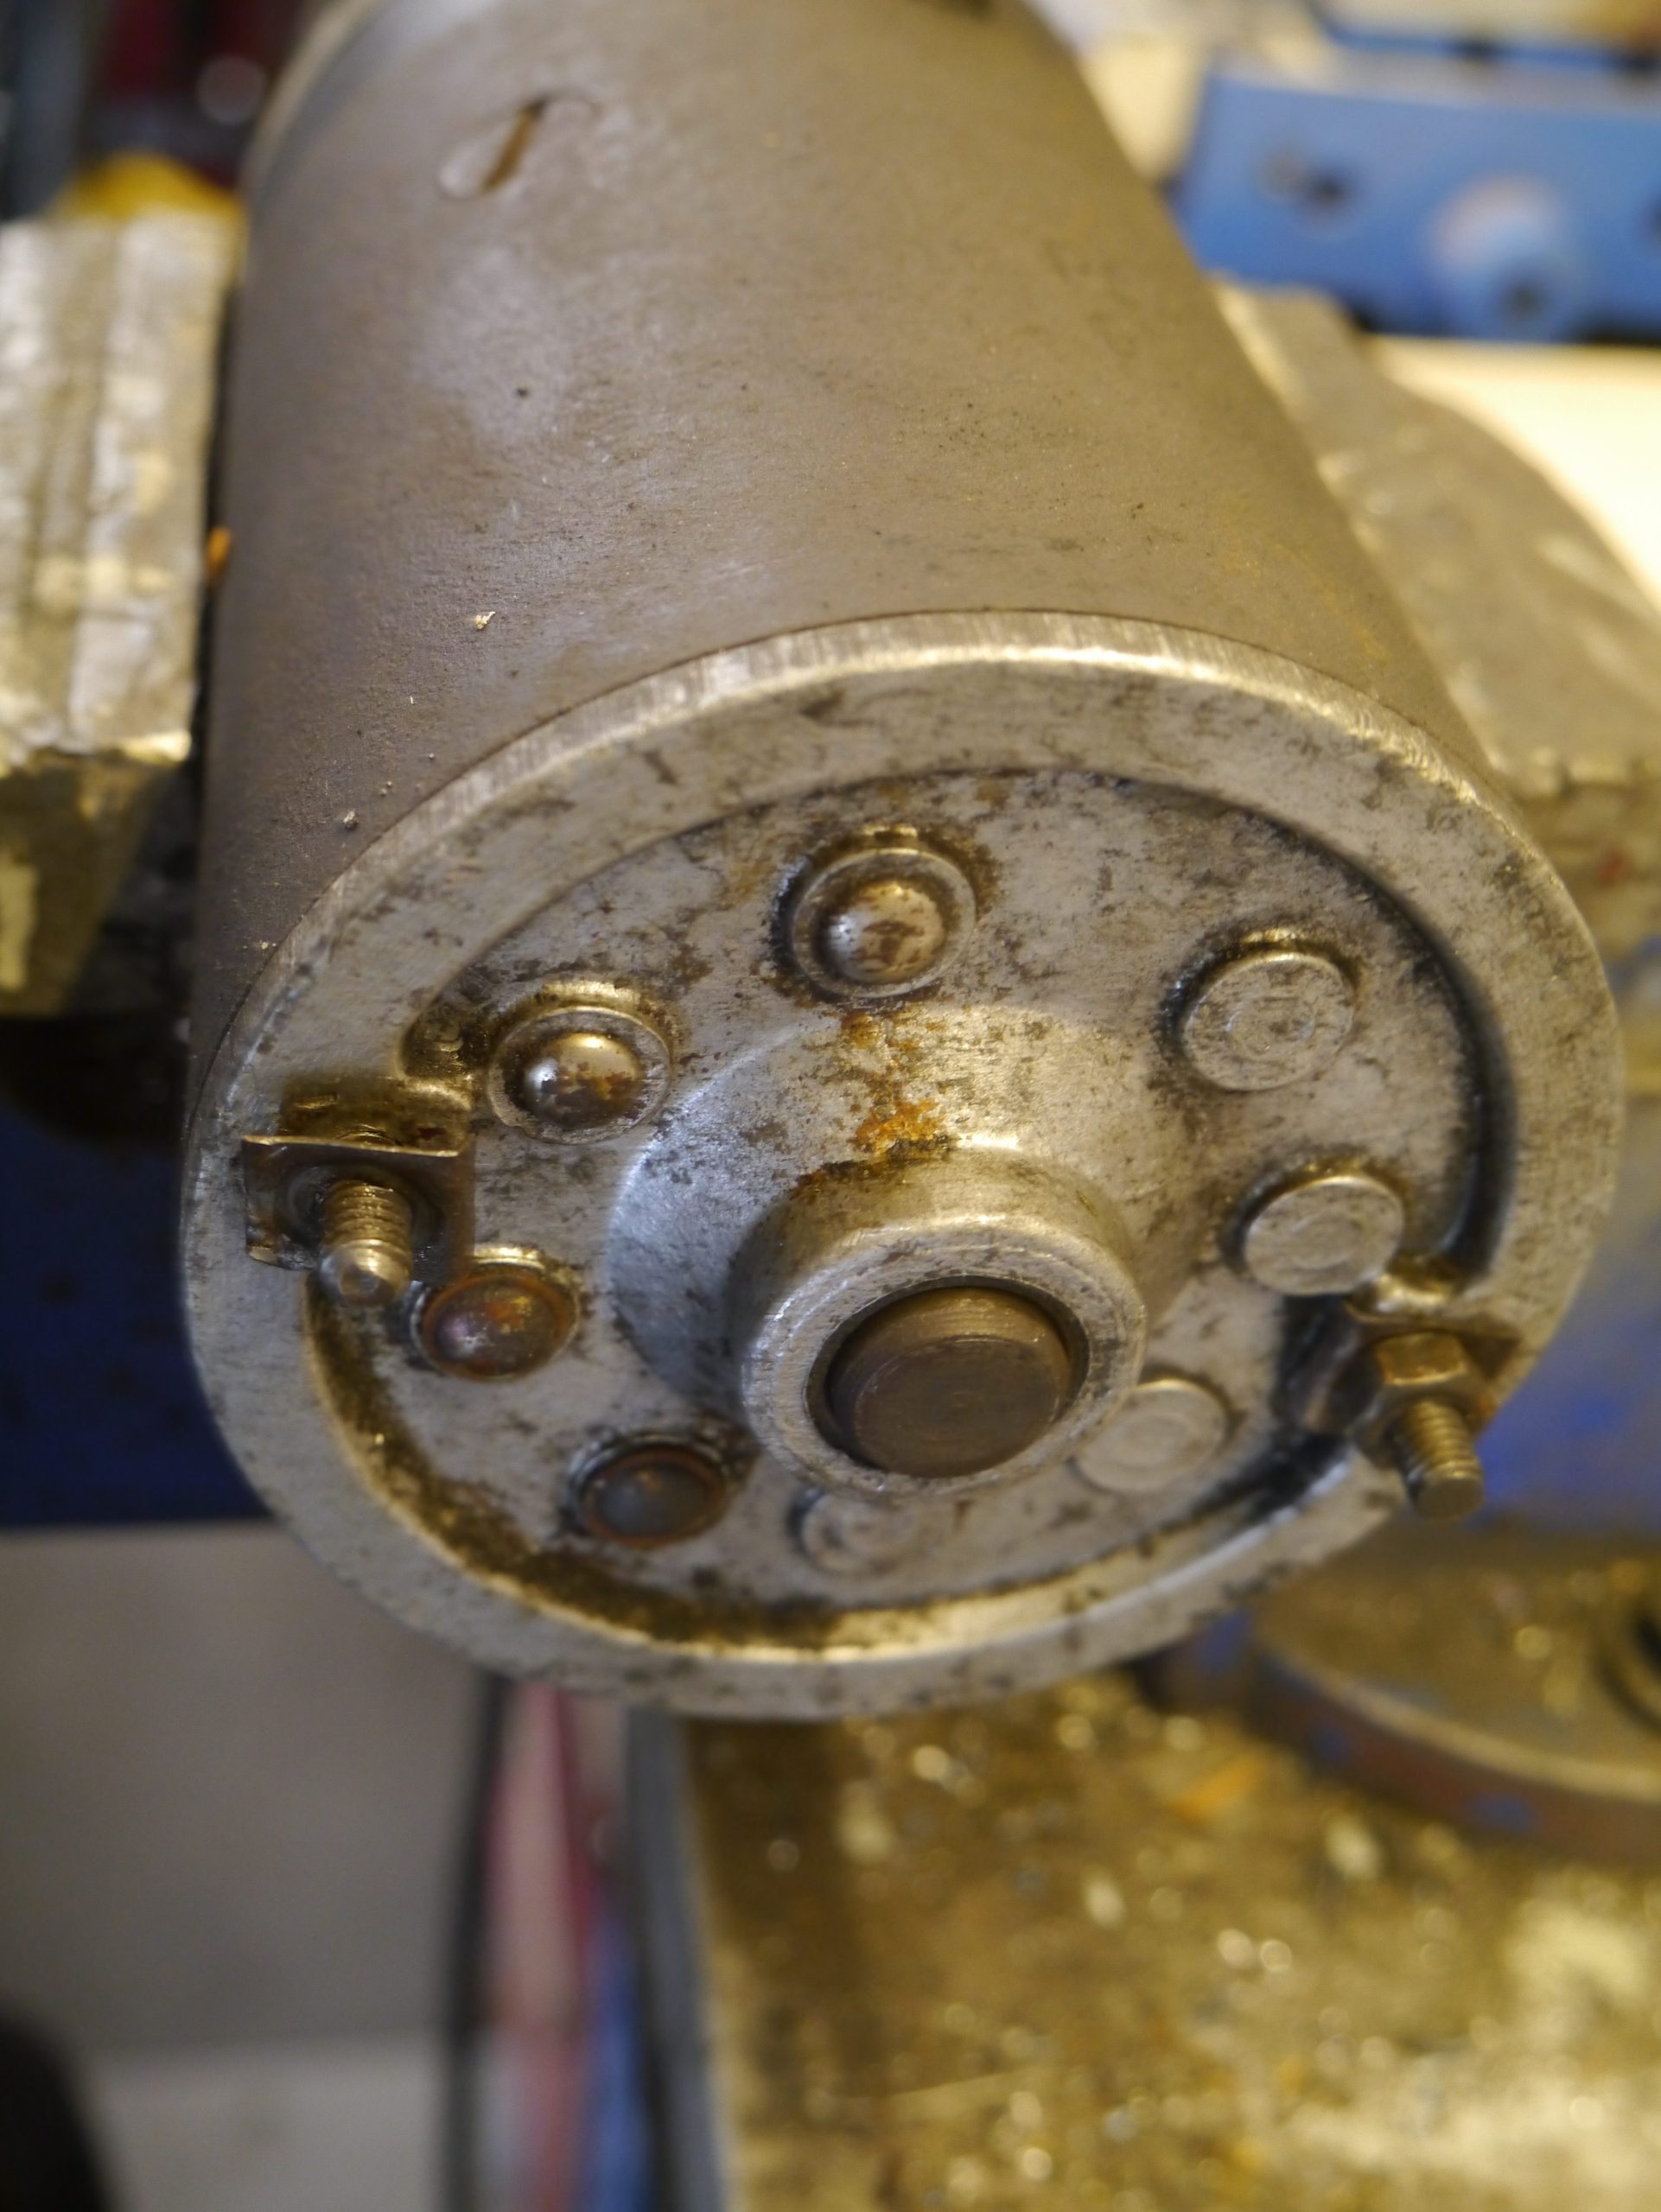
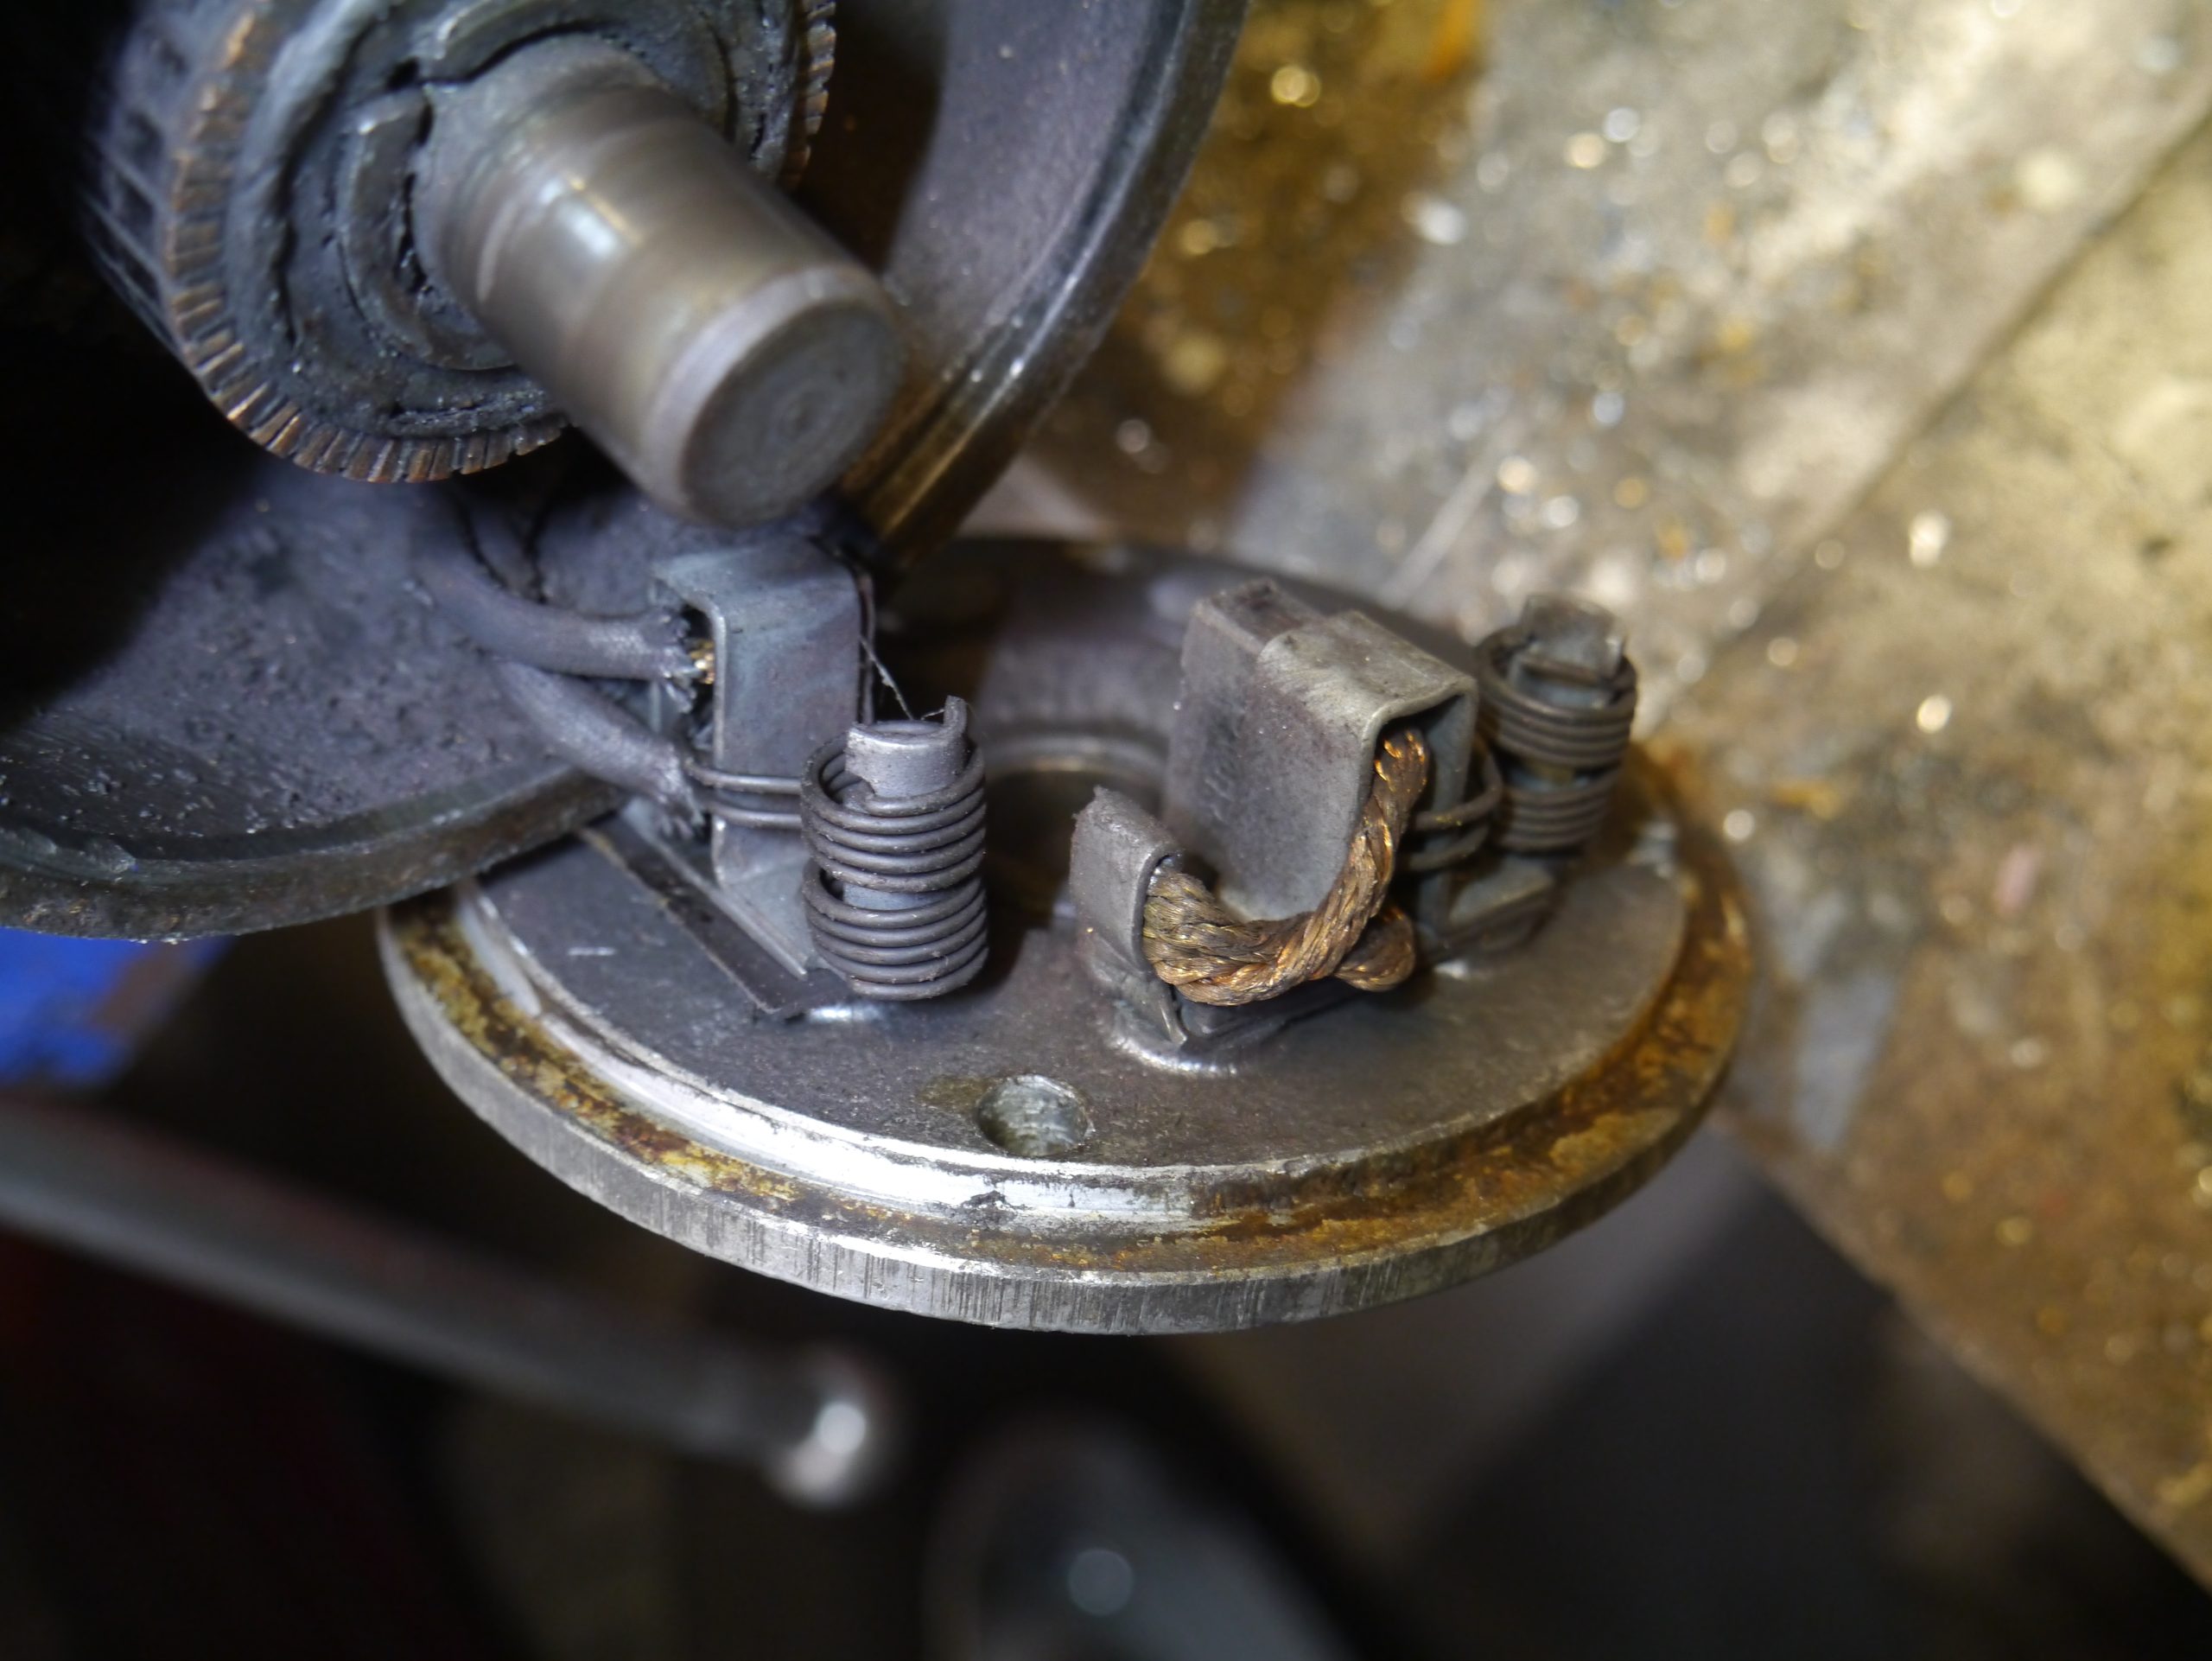
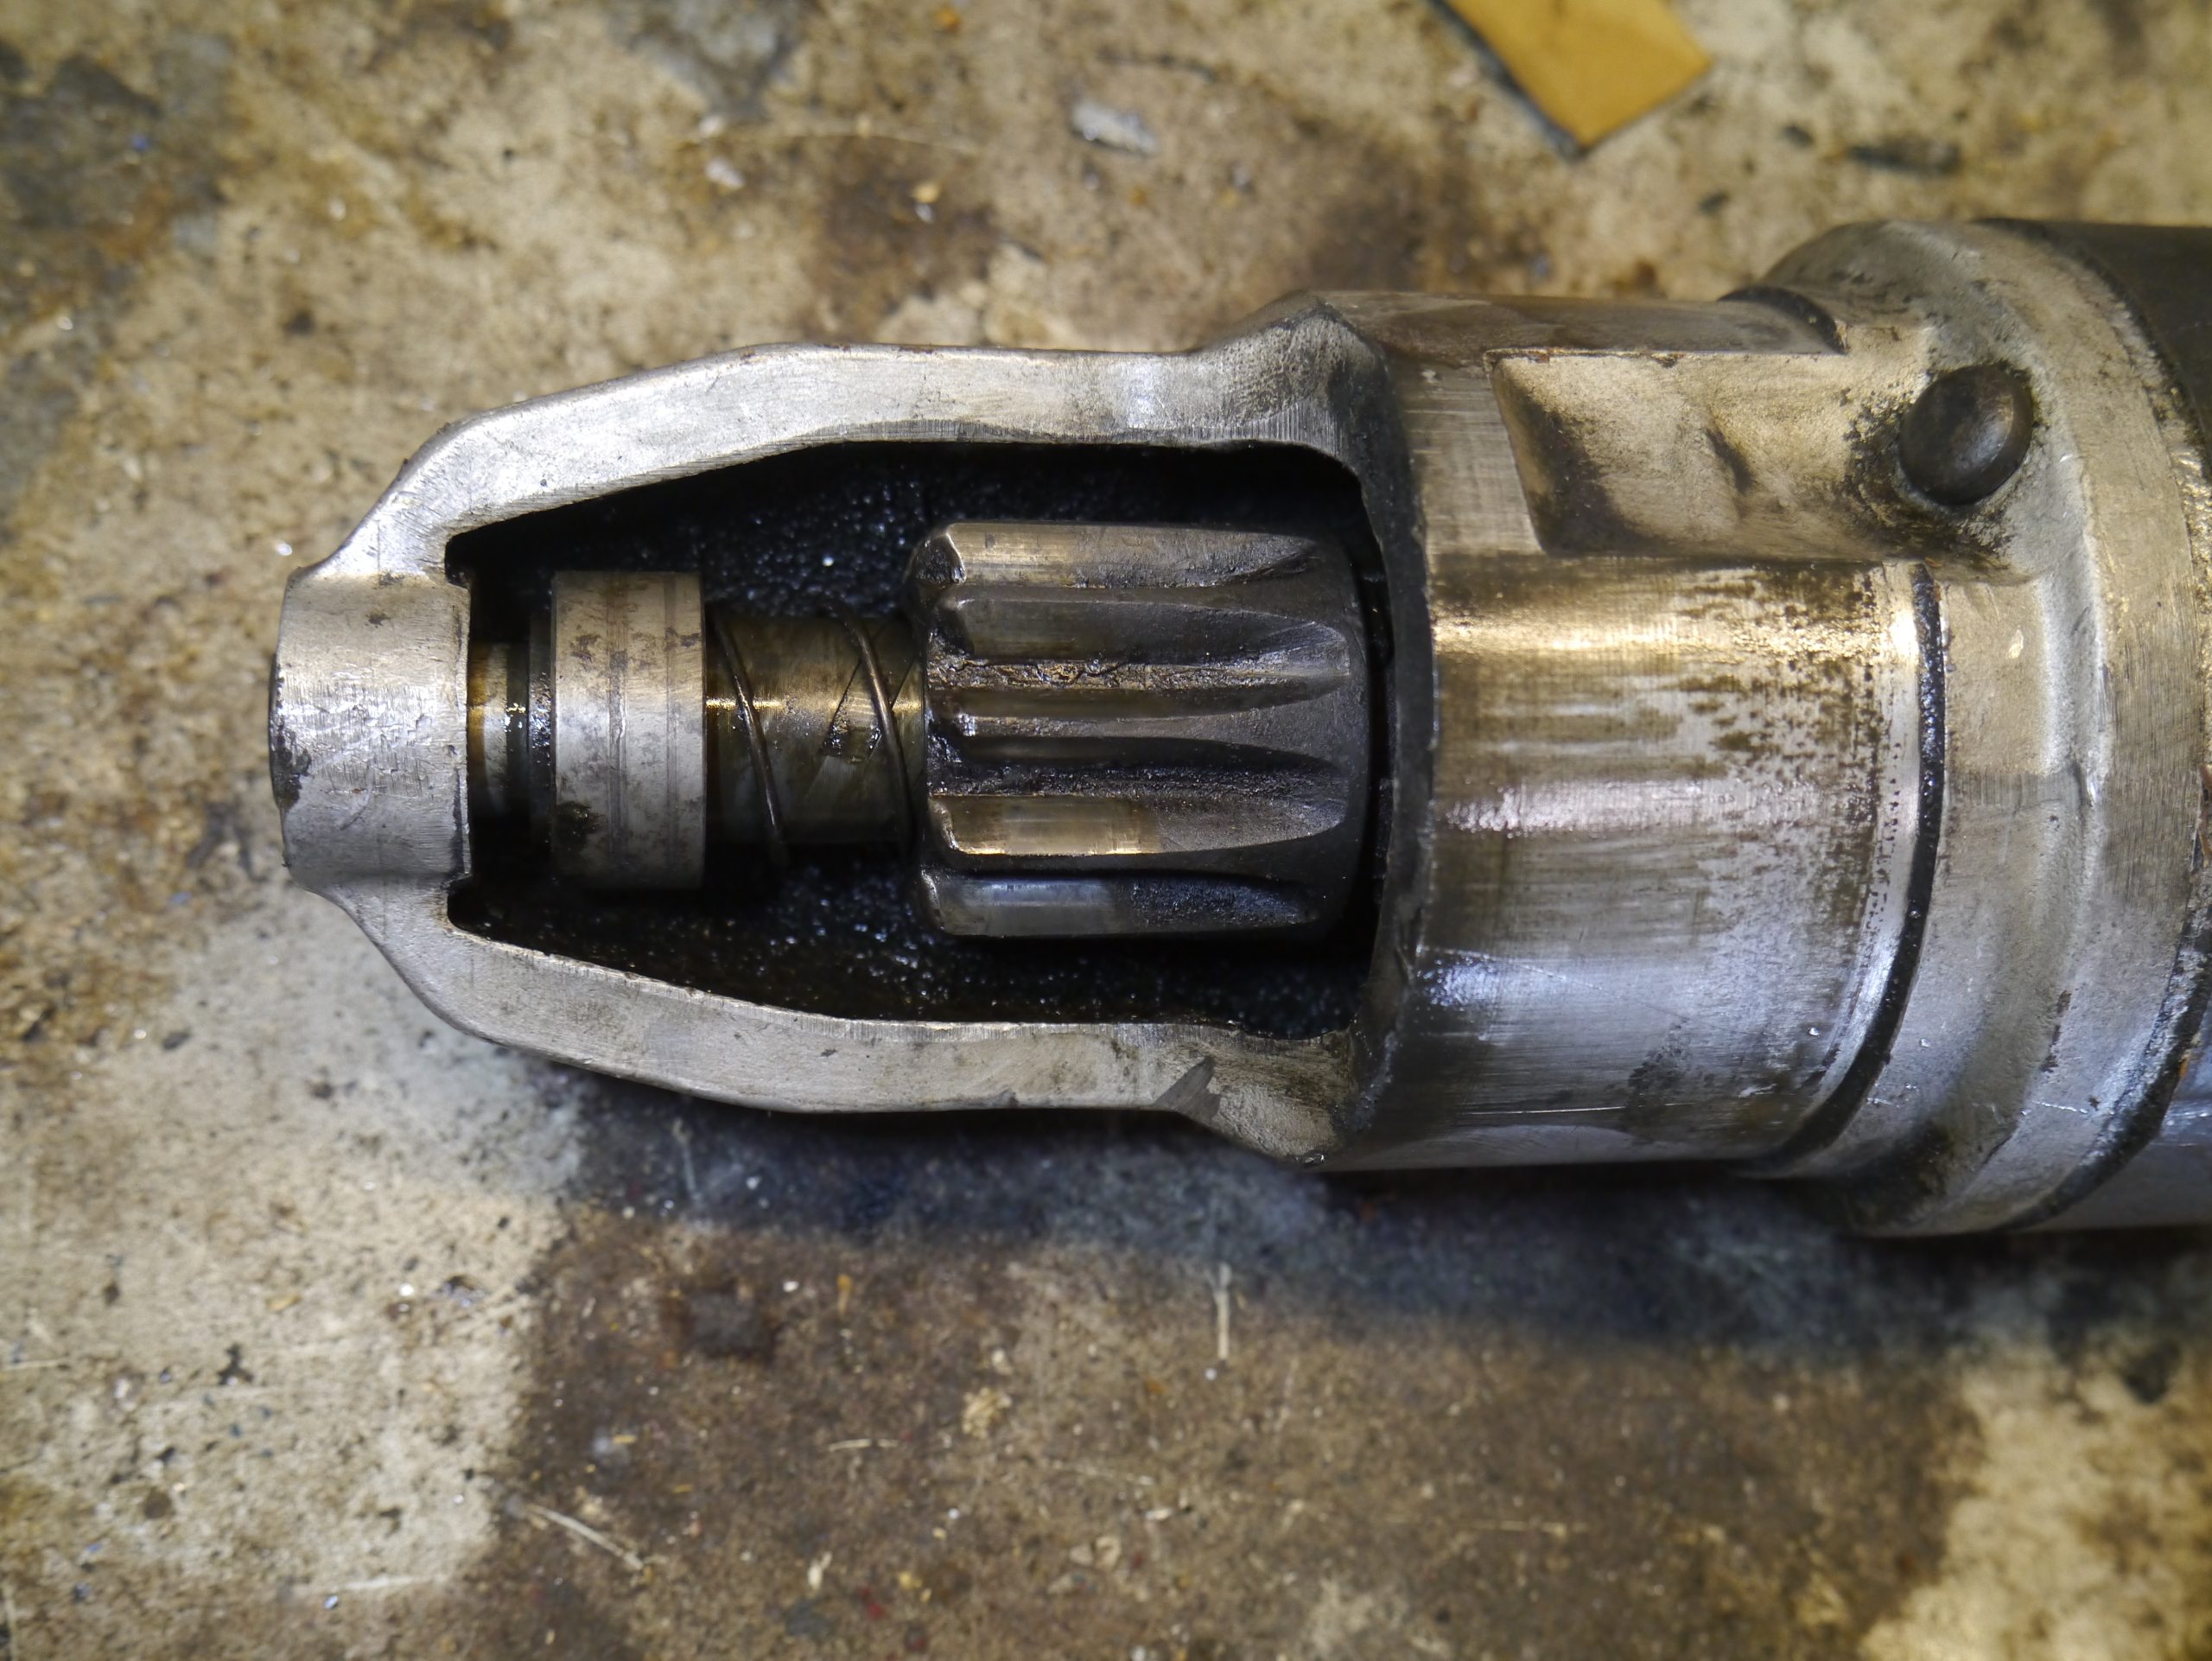
The carbon brush on the armature side (+) was the culprit, it was worn down pretty crookedly. It seems that one of the connecting wires had just a little too little space to allow the brush to move straight.
I then measured and ordered the carbon brushes.
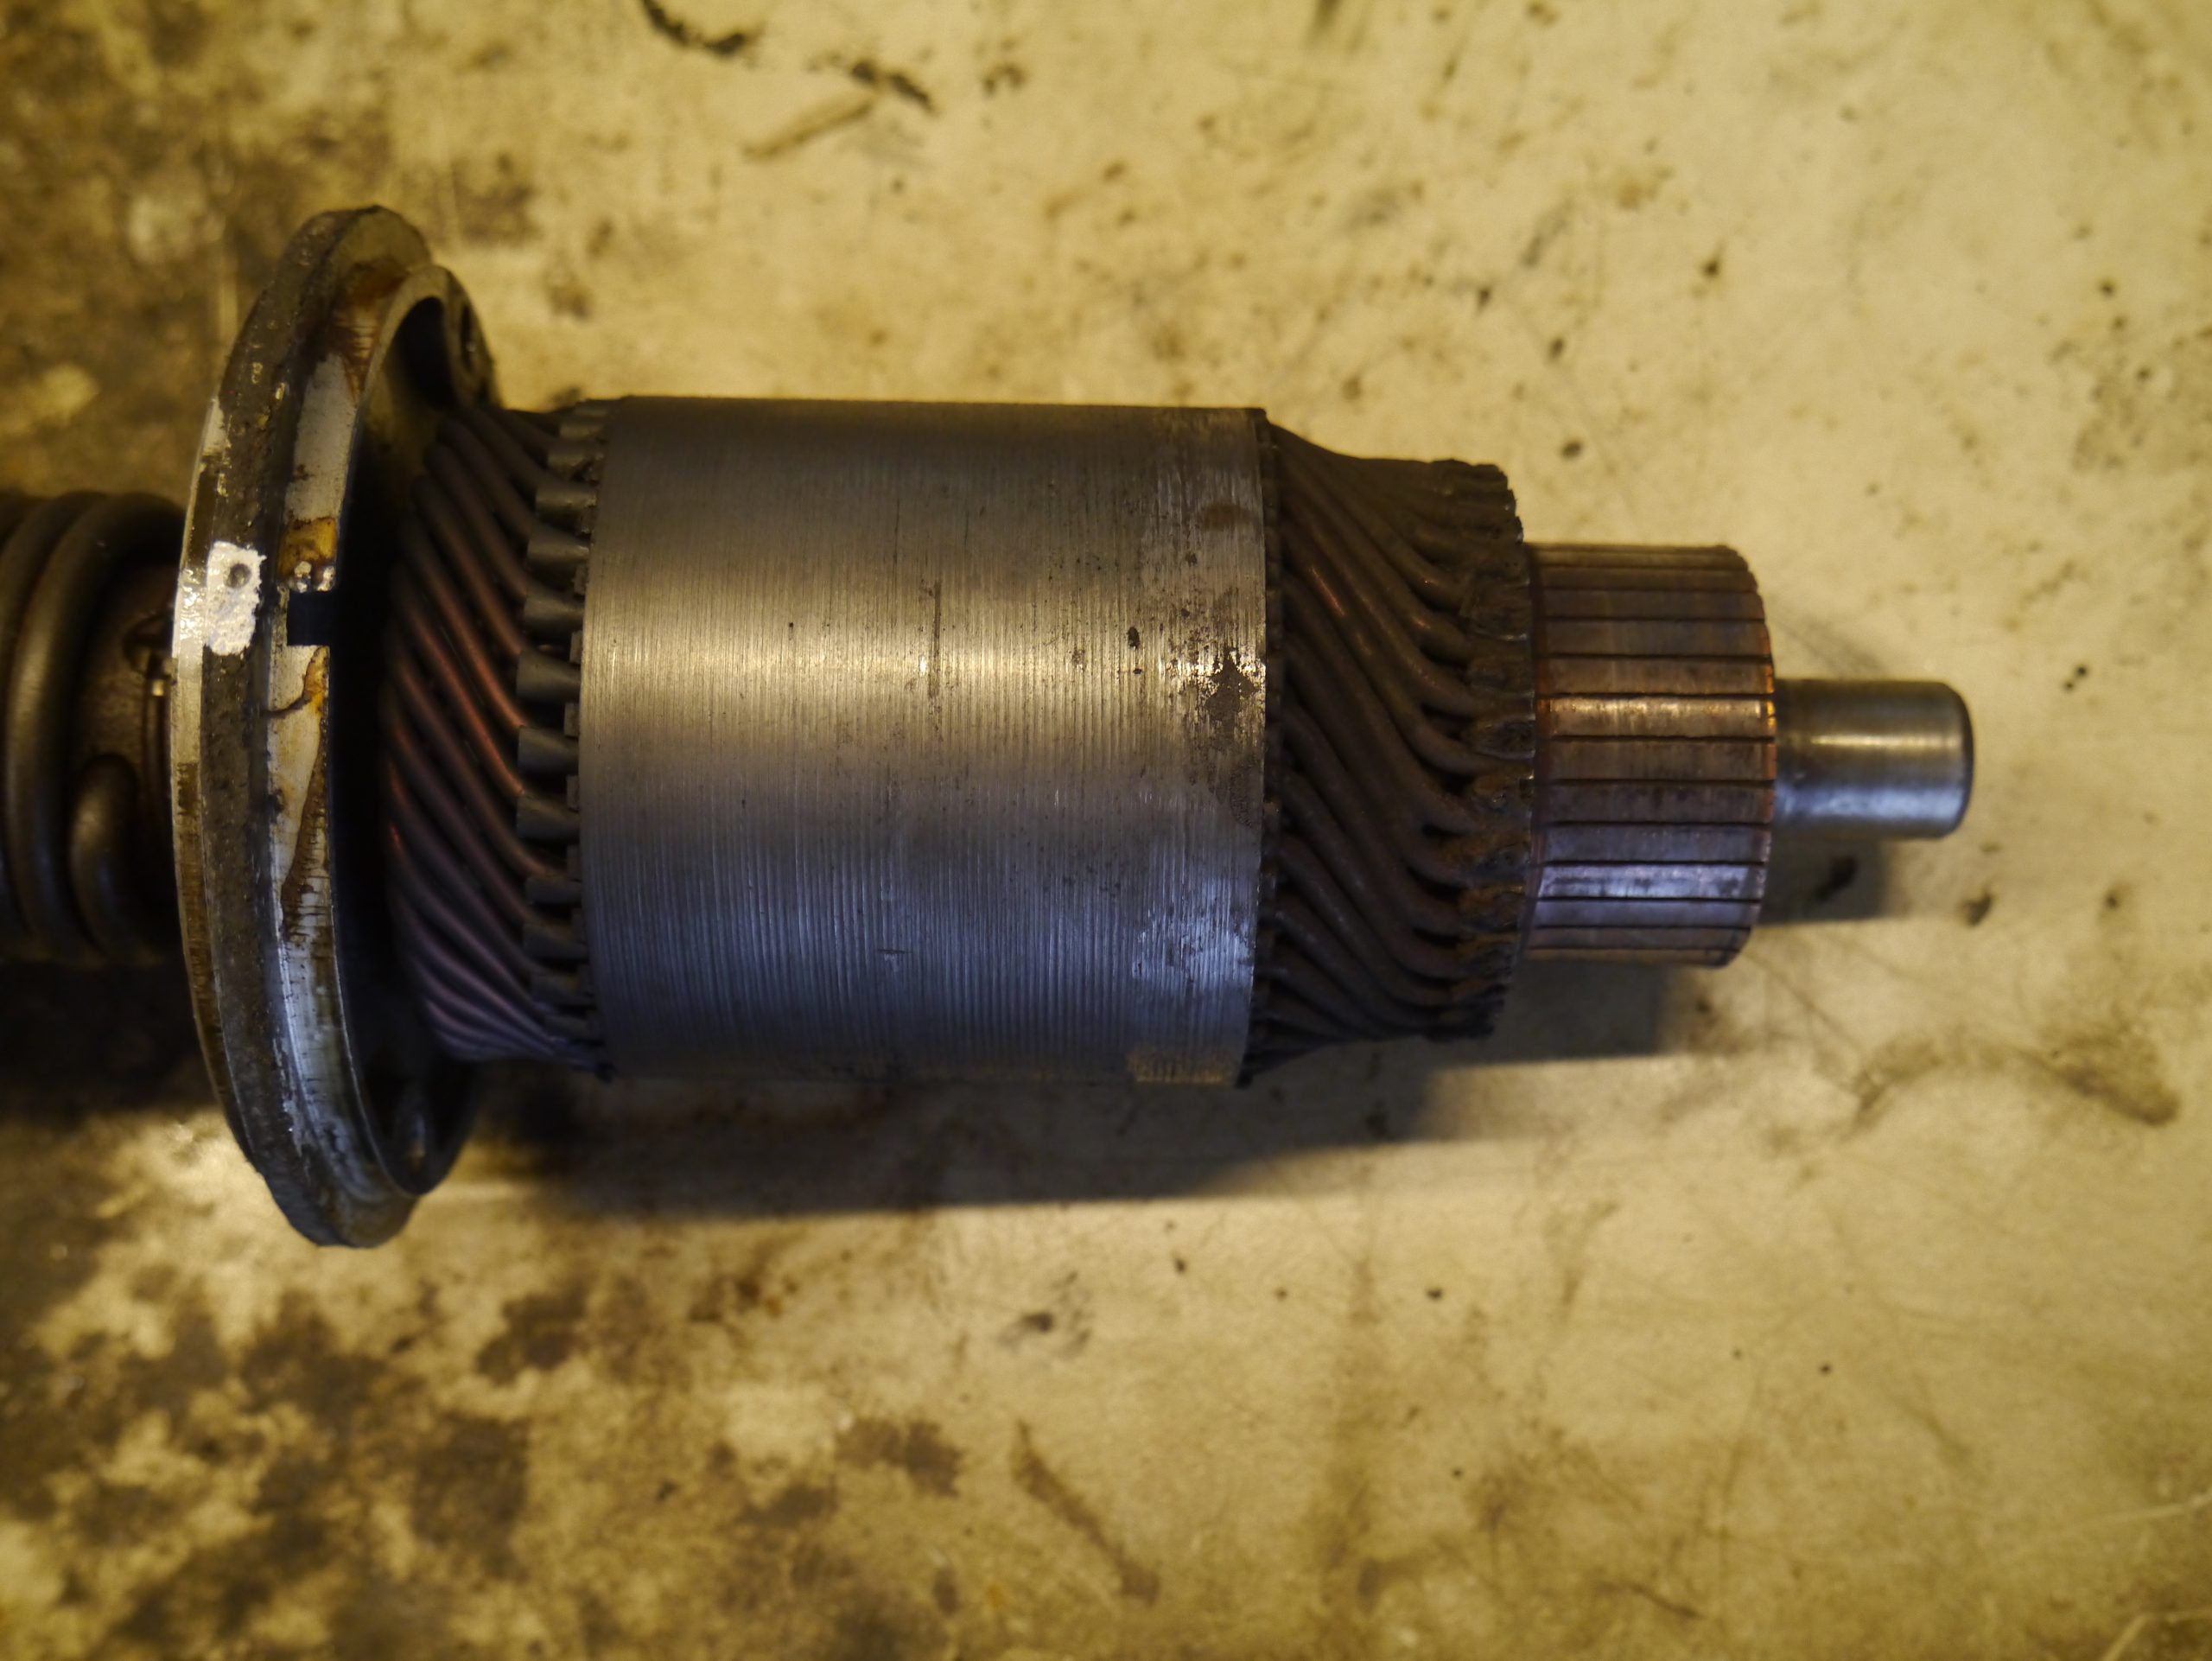
The starter motor is otherwise in fine condition, the rotor and collector also look good.
The carbon brushes are the same size (about 7×17.8 mm) , and they have the same kind of soldered wire connections.
In the end it was only necessary to replace the carbon brush on the armature side, the other carbon brush which is on the minus is barely worn.
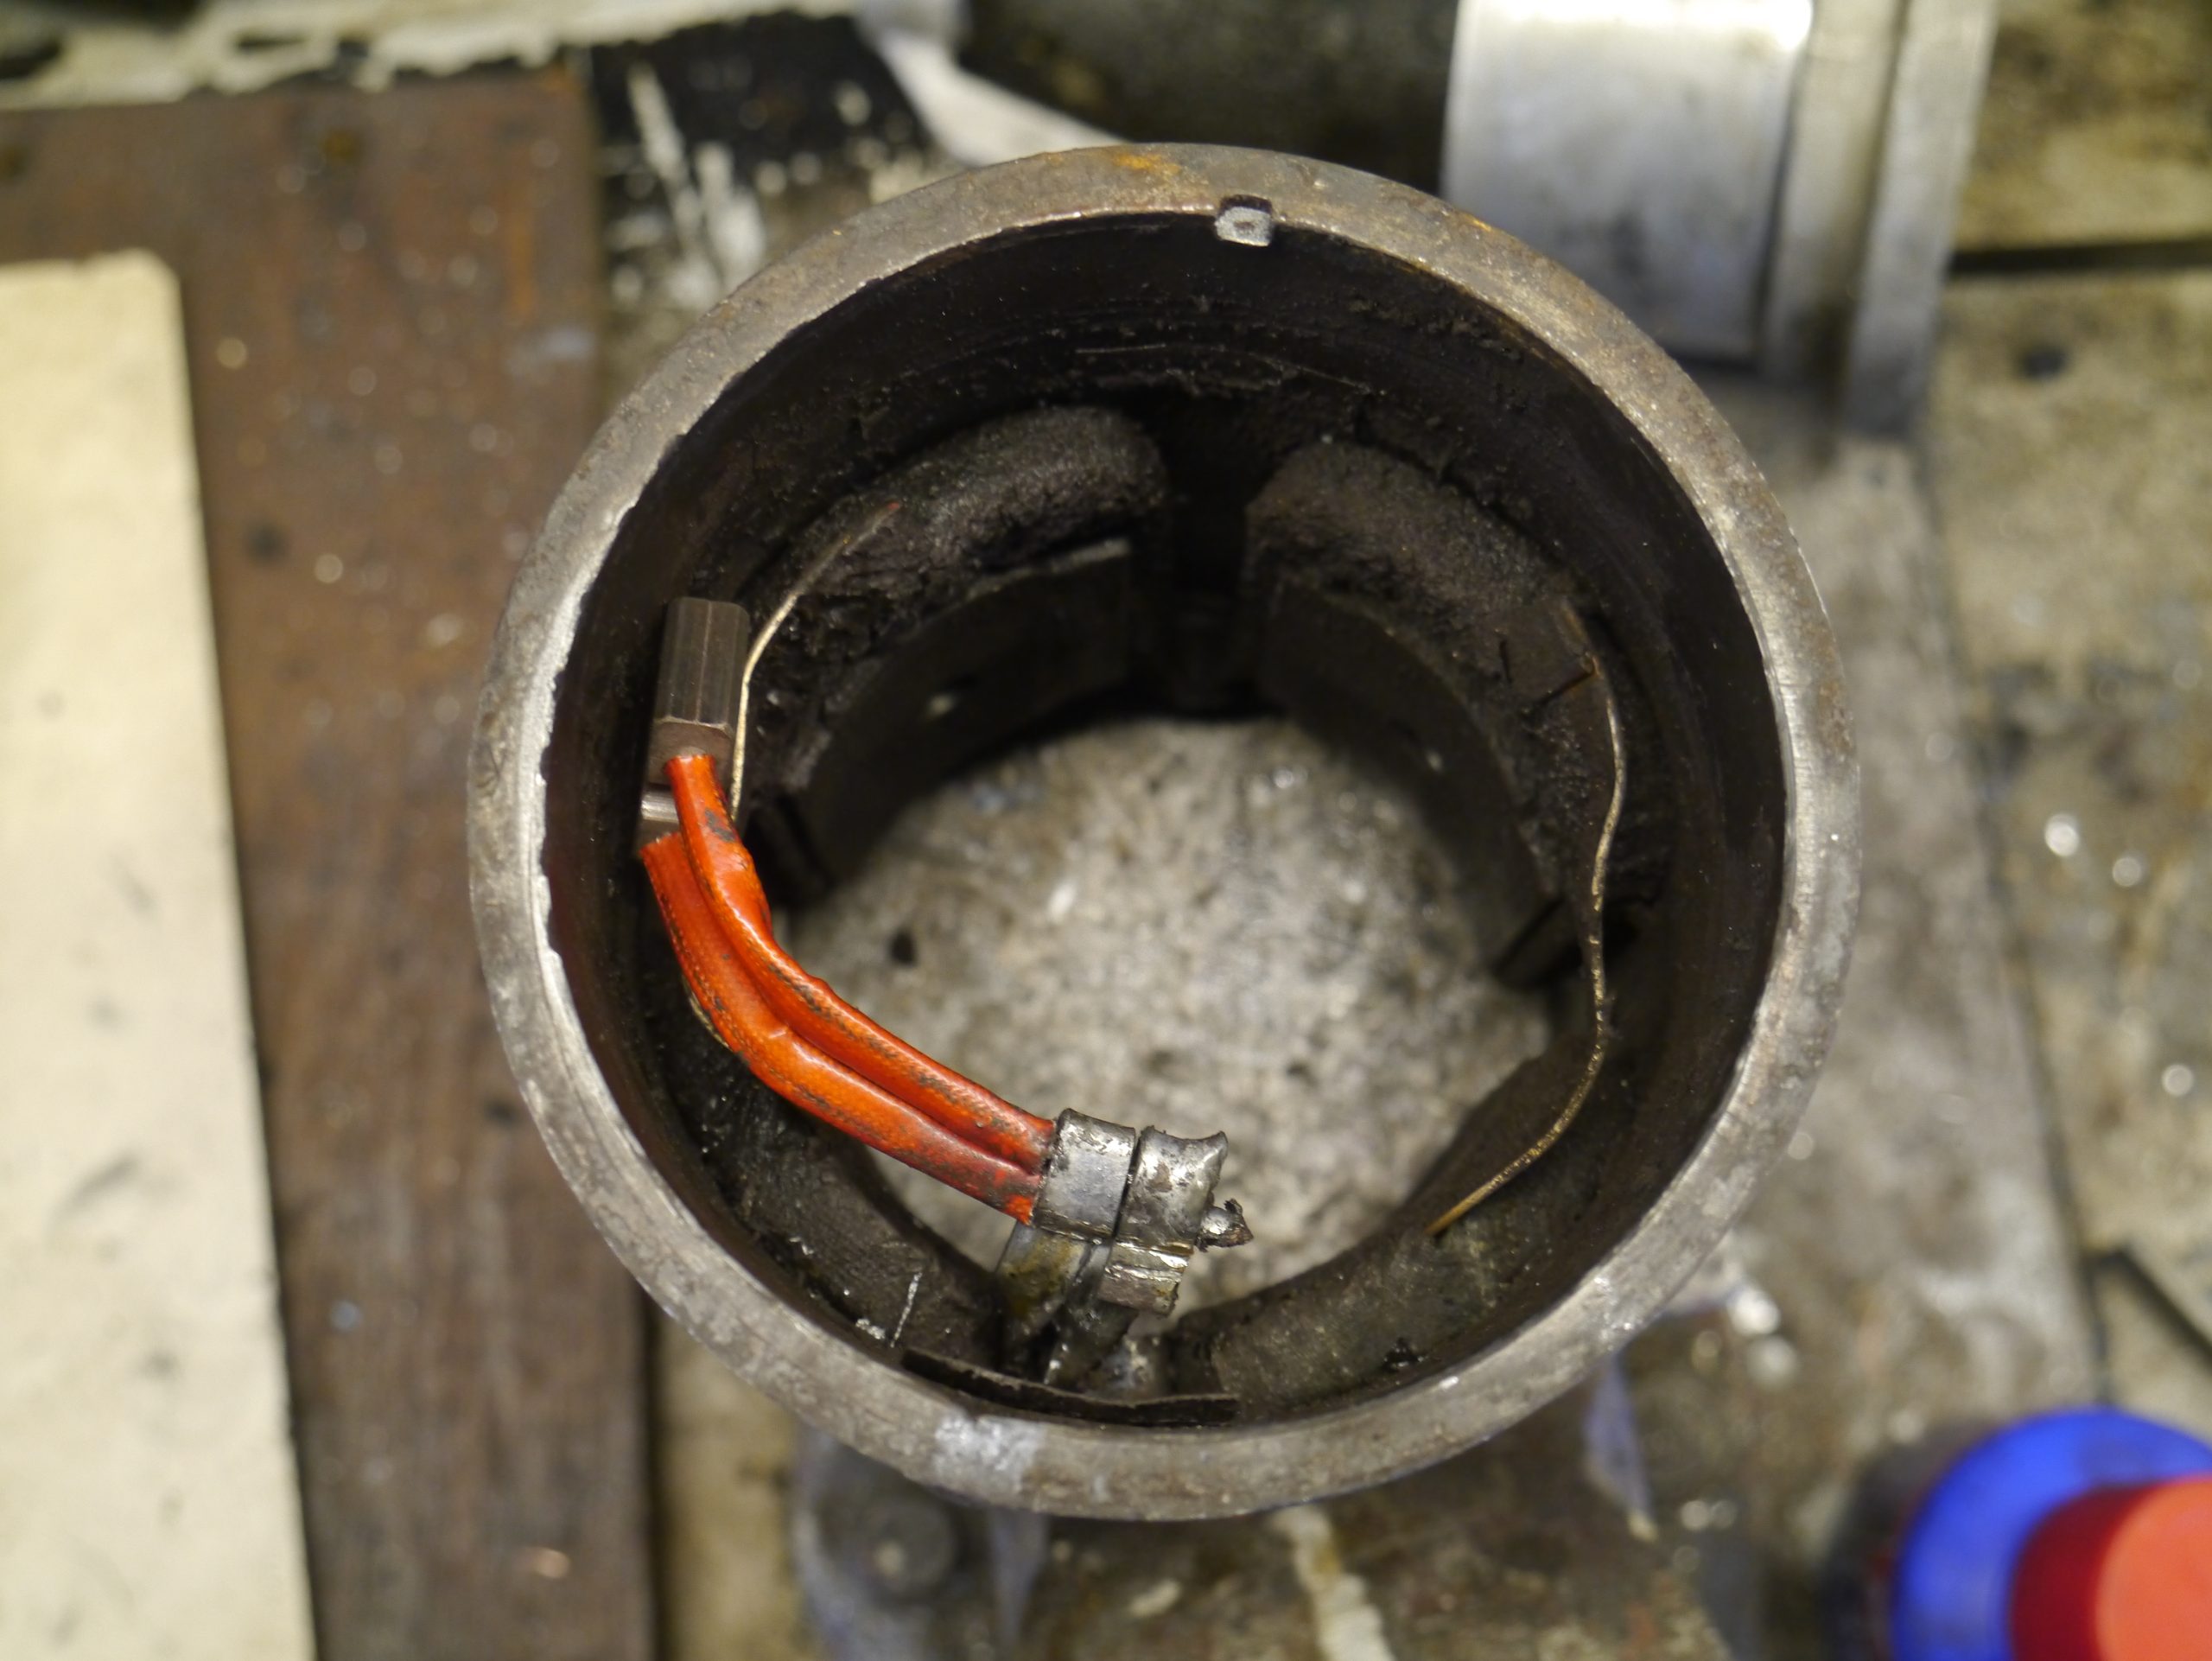
Above with the pre-soldered wires already mounted, and below AFTER soldering, after mounting the carbon brush in the carbon brush holder.

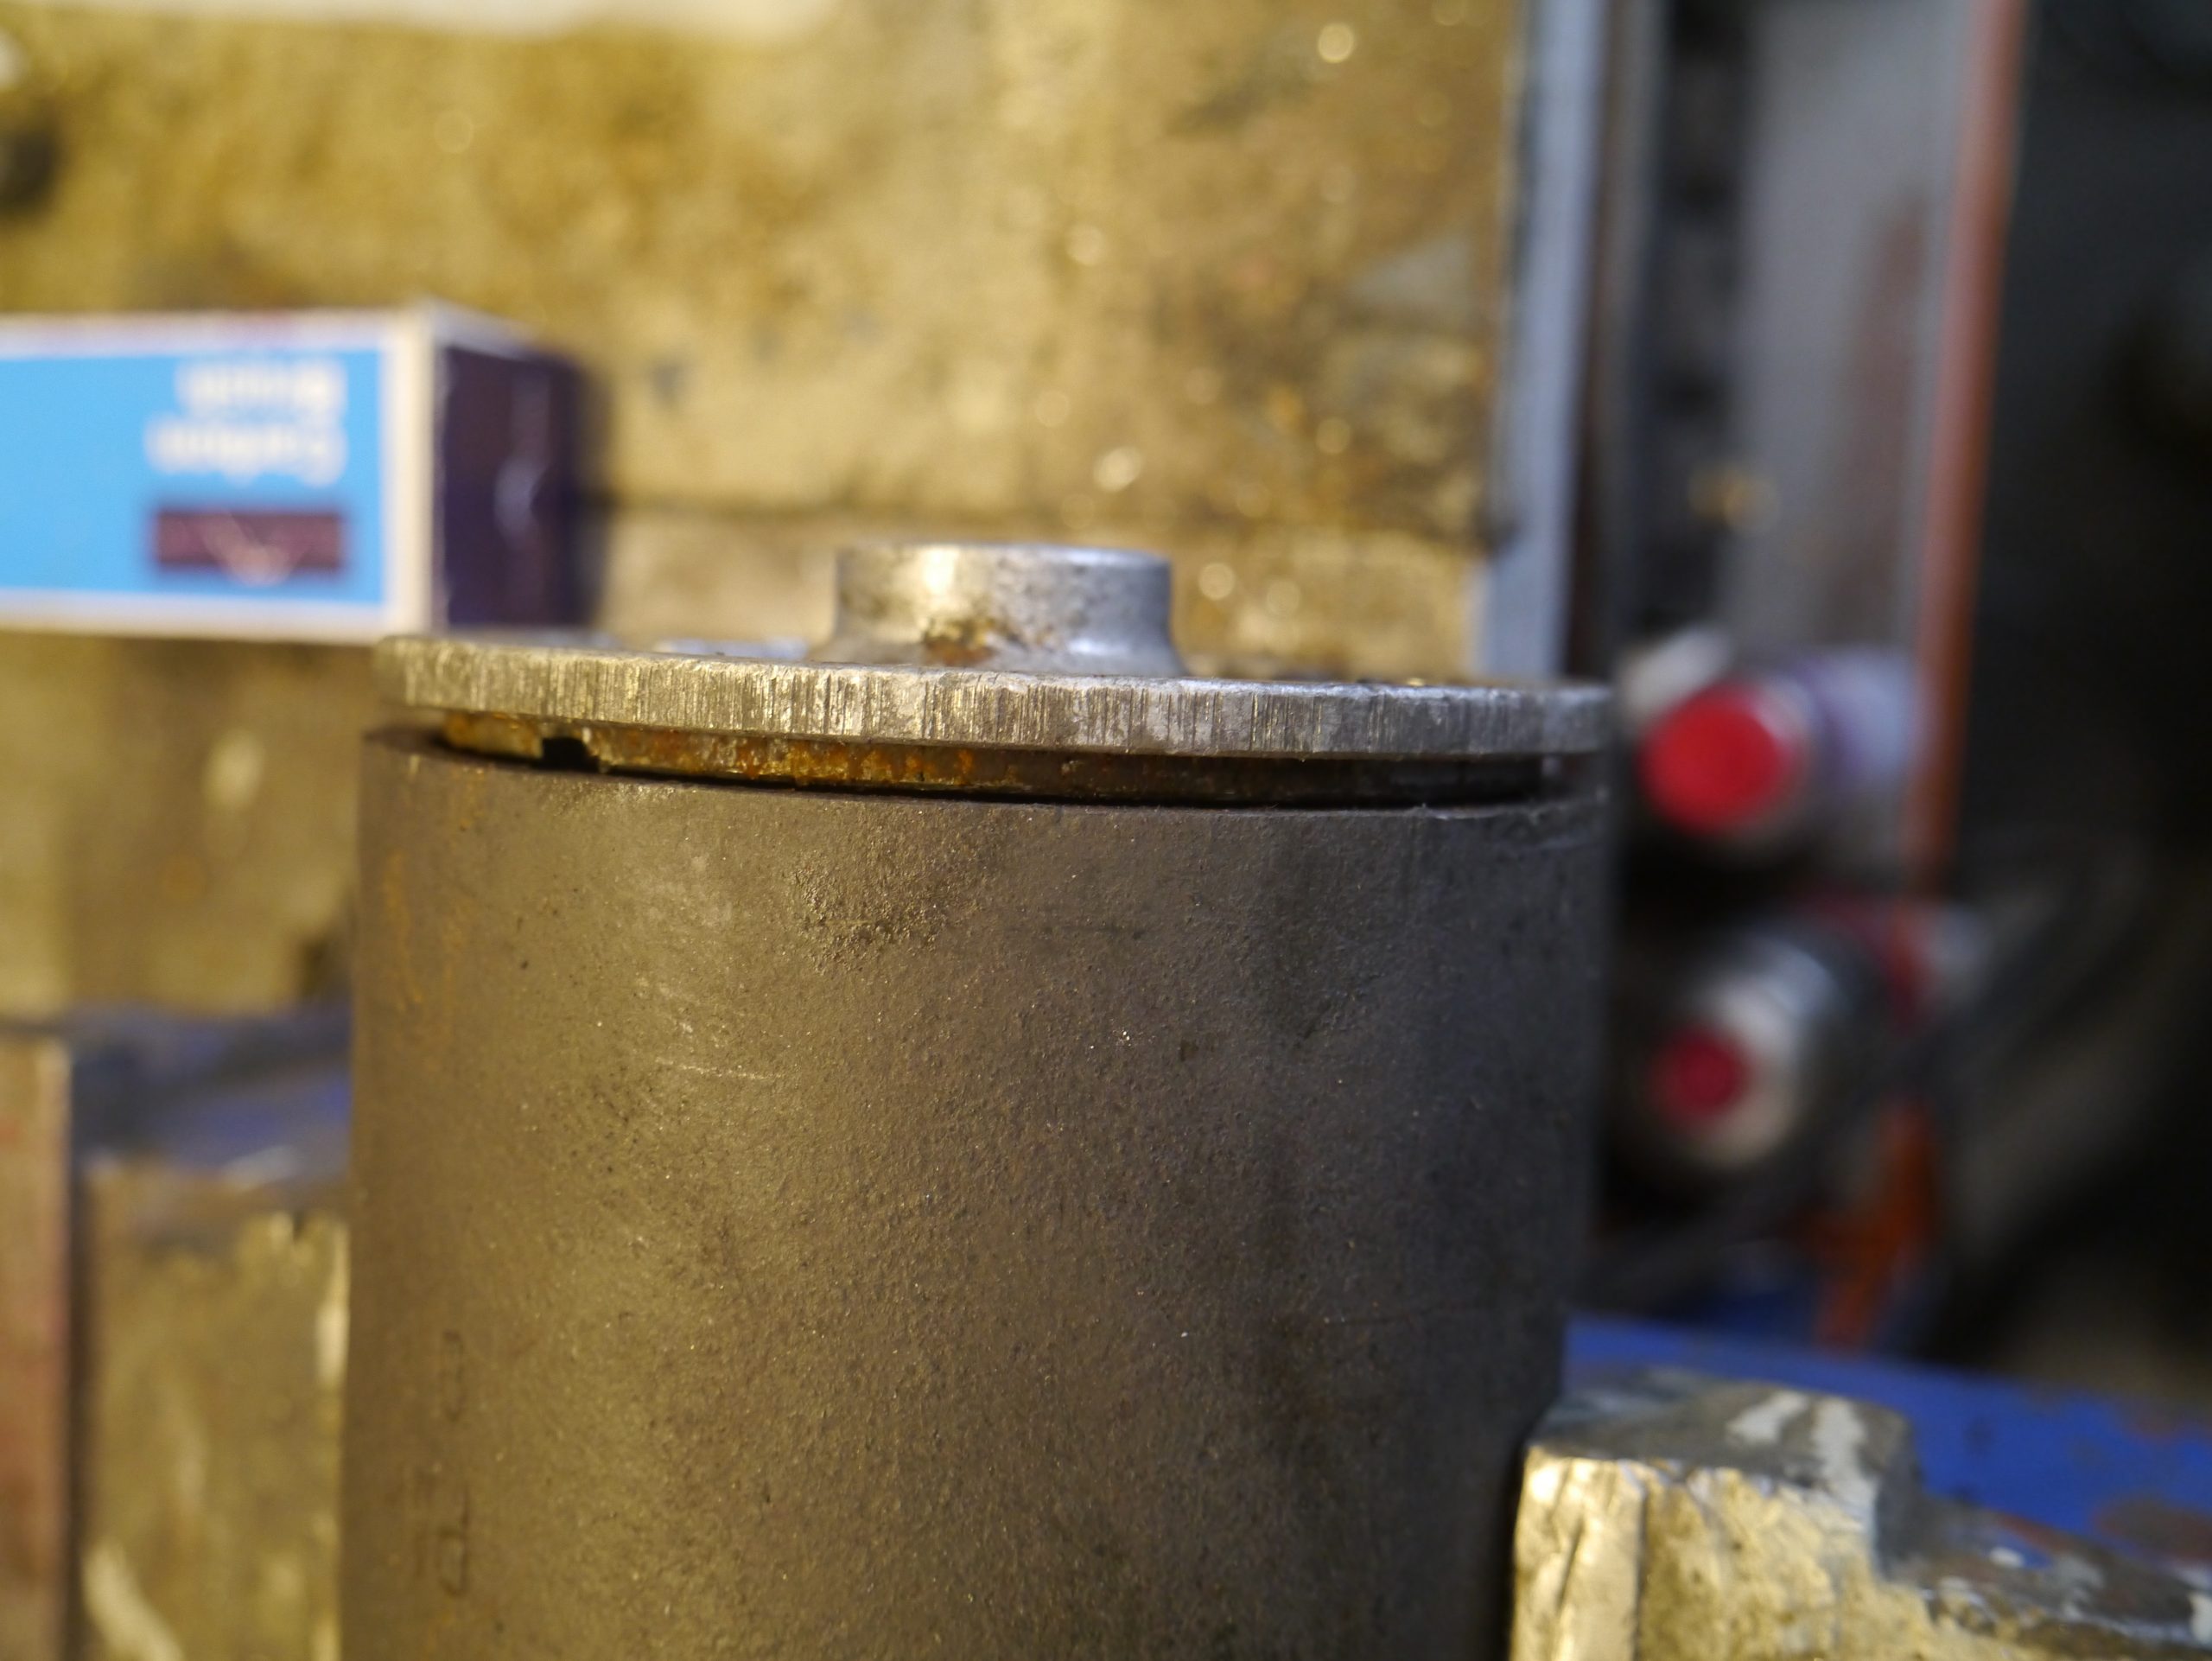
The collector of the rotor was completely flat so having it reworked in my lathe didn’t seem to make sense.
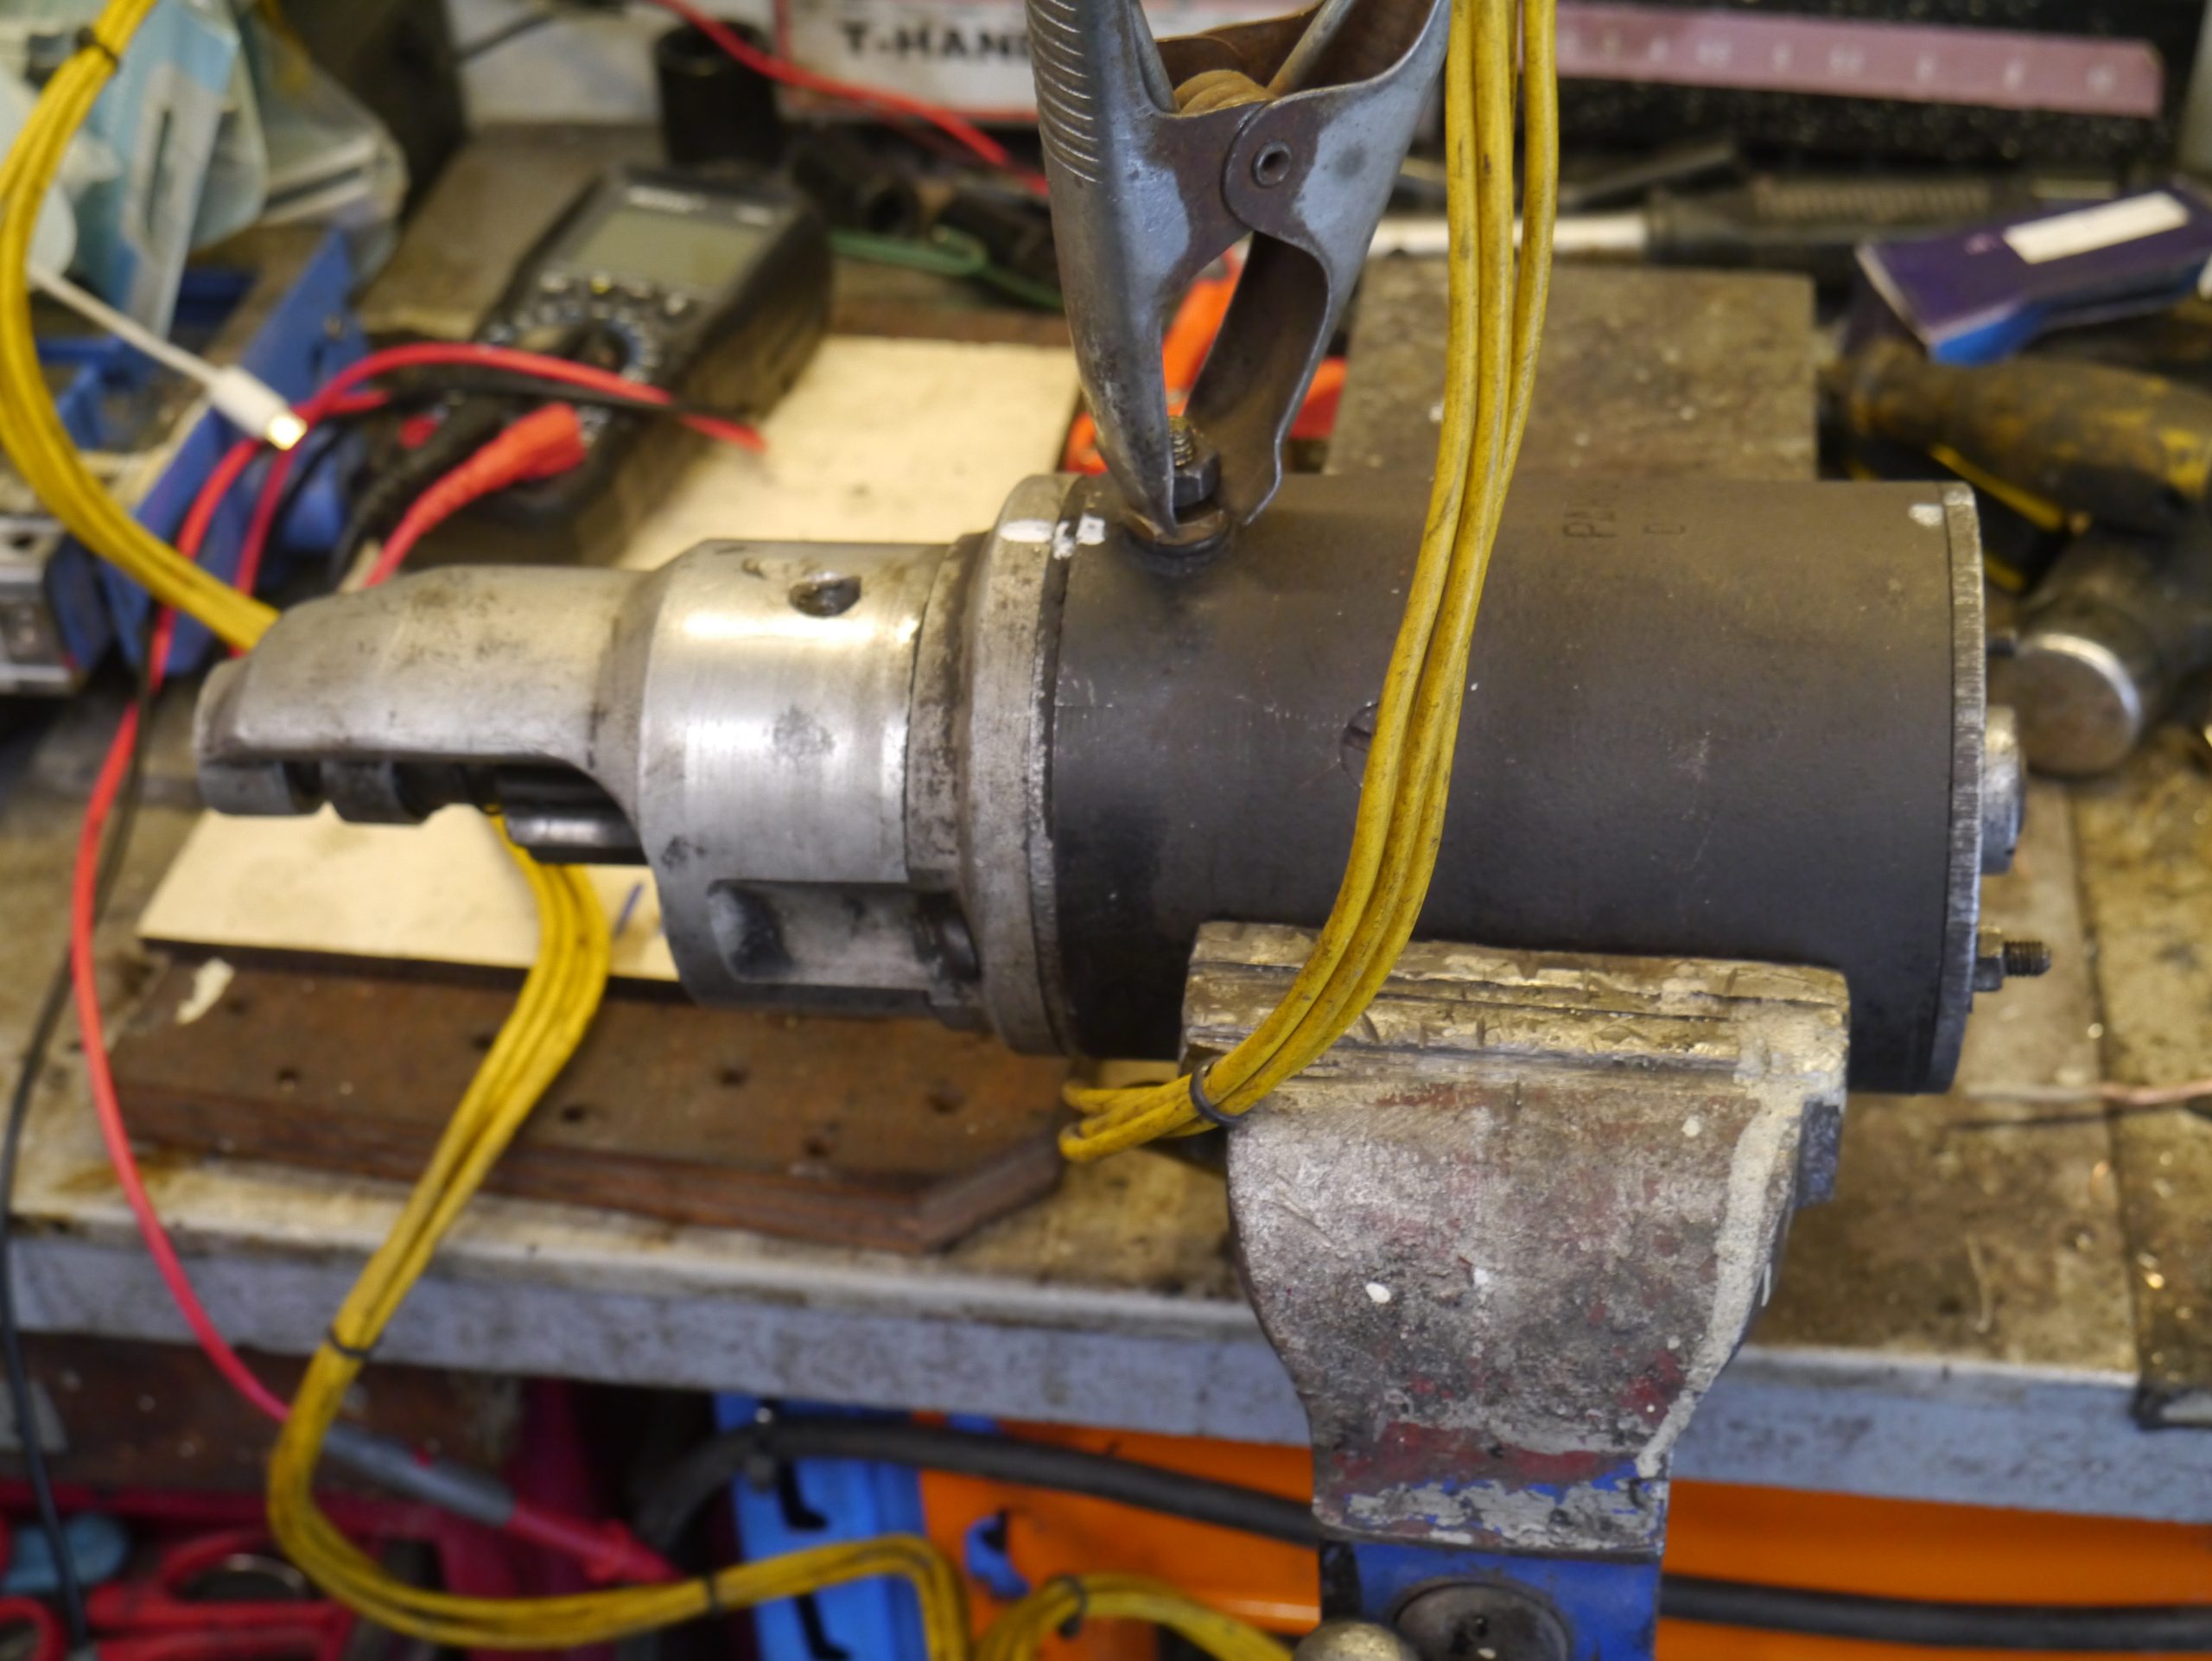
After cleaning and assembling it, I first tested everything using a small battery from my motor bike, gave everything a little grease, secured the back with the 2 locking plates and reinstalled the starter motor in the TA.
Immediately started and everything OK again!
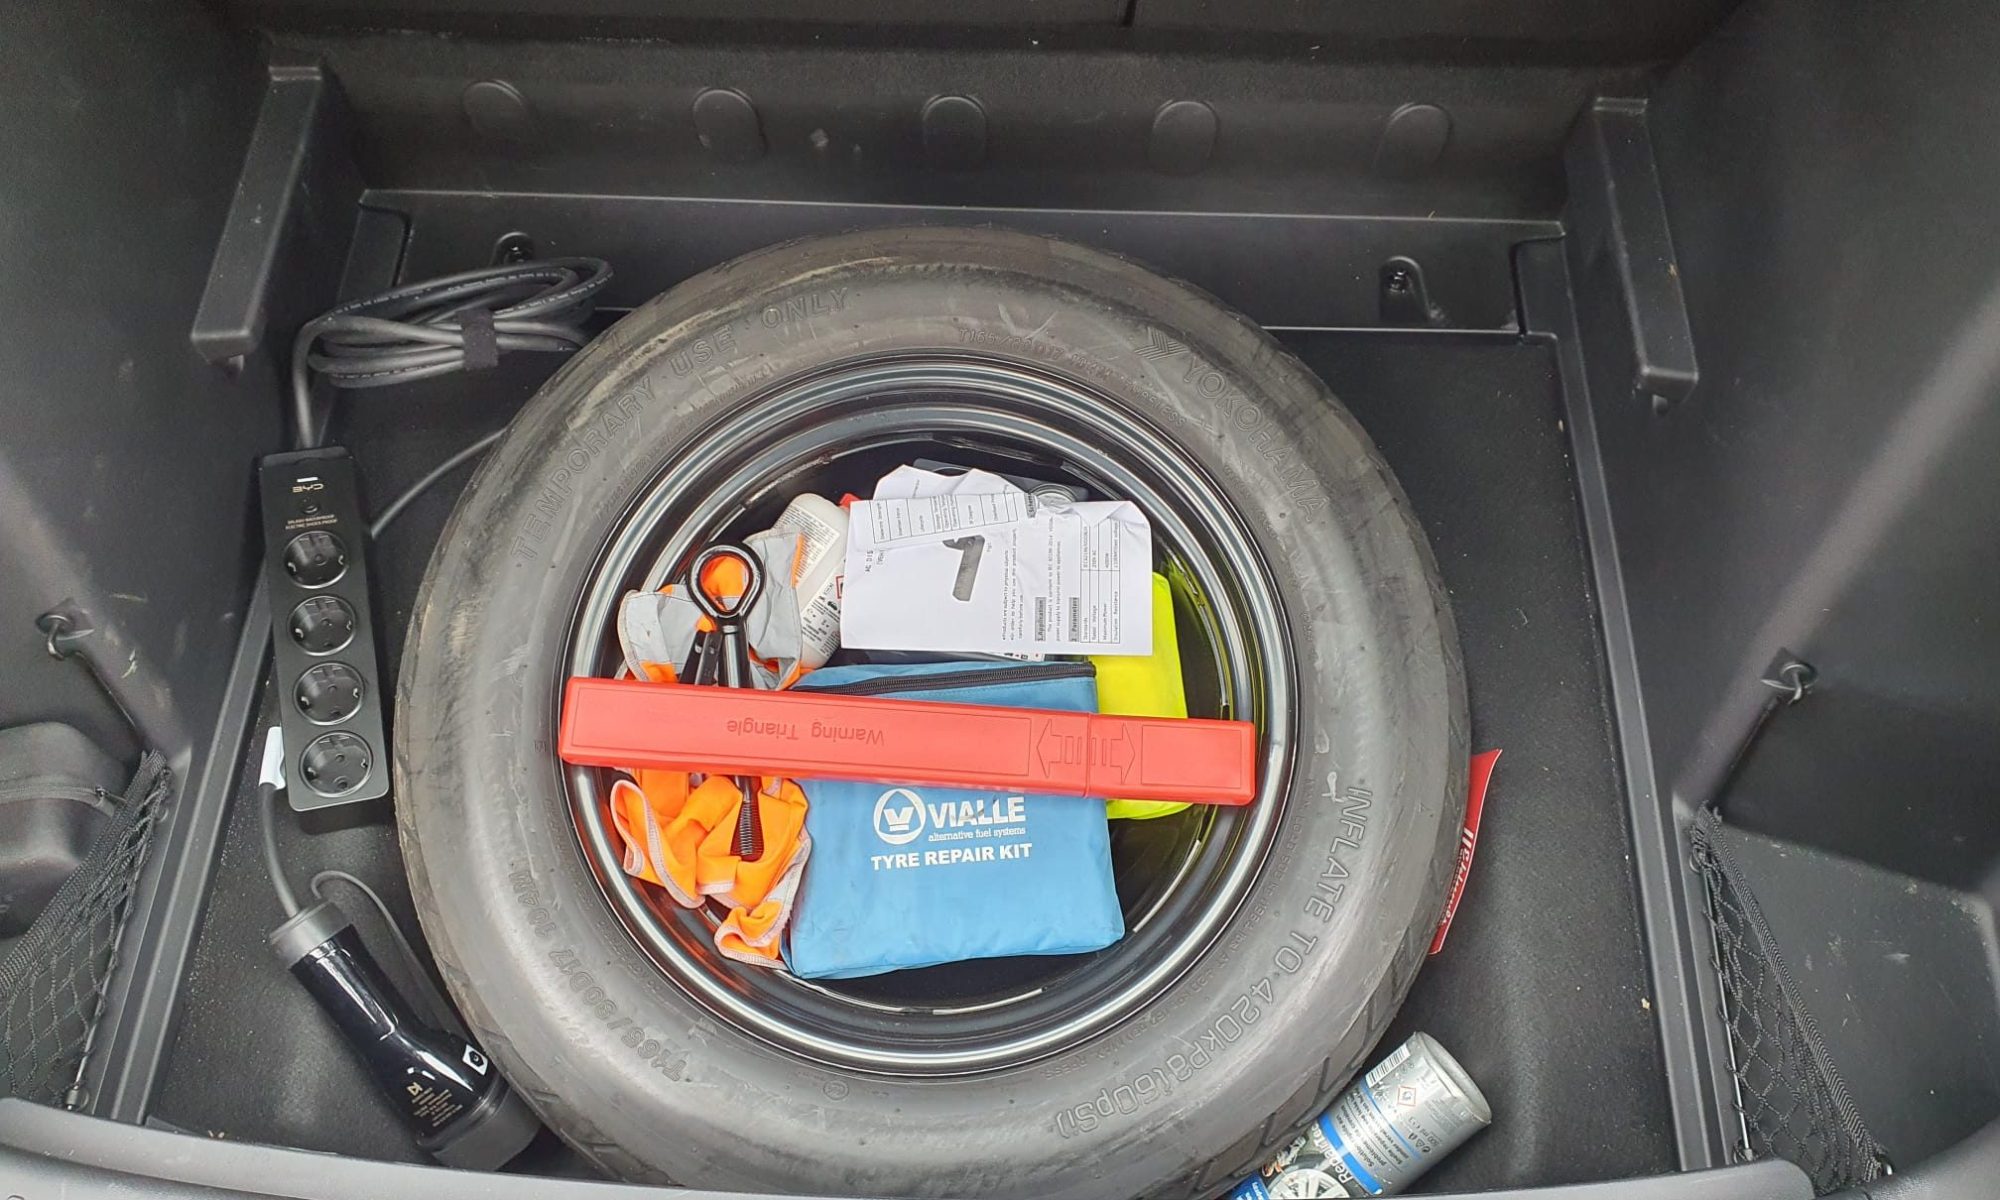
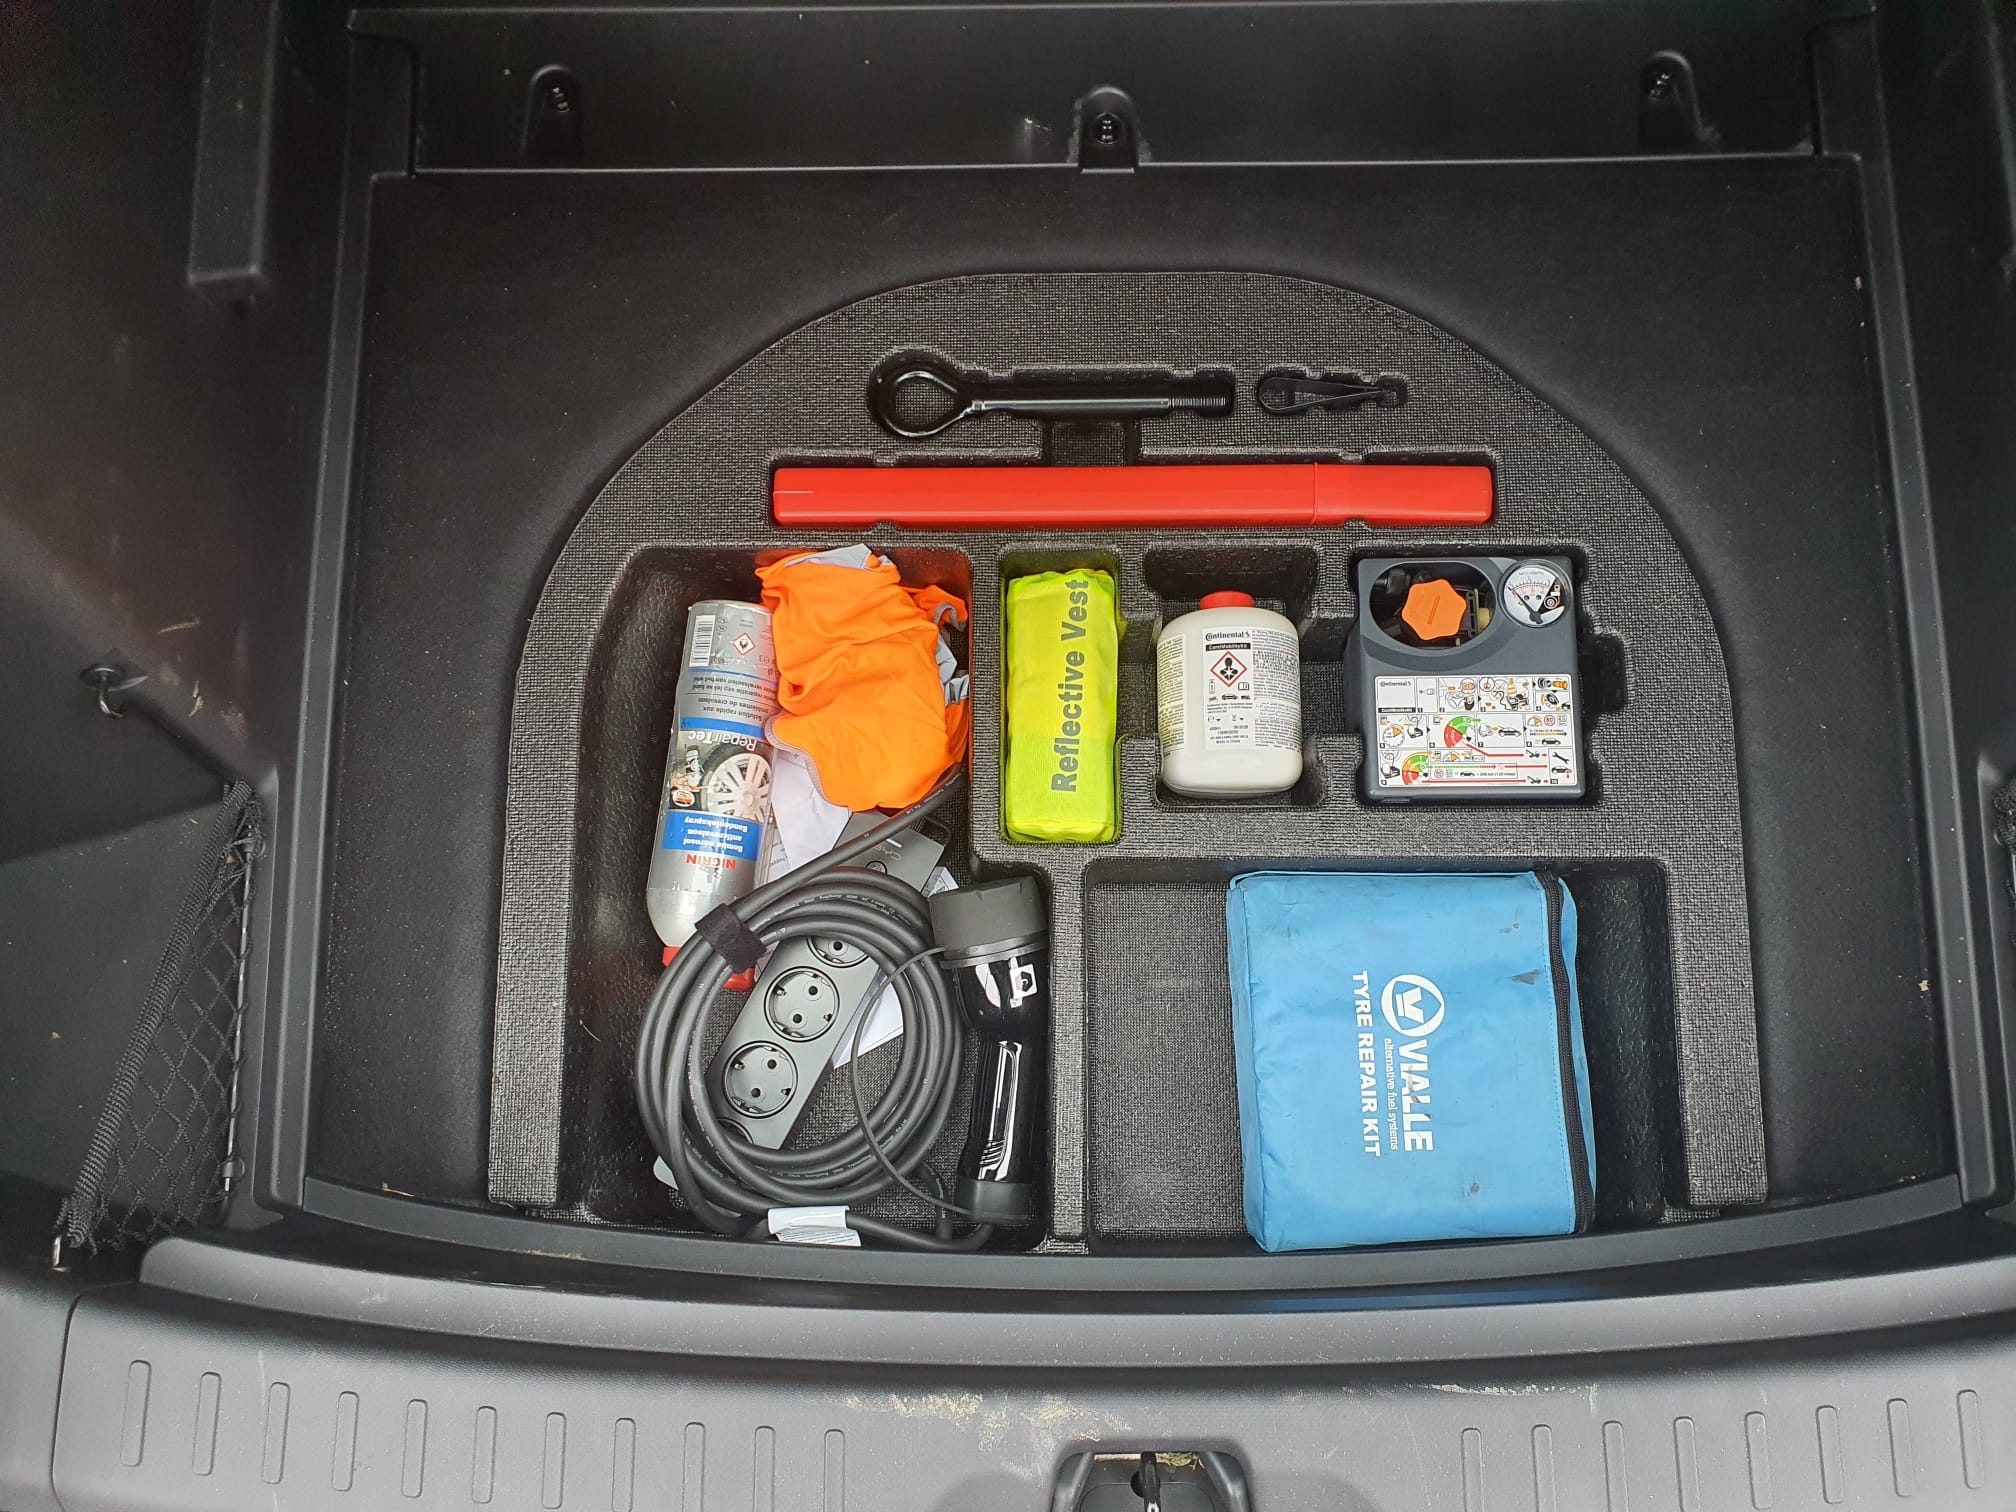
Above the original filling of the space at the bottom of the trunk of the Atto3 is shown, with a.o. the tire ‘repair kit’.
I like to drive around with a spare tire because I drive on construction sites quite often, and so far I have had 2x tire damage because of that. And such a damage is not always fixable with a fluid repair kit.
My new spare is a home-bringer also used on a Toyota RAV4 : R17 165/80/17 tire and a 5X114.3X60.1 rim with the same circumference, pitch and center hole as the BYD Atto3. The RAV4 weighs a bit more than the Atto3, so it should be fine.
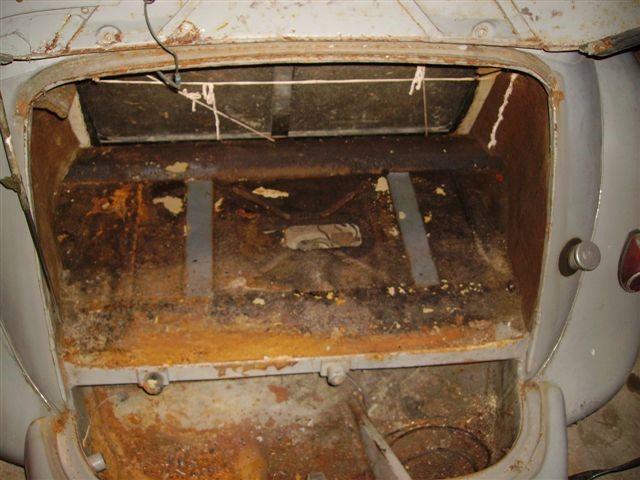
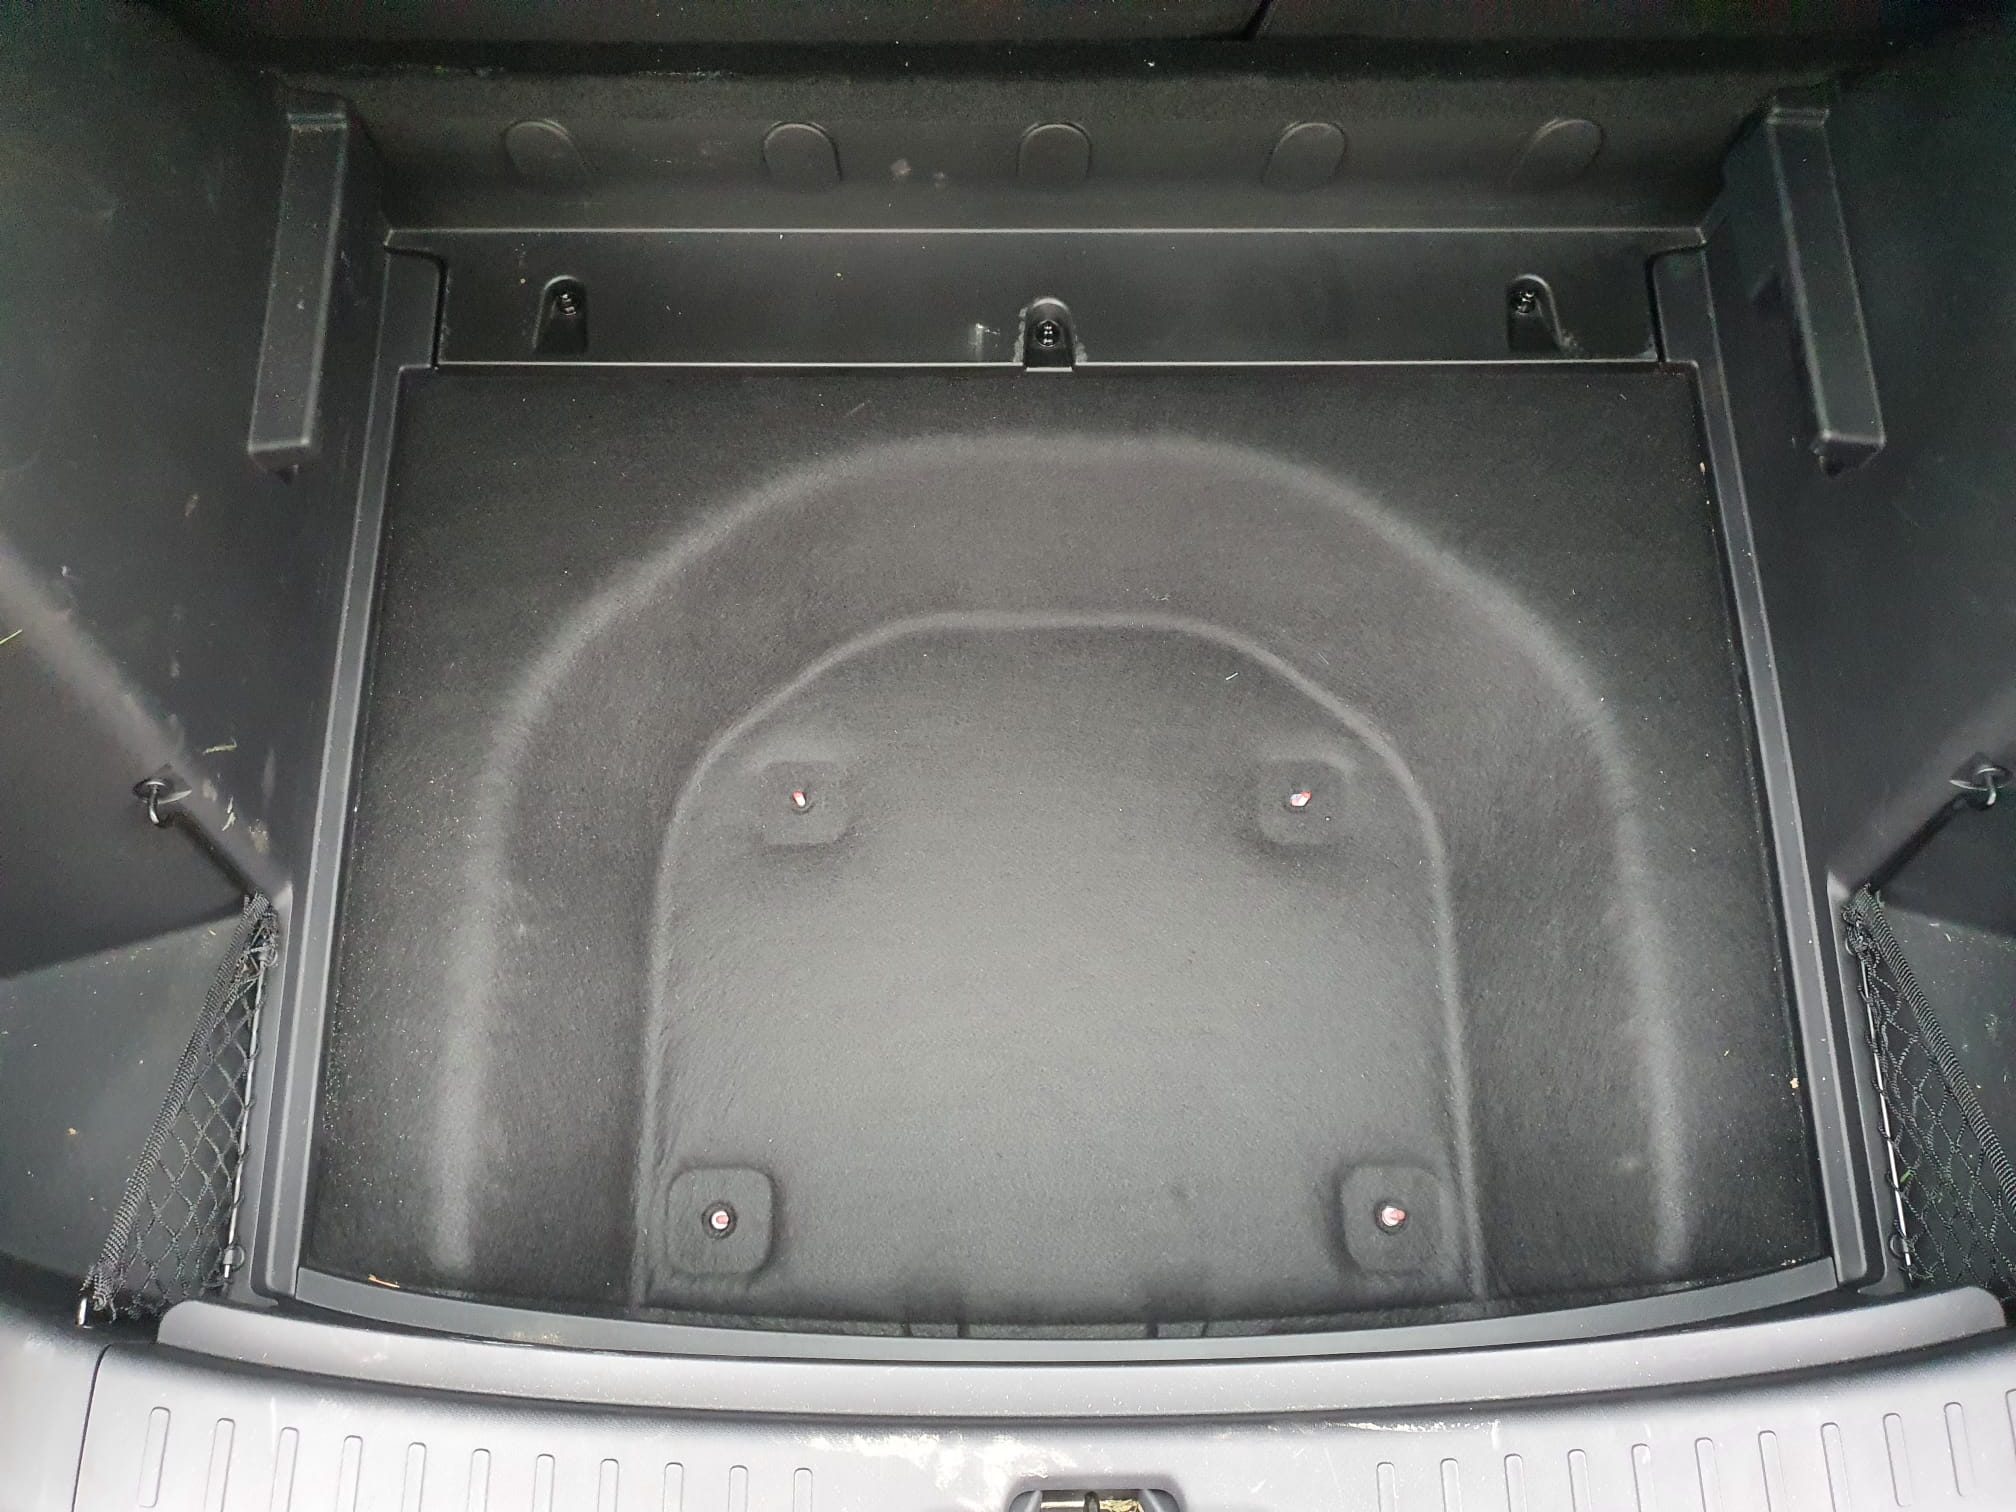
At the bottom of the trunk the available space for a home-bringer is only 57 centimeters in diameter for a spare tire.
This means that the spare tire will be slightly higher mounted, on a mounting bracket. Under the spare tire there is then room for the jack and the likes.
The trunk cover had 2 positions, and this shelf at the bottom of the trunk therefore only comes to one possible mounting depth, i.e. in the highest position.

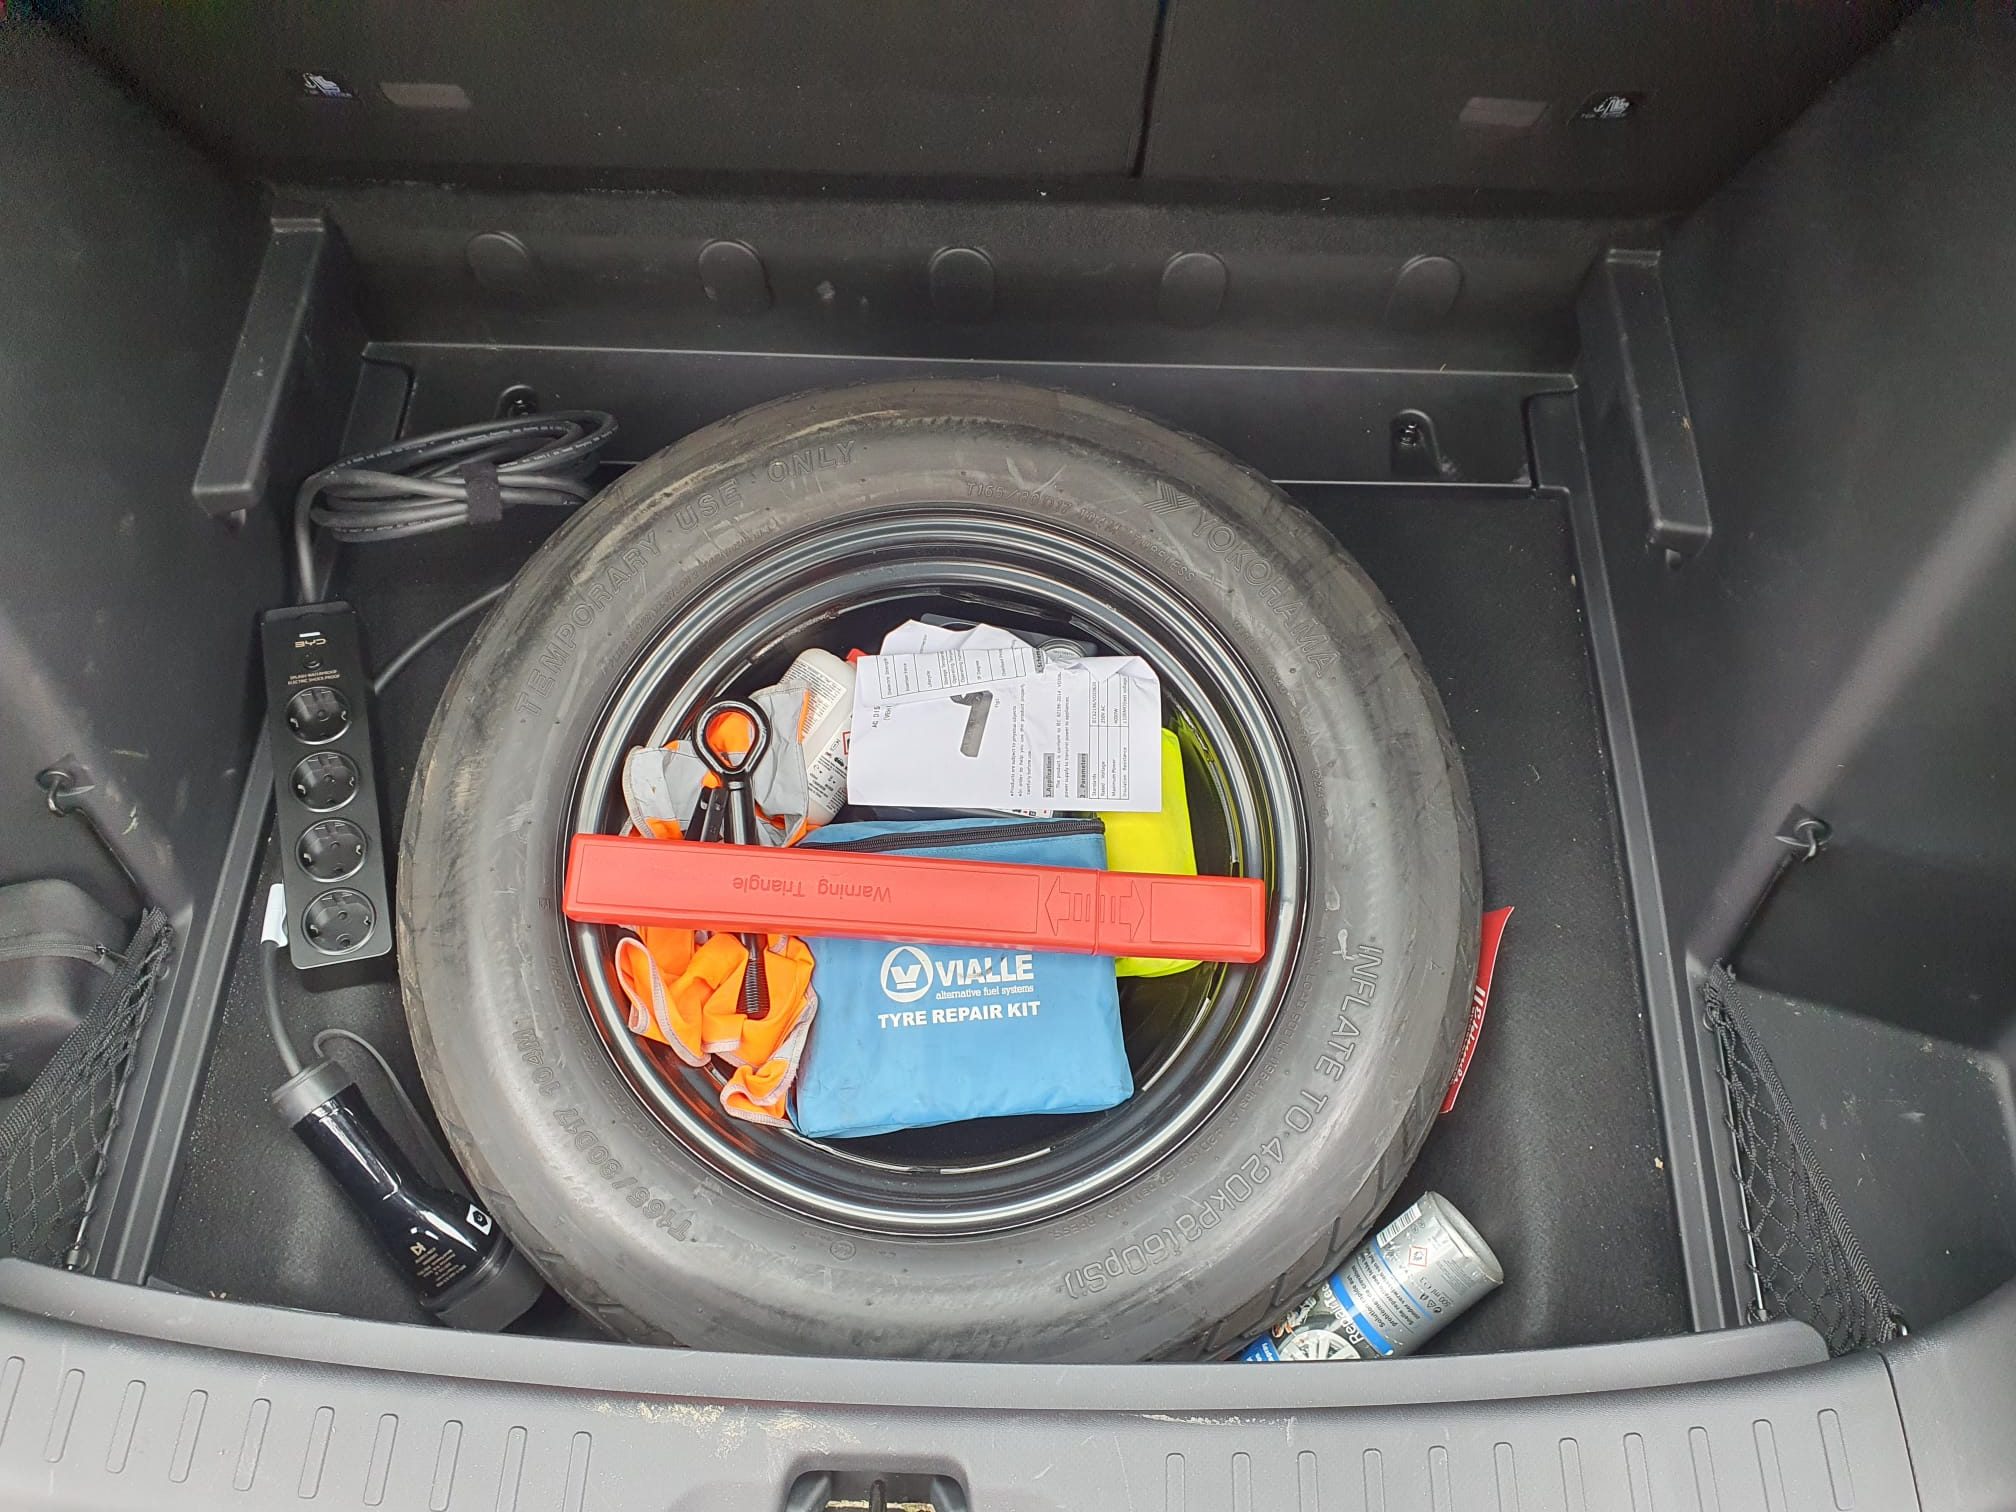
So- that’s how I positioned the spare tyre (from a Toyota RAV4, 17 inch) in the boot of the car. Not the nicest way but it works OK. The shelf that comes with the car can be positioned in the upper position no problem. I added a hydraulic mini jack and a wheel bolt wrench, since this was not part of the car’s accessories.
To hold the tire down, I made a mounting bracket from square iron tubing 20-20-2mm with 3 holes: 2 to tie it with M6 nuts to 2 of the 4 already available threaded M6 bolts and 1 hole in the center of the square stock to carry an M10 bolt going UP with a washer and a wing nut. The M10 bolt goes through 1 of the boltholes of the rim. I welded the M10 bolt in the center of the square steel and made the rear part almost flush with the square steel. Then, I mounted the bracket down on the floor of the boot with 6mm tubed M6 IKEA nuts that I had lying around from an old double children’s bed. These nuts are about 15mm in length with a large flathead on top and an Inbus insert in the top. This is ideal, because the M6 steel bolt-ends that stick up from the boot are only around 18mm in length and don’t stick through the 20mm square stock.
BTW: I shortened the 2 not-used standing M6 bolts to the height that they just carry one M6 nut each, might be useful in the future.
After the spare tire was mounted and secured with the washer and M10 wing nut on the bracket I used the bag that came with the removable part of the pulling rod to store all loose components like the puller for the plastic boltcovers that are mounte in the wheels and o on. This is placed in the inner part of the spare tire.
Unfortunately, I forgot to take some pictures of the setup of the spare tire mounting bracket, will do that when I can and present this here, later!